Tag Archives: waxing bowls

Every restoration has a beginning…. – Chuck, aka Desertpipe on SF


Chuck posted this on Smokers Forums and I thought it merited posting here as well. I asked him for permission to post and use his photos. I copied the exchange from his side in writing about his cleaning process. I include it here as it is helpful to see another refurbisher at work.

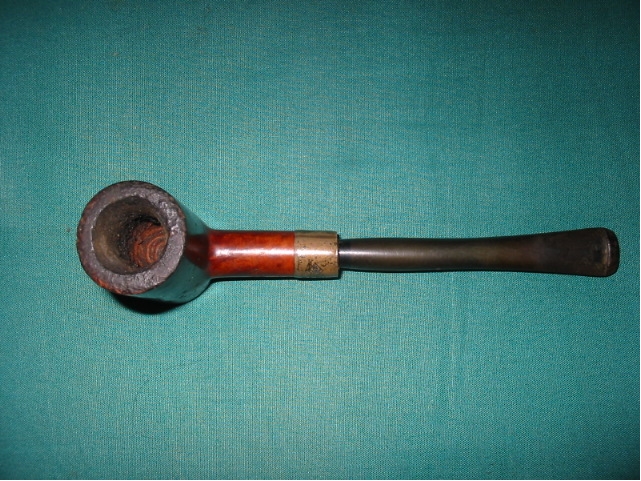
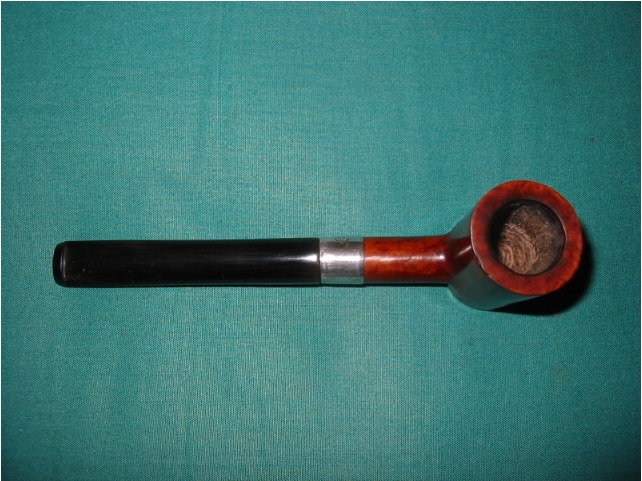
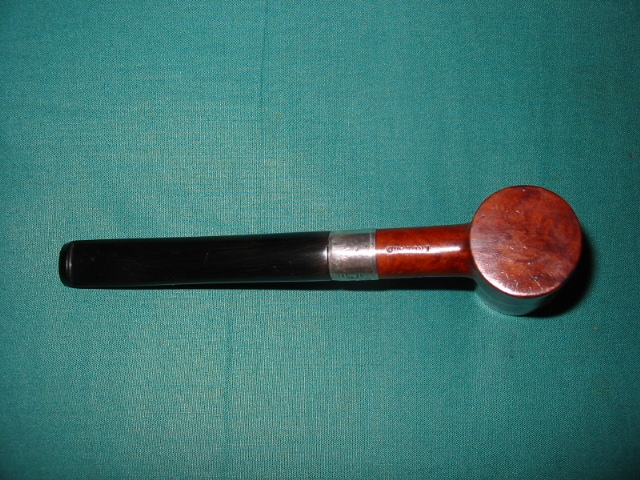
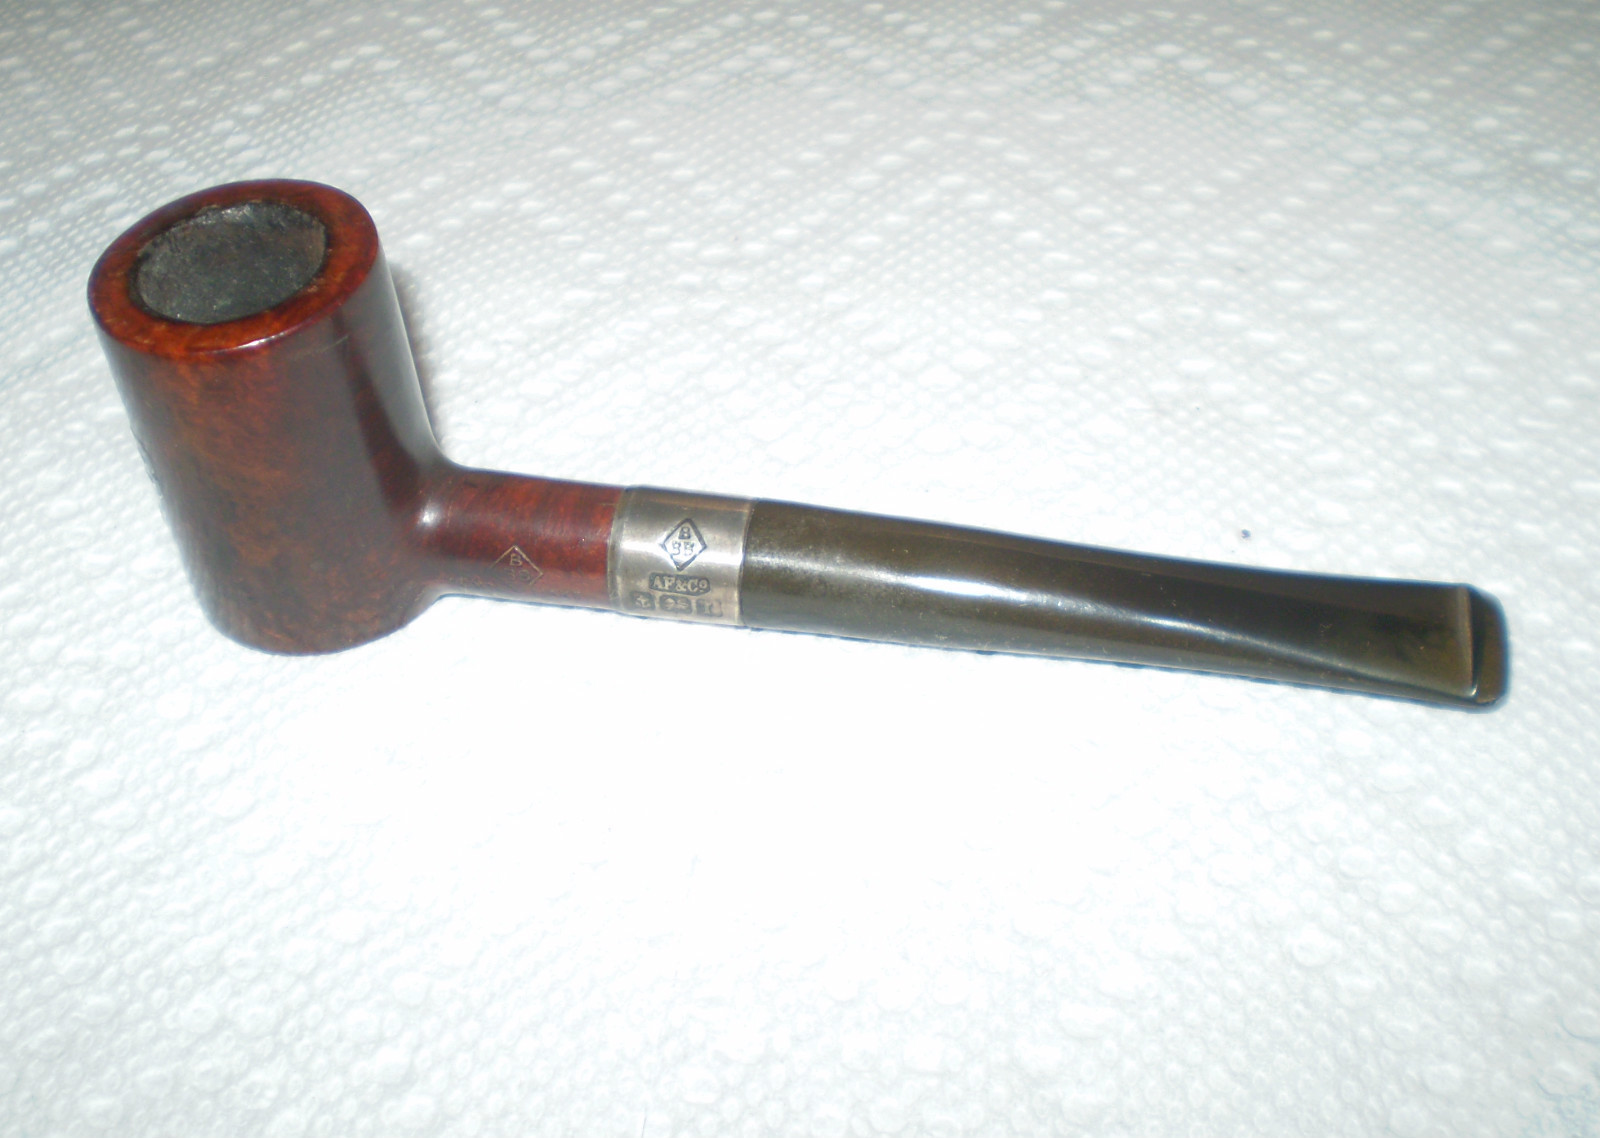
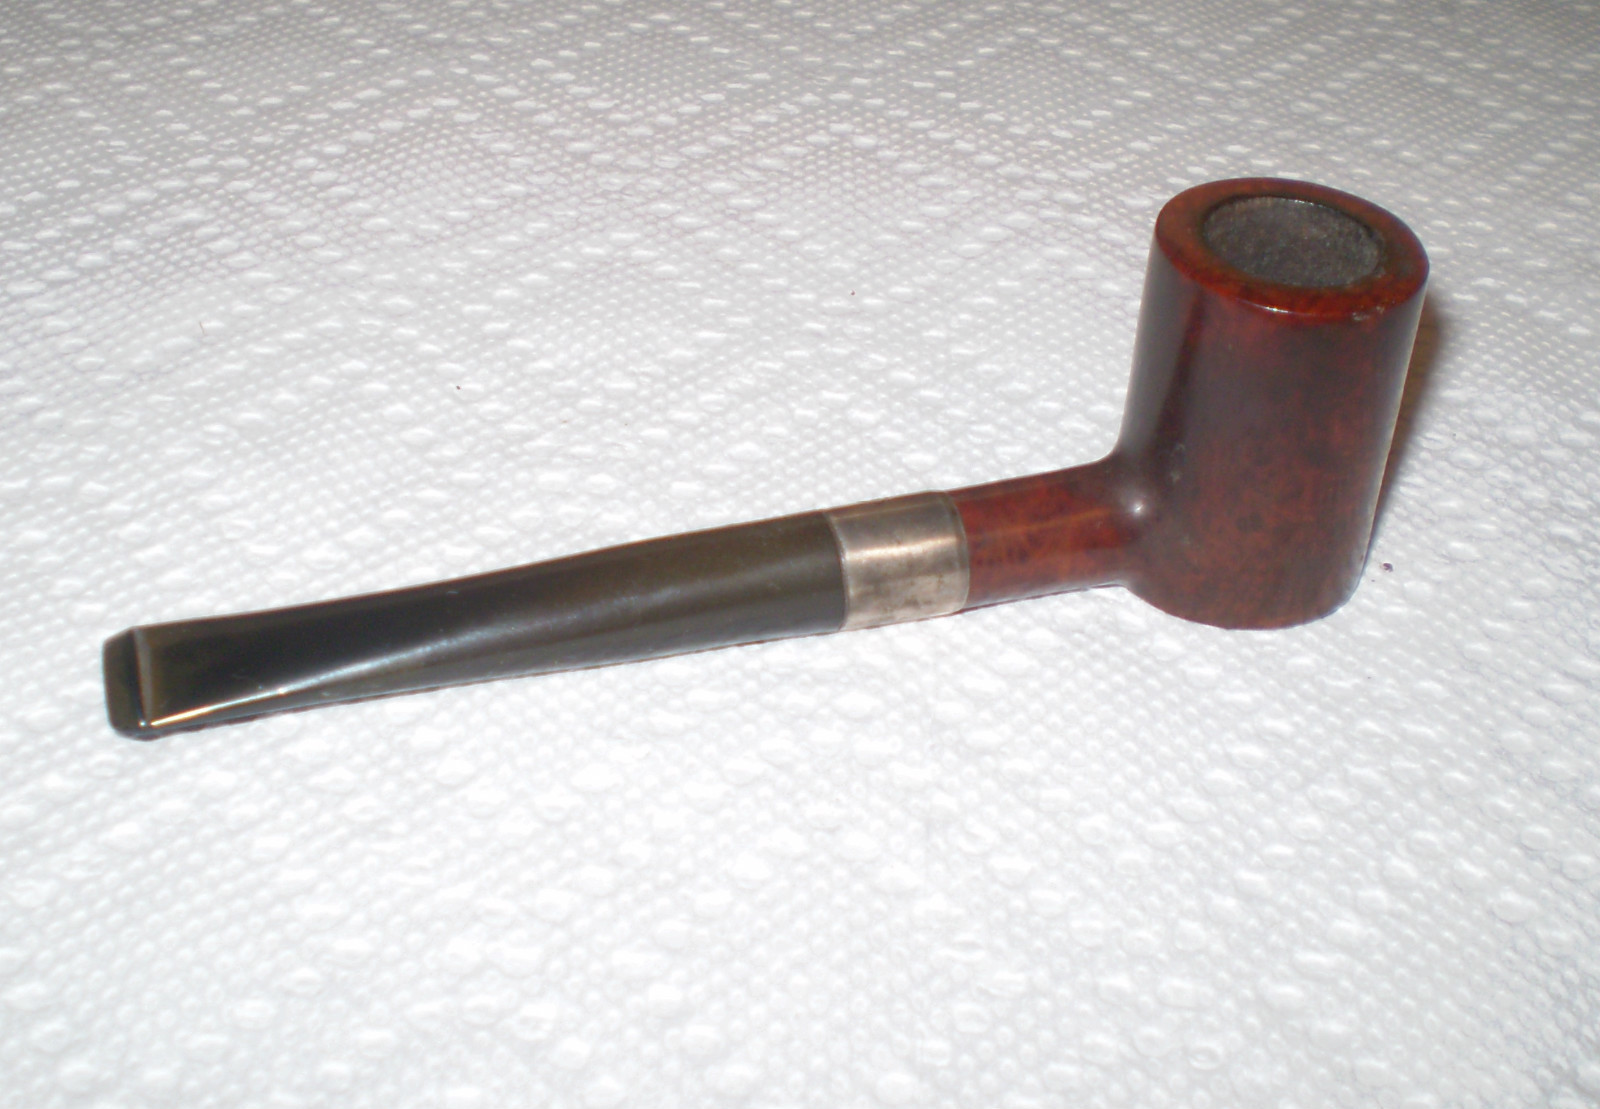
It is one thing to restore pipes for yourself, and then later on start giving them to friends. It is quite another to restore as an adjunct to working as a Tobacconist, in a Brick and Mortar Shop. I am slipping into that position, as my pipes have been well received in our Estate Pipe (sorry Ben) display case. I find myself challenged, and we will see, together, the outcome. Here is a trio of pipes that were they to show up in a group from eBay, would go directly to my “Someday Box”. They are caked heavily and there is damage beginning to the structure of the bowls. The briar is tar soaked to the point that grain is no longer visible, and the bits cannot go further into the shanks, nor be withdrawn in one pipe.

Stay tuned over this weekend, as I see what can be made of these three.

ImageImage

Mike….I have practiced on a number of pipes that were badly caked, actually a few were my Dad’s handed down, and I even purchased a few off eBay in that condition. I use my “Someday Pipes” to increase my skill level. I have acquired seven specialized tools that I use to vanquish this demon cake. And I examine closely for any existing damage, pointing it out to the customer and explaining a worst case ending to the attempted restoration.

And I sure hope in these three cases they end up resembling a pipe….

After carefully removing the bits from the shanks, I went to work on the cake. As Mike pointed out, one has to be very careful, as a pipe caked to this extent is almost assuredly suffering from some damage to the briar.

Special note – New Mexico Environmental has informed me that they plan to insist that I get the certification required for coal strip mining, if I plan to continue to bring back pipes in this condition…..

Stage one of the “Cleanup”….Bits soaked overnight in my magic solution and then steel wooled while still wet. Total bristle clean-out of the airway and the tenon area. Two solution scrubs of the briar and clean-out of the mortise…..now on to sanding and briar repair.

Image

I would have had these done Sunday evening, but with the temperature hovering around 100 degrees, we had a wide spread power outage on our side of the Mountain…..six hours later, we could check the update for fires, cool off and relax. The pipes had to wait….until now.

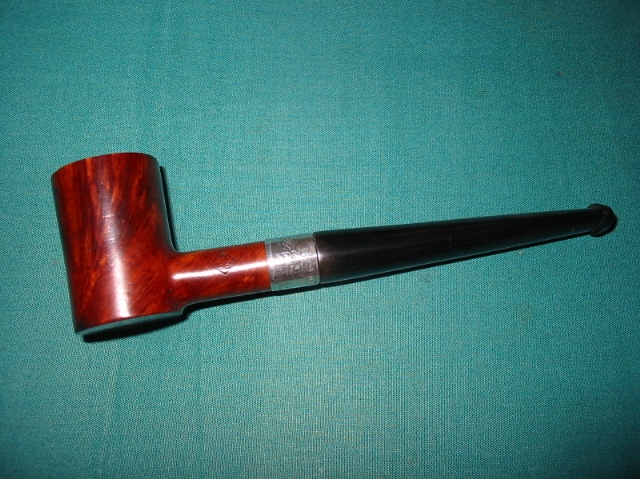
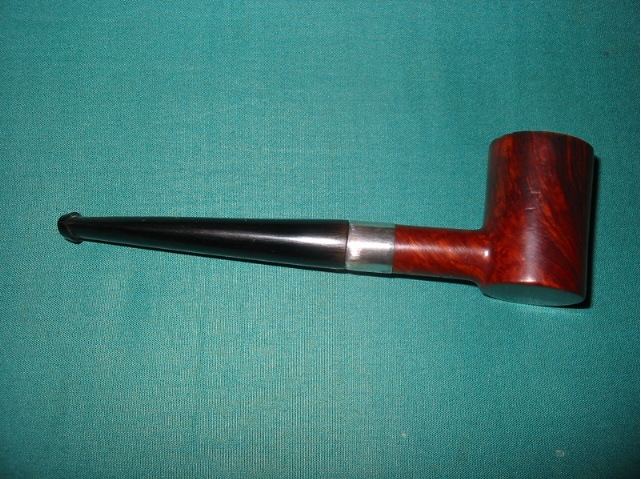
I did not restore the surface bite marks on the bits, as they were going back to the same owner. Leaving them as intact as they came to me, with no heavy sanding, allows him to retain much of the original thickness. Buffing them out and then resurfacing the finish has them looking good.

ImageImage

The customer had a funny response when he picked up his pipes today. He quietly picked them up, one at a time, and examined them for several minutes. He then looked up at me with a big smile on his face and said “Alright! What did you do with MY pipes?” Quiet for another minute, and then “They haven’t looked like this in 20 years.”

And then he paid his bill and added a tip to cover my lunch.

The 1912 BBB Poker


Blog by Steve Laug

I picked up this old 1912 BBB Poker on EBay not long ago. It is stamped BBB in a diamond on the shank and on the underside England. The silver is hallmarked Birmingham 1912. It is a smaller group 1 or 2 sized pipe. In the pictures the military stick bit looked like it belonged. It looked like it was shipped that way from the factory. The grime on the silver and on the shank as well as the oxidation on the stem made it appear to be that style of pipe. When it arrived with the other 5 pipes that I bought with it I examined it a bit more closely. In the picture below you can see the roughness of the stem. It is definitely poorly cut. The closer I looked the more I realized that it was a poor replication of an older stem. A BBB pipe of this age came with a different style of military stem and it had an orifice button rather than a slot like this one. The stick bit was not original as it was a slotted bit and was not finished smoothly. There were lots of file marks on both sides of the stem. When I removed the stem I was even more certain that it was a poor copy. The one thing I was still thinking was that it was definitely spigot or military bit pipe.

ImageImage

Then I began to work on the shank and the band. Someone had darkened the end of the shank to make it look almost black like the tarnished silver band. Once I cleaned the silver and cleaned the shank I could see that it was not a silver end cap at all but a very typical BBB silver band. In the picture below you can clearly see the end of the shank showing as it sits inside the silver band. I used a 1500 micromesh pad to clean off the end of the shank and return it to wood. When I re-stained the pipe I would also re-stain the shank end to match. It was clear that I would need to do a bit of research on what kind of stem was originally on this poker style pipe if I was to restore it to its original glory.

Image

I have a copy of the BBB Catalogue reprint from Gary Shrier so I got it out and went to work researching the look of the missing original stem. It became clear rather quickly that the pipe shape I had originally came with a taper stem with an orific button. In the catalogue is the exact shape in the exact size. I could not believe it. I laid the bowl on the page and then traced out the shape and size of the stem. A part of my hobby refurbishing is collecting old stems. I buy them wherever and whenever I find them and stockpile them in an old coffee can in my office. I went and got the can and emptied it on my desk to sort through what I had. I have yet to organize them by size so it is a matter of dumping the can out and digging through them. Well, I found one in my can of stems that had the right orifice button and the correct taper so I turned the tenon and fit the stem to the pipe. I used my Dremel to remove excess diameter from the stem so that it was the same diameter as the shank and band.

I also had to clean up the bowl of the pipe as the top was pretty beat up and the inside rim had been chipped and cut as if it had been carelessly reamed with a knife. I steamed the dents from the rim and carefully did a minor topping on the bowl to bring the top back to smooth and the inner and outer rim to smooth. I also chamfered or beveled the inner rim to bring it back into round. There were also dents on both sides of the bowl so I steamed those out as well. I use a wet cloth and a hot butter knife (heated over a flame) to raise the dents. I finished the work on the pipe by re-staining the top to match the bowl then buffed it and gave it a final polishing with White Diamond and then several coats of carnauba wax.

Here are pictures of the finished pipe. Other than being in colour it is a perfect match to the one in the catalogue.

ImageImageImageImage

Edit – 24 Feb. 2013 – I just came across an old BBB poker on eBay that is similar to the one above. I did some research on the stem on the one above and restemmed it. The one in the eBay photos is a newer version of the same pipe number. I have attached two photos below for sake of comparison.

BBB Poker BBB Poker 2