Tag Archives: repairing tooth dents

A Pre-Republic Peterson System Standard Reborn


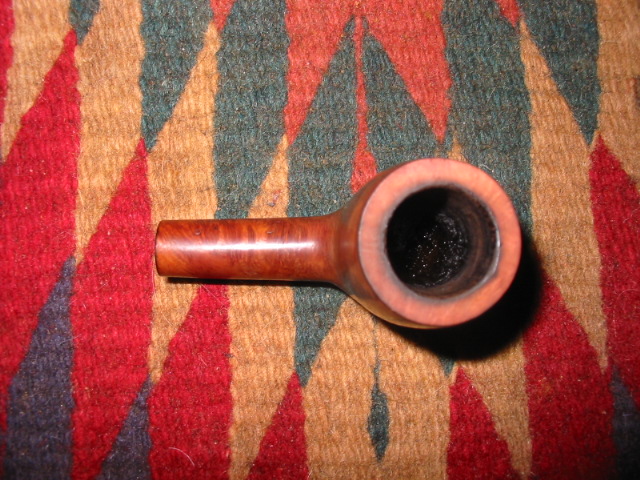
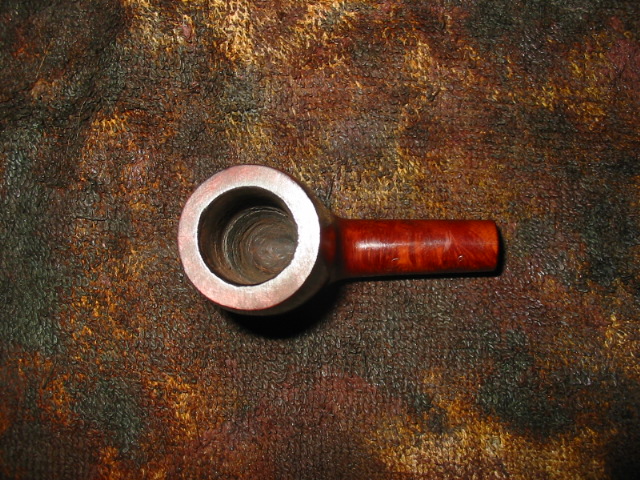
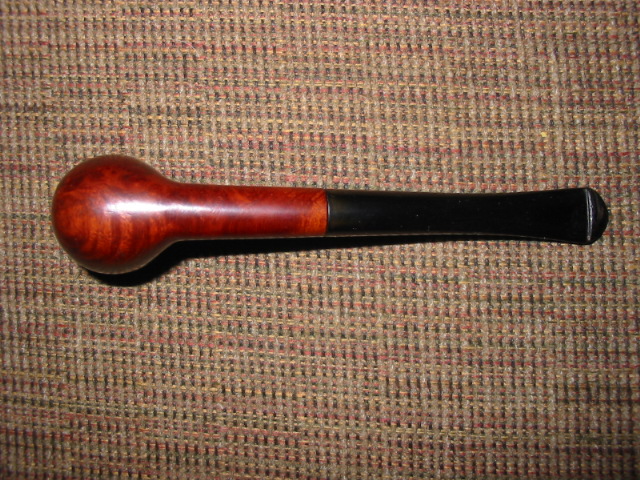
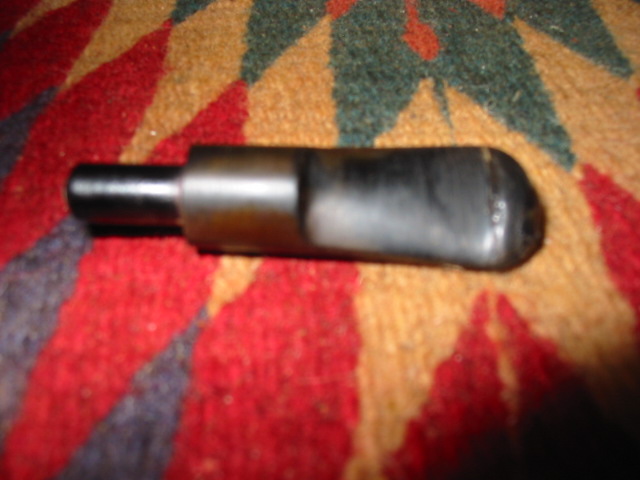
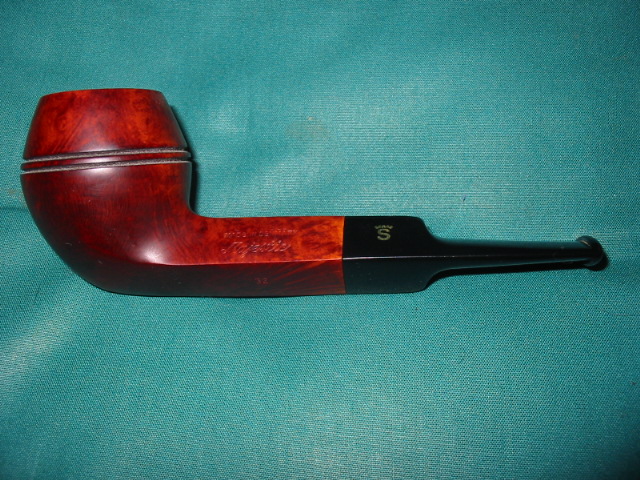
A month or so ago I was trolling eBay and ran across what I thought might be a Pre-Republic Peterson System 313.  I am not very learned in the different eras of many pipe companies but was fairly certain if I read the no-so-clear nomenclature right this was indeed a Pre-Republic era Peterson. Here are the photos the seller provided:

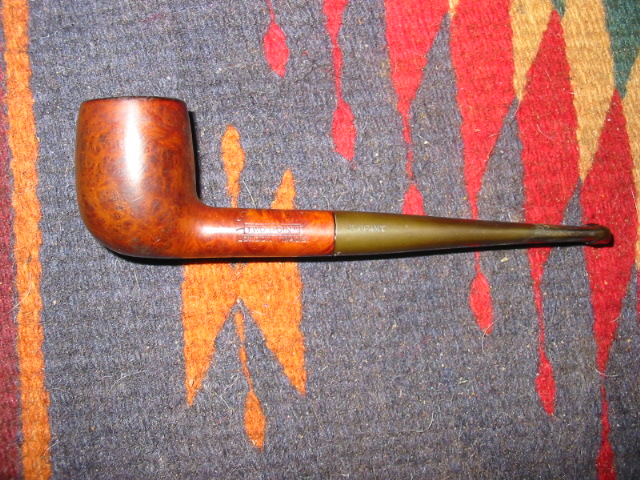
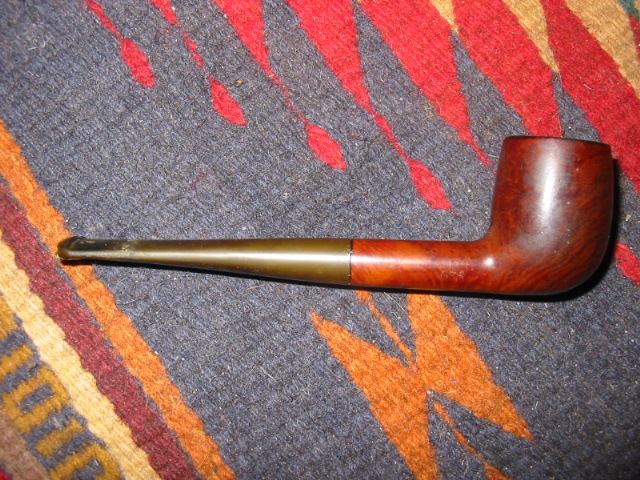
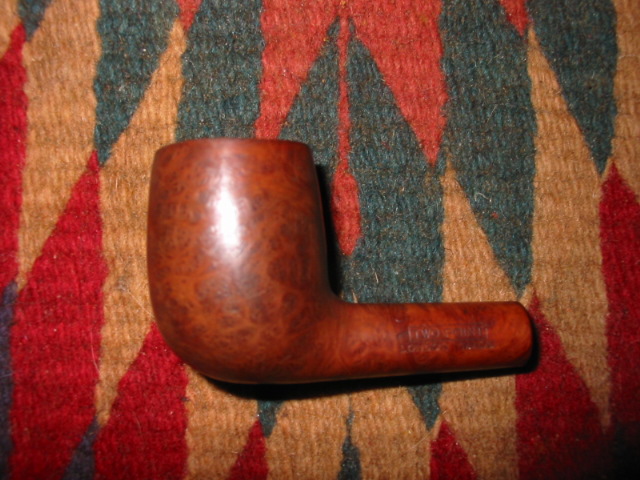
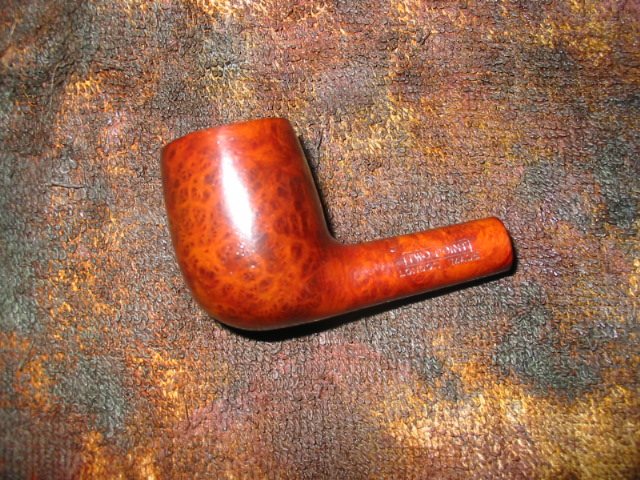
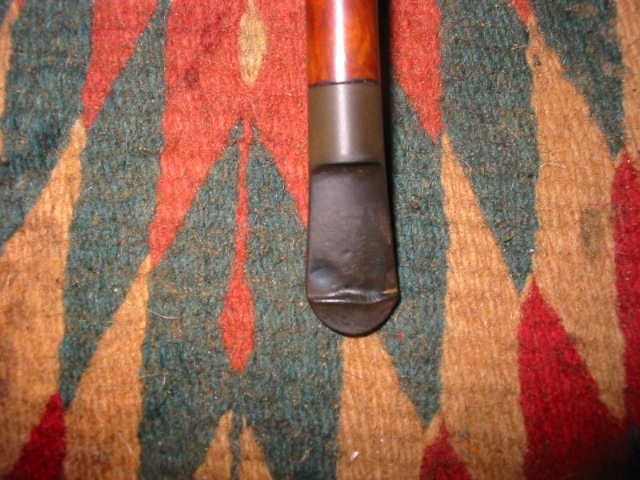
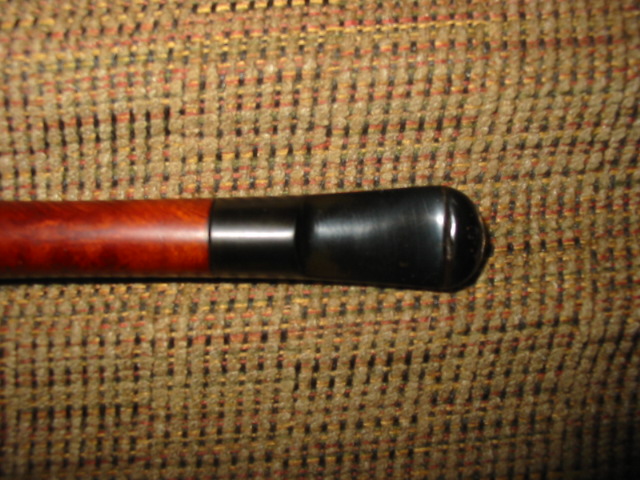
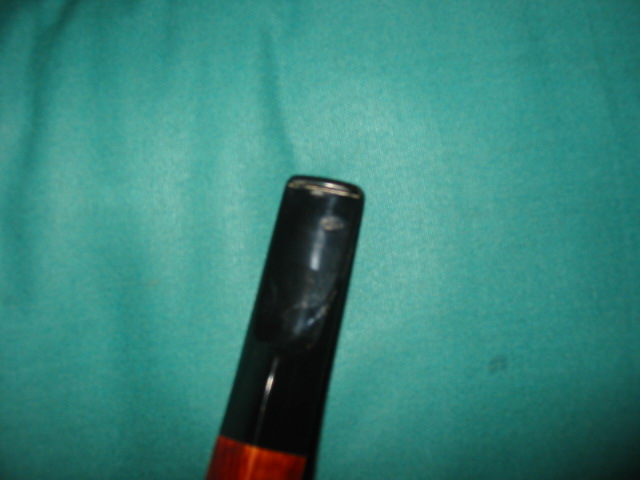
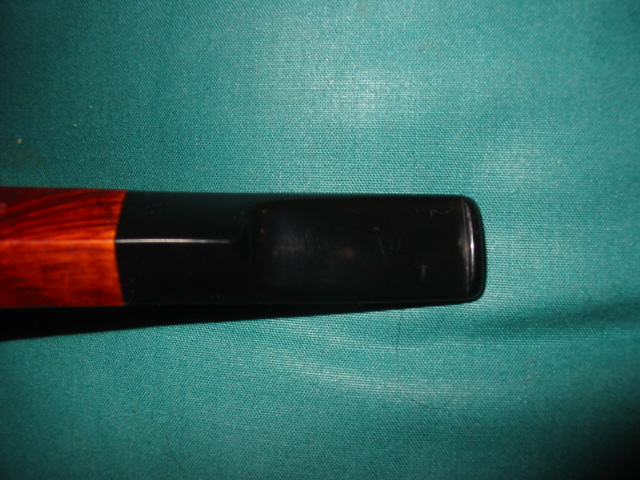
The pipe looked to be in pretty good shape so I thought I would take a shot at it. The seller had a Buy It Now or best offer price on it so I submitted my offer and went to do some research on the nomenclature in case my offer was accepted.After searching on Pipepedia and Pipephil I was sure that the pipe was indeed a Pre-Republic model. (The following photo shows the nomenclature and the small defect in the briar that probably kept it from being a higher grade pipe. The stamping reads “Made” on the top of the circle, “Ireland” in the bottom, and “in” in the center. These photos were taken by me after the restoration.)

A few hours later I received a counteroffer from the seller which I accepted. The seller was in Peru so now it was time for the dreaded wait.

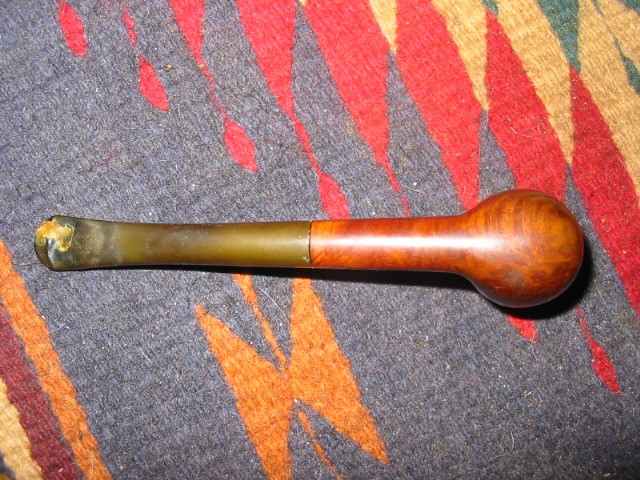
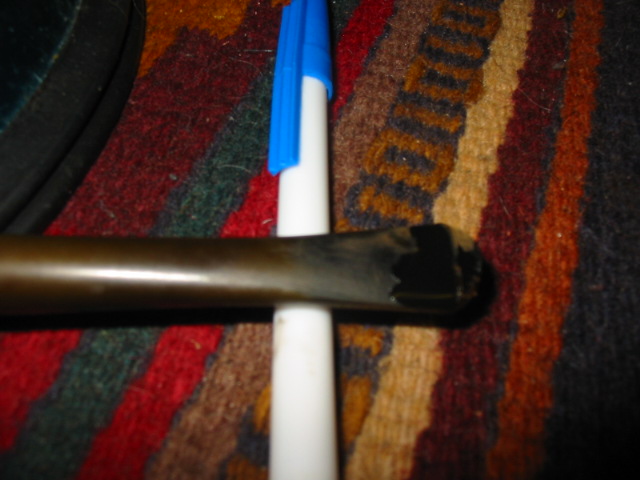
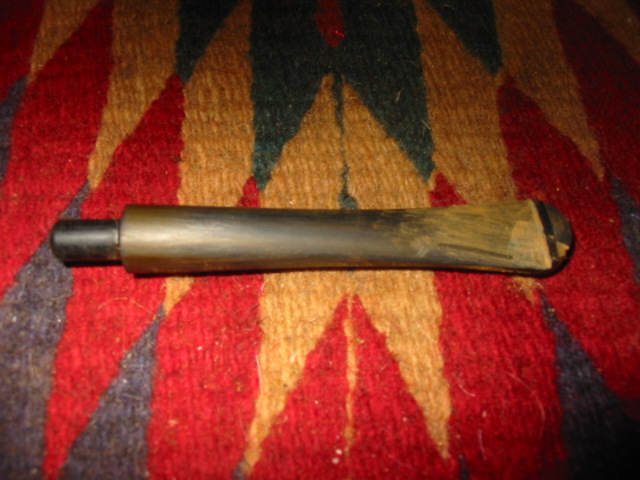
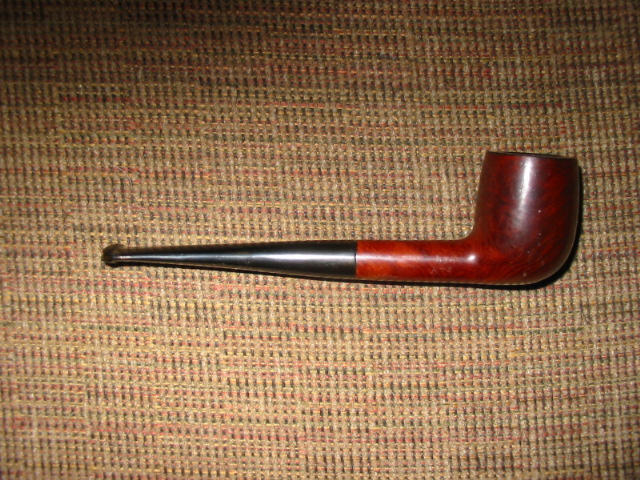
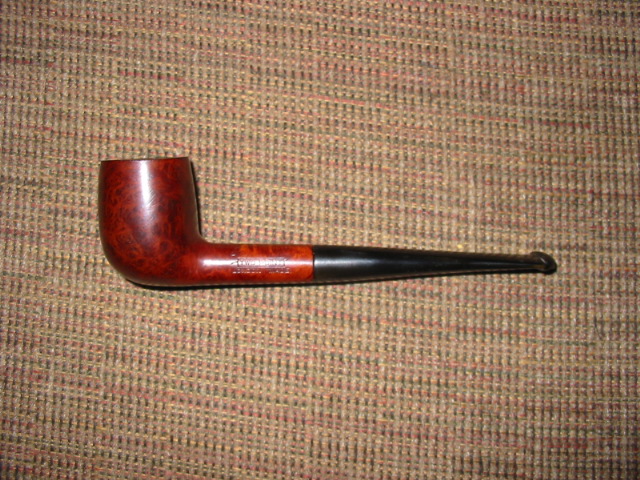
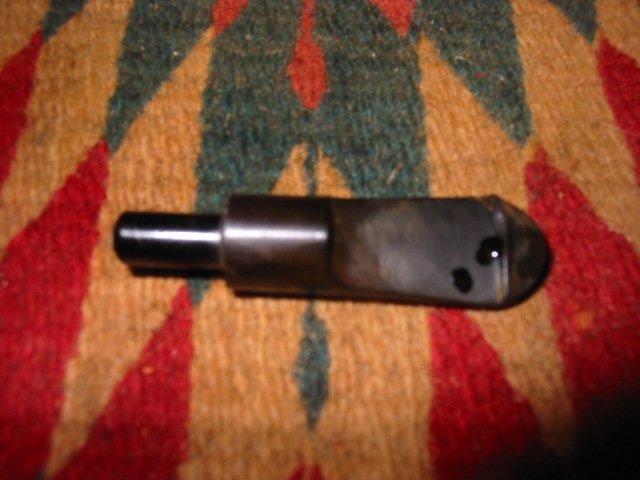
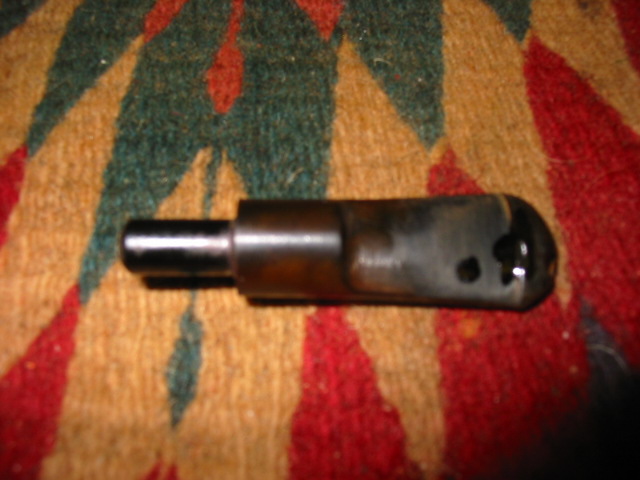
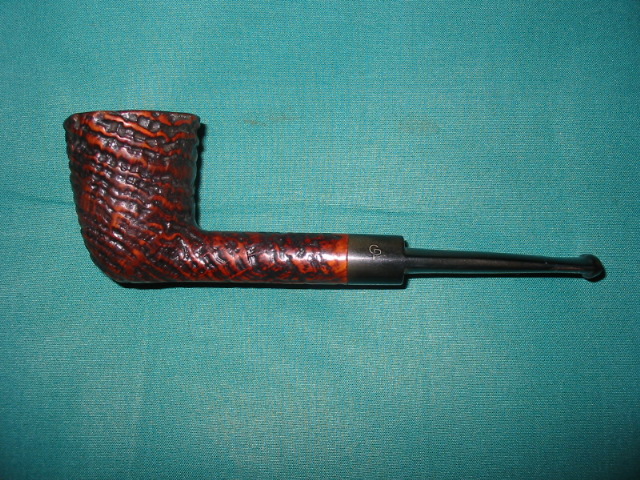
When the pipe finally arrived I was eager to tear into the box to see what I had! When I took the pipe out of the protective wrapping my first thought was “Wow, this thing is tiny!”. I have one over System pipe that is an XL315, a pretty large pipe. I didn’t realize the 313 was going to be comparatively diminutive in size! I was pleased to see that the nomenclature was stronger than I expected it to be and that the pipe was in pretty well as-shown condition; there was a deep burn on the front, inside of the bowl that I didn’t make out in the photos. Here are a few pictures I took upon getting the pipe unpacked.

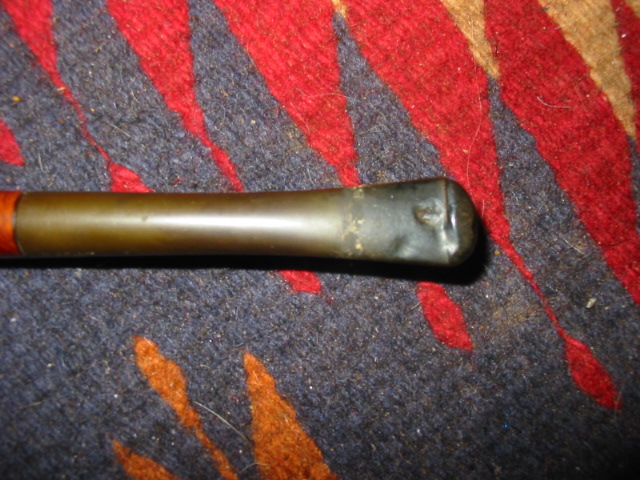
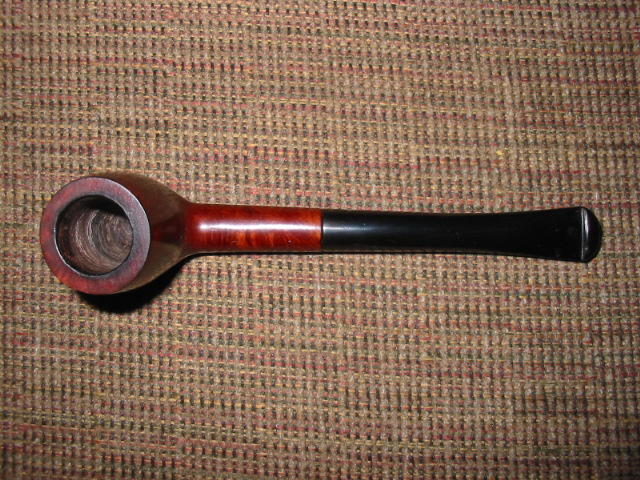
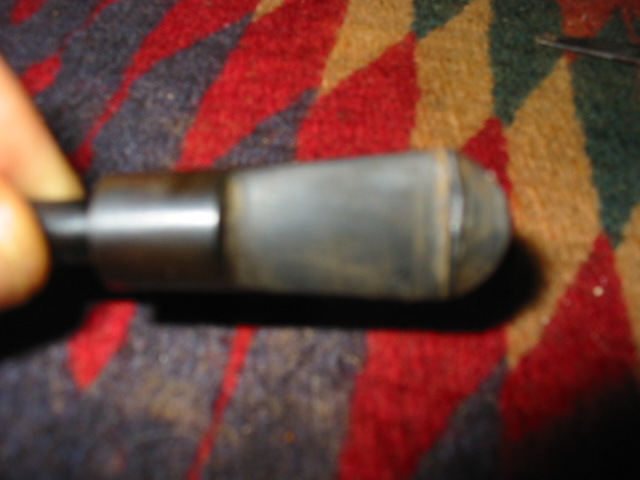
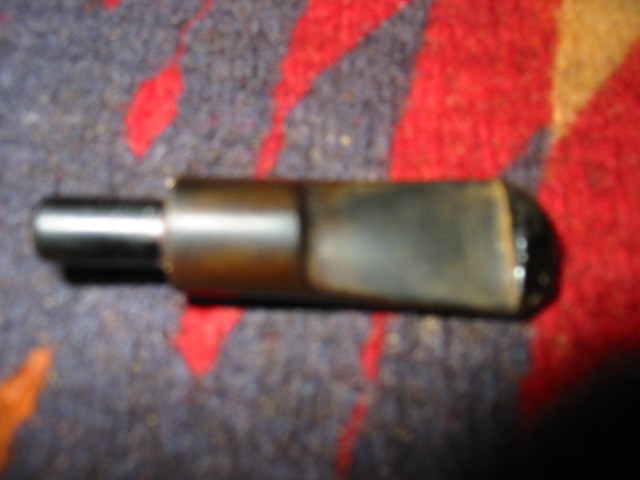
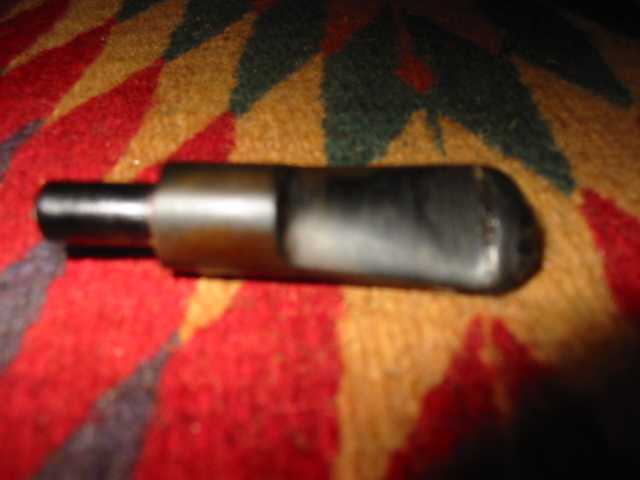
I dropped the stem in a warm Oxiclean bath while I began to clean the dirt and grime from the stummel. As I removed years worth of crud with cotton pads and both alcohol and acetone I began to really like what I was seeing! There were a few issues showing up now, but not anything too major: the rim cleaned up well but was burned worse than I thought, the nickle band had loosened over time and move up a little and was stained with tars (I think). All of these things were in my mind a good trade-off for the better than expected stamping though.

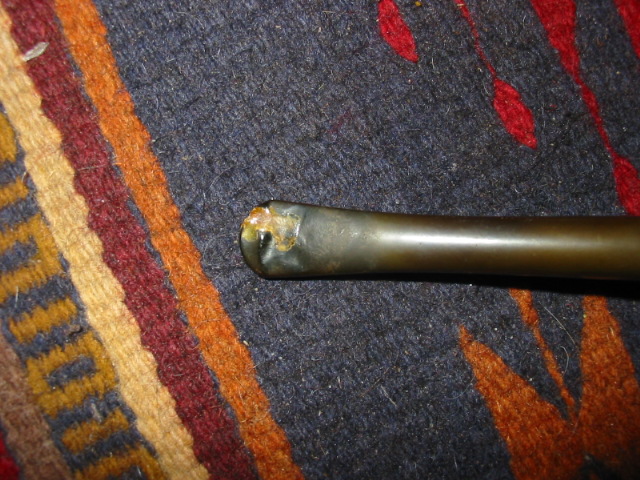
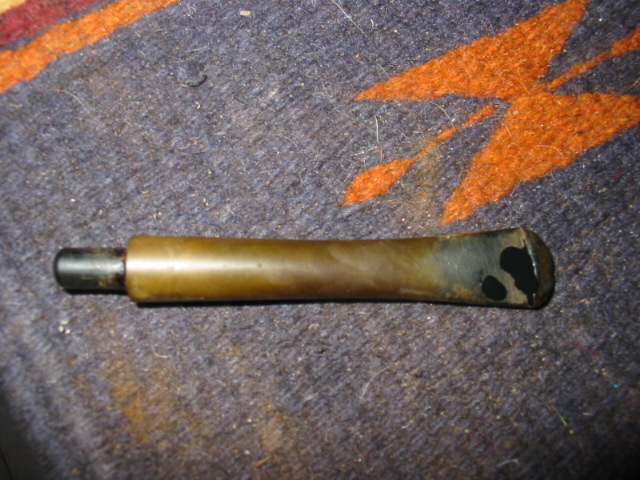
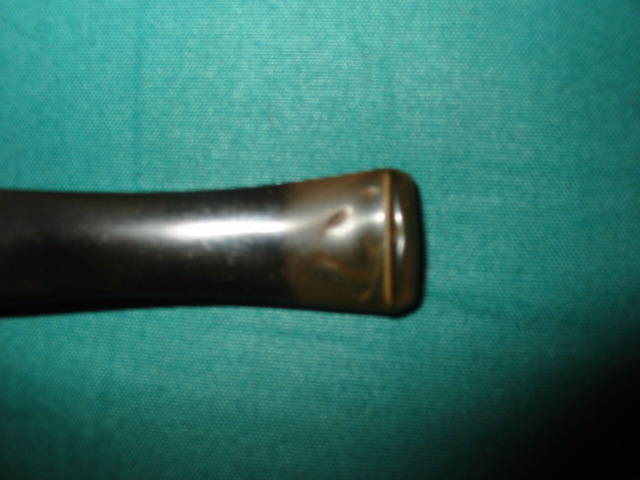
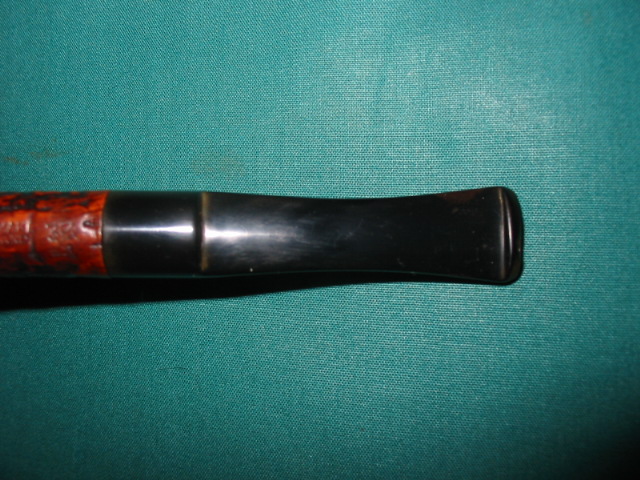
When I took the stem from the Oxiclean bath I scrubbed it down with a magic eraser to take off the loosened oxidation. Here’s what the pipe looked like at his stage; you can see the line where the band has moved over time.img_0207It was now time to start cleaning the internals of both the stem and stummel.

As I mentioned, this pipe has a rather small bowl; my smallest cutter on my PipNet set wouldn’t fit inside the bowl to ream it! The cake was hard but not terribly thick so I used the blade on my Sheffield pipe tool and some 320 wet/dry paper to ream back to bare briar. while I was doing the reaming I found was the burn on the rim was soft and would require more than just topping it. I decided to finish the internals before turning my attention to this problem.

I took a cotton swab soaked in alcohol and ran it through the stem; the P-Lip stem has a graduated airway, starting out very open and narrowing as it get closer to the button. As I turned the stem over to scrub the inside with the cotton swab a horrible goo ran out of the P-Lip!img_0200Needless to say, the pile of cotton swabs and pipe cleaners were only a representative sample of what it took to get the stem clean. And the well/mortise and airway of the pipe was equally nasty’ I really hadn’t expected this given the maintained cake in the bowl. I stuffed a cotton ball in the bowl and a cotton swab in the air hole, filled the bowl with alcohol and left it to sit over night. I completed cleaning inside the stem before going to bed.

The next day I removed the tar-stained cotton ball and swab from the stummel and  began to work on the burned rim issue after the pipe had dried an hour or two. I began by topping the bowl with 320 wet/dry sandpaper, checking my progress often. There was another smaller darkened area I wanted to remove, too, if I could, but I didn’t want to remove more briar than I had to.When the smaller spot was gone and the worse spot was improved I wiped the bowl down with alcohol to clean any remaining dust from it’s surface and began to polish it with micro mesh. I got up to about 2400, I think, and decided the burn was still too noticeable. I went back to work on the rim with a folded piece of 320 grit paper and worked a bevel on the inner edge of the bowl, then repeated polishing with micro mesh as before. The results were much better to my eye.

I moved on to the stem now, setting the bowl aside for later. The stem wasn’t in particularly bad shape, mostly just oxidized, as some of the previous photos show.There was a couple of deeper tooth marks on the bottom and top near the button that had to be filled. I sanded the oxidation off using 320 grit paper then cleaned the stem well with alcohol on a cotton pad. I picked at the deepest dents and the button “steps” with a small “toothpick” knife I have to make sure all the oxidation was out of the dents and grooves. After giving the areas a spray of CA glue accelerator I applied clear CA glue to both spots, gave it another spray and then let it sit a few hours to cure well; I didn’t want the glue to run while it cured or I might have skipped the accelerator altogether. (I didn’t remember to take many photos during this process.) After the glue cured I used needle files and sandpaper to smooth and better blend the patches, after which I polished the stem with the full range of micro mesh pads, 1500-12000.

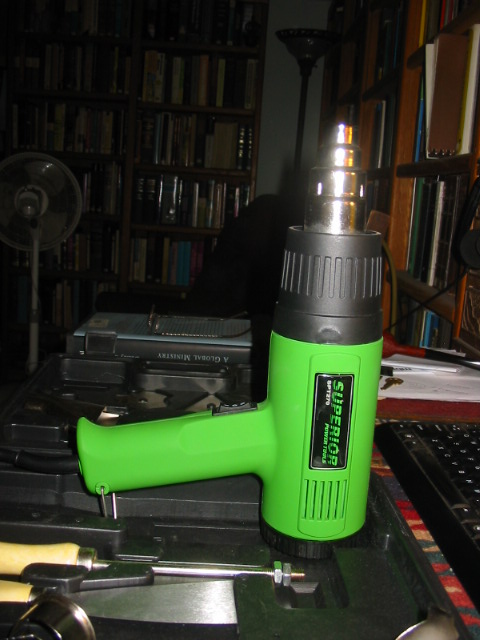
Now that the stem and stummel were fully ready, I moved to the downstairs workshop for the finishing touches on everything. I began with my heat gun, warming the band to expand it and press it back in place; I pressed it into an old buffing wheel, using the center hole to help fix the slight out-or-roundness that had gotten in the band, too.

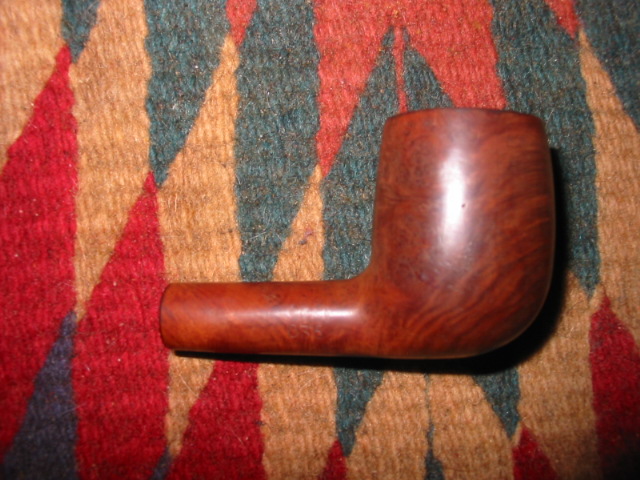
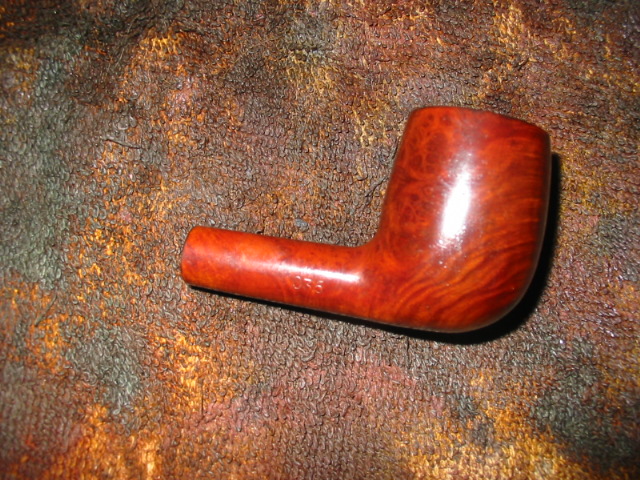
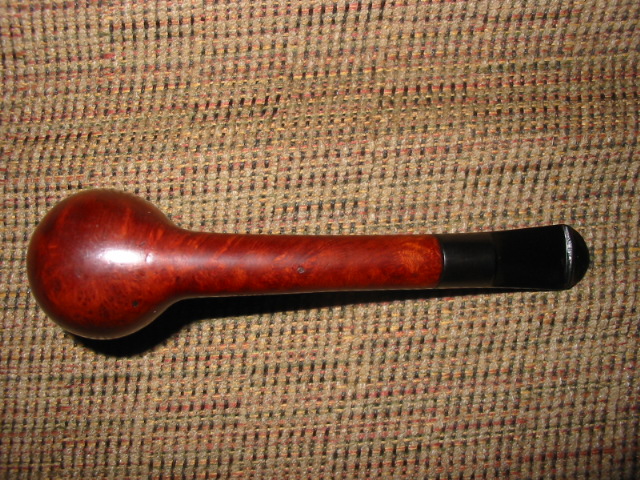
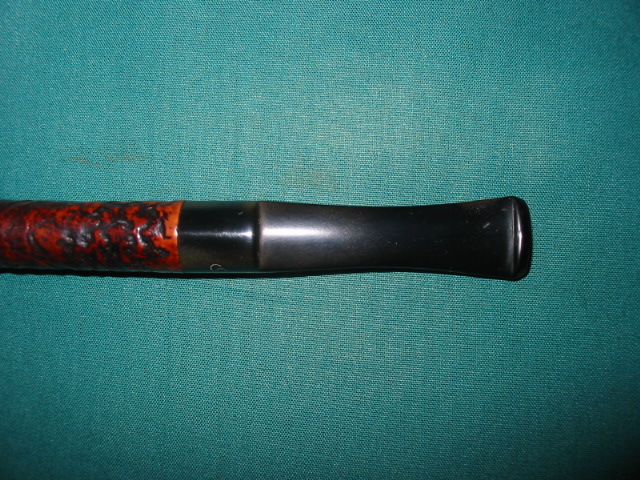
Next I used a dark brown stain pen to re-stain the bowl. I covered it entirely, as evenly as possible, twice and let it dry for a little while before using another alcohol dampened cotton pad to wipe off some of the excess to allow the grain to shine through. Next up was buffing with the Dremel. I used brown Tripoli on the stummel and nickle band first and then white diamond and blue compound on both the stummel and stem. I finished up with a few coats of carnauba wax on the entire pipe and a hand buff with a micro fiber clothe to raise a nice shine. I am really pleased with how the pipe came out overall and think the beveled rim idea to fix the burned area blended in very well. Before you see the finished pipe I must confess the first bowl I smoked in it was horrid! I had to go back and do a second alcohol treatment and I soaked the stem in alcohol and cleaned it again, too. The second cotton ball was even more tar-stained than the first! I had to re-wax and buff the whole pipe, too. But the next bowls proved it was well worth the effort as the pipe now smokes dry and sweet!

Refurb on a Two Point Billiard – Gnawed Stem


This is the second Two Point pipe that I had in my box to be refurbished. It obviously was owned by the same pipe man as the little Lovat as evidenced by the matching bite marks. The pipe had an uneven cake in the bowl making the bowl conical even though it was U-shaped in reality under the cake. The rim was dirty and tarred but not damaged with dents or knock marks. The finish was spotty and uneven so the bowl would need to be stripped and restained for good coverage. The biggest problem can be seen in the first two pictures below: the stem was very badly chewed. In the first picture it can be seen that the top of the stem had several deep bite marks and the button was eliminated on the left side. It was more of an upward slope to the tip than the sharp angular edge that was originally there. The round cap of the top of the p-lip button was smoothed out and no longer crowned. In the second picture you can see that the bottom tooth marks and bite throughs had been repaired with what appeared to be epoxy that was fairly caked on the stem tip to the point that the lip line and the button were gone. What remained was a working stem that had no beauty to my eye.

ImageImage

The third and fourth photos show the profile of the button and it can be seen to have been virtually eliminated with the slope of the epoxy on the bottom edge and the chewed top edge. You can also see the state of the finish on the pipe. The spottiness and grime that covered the outside of the bowl are visible. Obviously this was a good smoking pipe that the previous owner cobbed a repair on so that he could continue to enjoy smoking it.

ImageImage

The next two photos are enlarged to show the state of the stems. The first one shows the top of the stem and you can see the two large dents (interestingly they are in the same place as those on the other Two Point pipe).You can also see the wearing away of the edge of the button to a slope. The crown is also flattened. The second shows the underside of the stem and the remaining two dents – one next to the button on the bottom half of the stem and the second inward from that dent. You can also clearly see the epoxy patch that fills the bite through and the button. The usual line that separates the button on the p-lip from the stem is gone. To repair these two surfaces the dents need to be raised and the holes filled to the point where it is possible to cut a new button on the top and the bottom. The crown will need to be built up a bit and the epoxy patch hidden or blended into the black of the stem.

Image

IMG_7946
I decided to work on the top side of the stem first and heated the surface of the vulcanite to lift the dents as much as possible. Once that was finished I filled what remained of the two dents with black super glue (see the first photo below). The dent next to the button I over filled so that I could have room to recut the edge of the button. When the glue had dried I sanded it back with 240 grit sandpaper to even the surface. I also recut the button edge to give it more of a sharp distinction. The sanded top surface can be seen in the second photo below.

Image

Image

On the underside of the stem I decided to recut the button and the line with needle files before I refilled the dents and the epoxy patch. I sanded off the extra epoxy to get the surface smooth and level with the surface of the stem. I used 240 grit sand paper to bring the surface down and the needle files to cut the edge on both sides of the line. You can now see that line in the picture below and there is a definite break between the bottom of the p-lip and the stem. It is a duplicate of the button on the Two Point Lovat.

Image

Once I had that recut the button area I filled the surface of the stem with black super glue as seen in the picture below. I propped it with a pen to keep the surface level as I did not want the super glue to run and pool. I also built up the epoxy patch on the edge of the button as well. Once the glue was dry I sanded the surface and did a bit of work with the needle files to redefine the edges. The second picture below shows the sanded stem with a smooth surface.

Image

Image

I finished sanding the stem with 400 and 600 grit sandpaper and water and then moved through the micromesh pads from 1500-6000 grit. The trick was to build a black coating on the epoxy patch. This took repeated coats of the black super glue. Once that was complete then the stem could be polished by hand until I finished with the bowl refinishing.

While I had been working on the stem the bowl had been soaking in the alcohol bath. Before dropping it in the bath I had wiped it down with a soft cloth and acetone (fingernail polish remover works very well) to remove the finish and the grime. It was time for it to be removed from the bath so that I could work on it. The three pictures below show the bowl after it has dried off from the alcohol bath. It now needed to be sanded with micromesh to remove any surface scratches and the rim needed to be thoroughly wiped down in preparation for the staining. I sanded and then wiped it down with a soft alcohol soaked cloth and set up the staining area.

ImageImageImage

The next four photos show the restained bowl. I used a medium brown aniline based stain (Fiebings Leather Dye) to stain the pipe. Once it was stained I flamed it and buffed it to polish the briar and make the grain stand out. The patterns of birdseye and swirls is quite unique. This is a clean piece of briar – no fills and no problem areas.

ImageImageImageImage

I then put the stem on the pipe and buffed the entirety with White Diamond and carnauba wax to bring it back to a shine. The final four photos show the finished pipe. Pay attention to the stem and button areas as they are now very distinct in the profiles and the build-up on the top and bottom give it back its original shape.

ImageImageImageImage

Rebuilding a chewed and dented stem with super glue


I just finished reworking this old stem from an Imperial Two Point Made in London Lovat. The stem was very unique in that it is a p-lip design though slotted in the airway. I have a second one that I am working on that has the same stem so I believe this is one of the hallmarks of the Two Point. That being the case I decided to restore the stem rather than cut a new one. You can see the state of the vulcanite from the three pictures below. The first picture is of the top of the stem. There were three major tooth dents in the surface of the stem, two chunks out of the edge of the button and a piece missing out of the edge of the lip of the slot. The second picture is of the underside of the stem. There you can see one major dent from teeth and also several smaller dents. There is also a dent in the edge of the lip of the pipe that has moved the straight line with a dip in it. The third picture shows the slot in the end of the stem, it is a bit out of focus but you can see the missing piece at the left side of the top edge.

ImageImageImage

I used my heat gun set on low to lift the dents as much as possible before working on the stem with sandpaper and superglue patches. I cleaned the surfaces of both the top and bottom of the stem after heating and then sanded them with 240 grit sandpaper to remove oxidation and anything that would prohibit the glue from sticking. In the first photo below you can see the two patches on the dents that remained after heating on the underside of the stem and the work that has been done straightening the line. I decided to work on the underside first as it needed a bit less repair. Once the glue was dry I turned the stem over and patched the top side. In the second photo below you can see the super glue patches on the surface of the stem, the two dents on the edge of the button to build up the edge. Once it was dry I planned on using needle files on both top and bottom to sharpen the edge of the button to a crisp restored look.

ImageImage

The next two photos show the top and bottom surfaces of the stem after sanding with 240 grit sandpaper to bring the glue patches flush with the surface and using the needle files to sharpen the edges of the patched button.

ImageImage

The next picture (I apologize for the blurriness but I think it still is clear enough to see the point I am making) shows the work that was needed to rebuild the lip of the button on the topside where the chip was. I carefully layered in black superglue making sure not to close off the airway. I used a greased pipe cleaner folded in half in the airway of the slot to provide a base to build on. Once the base was buildt I stood the stem on end and gradually layered in super glue to build up the top edge of the slot. The goal was to return it to a smooth rounded crown with a clean straight slot for the airway.

Image

The next two pictures show the build up area on the end of the button. It is a shiny black spot in the photo at the bottom right edge of the button. Each one shows a bit more of the build up to give an idea of the process. I would have to recut the edge of the button on the top side when the build up was complete.

ImageImage

When I had the surface filled to satisfaction I recut the edge of the button with the needle files and also sanded the surface with 240 grit sandpaper and 400 and 600 grit wet dry and water to smooth out the fill. I then proceeded to use my normal list of micromesh pads from 1500-6000 grit to finish the stem. I put the stem back on the pipe and buffed it with White Diamond. I took it back to the work desk and gave it a coat of Obsidian Oil, wiped it off when dry and gave the stem a final coat of carnauba wax. The pictures below show the finished stem. The first one shows the topside and the rebuilt crown of the button. The glare and shadows on the picture do not allow you to see clearly the recut edge but it is straight and clean. The second picture shows the underside of the stem and the crisp straight edge of the button. The final picture is an end shot to show the slot and the curve and flow of the crown of the button.

ImageImageImage

Overall I am pleased with the repair and now have a renewed pipe.

ImageImage

Lifting Tooth Marks from a Lucite Stem with a Heat Gun


A normal pattern of behaviour for me in my refurbishing work is that once I figure something out that works on one kind of material I want to try it on a variety of similar items. In this case once I had used the heat gun to lift the tooth dents on a vulcanite stem I wanted to experiment with Lucite stems. I had no clue whether it would work or even if Lucite had some kind of memory that would bring the dents back to a smooth surface on the stem. There was only one way to find out since I could find no answers online and that was to give it a try. I figured the worst that could happen if I was careful was that the stem would remain the same – dented or a bit melted and I would have to do a different kind of repair. I had a nice little Stanwell bulldog that was given to that had a Lucite stem that had some tooth dents in the stem – just ahead of the button. There was one dent on top and one underneath.

Image

The two pictures below show the depth of the marks (Again I ask your forgiveness the poor quality of the photos, several of them are a bit blurry but I think that they give you a good idea of the nature of the problem. The dents look far worse in person than the pictures show). The top photo shows the top of the stem and the second photo the underside. I decided to continue my experiment with lifting the tooth dents with my heat gun on this Lucite stem as it seemed like a good candidate for the trial.

I personally like working with a clean surface when I am doing this kind of work so I scrubbed the tip to clean it of any grime or grit that might be in the dents. I used a soft cloth dampened with Isopropyl alcohol to clean the surface then I buffed it with a quick light touch on a White Diamond wheel.  The pictures below show the stem just before I used the heat gun on it. You will see in the photos that there are small pits close to the button as well as the larger dents on both sides. The crevice between the button and stem body also has some scratches that would need to be sanded out once the tooth dents were dealt with.

ImageImage

As I explained in the post on the vulcanite stem I once again stood the heat gun on its end pointing upward. I used the wire stand built into the handle to stabilize the gun in this position (see the picture previous post on lifting tooth marks from vulcanite). I wanted to be able to have both hands free to maneuver the stem over the heat so having the gun positioned in this manner allows me to do that. I set the heat gun on low heat as before because I did not know how the heat would affect the Lucite. I have found that high setting can too easily burn the vulcanite so I was assuming the same thing would be true of the Lucite.

I worked the stem over the heat keeping it about 4-6 inches above top of the gun tip as it allows it to thoroughly heat the Lucite. I move the stem constantly back and forth across the heat. I kept the stem on the pipe as before and used the bowl as a handle. In this instance I worked to just keep the first 3/4 inches of the stem from the button forward in the heat. I stopped frequently to check on the progress and see if there was any blistering on the stem. It took a bit longer for the heat to work on the Lucite. I think it must be the density and hardness of the Lucite that makes the difference. With the application of heat the Lucite began to return to its original smoothness. I kept the heat on the stem until all the dents were gone. The reason I believe the process worked was because the dents in the Lucite were not cuts in the surface but actual dents. The application of the heat did the trick.

Once the surface was smooth I took it off the heat and cooled it the same way I did the vulcanite. I did not want the stem to bend accidentally while it was soft so I dipped the tip in some running cool water to set the new surface. I dried off the tip and then sanded the area with 400 and 600 grit wet dry sandpaper (with water on the stem as I sanded) and then moved through the grades of micromesh pads – 1500, 1800, 2400, 3200, 4000 and 6000 grit. By the 3200 grit micromesh pad I found that the Lucite was beginning to have a smooth and glossy finish. The sanding with the final two grades of the pads really polished the stem and gave it the glassy finish that polished Lucite has. I finished by giving it a final polish on the buffer with White Diamond polishing compound and a coat of carnauba wax.

Here are some pictures of the top and the underside of the finished stem.

ImageImage

Lifting Tooth Marks in an old Charatan Stem with a Heat Gun


I picked up this old Charatan 33X Bell Dublin off of EBay in the 90’s and refurbished the bowl and rim and gave it a good polishing with some Halcyon 2 wax. I find that the wax works very well on sand blasted and rusticated surfaces. This one turned out to be a great smoking pipe.  The briar is extremely lightweight and has a nice deep blast to it. Charatan does this shape like no one else and it is a favourite of mine. I liked everything about this old pipe but… it had some incredibly deep tooth marks on the stem.

Image

The two pictures below show the depth of the marks (Please forgive the poor quality of the photos, though they are a bit blurry they communicate the problem. Know that it was far worse than the pictures show). They arc across the stem just in front of the button and extend about a half inch into the stem. The top photo shows the top of the stem and the second photo the underside. I covered them for the longest time with a rubber softee but really did not like the feel of that in my mouth so I decided to experiment with lifting the tooth dents using my heat gun.

Image

Image

I scrubbed the tip to clean it of any slurry that had built up under the rubber softee tip. There seems to always be a white calcification under the rubber guard. I cleaned that up with my buffer and some sandpaper. The photos above show the stem after I had cleaned it and it was ready to be heated.  I have a heat gun that I can stand on its end pointing upward. It has a wire stand built into the handle that stabilizes the gun in this position (see the picture below). Having the gun positioned in this manner allows me to control and manipulate the stem with both hands over the heat. I set the heat gun on low heat as I have found that high setting can too easily burn the vulcanite. I learned that painful lesson on some precast stems that I was trying to bend. I had used the heat gun to bend my stems for quite some time but had not used it to lift the tooth marks from the stem until I used it on this stem.

Image

The trick I have learned in the process is to keep the stem about 4-6 inches above top of the gun tip as it allows it to thoroughly heat the vulcanite but not burn it. I move the stem constantly back and forth across the heat. I kept the stem on the pipe this time and used the bowl as a handle. In this instance I worked to just keep the first inch of the stem from the button forward in the heat. I stopped frequently to check on the progress and see if there was any blistering on the stem. The blistering can easily happen and is a pain to deal with. It can be sanded out but it is a case of creating a problem while solving another one – kind of like how plumbing repairs always work out for me. It did not take long for the heat to do its magic. Vulcanite has memory so with the heat it returned to its original smoothness. I have found as long as the bite marks are not actually cuts but dents they will lift out with persistence and heat.

Once the surface was smooth again I took it off the heat and cooled it by dipping the tip in some running cool water to set the vulcanite in its new position. It is the same principle that is used in bending the stems. You heat and get it bent to the position you want and then dip in cold water to set it. I figured it would work the same in this instance and it did indeed work. I dried off the tip and then sanded the area with 400 and 600 grit wet dry sandpaper (with water on the stem as I sanded) and then moved through the grades of micromesh pads – 1500, 1800, 2400, 3200, 4000 and 6000 grit. By the 3200 grit micromesh pad I found that the stem was beginning to get a smooth and glossy finish. The final two grades of the pads really polish the stem and give it a glassy finish. To finish the work on the stem I took it for a final polish on the buffer with White Diamond polishing compound. It really shone when that was done.  The work was finished after I gave it a good coating of carnauba wax.

Here are some pictures of the top and the underside of the finished stem.

ImageImage