A Comoy’s The Guildhall London Pipe


Blog by Steve Laug

This refurbishment was probably the easiest I have done in a long time. The pipe is unsmoked as far as I can tell. The shank is pristine, the stinger apparatus is unsoiled and clean, the stem inside is clean and the bowl is carbonized but unsmoked. The stem had some tooth chatter that makes me wonder if someone used it for a prop or something. The finish was in excellent shape with no nicks or dings. The bowl is flawless in terms of fills, I can find one pinhole sandpit but otherwise perfect. It is stamped on the left side of the shank The over Guildhall over London Pipe. On the right side it is stamped Made In London in a circle with the In central in the circle. Underneath the circle is stamped England. Toward the front of the shank on the right side is the shape number 159. The first series of five pictures shows the state of the pipe when I got it.ImageImageImageImageImage

I sanded out the tooth chatter with a medium grit sanding sponge. I find that these give me a lot of flex and fit well against the button and follow the curve of the stem nicely. The medium grit works well to remove tooth chatter from the stem without removing too much of the material. The next series of three photos show the stem after sanding it with the sanding sponge.

ImageImageImage

After sanding with the medium grit sponge I used the Maguiar’s Scratch X2.0 polish on the stem. As usual I applied it with a finger to rub it into the stem and then removed it with a cotton pad, polishing as I removed it. The next three photos show the stem after polishing with the plastic polish.

ImageImageImage

I then used the micromesh sanding pads from 1500-12,000 grit to finish the polishing of the stem. The next series of eight photos show the progressive shine that is achieved by the micromesh pads. The last of the eight photos is the 8000 grit pad. I continued sanding with the 12,000 grit pad to finish and then buffed the stem and pipe with White Diamond.

ImageImageImageImageImageImageImageImage

The pipe is finished – that did not take too long – a very easy refurbishment that is for sure. The next series of four photos show the finished pipe. After buffing with White Diamond I gave it multiple coats of carnauba wax to bring it to a shine. Now it is ready to smoke and looking pristine.

ImageImageImageImage

A Kaywoodie Handmade Brought Back to Life – Greg Wolford


Blog by Greg Wolford

Greg is one of the blog’s readers and comments often on various posts. He contacted me about writing an article for the blog. He sent me the following article. I want to thank Greg for documenting his work on this old Kaywoodie Handmade. It is great to be able to read and see what others are doing as they work on restoring old pipes to their former glory. Here is a brief biography of Greg that he has written. (I invite others who have been reading the blog to do the same. Send us pictures and documentation of the work you have done and are doing.)

In June of last year I saw a bunch of old pipes, filthy and dirty, wasting away in an antique store. Thoughts of my former hobby of working with wood flooded my brain, as did the romantic idea of bringing new life to these old relics. I purchased the whole lot of 25-30 pipes and pieces and began to research how one goes about restoring these wonderful pipes to at least enjoyable and useable condition, if not to their total and complete former glory. Much help and advice has been shared with me in this short period of time; I have learned a tremendous amount from this blog, its founder and contributors. I am honored to have the opportunity to share some of my work here and to, hopefully, repay some of the kindness shown to me when I began and as I continue to learn this restoration-side of our pipe hobby.

I picked up this old Kaywoodie last month at an antique mall. It was in poor, filthy shape when I found it but I knew her potential. The stamping is not very strong but identifies it as a Kaywoodie Handmade, which I’ve seen and owned before. But this is one of the oversize models, a style that I’ve not yet had.

ImageImageImageImageImageImage

I began with an overnight alcohol soak and allowed a few hours dry time before I began working in the briar. She had a few scratches and a bit of whitish “mold” that I wanted to get rid of.

ImageImageImage

The previous owner must have had the dreadful habit of knocking the rim of the bowl to empty the pipe on a hard surface; the front was beaten down by probably 1/8th of inch, give or take a bit, giving it a terrible “frontal slope” (visible in the photos above and below). This seemed like the best place to start working on the briar. Before starting, I put the stem in a warm OxyClean soak so it would be ready when I was. 

ImageImageImageImageImage

It took a lot of steaming and some topping to get the bowl back to even. I alternated steaming and topping until I was happy with the shape. The only thing I was unhappy with was finding a sand pit in the new top of the rim; I filled it with briar dust and dropped a little Super Glue into it to make a fill. The fill is somewhat visible but should fade with use as patina develops (I hope). 

ImageImage

For the scratches and left over “mold”, I lightly sanded with 400 grit wet dry paper. It didn’t take too long on the scratches since they weren’t deep. The carved areas where the whitish substance was took more time but came off fairly easily.  I then stained it with Fiebing’s Dark Brown leather dye, cut about 50/50 with 91% isopropyl alcohol. I applied, flamed, buffed with an old t-shirt by hand and repeated. Then I took the pipe to the buffer for a treatment with Tripoli, white diamond, and finally a few coats of carnauba wax. For the final buffing I used my cordless drill with a “mushroom” buffer attachment. I find the shape of the mushroom allows me to get into every crevice with relative ease. Lastly, I cleaned with stinger by buffing it with blue rouge several times, bringing it back up to a nice, new shine. I then set the bowl aside to work on the stem. 

ImageImage

When I took stem out of its bath I rinsed it well and used a Miracle Eraser to remove some of the loosened oxidation. To my surprise I found that the bit was cracked under all the crud, something I had not dealt with before. I then took a fluffy pipe cleaner and dipped the first 1.5 inches or so into Vaseline and then inserted it into the stem.  I dripped some Super Glue into the crack and let it sit a while until it had hardened through. (This was my first time fixing a crack with super glue and was happy with the outcome and learning curve.) The stem was really deeply marked dents and scratches and took a lot of time and work. I began with some heat from a candle to raise what I could of the dents. Then I used various needle files, wet/dry sand paper in grits from 220-800, micro mesh 1500-4000, plastic polish and carnauba wax on it. I actually started over twice, at different points, to get it as nice as possible.

Here are photos of the finished pipe.ImageImageImageImageImageImage

Review of a John Rocheleau Acorn


I am pretty certain that many of you who will read this review are unfamiliar with John Rocheleau or his pipes. John was a Canadian pipe maker and artist who, though still living, is no longer able to carve pipes. It is a shame and a loss to the pipe smoking world as he made beautiful and great smoking pipes. I keep my eyes open for them on the estate market and have been able to pick up a second one that came from John’s own collection.

I still remember driving to Kelowna, British Columbia from Vancouver to pick up this little pipe. I had talked with carver, John Rocheleau for quite a while and wanted to purchase one of his pipes. One day it happened that I had some meetings in Kelowna (about a four hour drive from Vancouver) so I called and set up an appointment to visit with John and pick out a pipe from his finished pipes. I arrived and had a great visit with John, looking at his own collection of pipes and talking about the incredible paintings that he does. John is a great artist besides being a pipe maker. We enjoyed some good tobacco and conversation and then he brought out the pipes that he had for sale. This little acorn shape just called my name. It looked amazing and when I picked it up to look it over, I fell in love with it and did not lay it down again. The workmanship on this pipe is very nice. I have smoked it quite a bit over the years since I got it. The length of the pipe is 5 1/2 inches and the bowl height is 1 1/2 inches. The outer diameter of the bowl is 1 5/8 inches. The chamber diameter is 3/4 inches and depth is 1 1/8 inches. It sits well in the nook of the hand formed by the thumb and index finger on either hand. The stamping is on the underside of the shank. It is stamped Rocheleau in script and to the left of it is stamped A49A.  

Image

The pipe has a rusticated finish and the staining choice highlights the unique rustication. John has a achieved a rustication that looks and feels like a sandblast. I was able to sit in his shop that day and on one other occasion and watch as he rusticated the pipes with a Dremel and a cutting head. In this case he left a smooth area near the shank stem union and on the underside of the shank. The top of the bowl also has a smooth area that nicely integrated with his rustication. The stain has several distinguishable colours that show the number of coats used. There seems to be a medium brown understain that comes through in the smooth areas of the bowl and shank and in the high points of the rustication. Over this is a coat of dark brown. The result is a multidimensional look to the finish and stain of the pipe. The colour varies with the light that hits the bowl. The rim’s inner edge is straight into the bowl with a clean sharp edge. John highlights this crisp look with the smooth finish on the pattern of the rim. The outer edge is crown almost like a cap on a Rhodesian that comes to a sharp edge and drops evenly to the sides. The crowned top gives the pipe almost a Rhodesian look from the side.

The stem is a well-made saddle style with a bit of a Danish flare. From the shank stem union the saddle flares to the end where it slopes to the blade. It is hand turned ebonite or vulcanite. It is a softer feel in the mouth and on the teeth than acrylic. The stem blade tapers gradually back to the button where it flares to the same width as the flare on saddle. It is just the right thickness at the portion that rides in the mouth – not too thick or too thin. It is also durable and is made of quality material as it has not oxidized in the years I have had it. John used a briar inlaid circle in his stems as his logo. The tenon is an integral part of the stem and is chamfered outward to form a crowned end which is also countersunk and well-polished. The button is well shaped – thin at the edges with a very slight rise to the centre top and bottom, forming an eye shaped end view. The lip on the button is very slight but still fits well behind the teeth for a comfortable feel. The slot in the end of the button is also funneled and flattened to deliver a mouthpiece that has the same diameter from start to finish. John also rounded the ends of the slot giving it a finished look. The attention to detail shows the artist’s touch that John puts into his pipes. It is a comfortable and well executed pipe. A pipe cleaner passes easily through the pipe with no obstruction.

I have two of John’s pipes and both are identical in terms of internal mechanics. John mastered the airflow dynamics of his pipes and the draught is clean and easy with no whistling or tightness. It has an easy draw that makes smoking it a pleasure. The bowl chamber is drilled to a 3/4 inch diameter. The bowl was clean and raw briar with no bowl coating. The cake built up on the bowl very easily. The draught hole is centered at the slightly above the bottom of the bowl and seems to have a slight funnel leading into the shank and stem. The fit of the stem to the shank is excellent – smooth and tight with no light showing at the joint. The tenon fits well in the mortise and seems to sit deep in the mortise against the bottom. The airway is in the centre of the mortise and aligns with the airway in the tenon. The edges of the tenon have been polished and rounded and the airhole countersunk so that it meets the airway in the mortise. Looking at the airways with a flashlight it is clear to see that they are smooth and polished with no rough edges.

I have always smoked Virginias in both of John’s pipes and they seem to handle them exceptionally well. They both smoke cool and dry and deliver good flavor with the Virginias that I choose to smoke in them.

A Quick Refurb on a BBB Straight Bulldog


Blog by Steve Laug

I picked this little BBB ** Bulldog up yesterday at a flea market for $16. It is stamped BBB in a diamond over ** on the left side of the shank. The other side is stamped 401 (shape number) over Made in England. The first four pictures below show what it looked like when I found it. It was hidden under a group of worn old pipes and this one and a little Comoy’s Guildhall became mine. The bowl was in pretty clean shape. The finish is clean with only a small dark spot on the shank where it must have touch a coal in an ashtray. The wood is not burned only darkened. The rim was clean but for a little tar. The bowl did not need to be reamed though it was a little out of round. The inner edge of the rim on the front right is a bit damaged from lighting the pipe repeatedly in the same spot. The double rings around the bowl were filled with wax in many spots and would need to be cleaned out for them to really show well. The stem had tooth marks on the underside and topside near the button and the tooth chatter on the oxidized stem would need some work. The BBB diamond was full of gunk and was oxidized with a greenish hue. Inside the shank and stem were dirty but would not take much to clean it up.

ImageImageImageImage

I put the next picture in to show the little Comoy’s Guildhall that I picked up at the same time and give a feel for the size of the pair. Both will not need a lot of work to bring them up to being ready for a smoke.

Image

I used silver polish to begin with and cleaned the brass BBB logo. I wanted to see what kind of shape it was in before I began work on the stem. It turned out to be in great shape under the grime and oxidation. The BBB stamp is clean and sharp and the lines in the background are still visible. Once I had the logo cleaned I worked on the tooth chatter and tooth marks in the stem. I used 320 grit sandpaper to work out the tooth chatter and a lighter to heat up the bite marks and lift them out. I then sanded them with 320 grit sandpaper to remove the remnants of them. The next series of three photos show the stem after sanding tooth chatter and bite marks out of the stem.

ImageImageImage

I cleaned the rim by lightly sanding it with 320 grit sandpaper and then wiping it down with saliva until the tars were removed. The photo below shows the rim after the sanding and cleaning.

Image

I sanded the stem with a medium grit sanding sponge to remove the scratches left by the sandpaper and then polished it with Maguiar’s Scratch X2.0. The next series of three photos show the stem as I worked on it with the micromesh sanding pads 1500-12,000 grit. In this case I wet sanded with the 1500, 1800 and 2400 grit micromesh and then dry sanded with the remaining grits of micromesh.

ImageImageImage

I gave the bowl a quick buff with White Diamond and then gave it several coats of carnauba wax. The next four photos show the polished bowl.

ImageImageImageImage

The next three photos show the stem after it has been polished with the micromesh pads up through 12,000 grit. I then used the Maguiar’s polish to finish off the polishing. The oxidation around the stem medallion and on the top sides of the saddle came off with some serious scrubbing with the polish. I also used a dental pick to clean out the two rings around the bowl cap of the bulldog.

ImageImageImage

The next series of four photos show the finished pipe, cleaned and ready to smoke. I rubbed the stem with Obsidian Oil and then once dry gave the whole pipe several coats of carnauba wax. The dark burn mark on the shank is only surface but still shows clearly in the finished pipe  – won’t affect the way it smokes though.

ImageImageImageImage

A Reborn Real Briar Prince – Restemmed and Restored


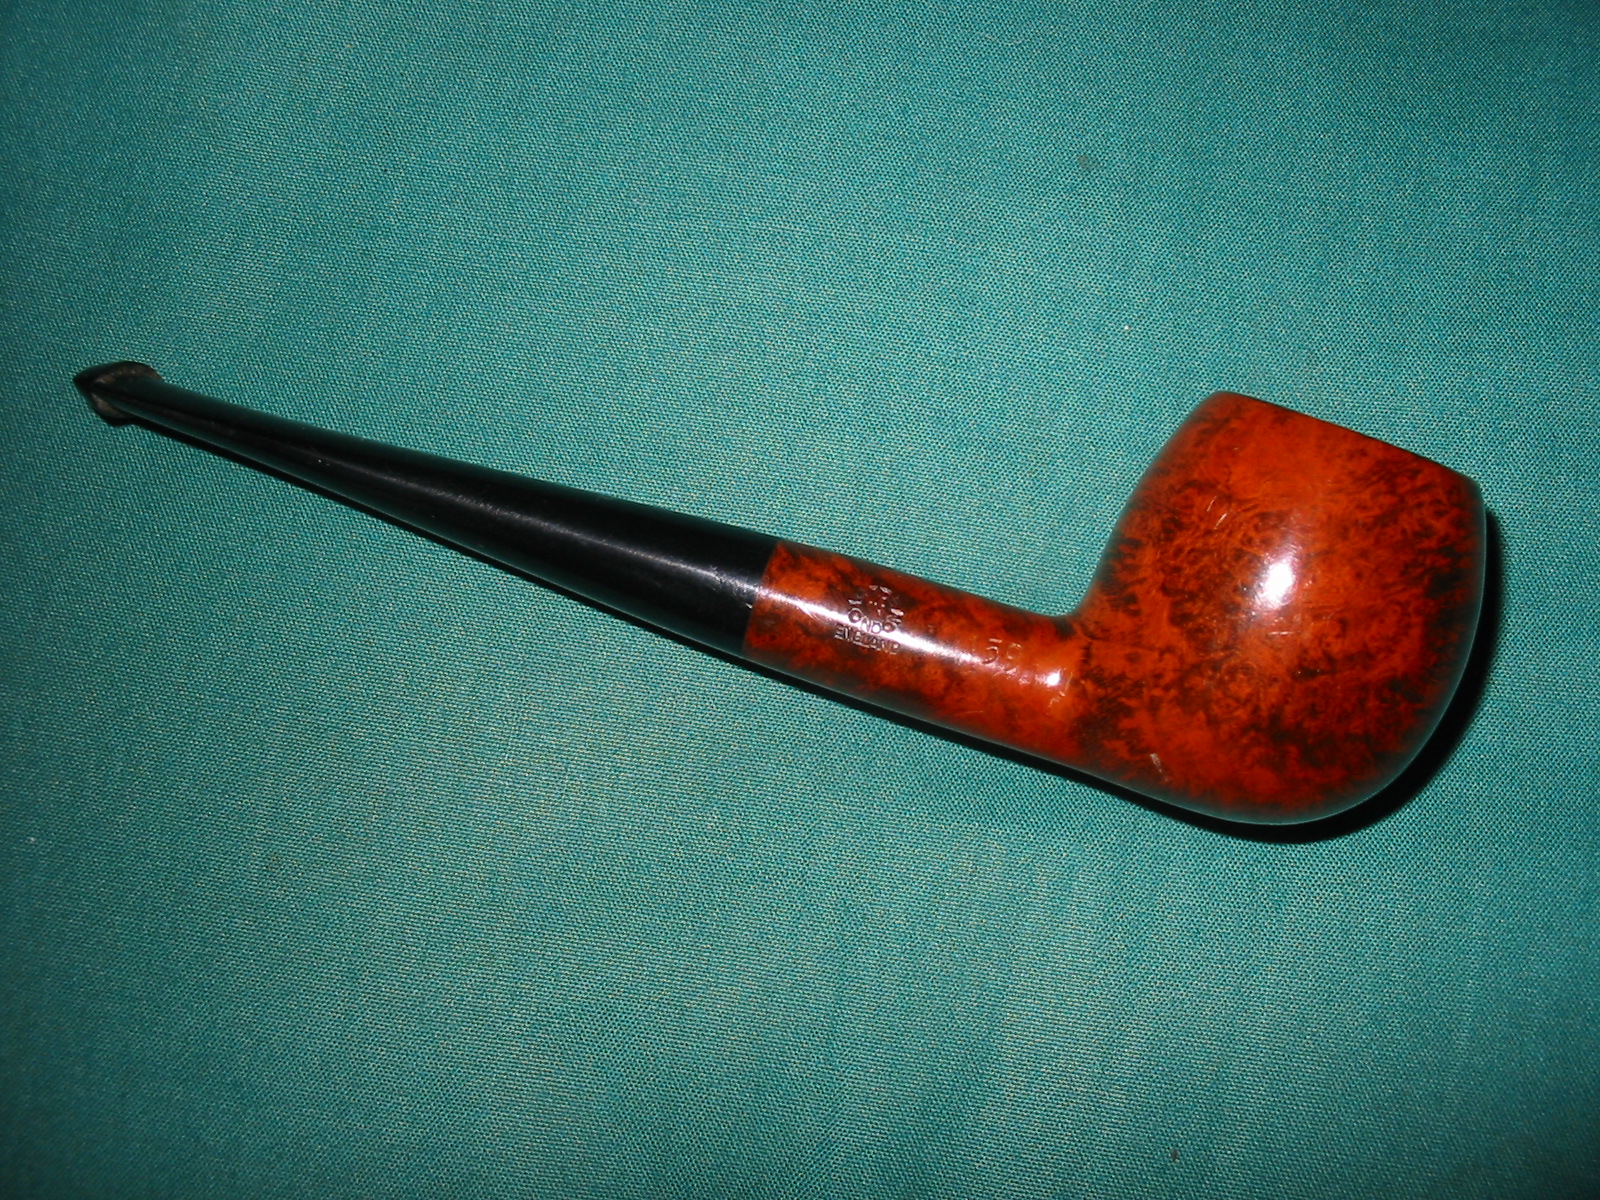
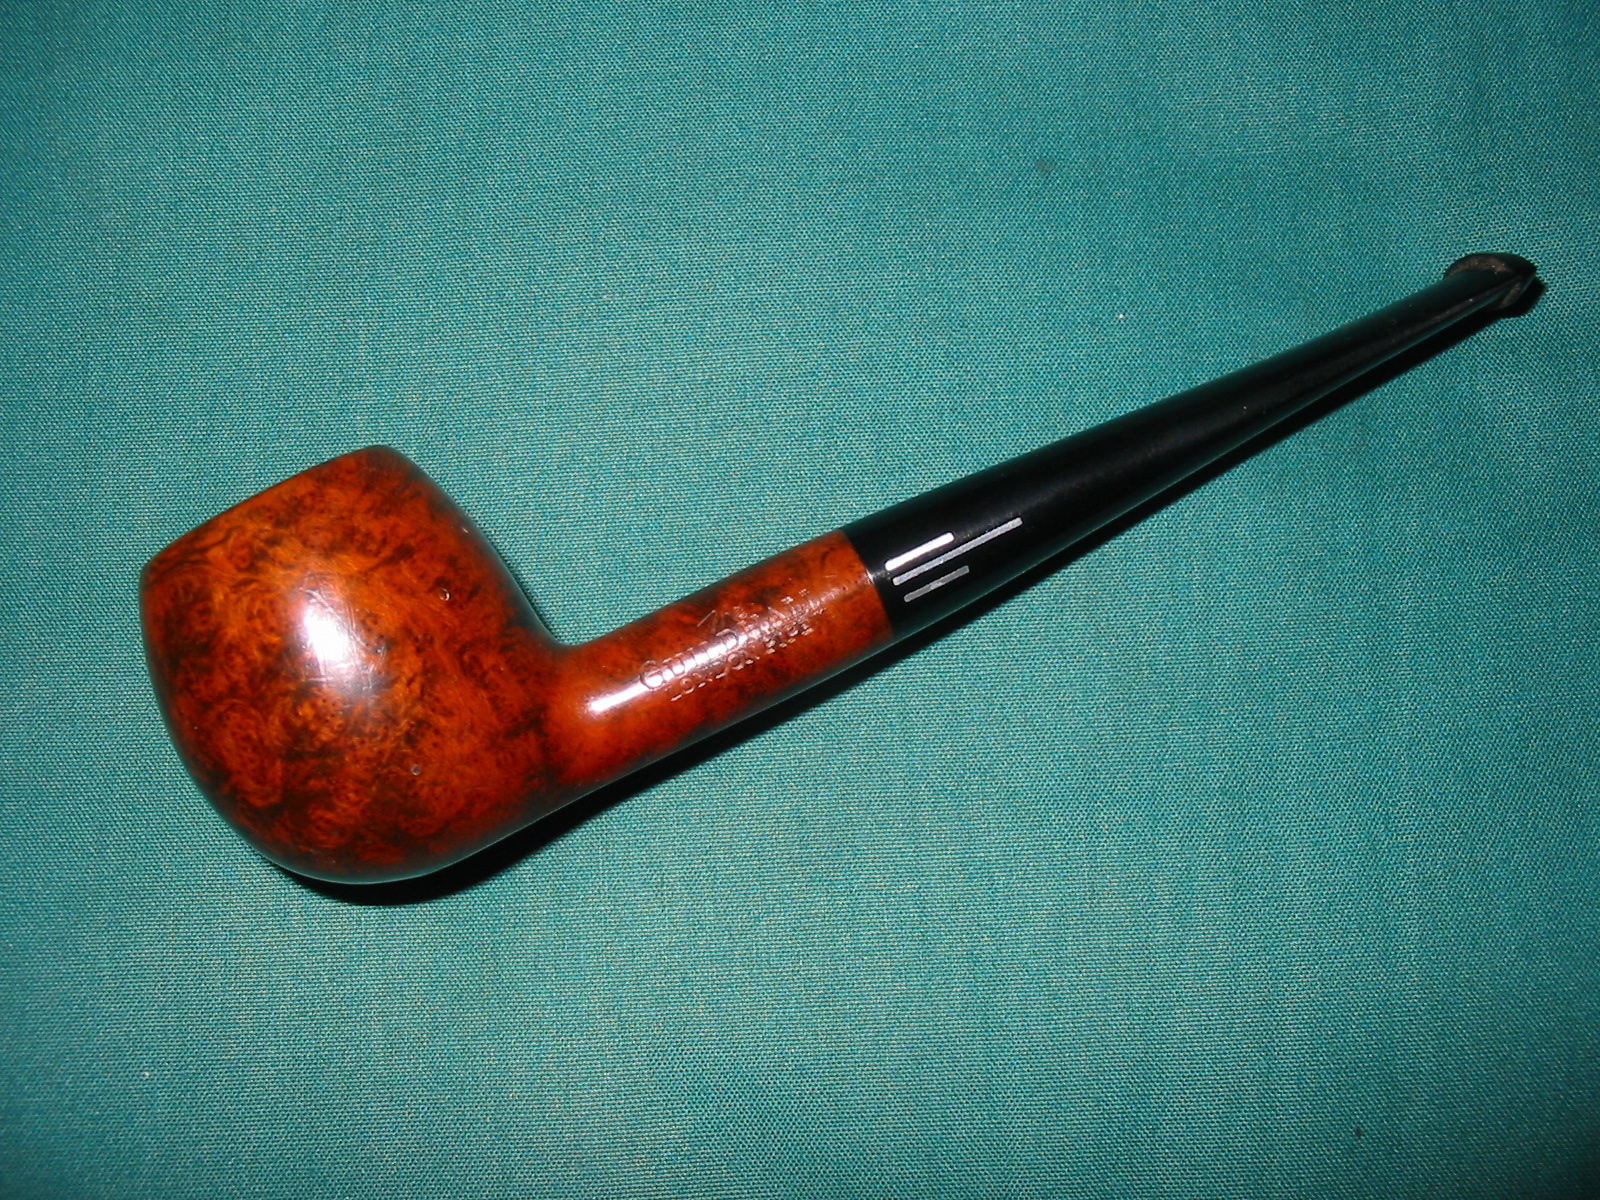
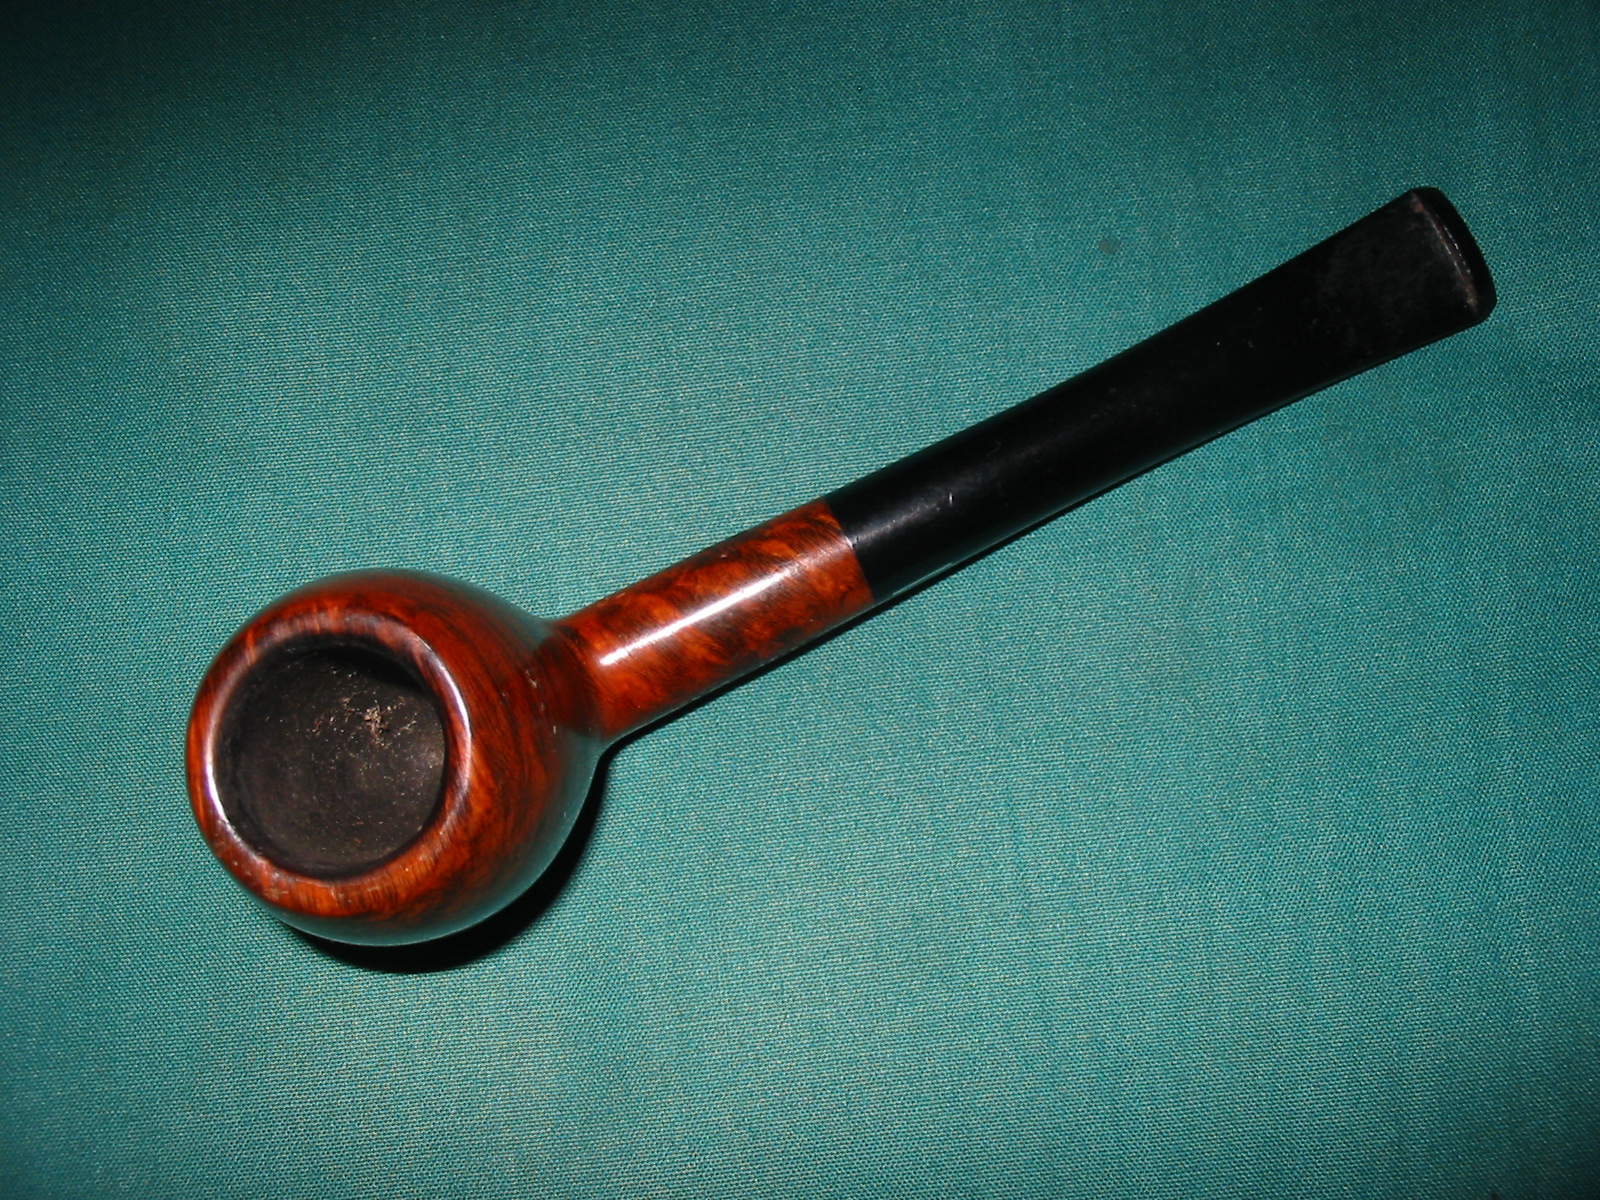
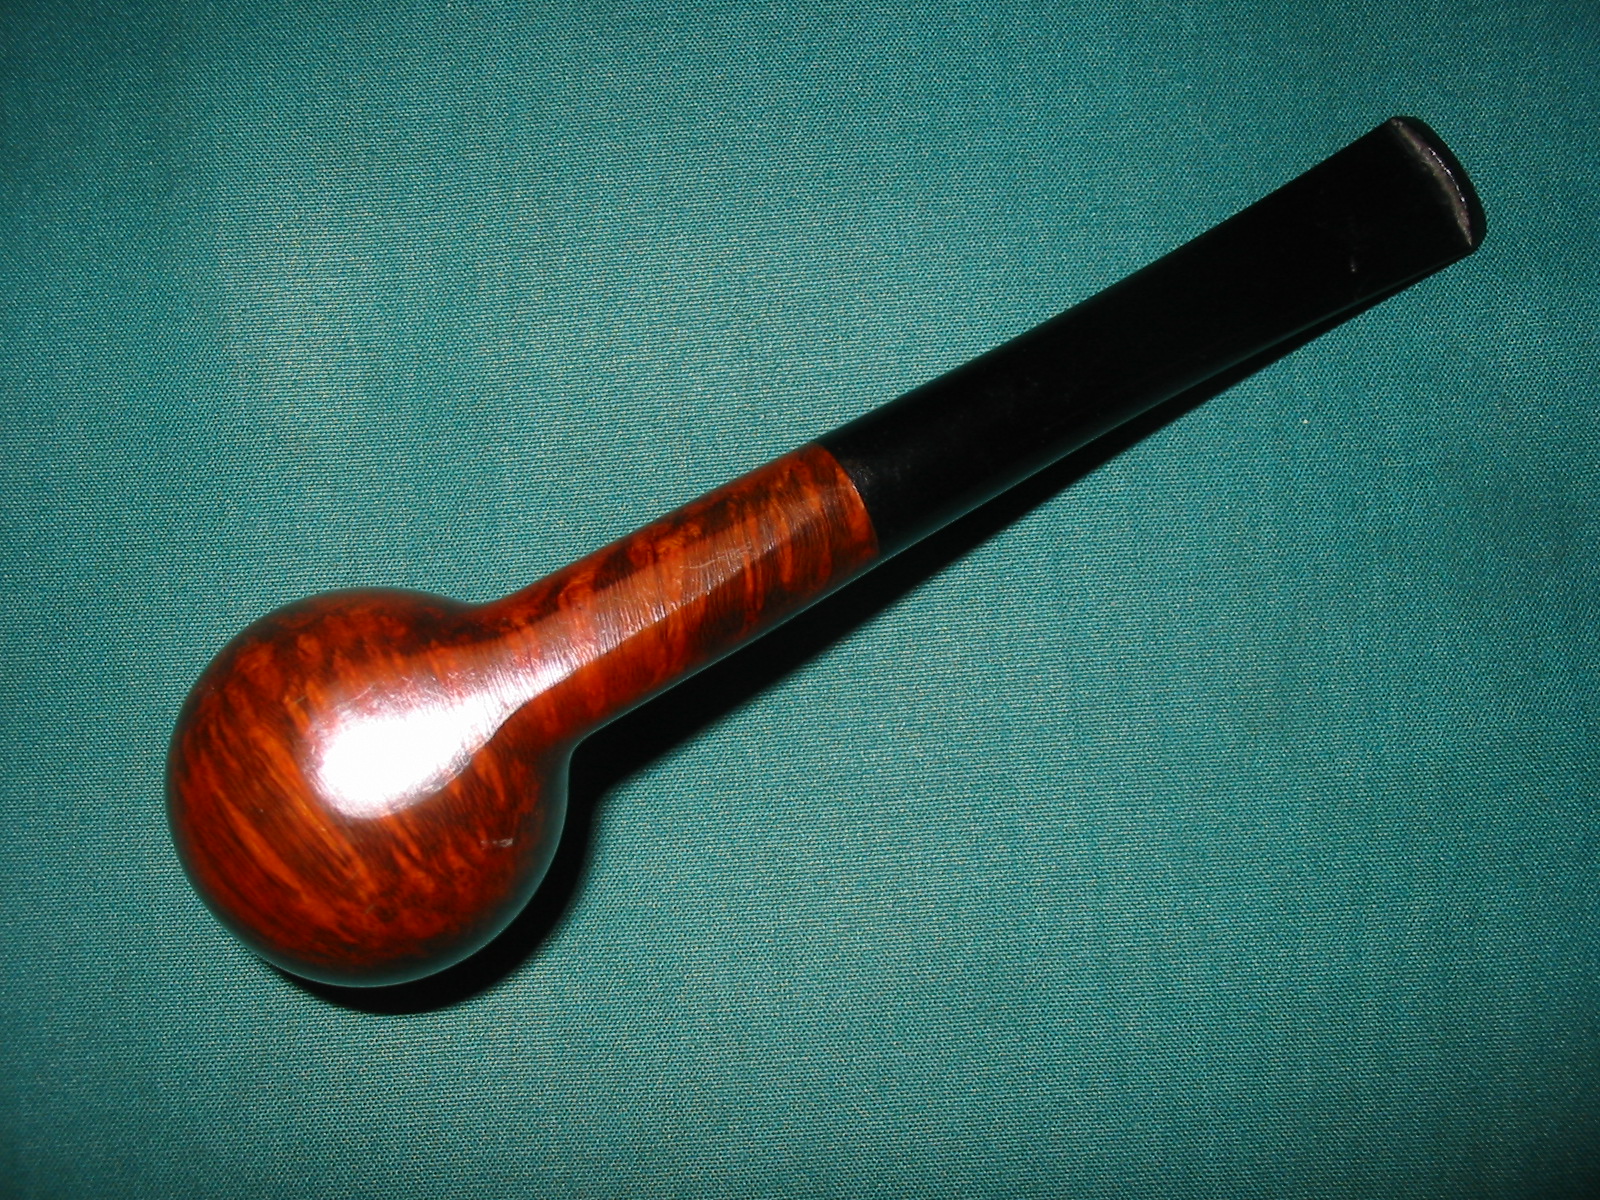
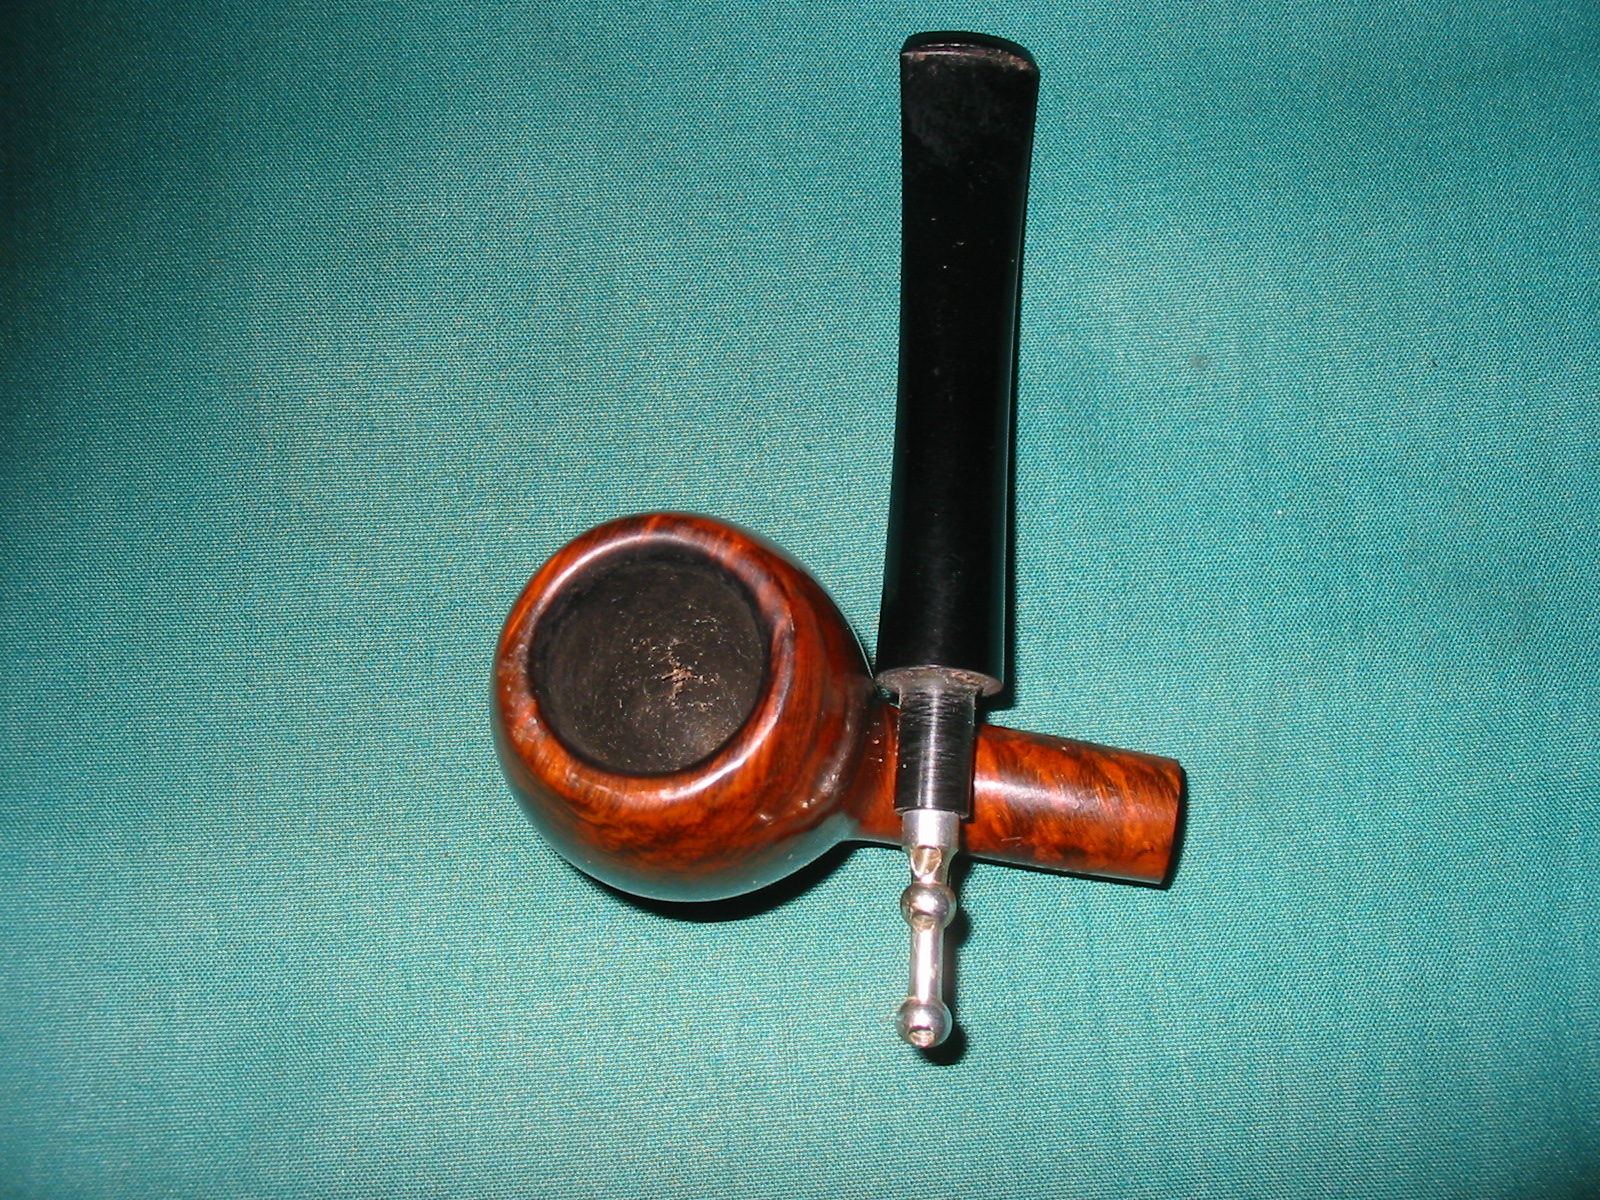
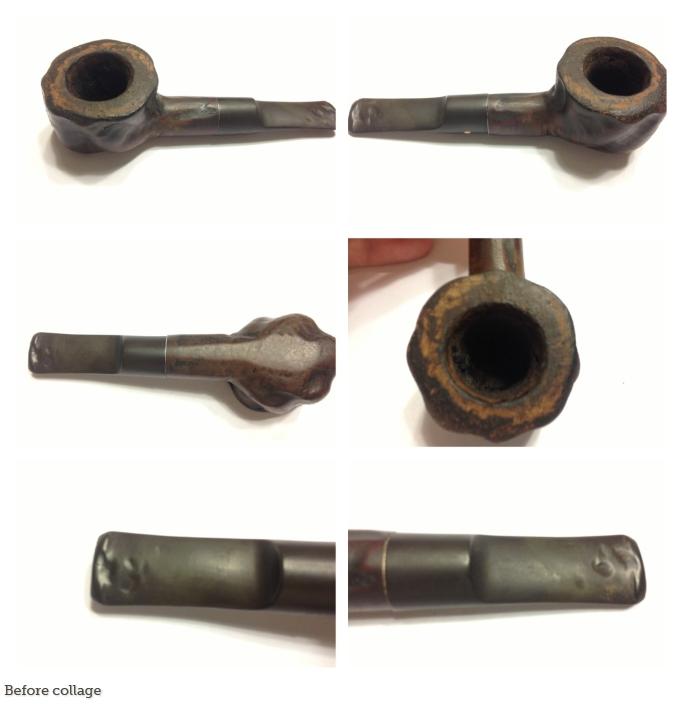
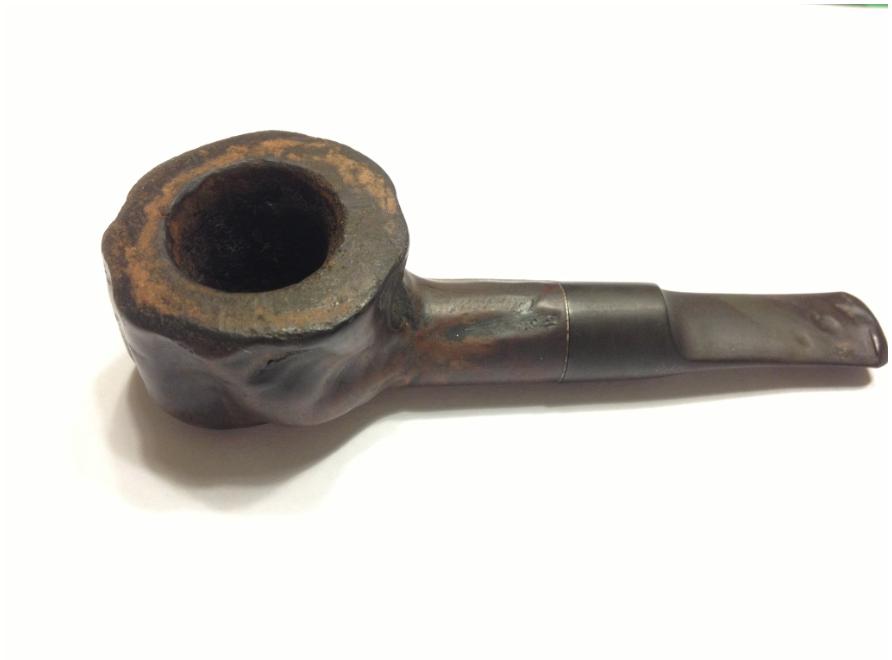
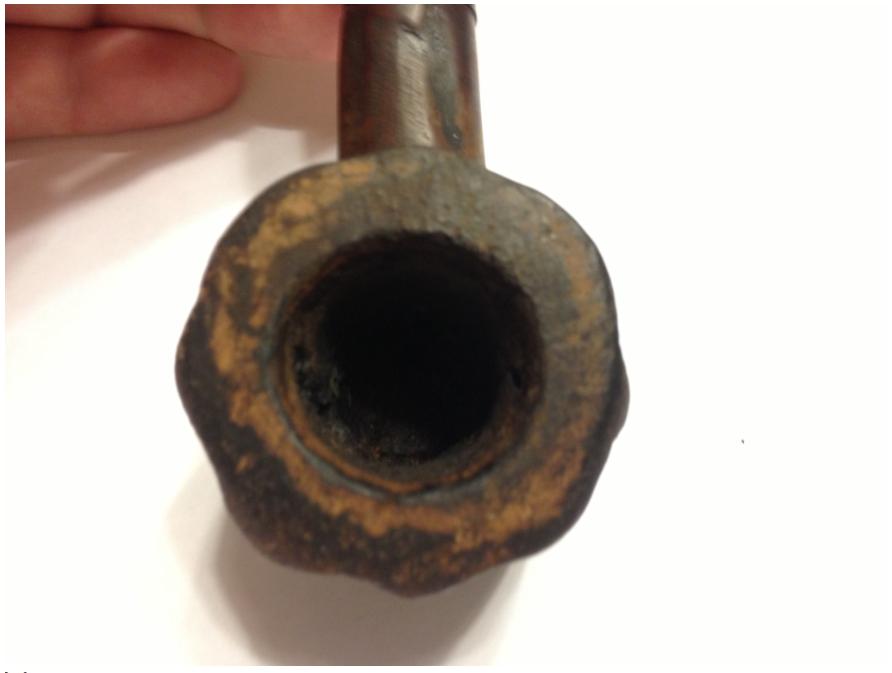
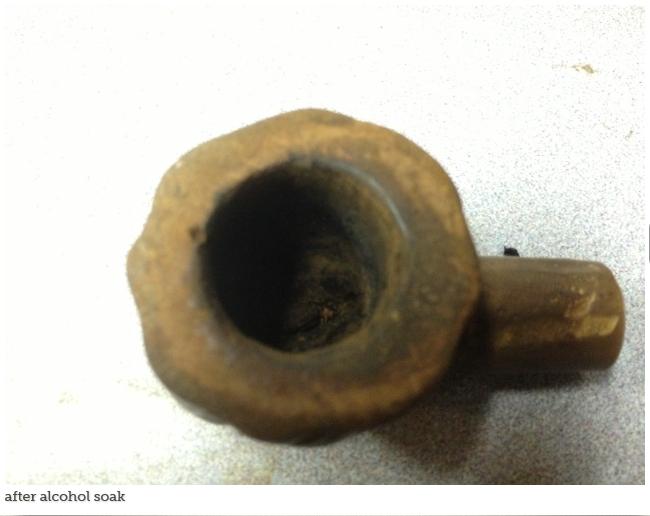
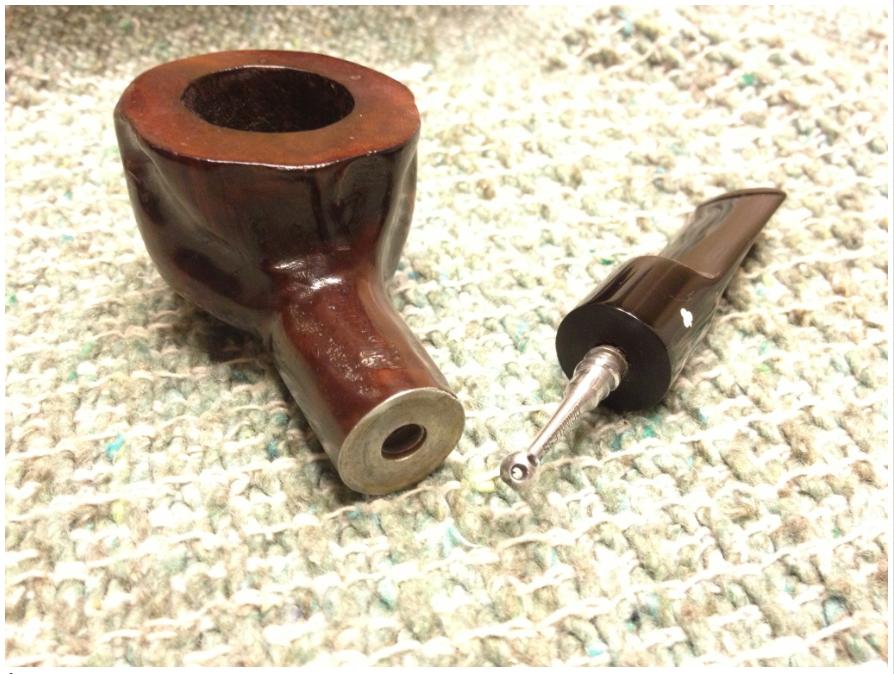
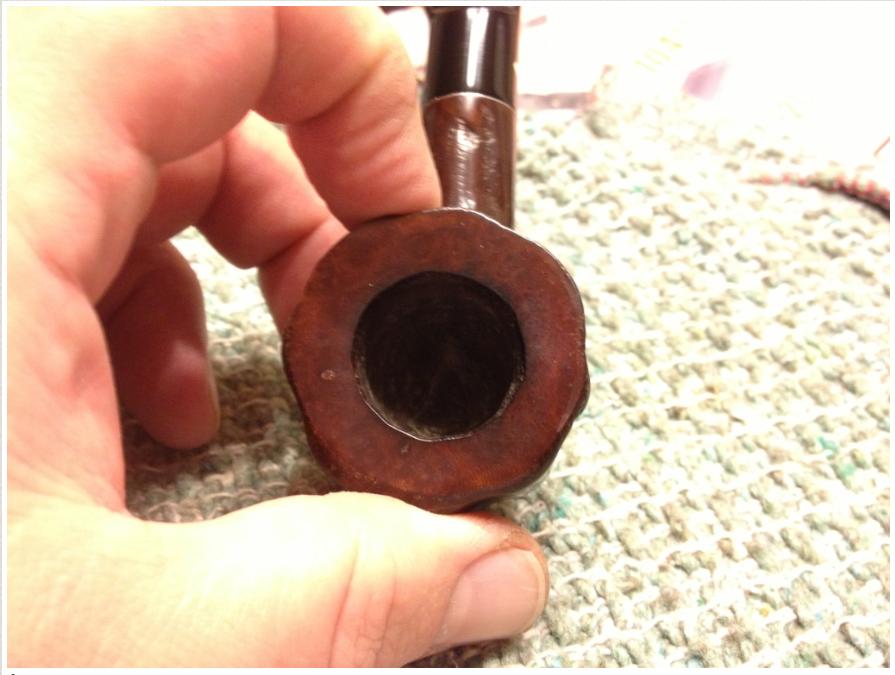
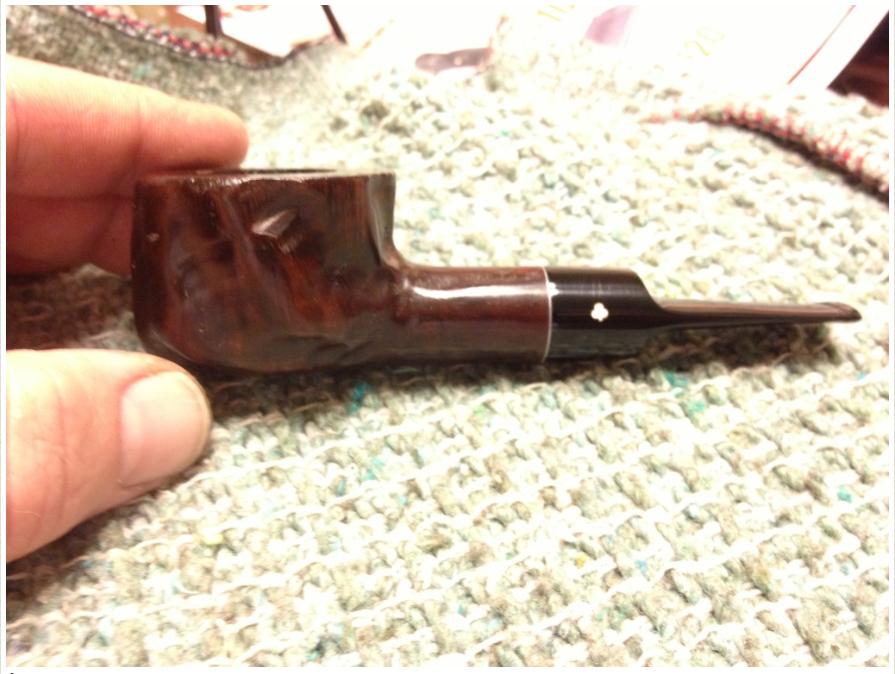
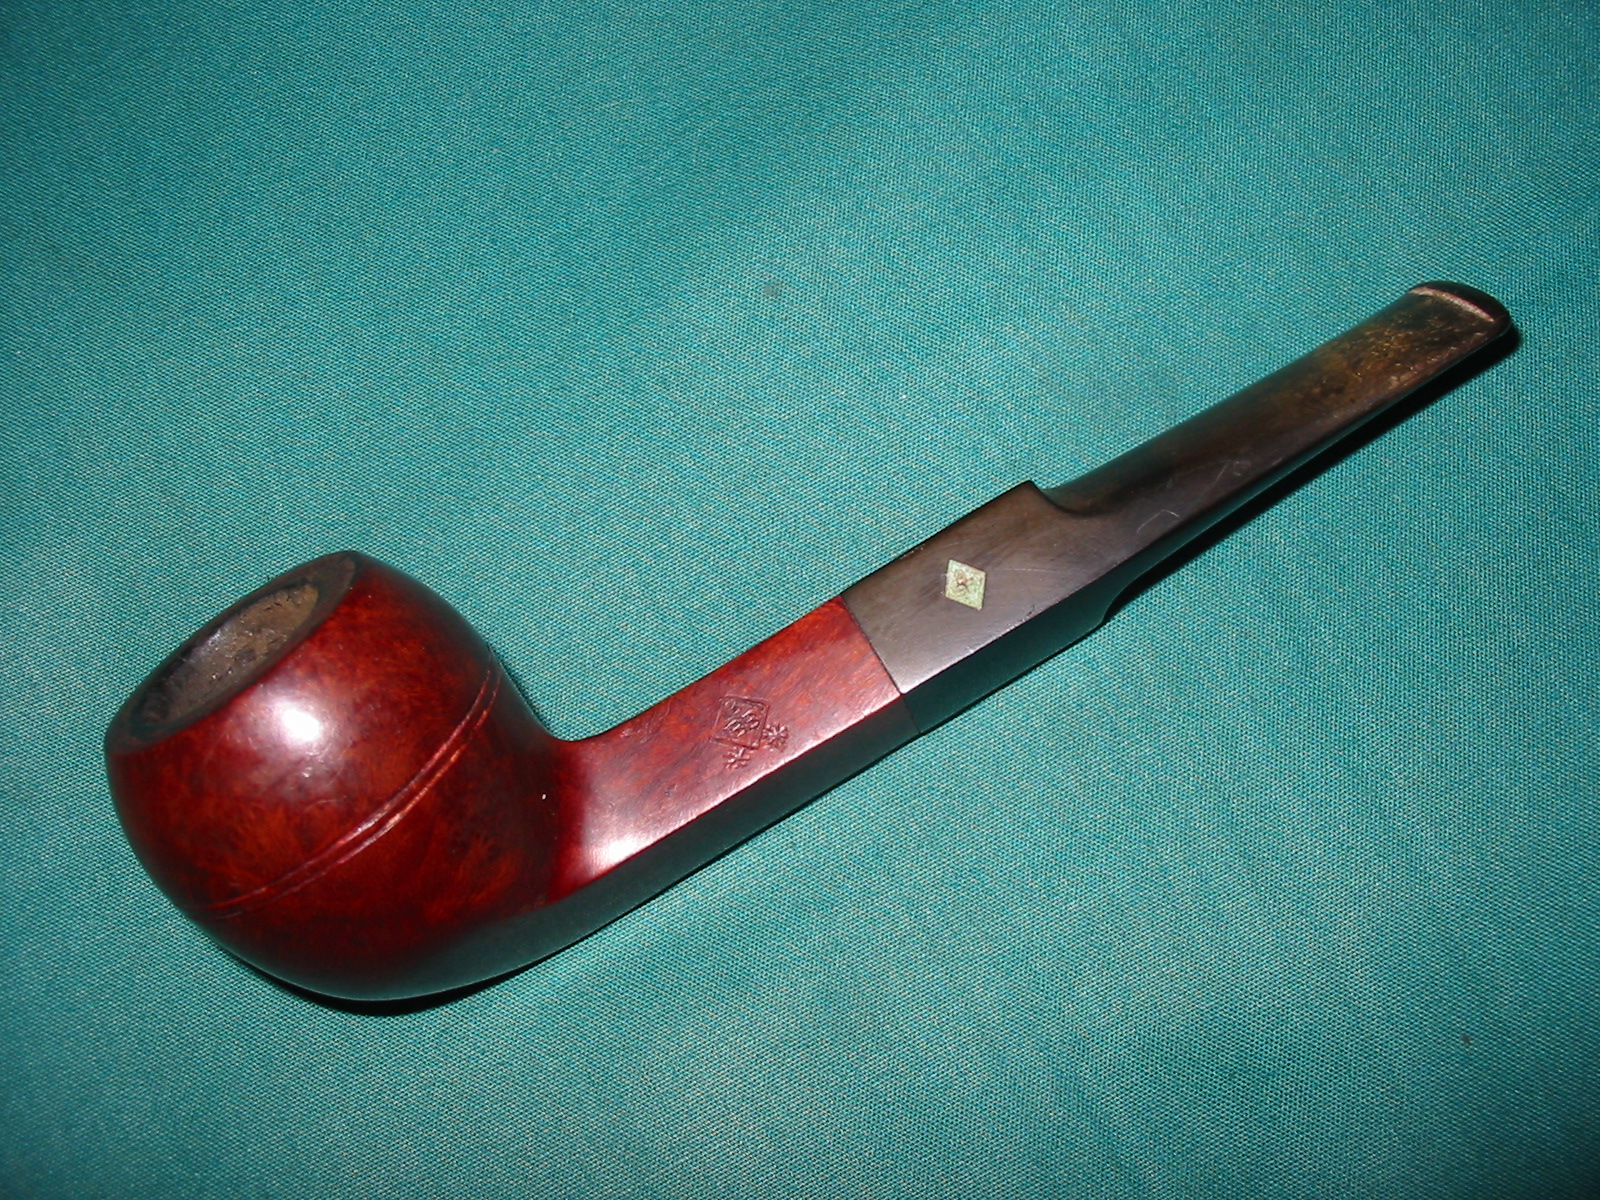
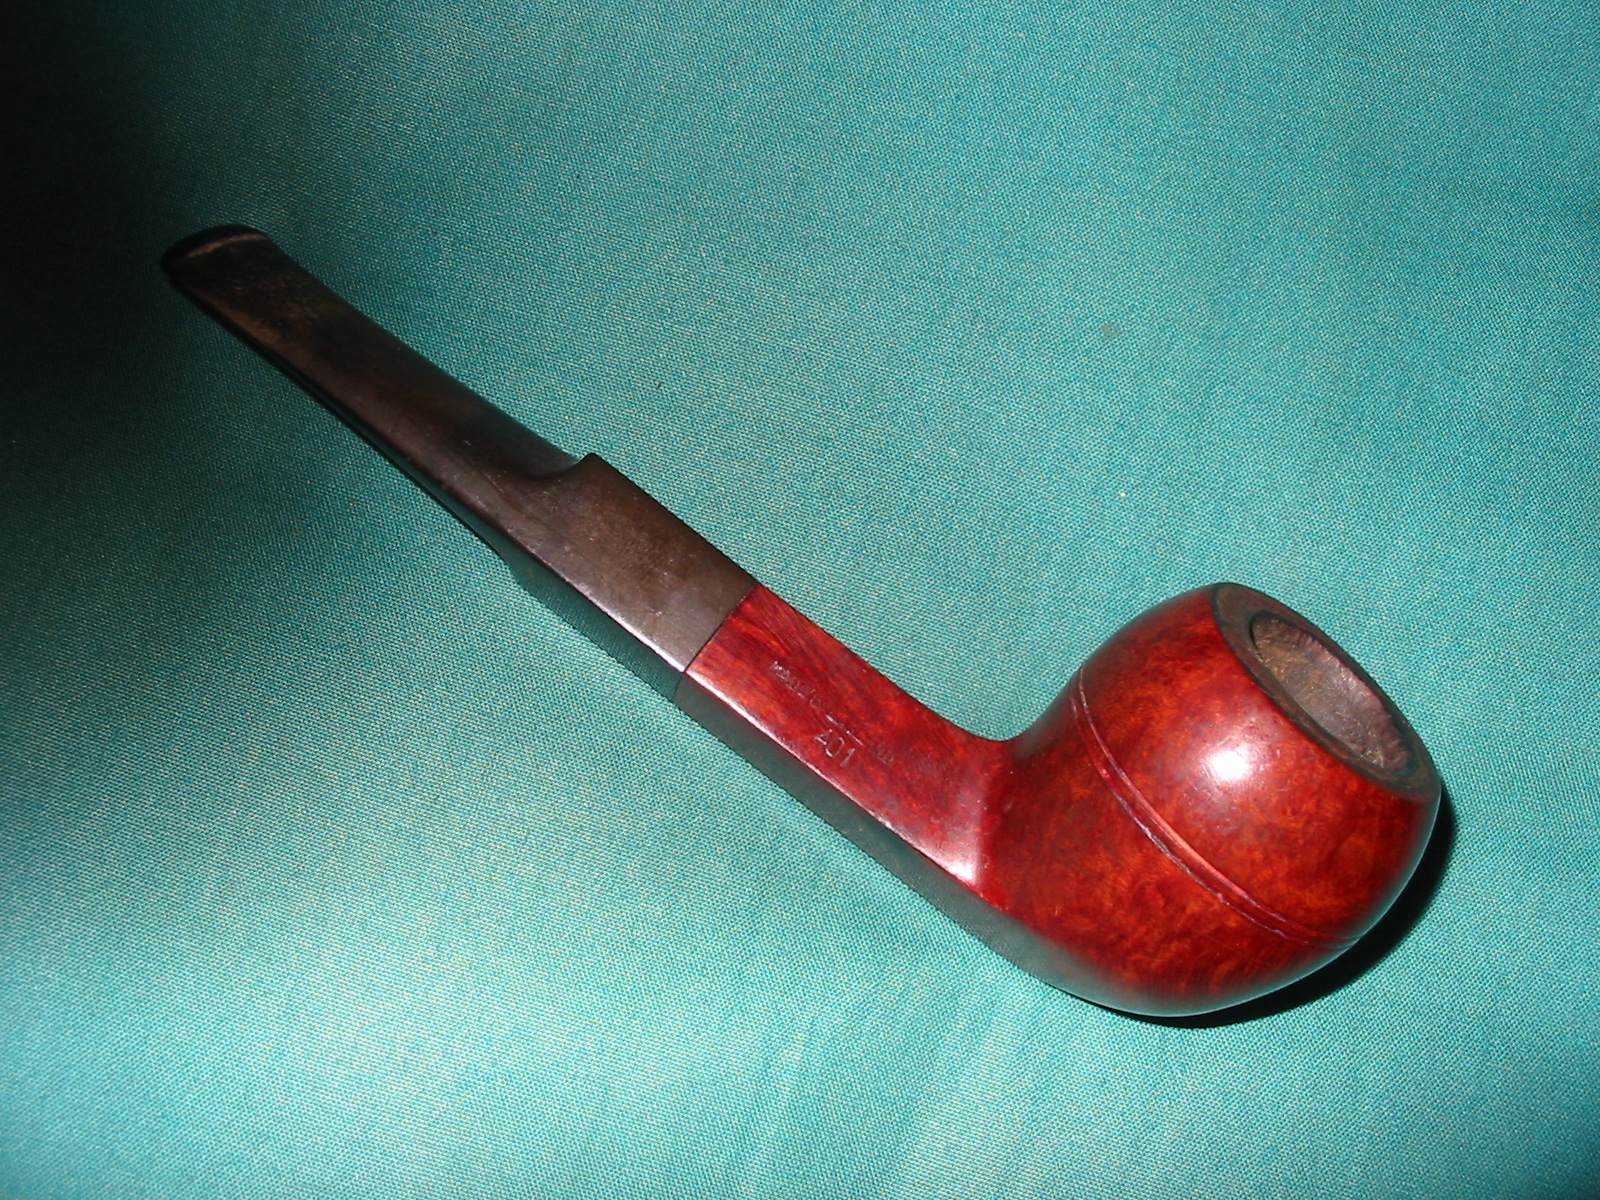
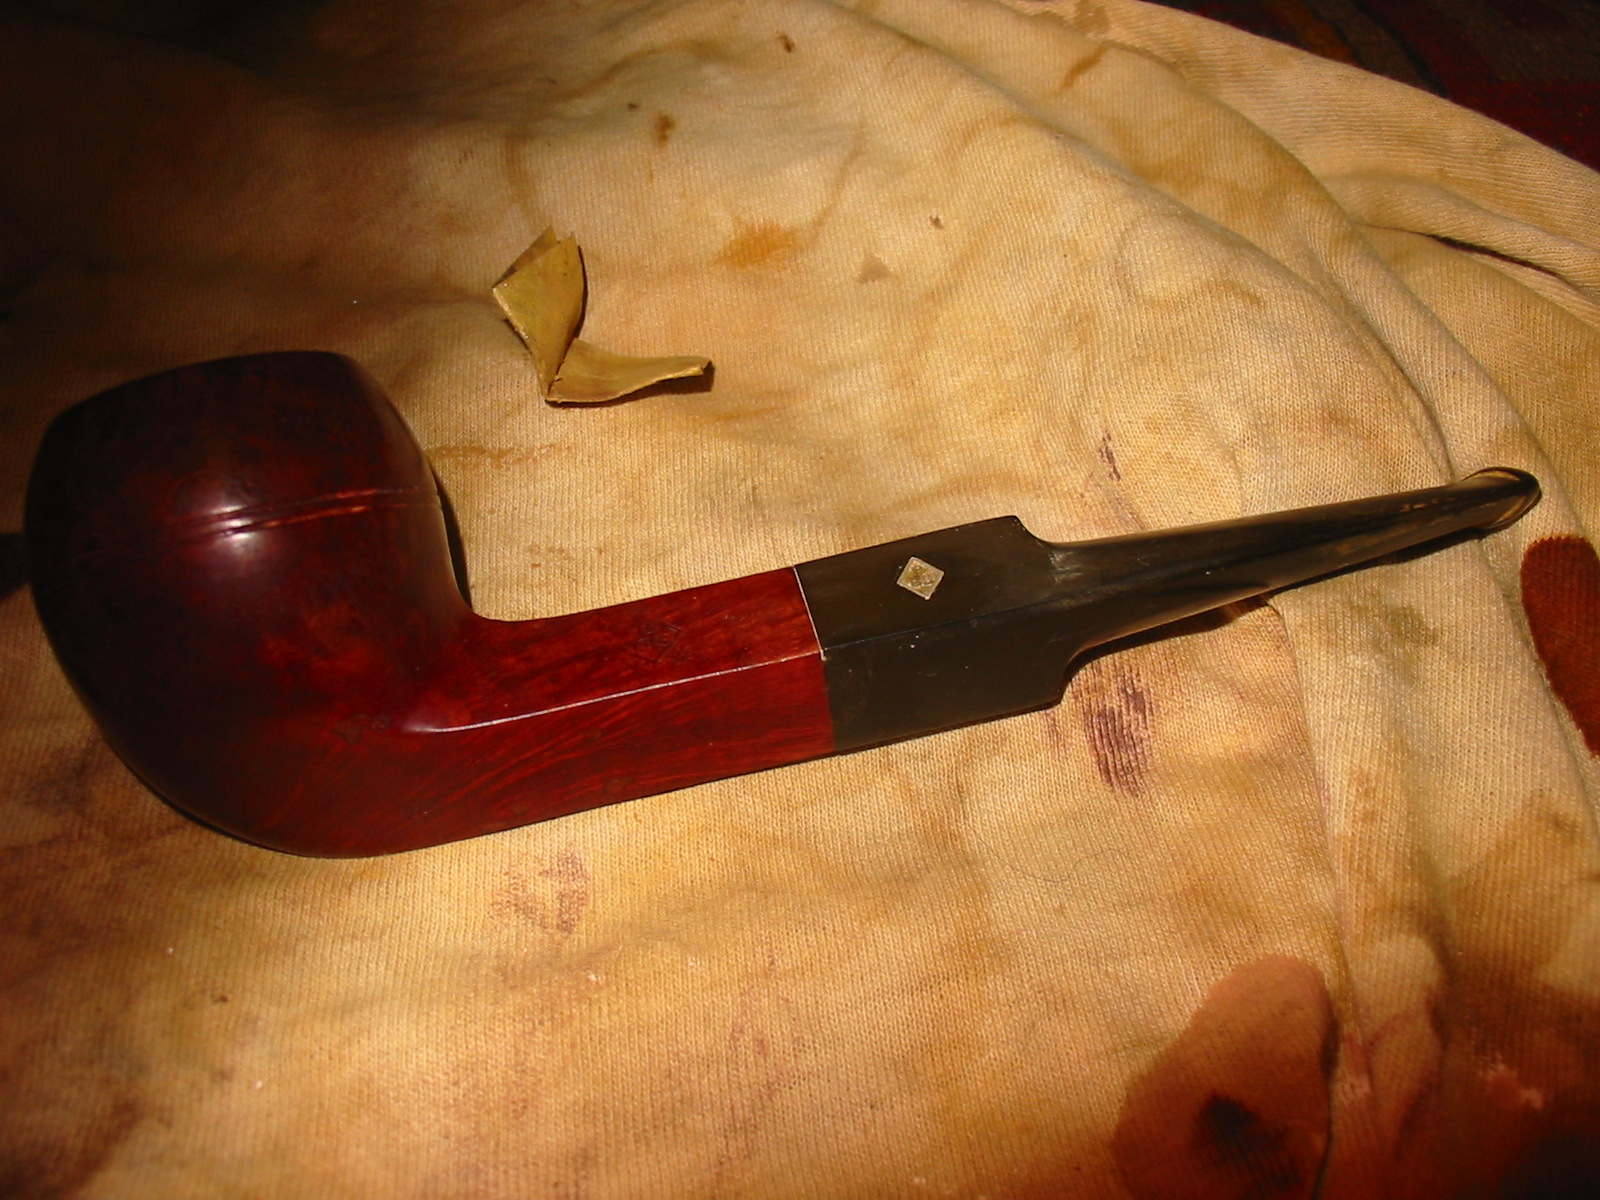
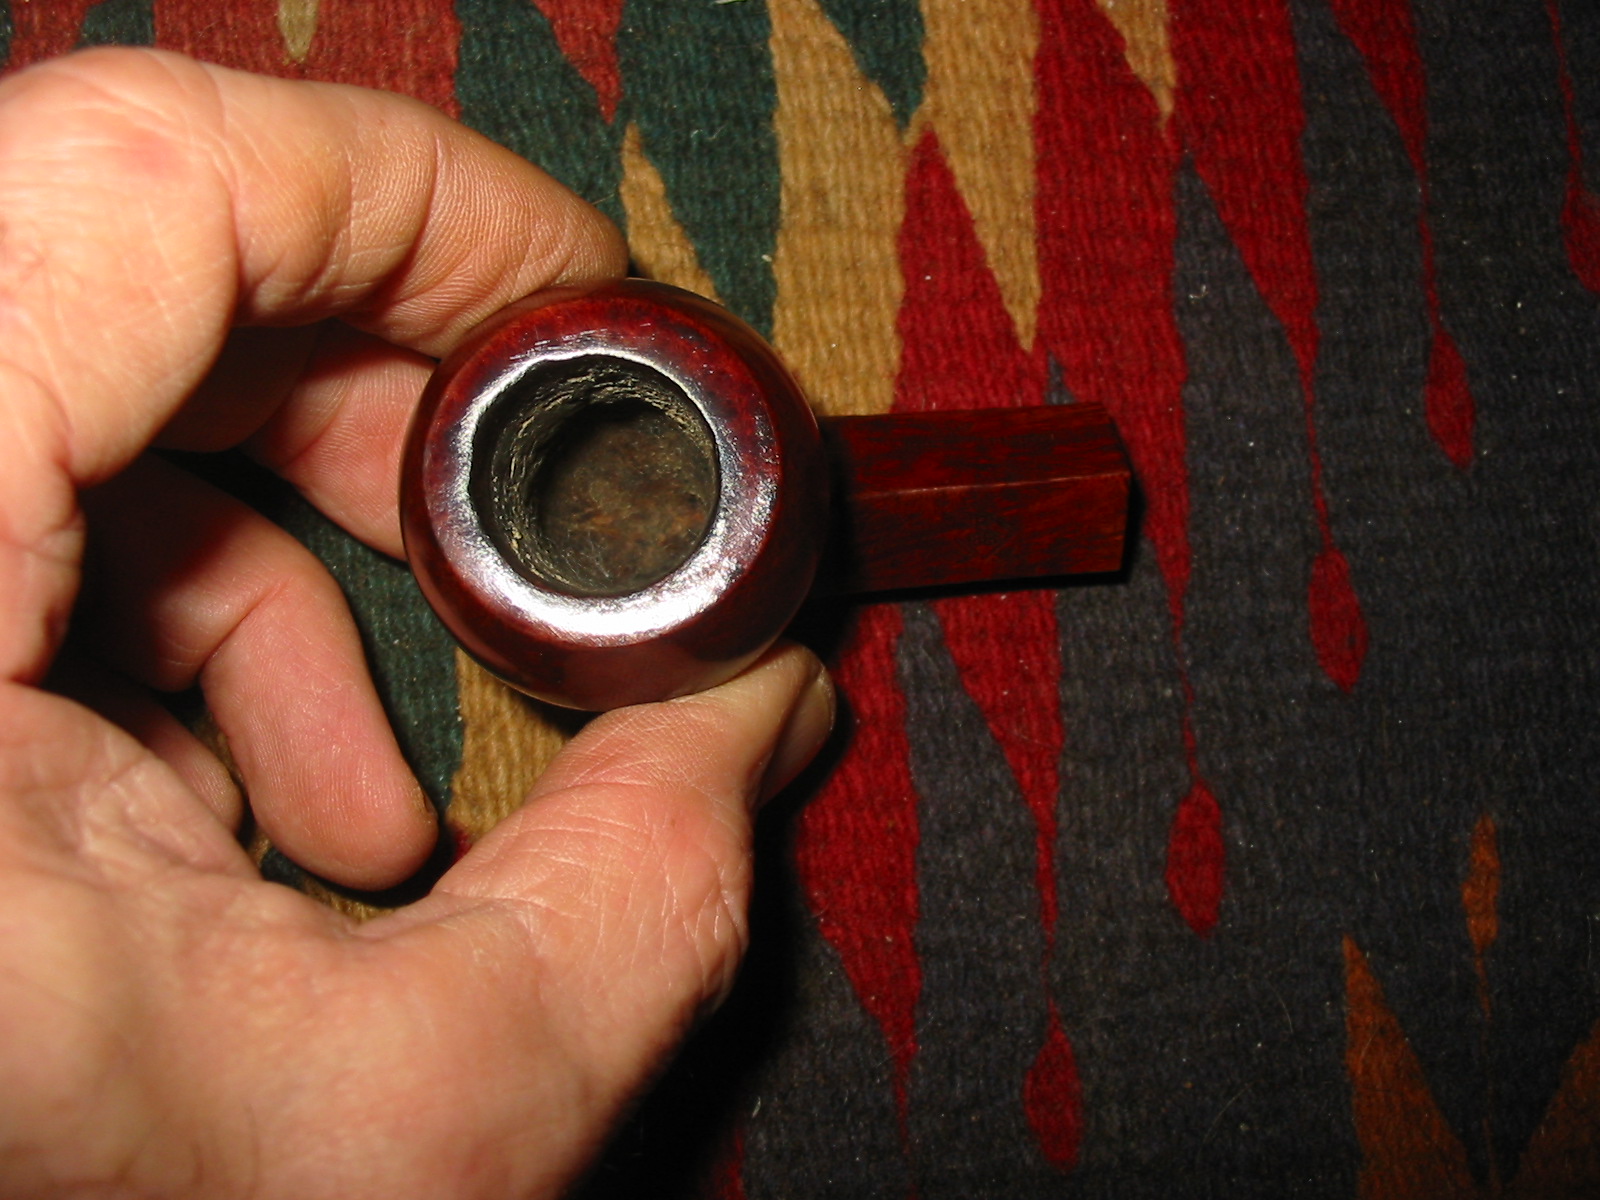
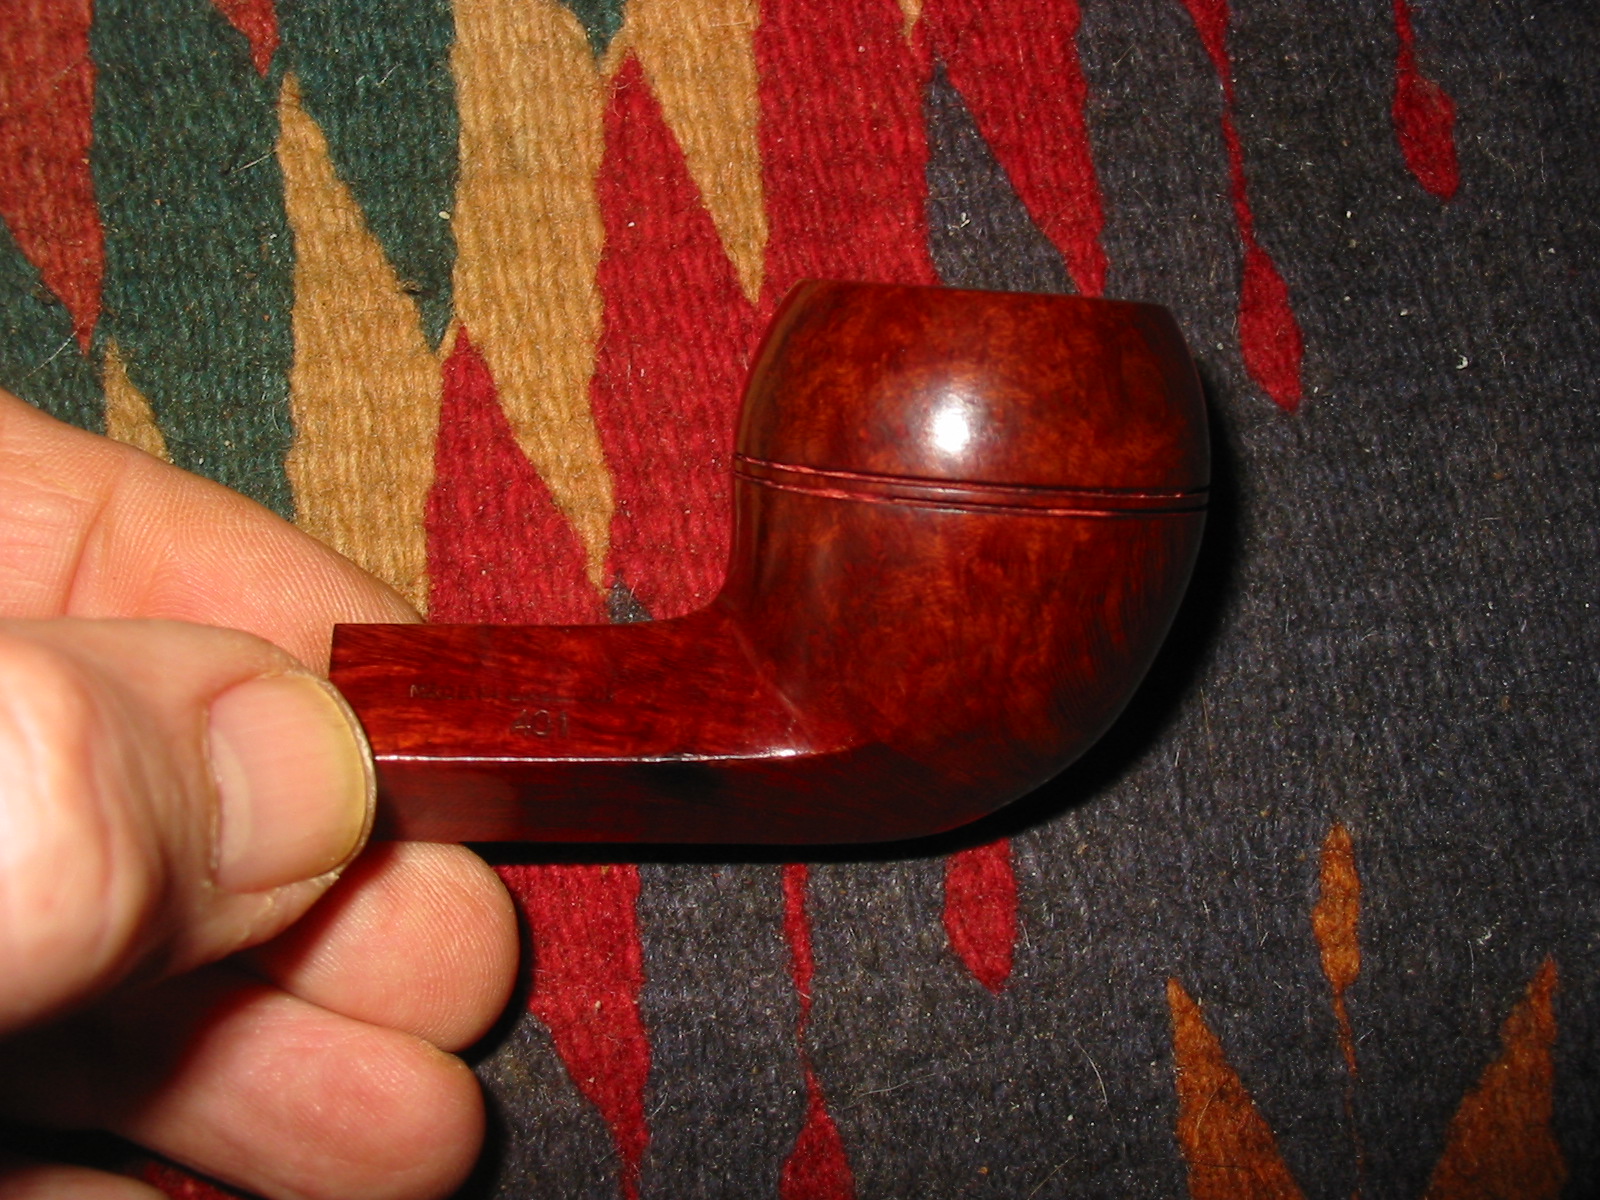
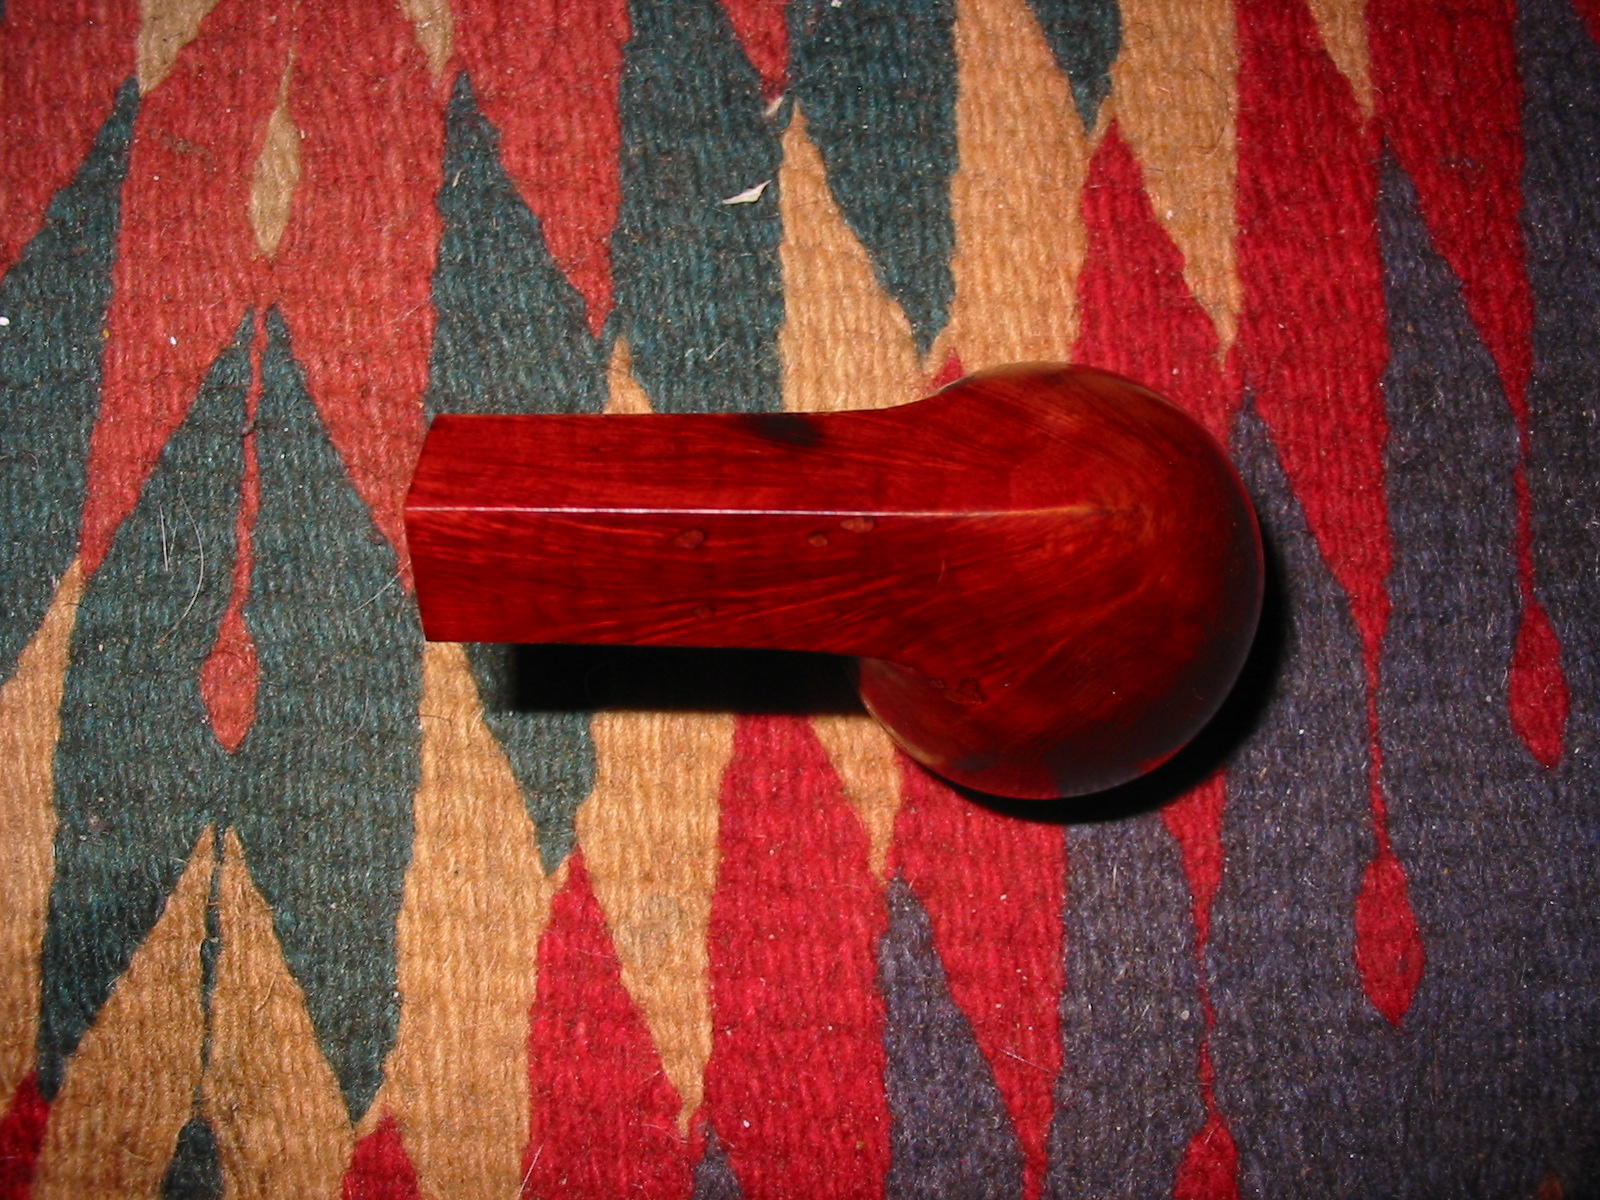
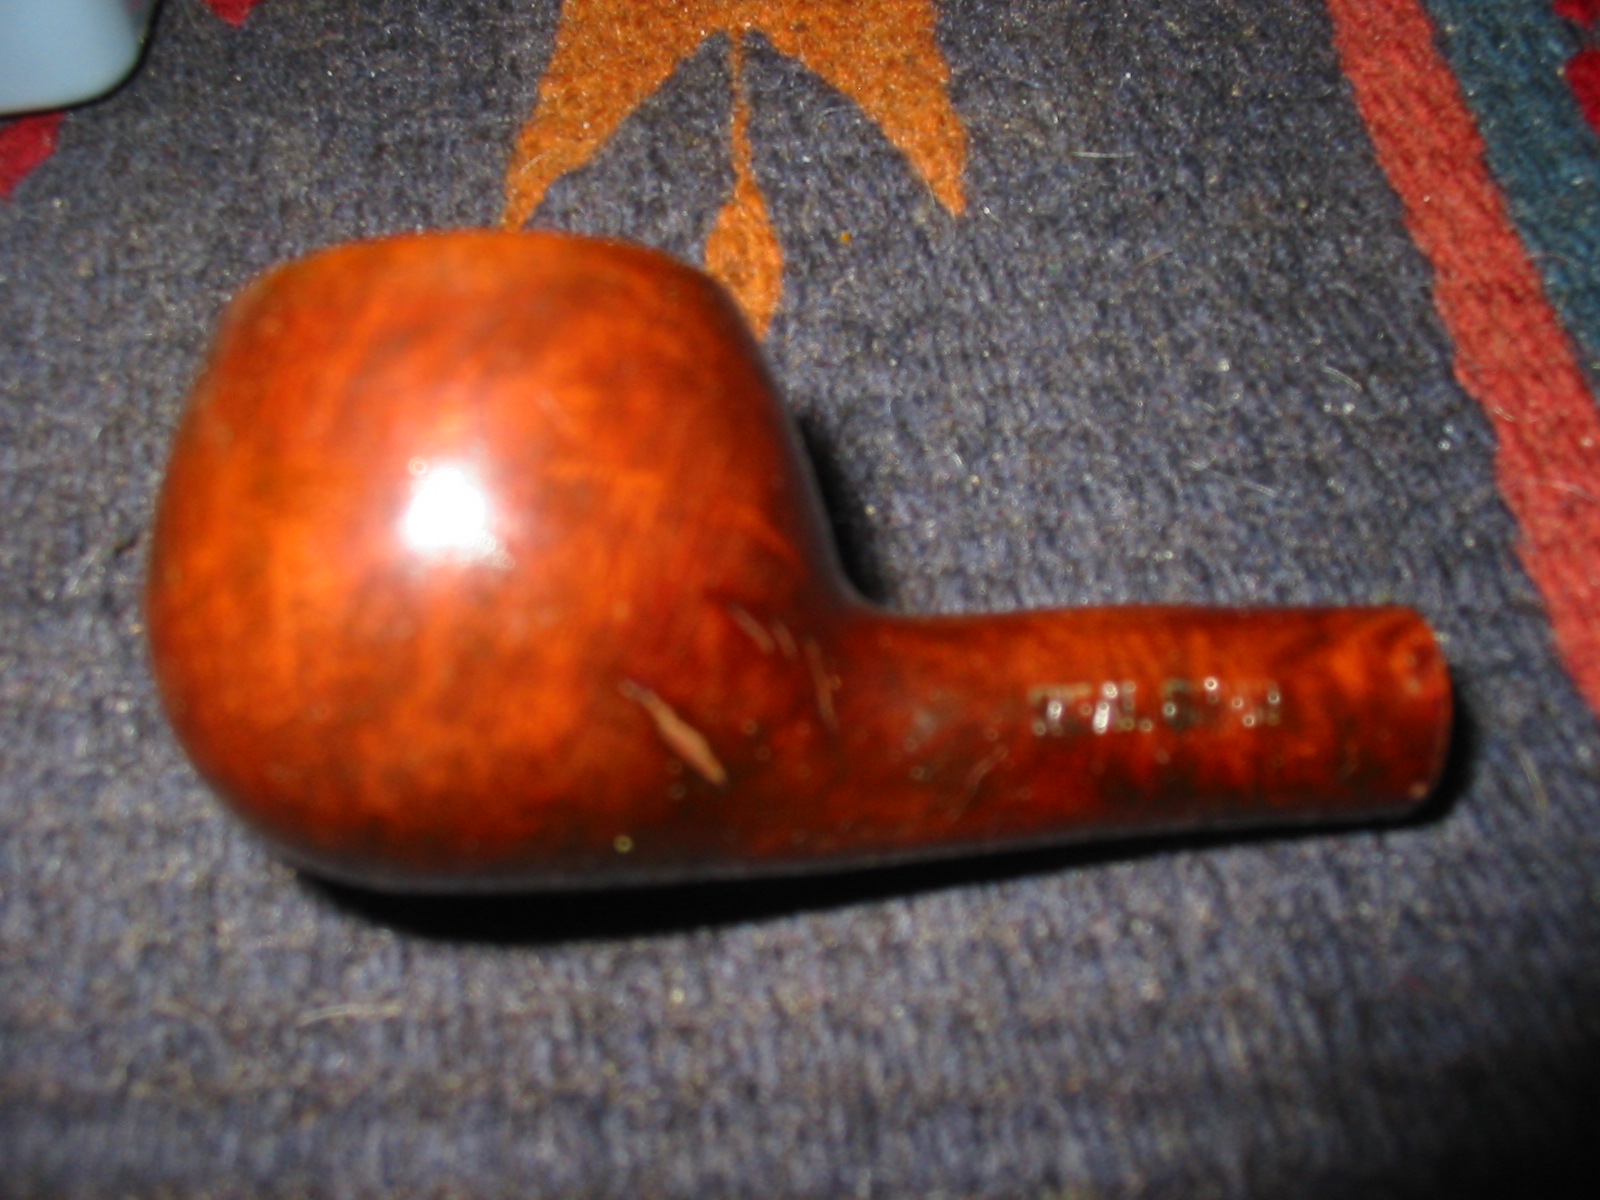
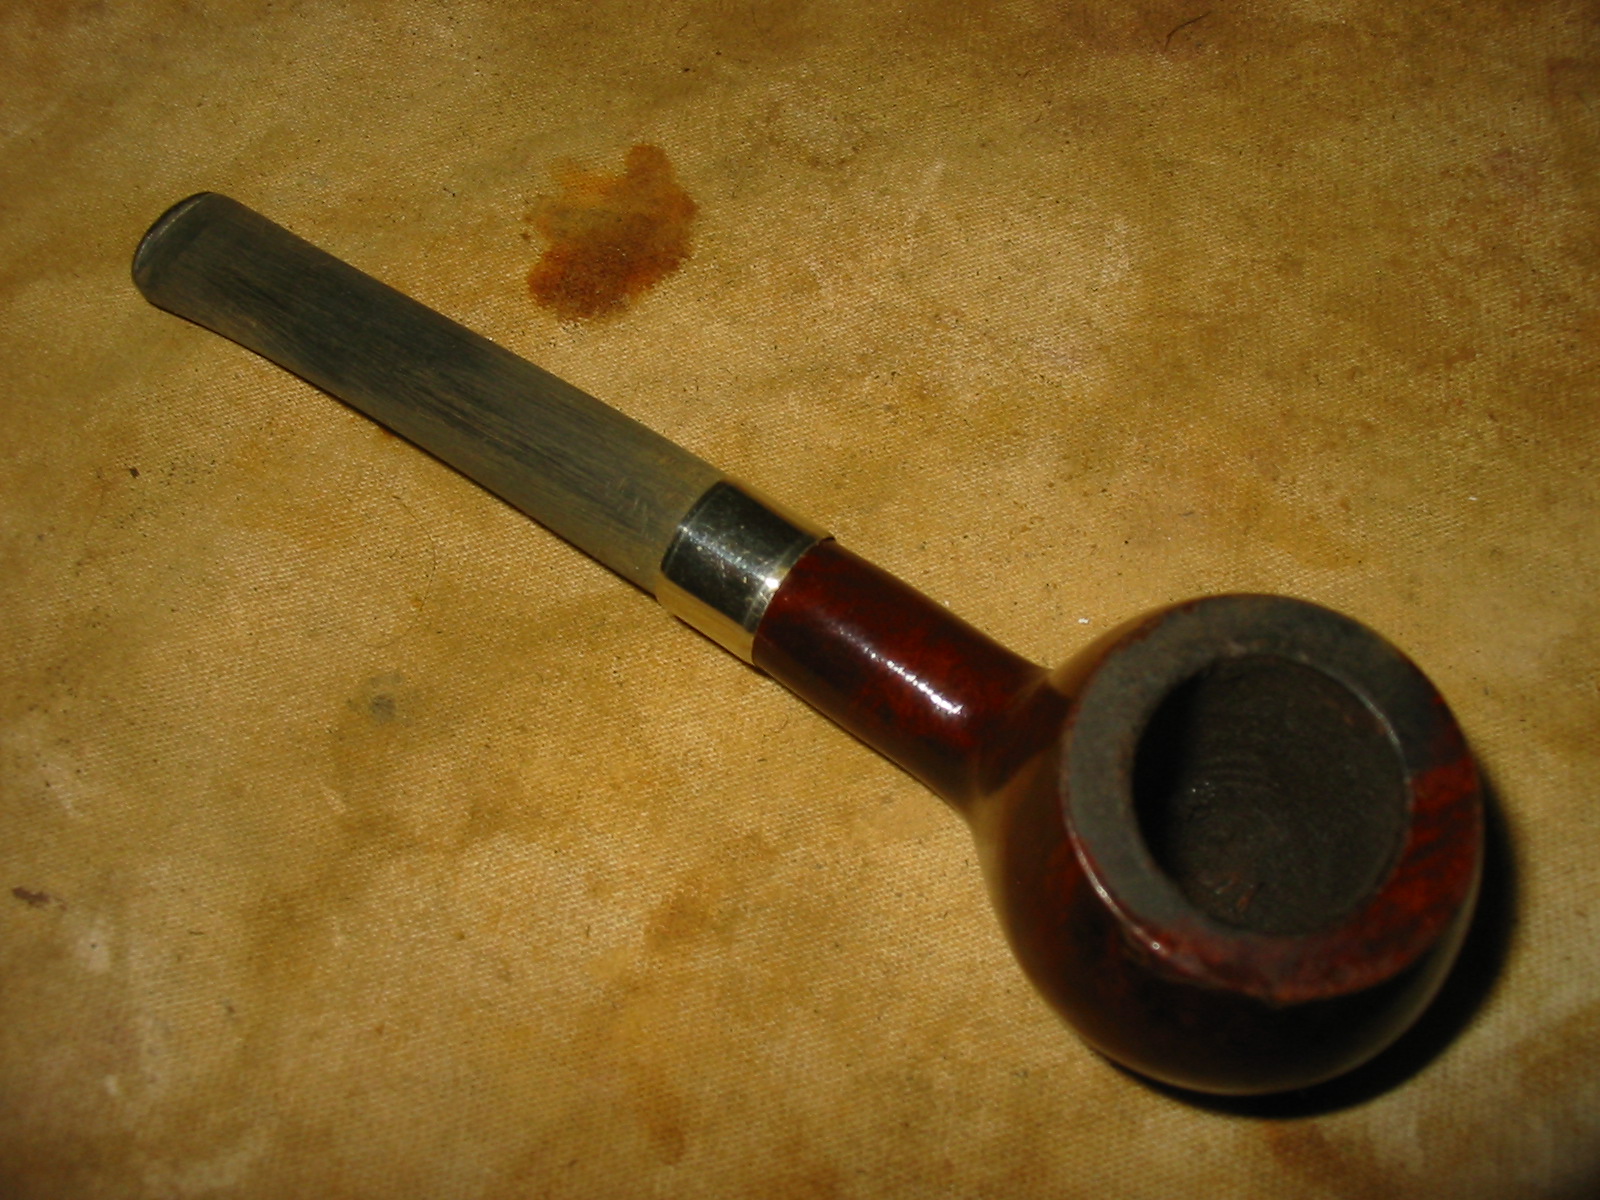
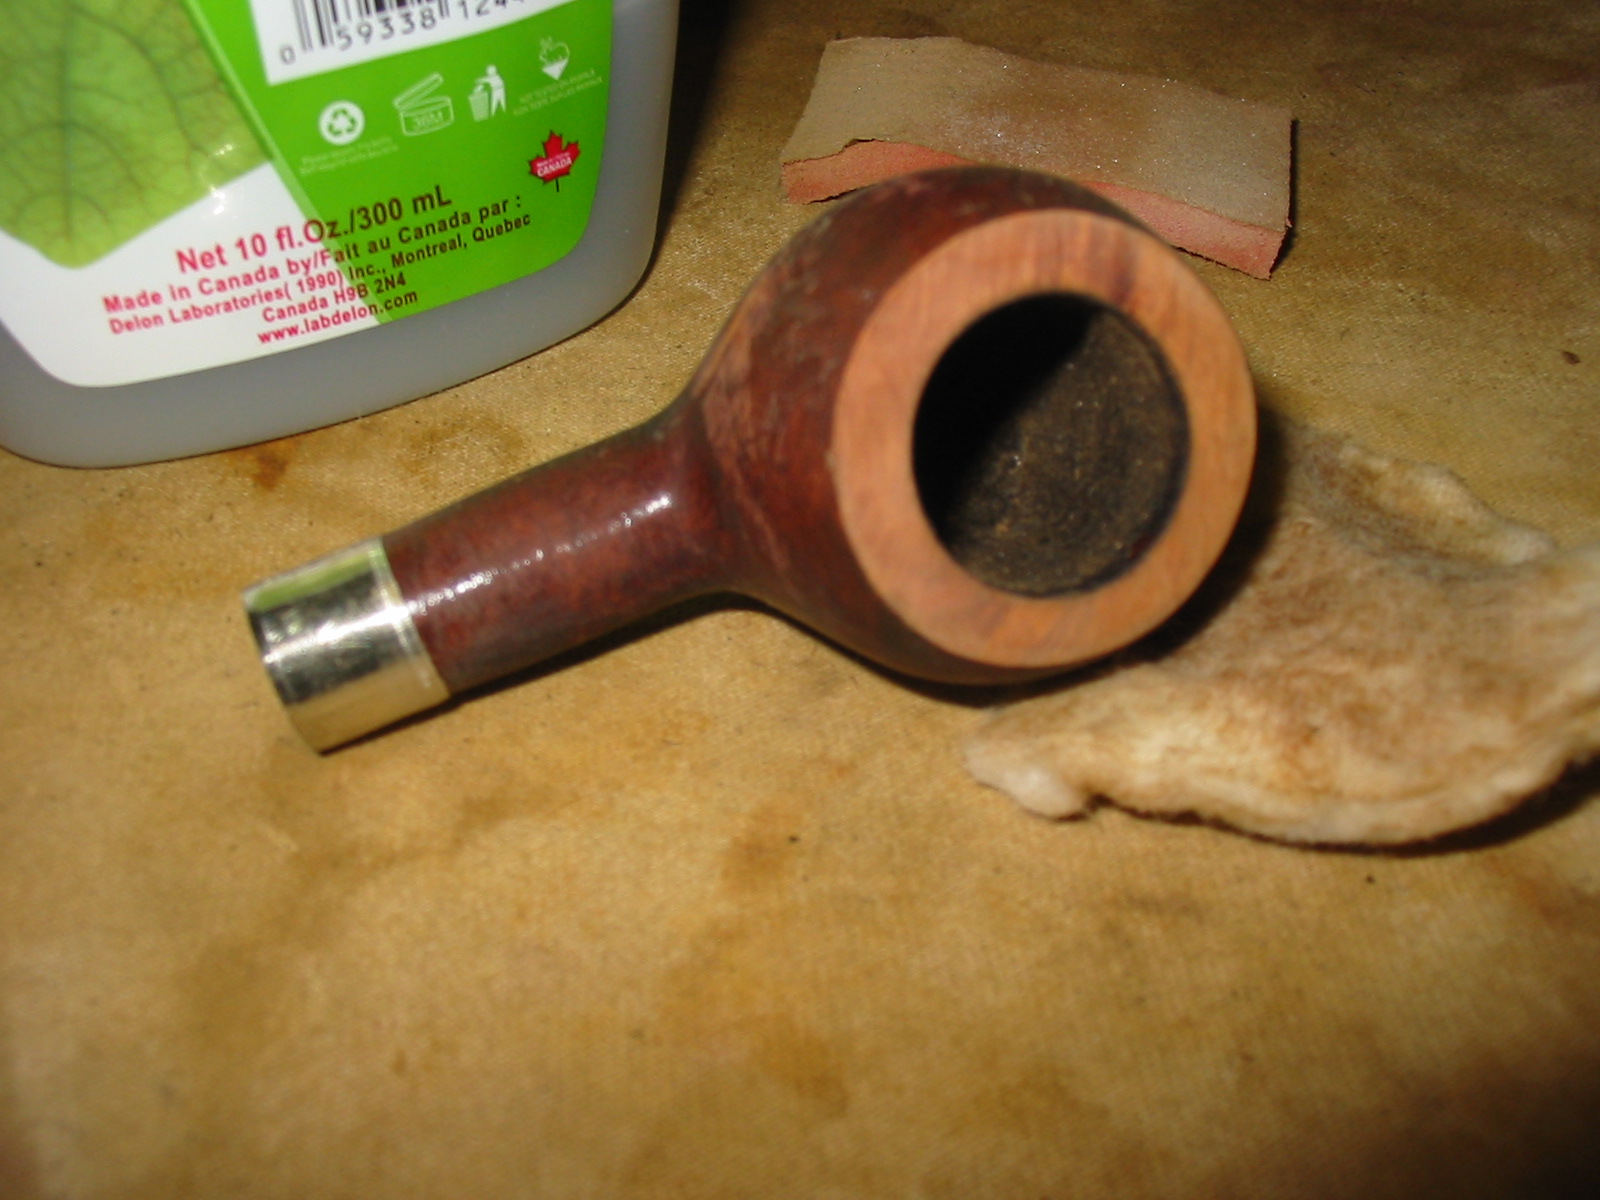
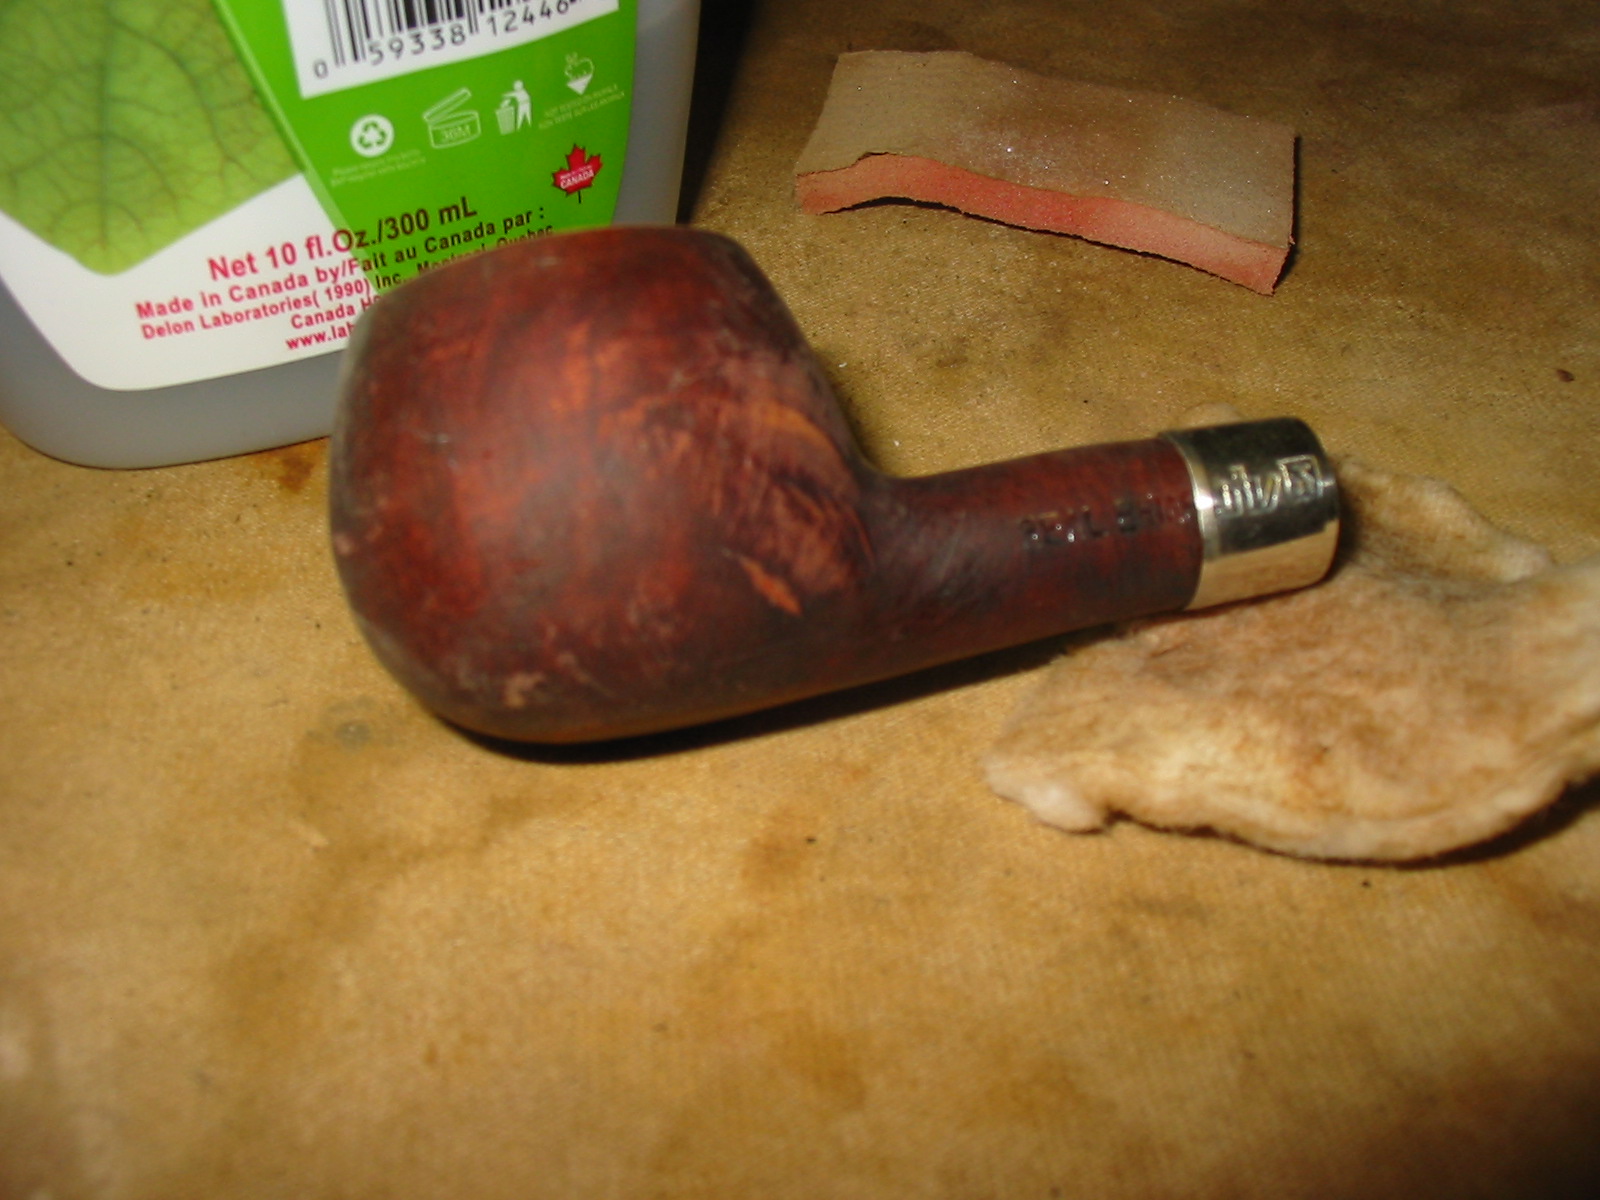
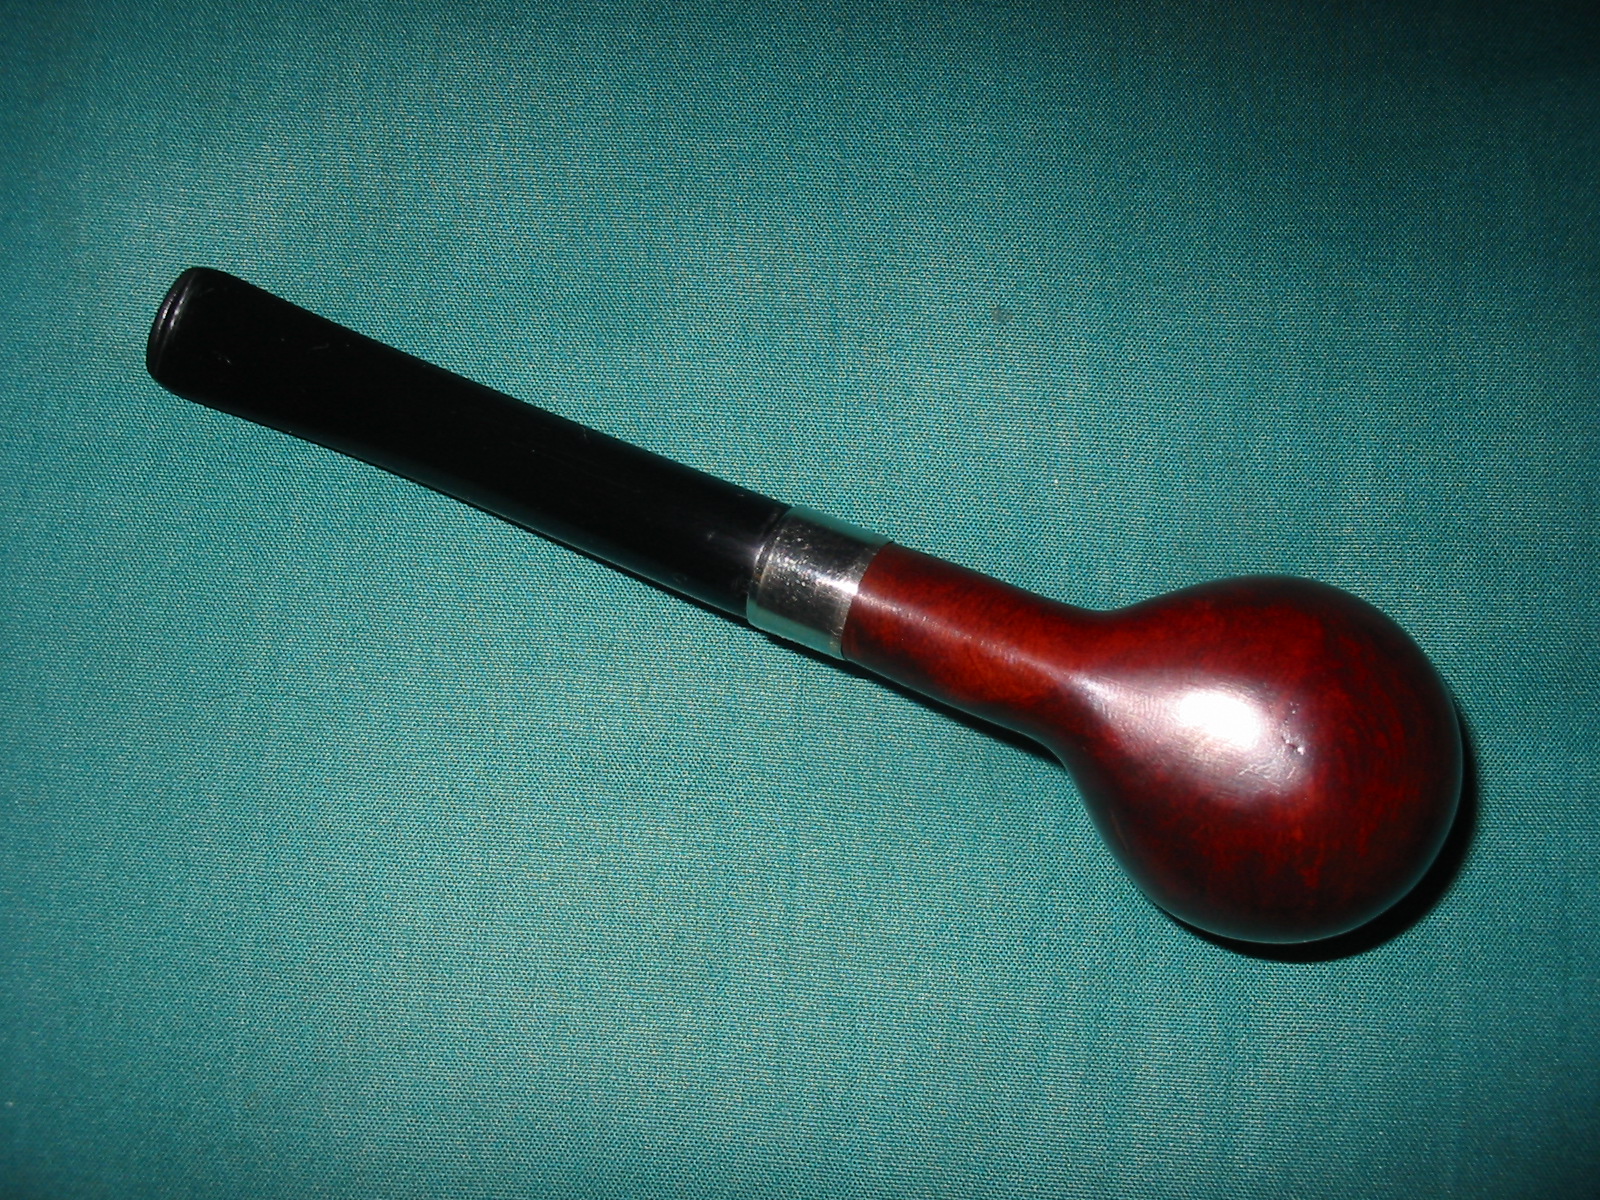
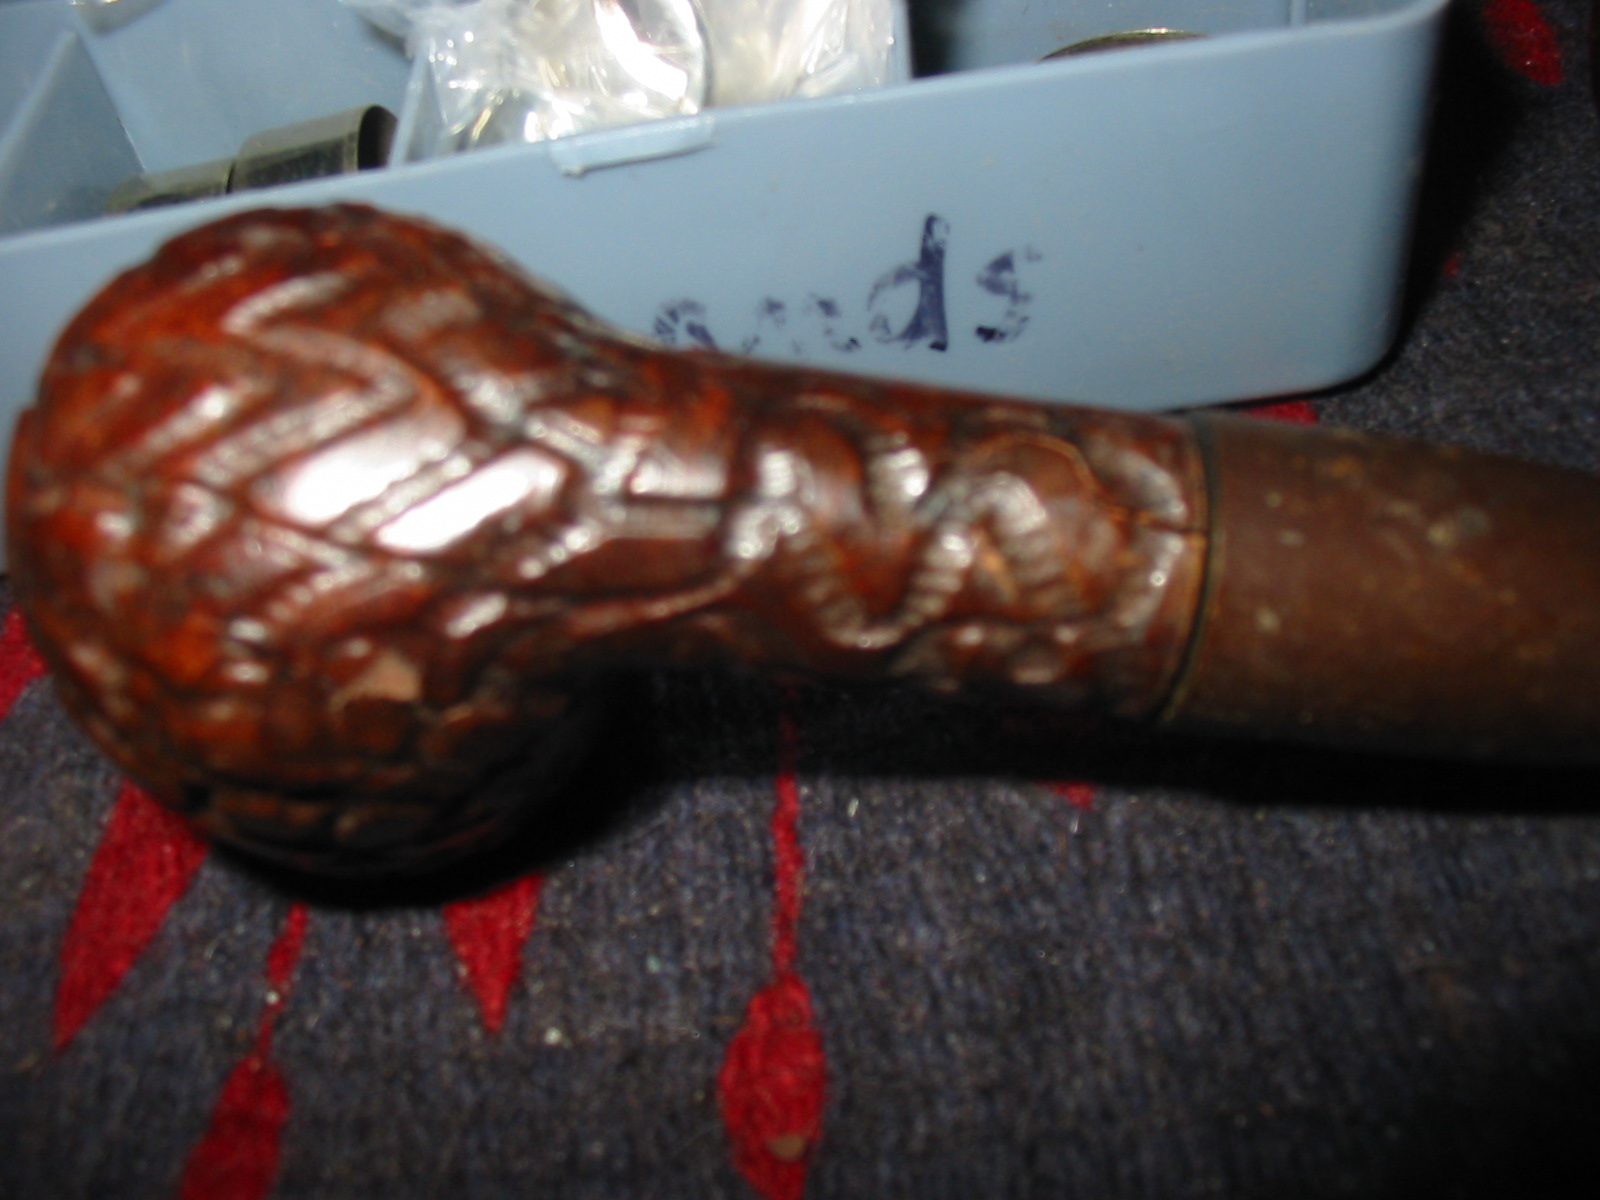
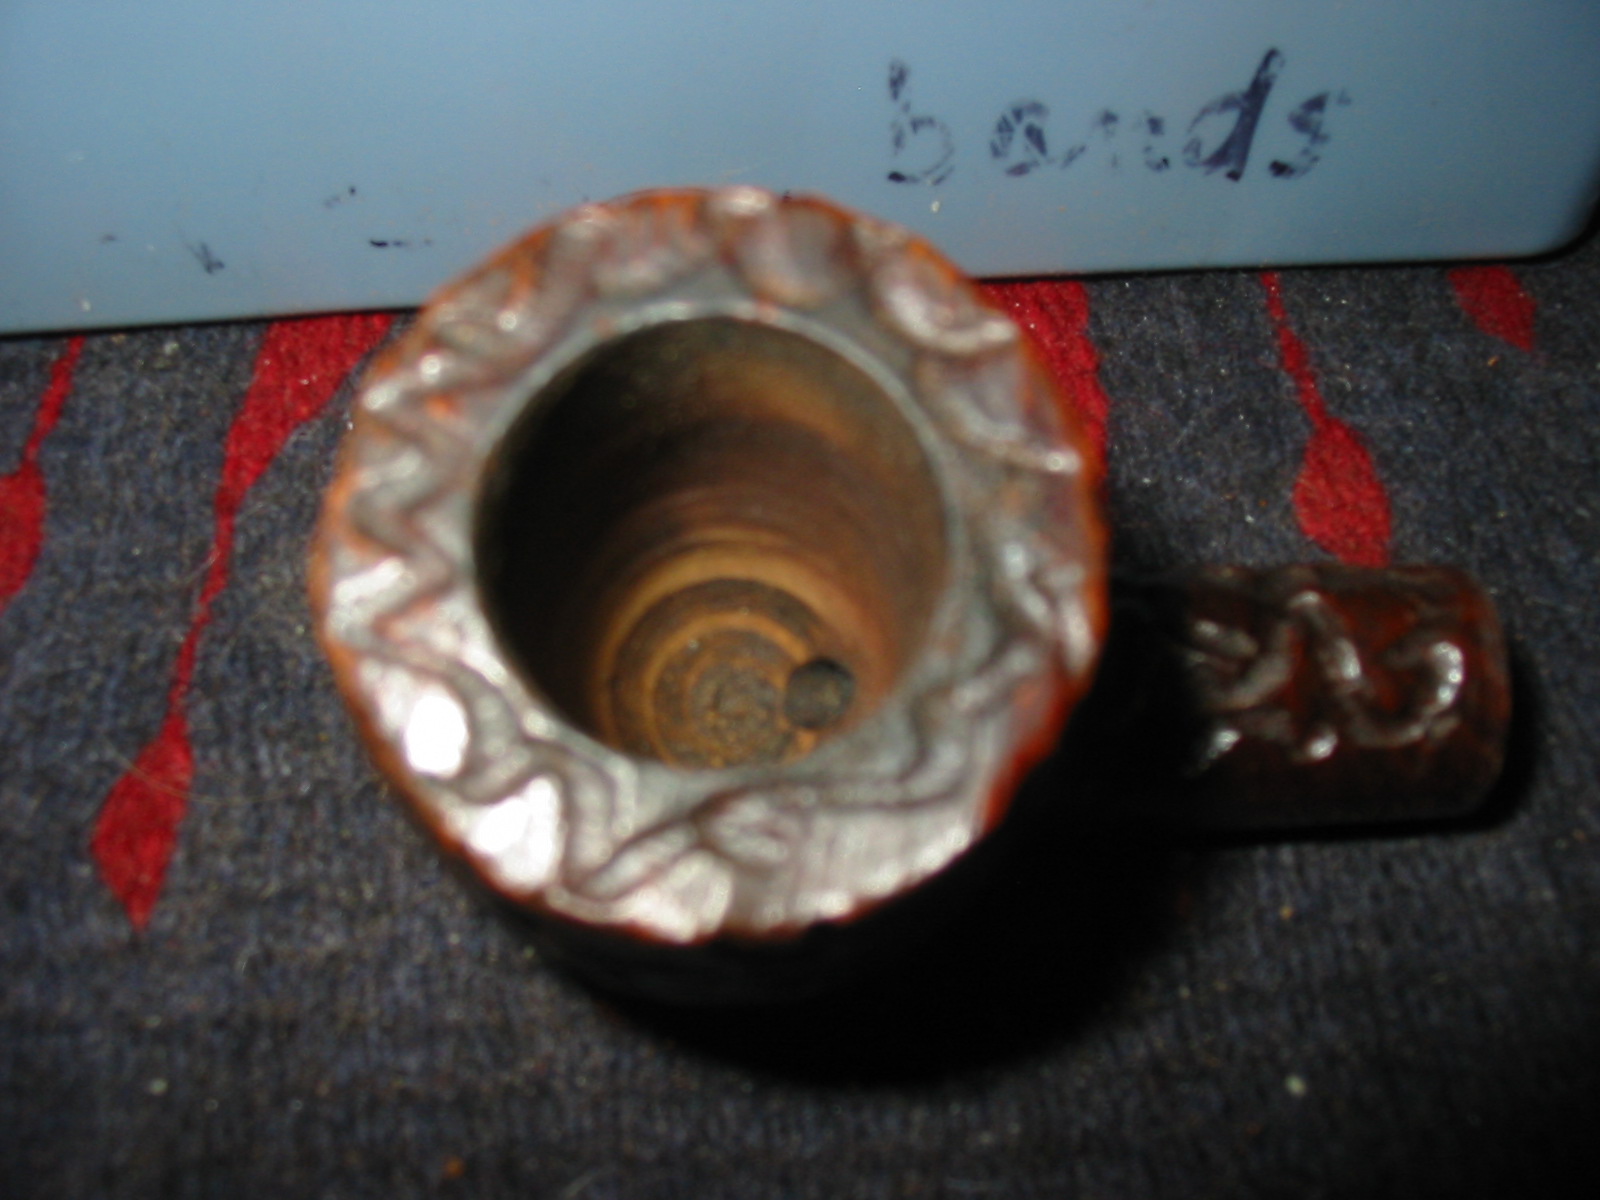
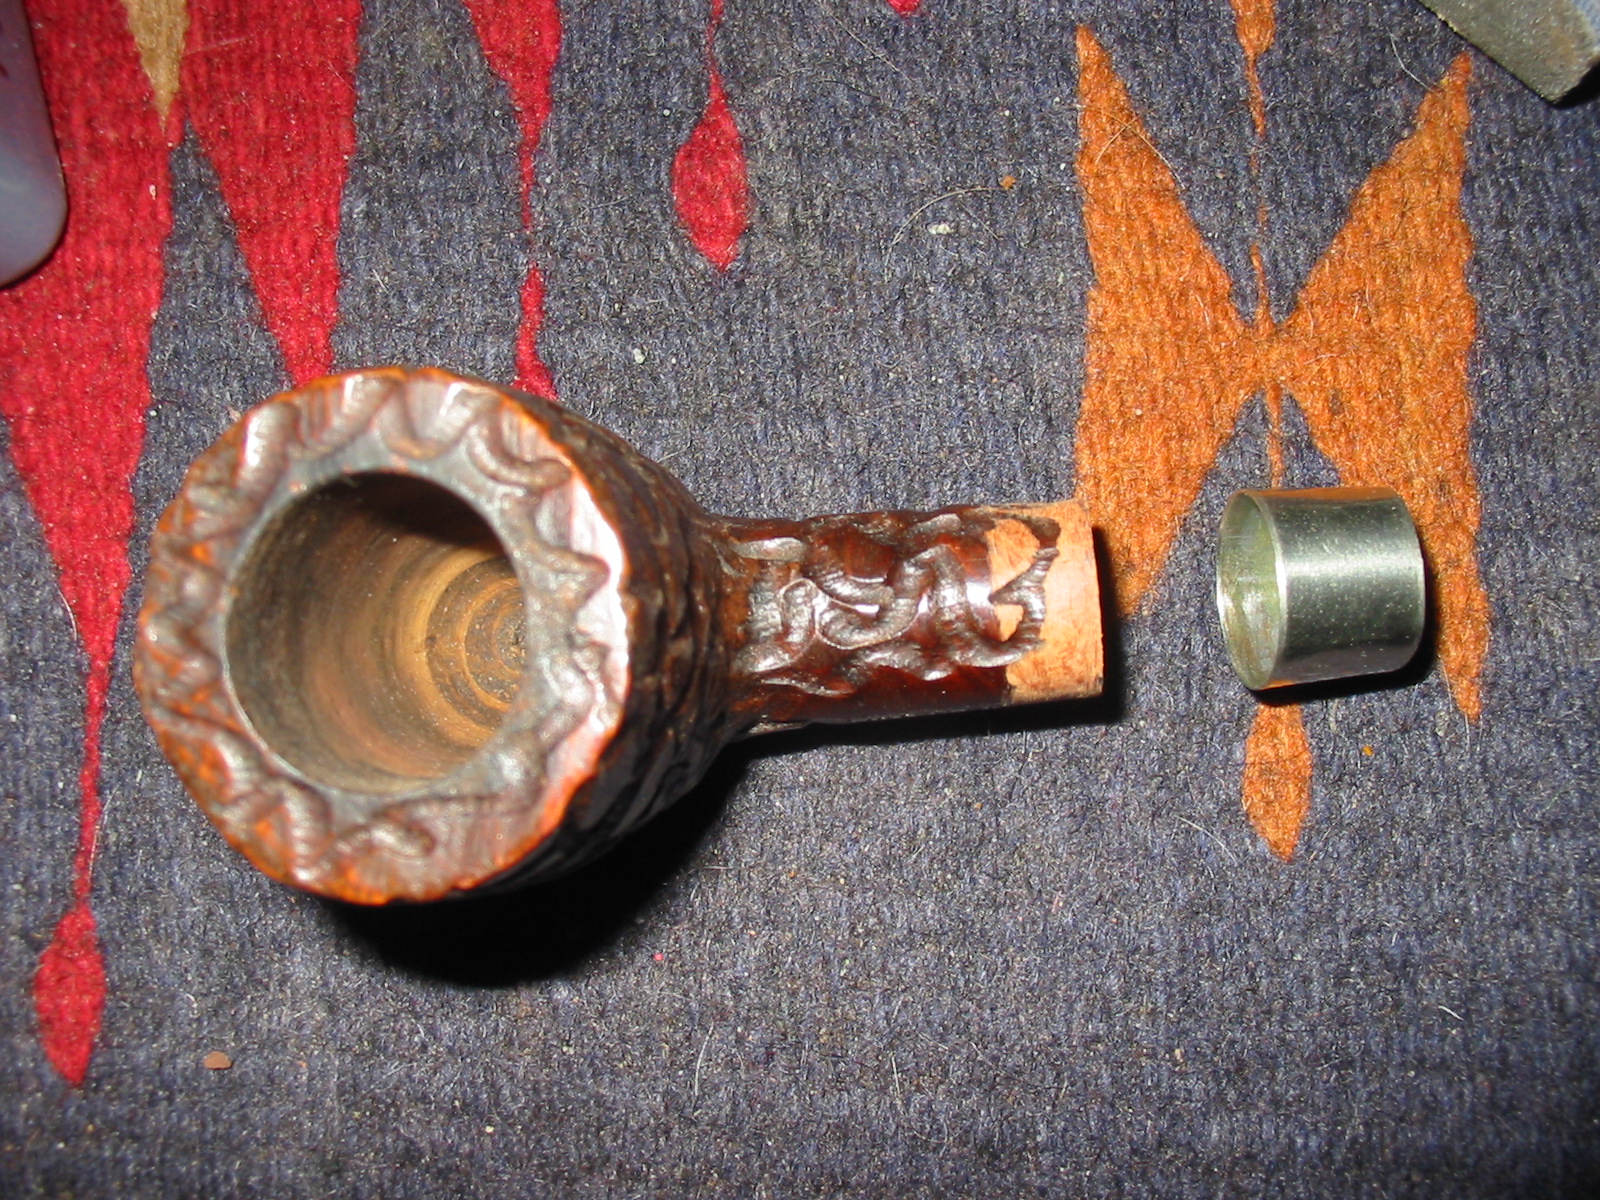
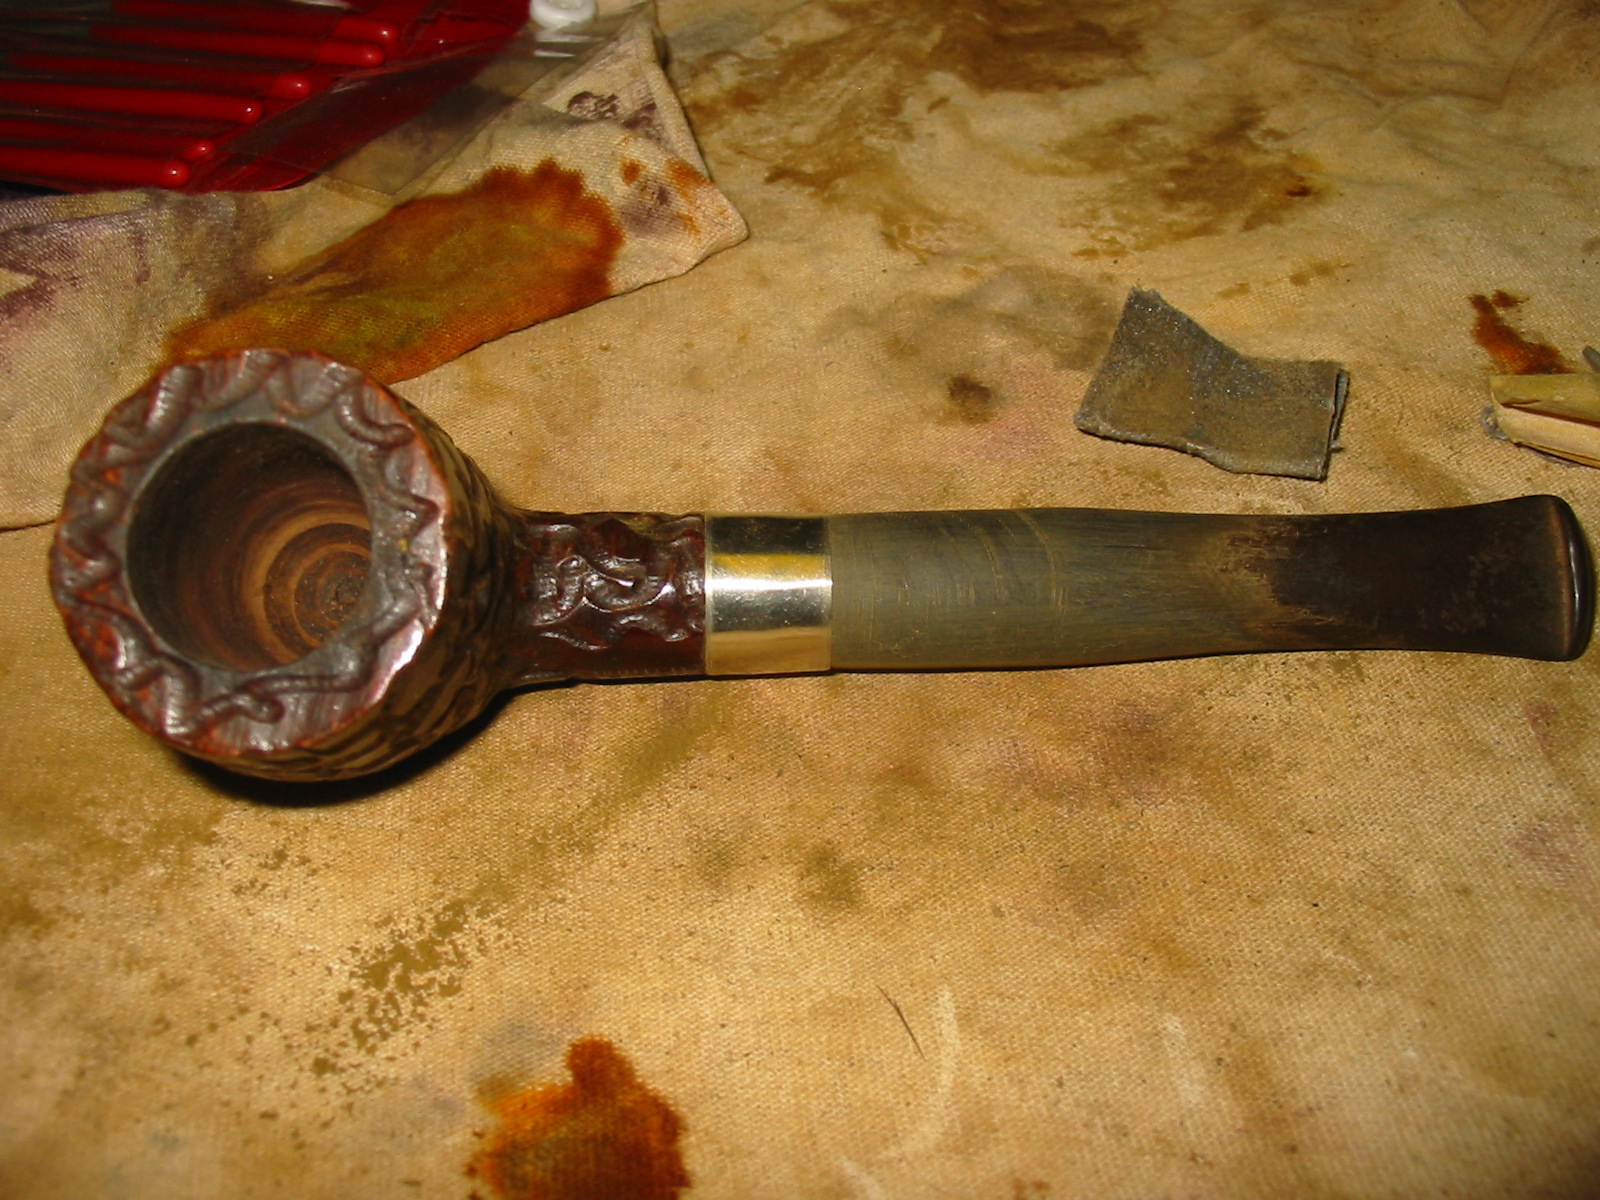
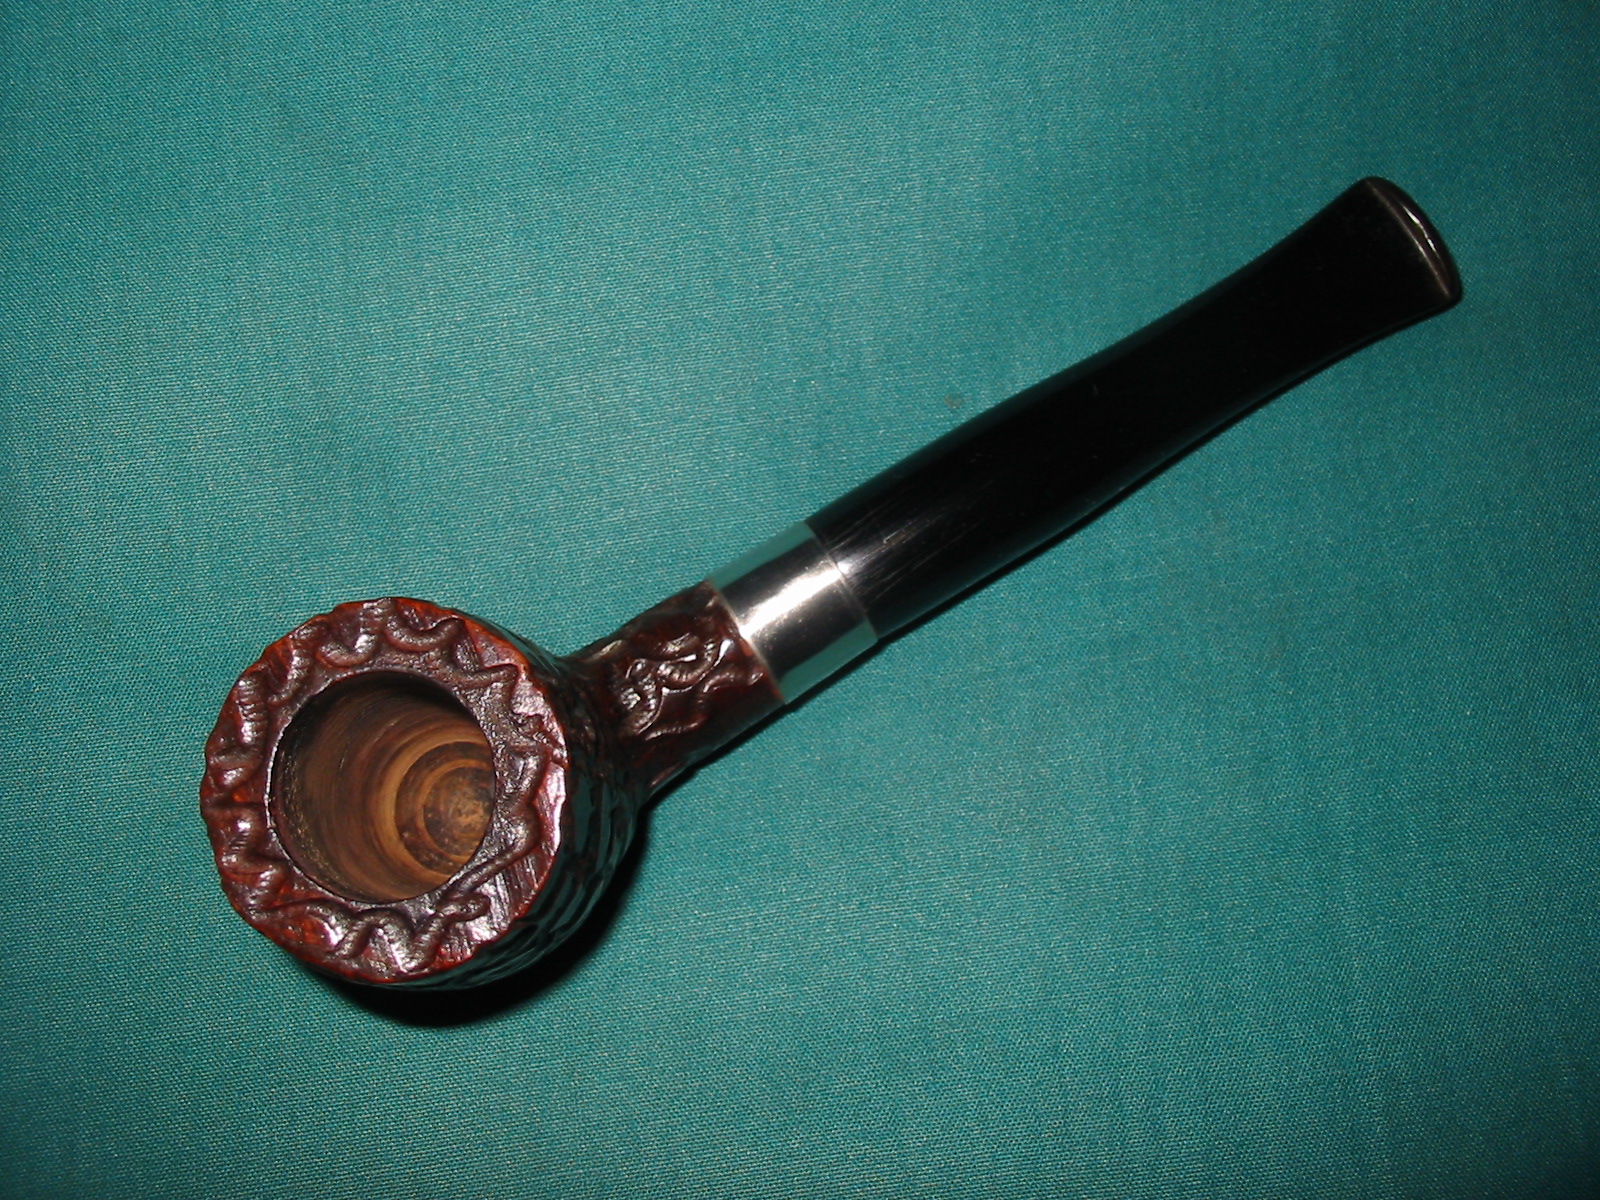
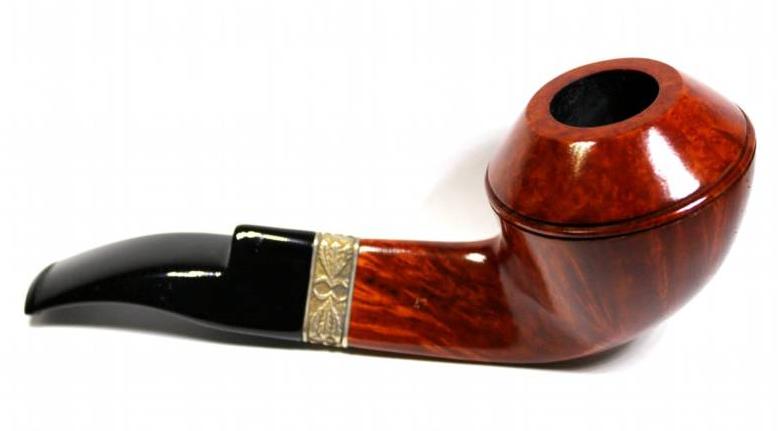
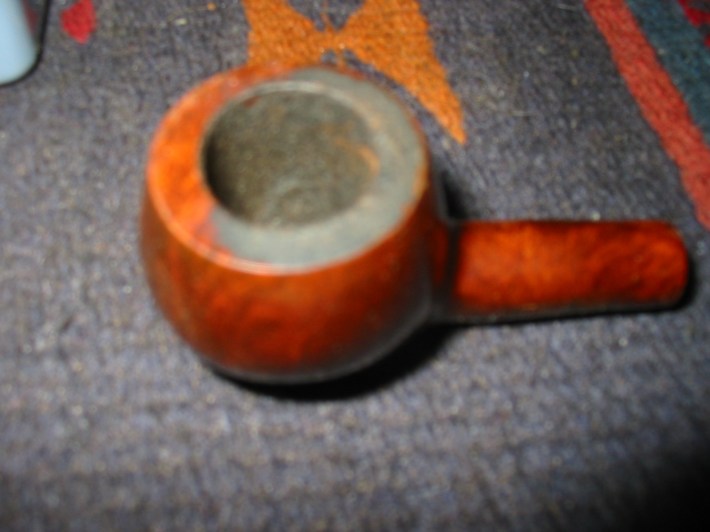
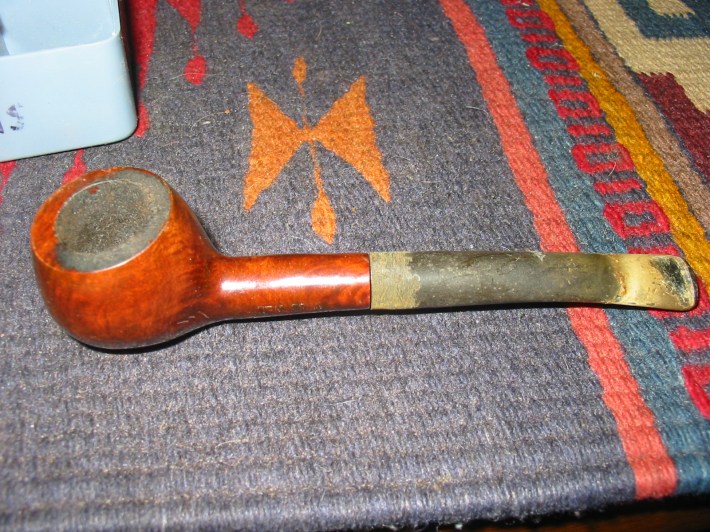
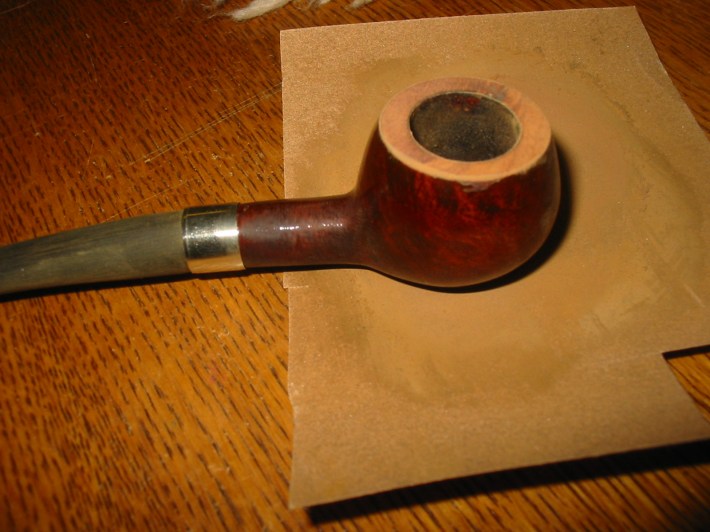
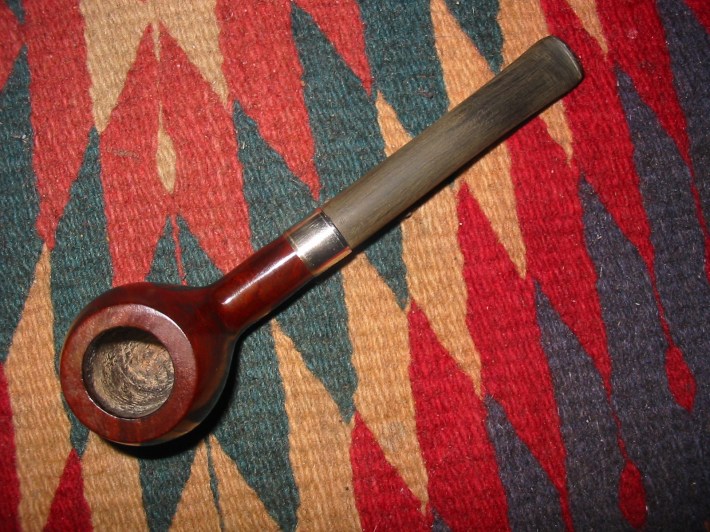
Quite a few of the old stummels in my box for restemming are stamped Real Briar over Made in Italy. This one caught my eye. It had a great classic shape of a Prince. I dug through my can of stems and found an old stem that would work on this little prince with some work. The bowl was coated with tars and needed to be reamed. The rim was tarred and the cake overflowed the bowl onto the rim. On the bottom left side of the bowl near the shank were several fills that were visible and ugly. The shank was plugged with tars and oils and I could not pass a pipe cleaner through it. The old stem I picked had the right shape but was also badly oxidized and coated with a calcification that was white and hard. The button had a single hole drilled in the centre but it had been damaged and had been worn toward the top of the button. This one was going to be a challenge but it was something I wanted to give a shot.

ImageImage

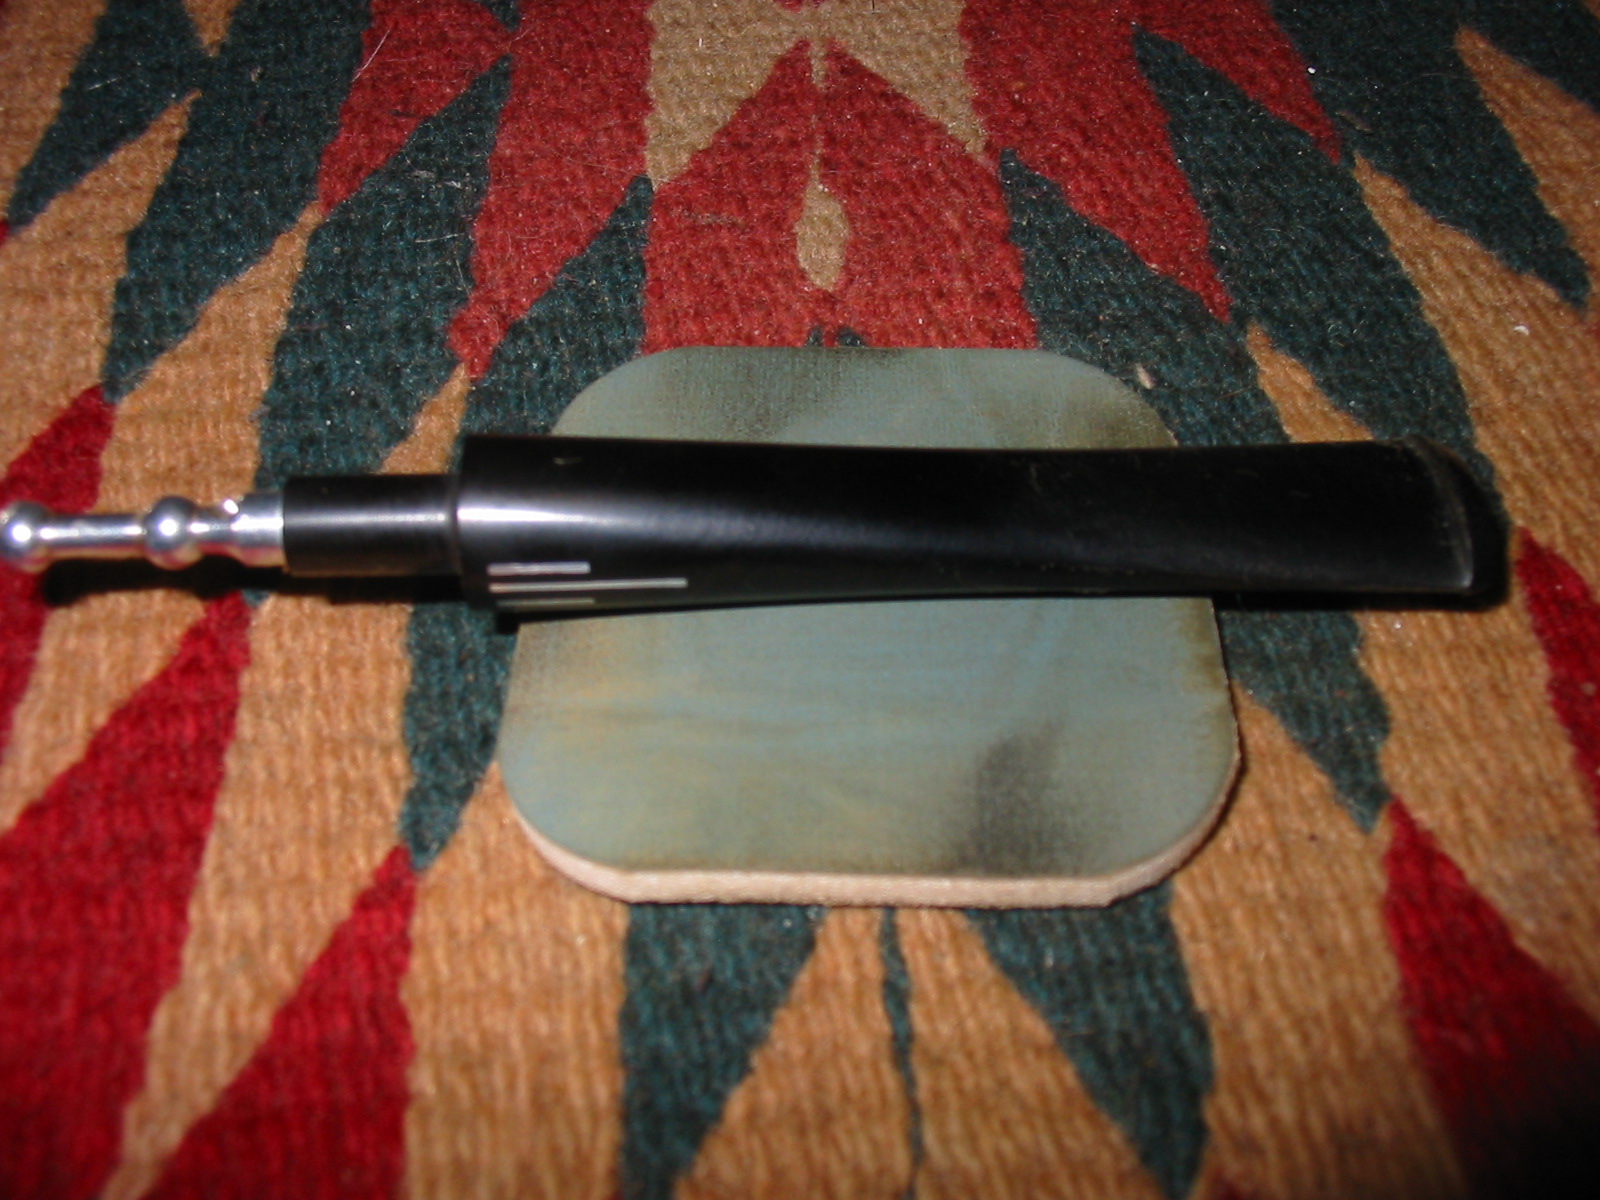
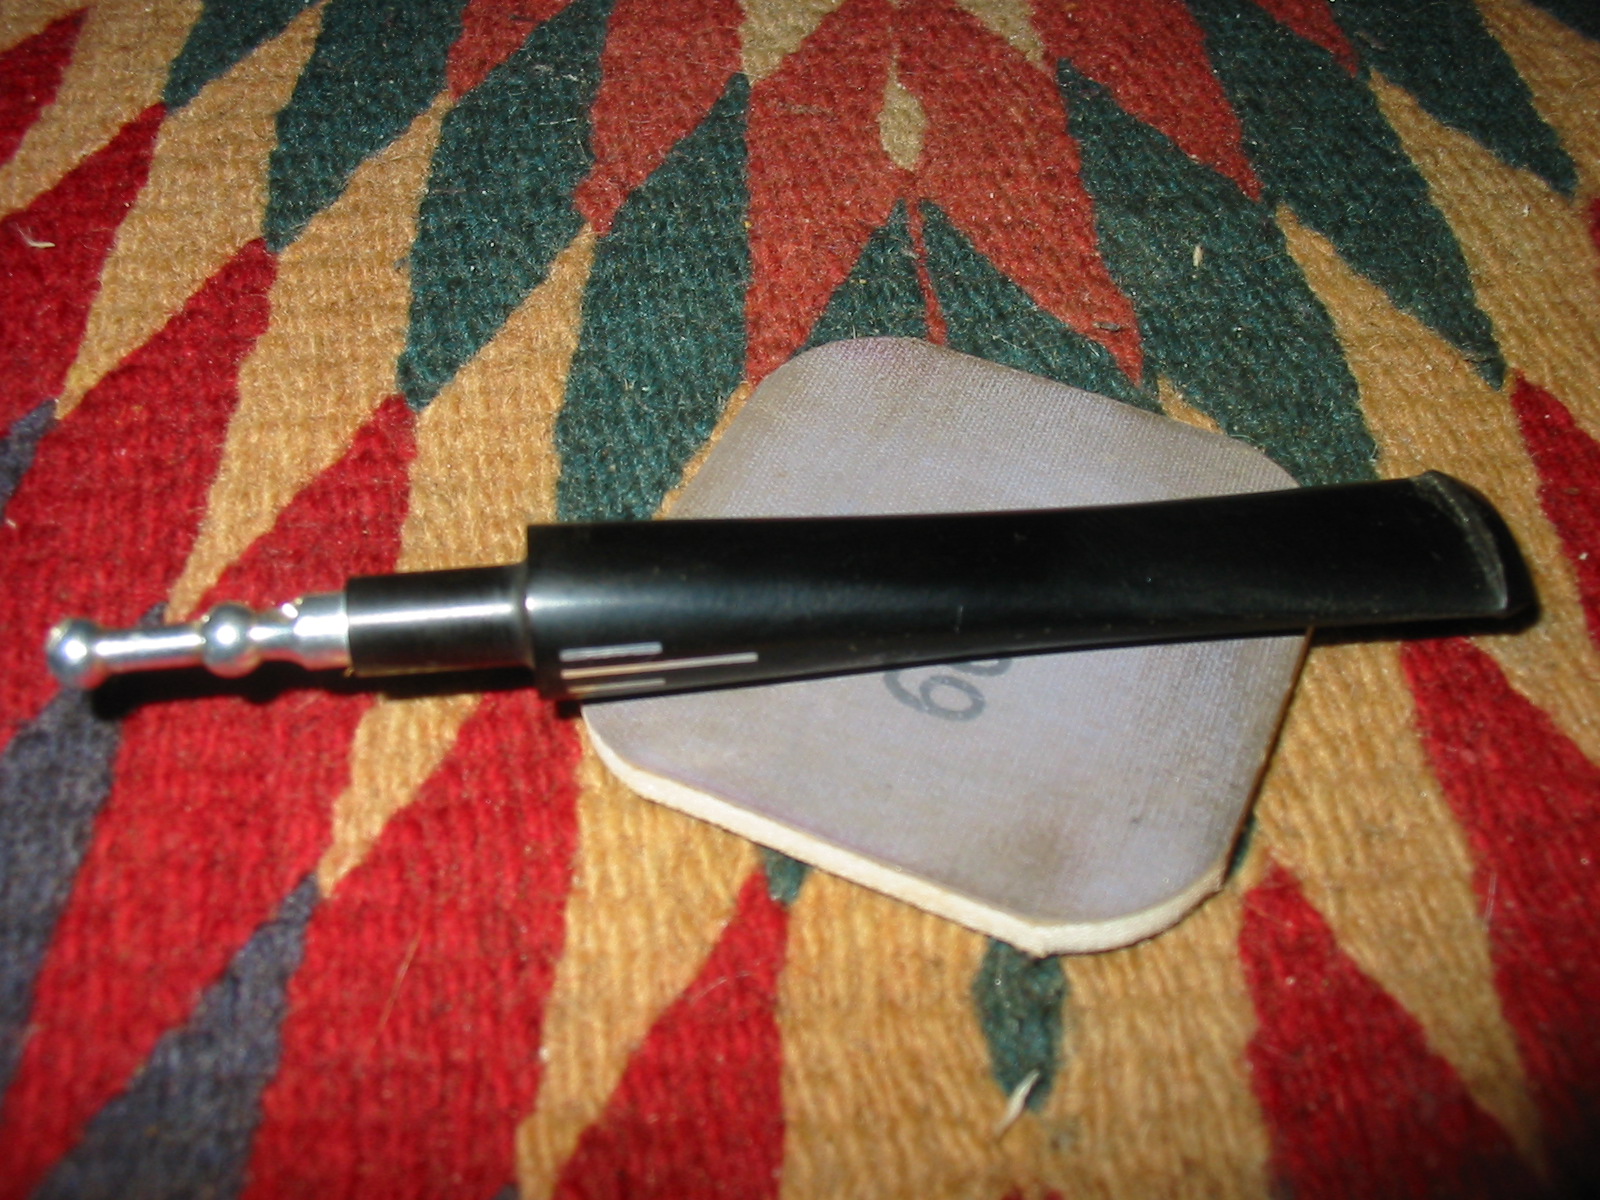
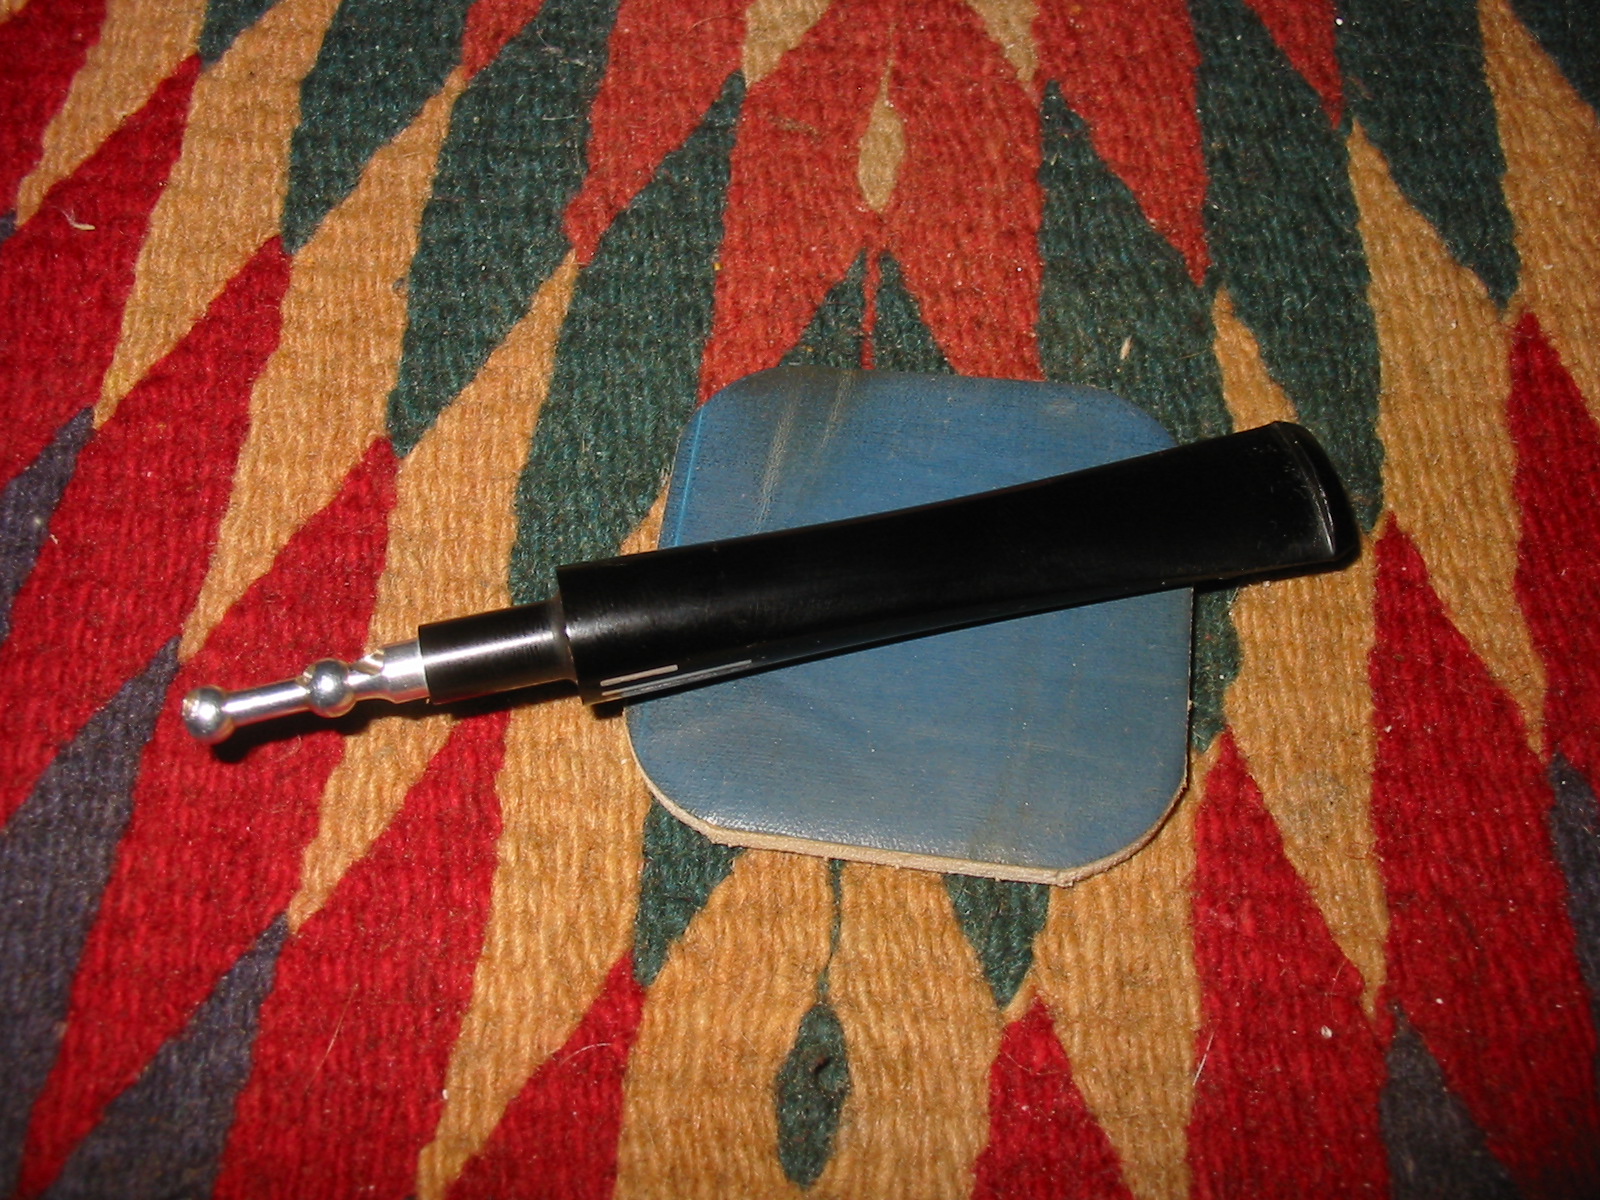
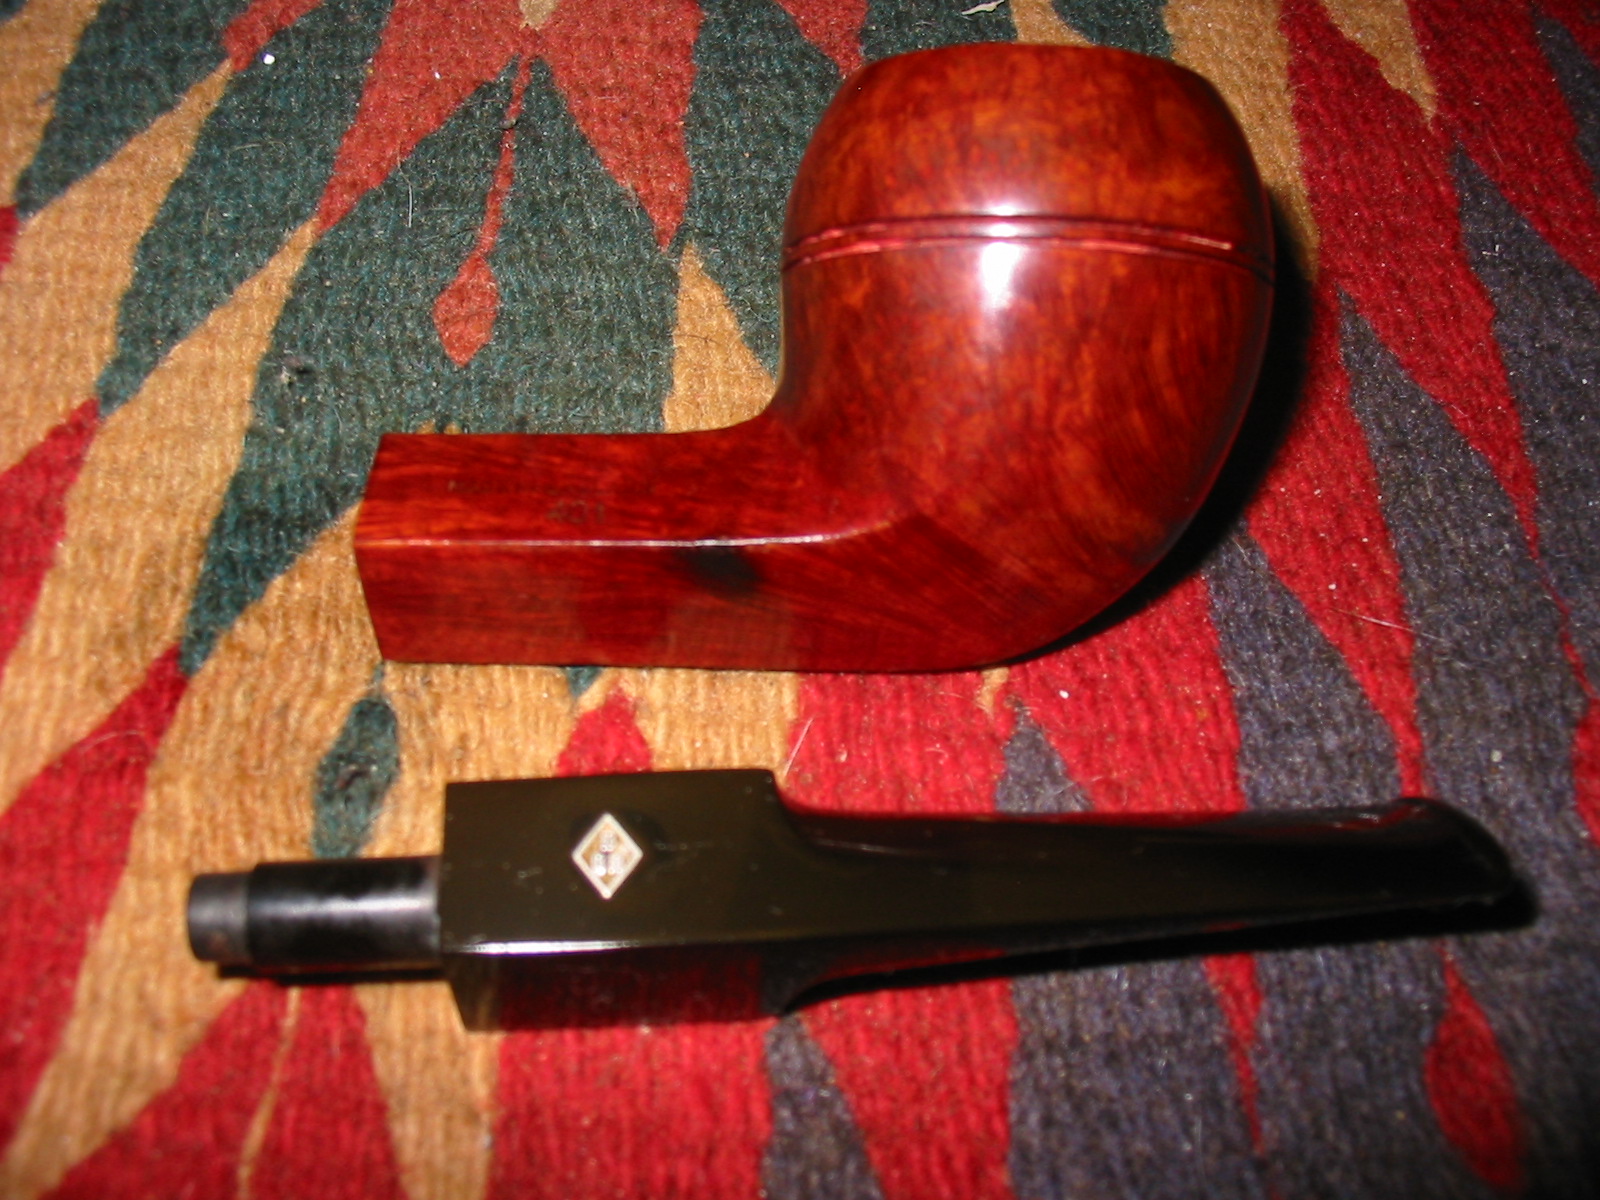
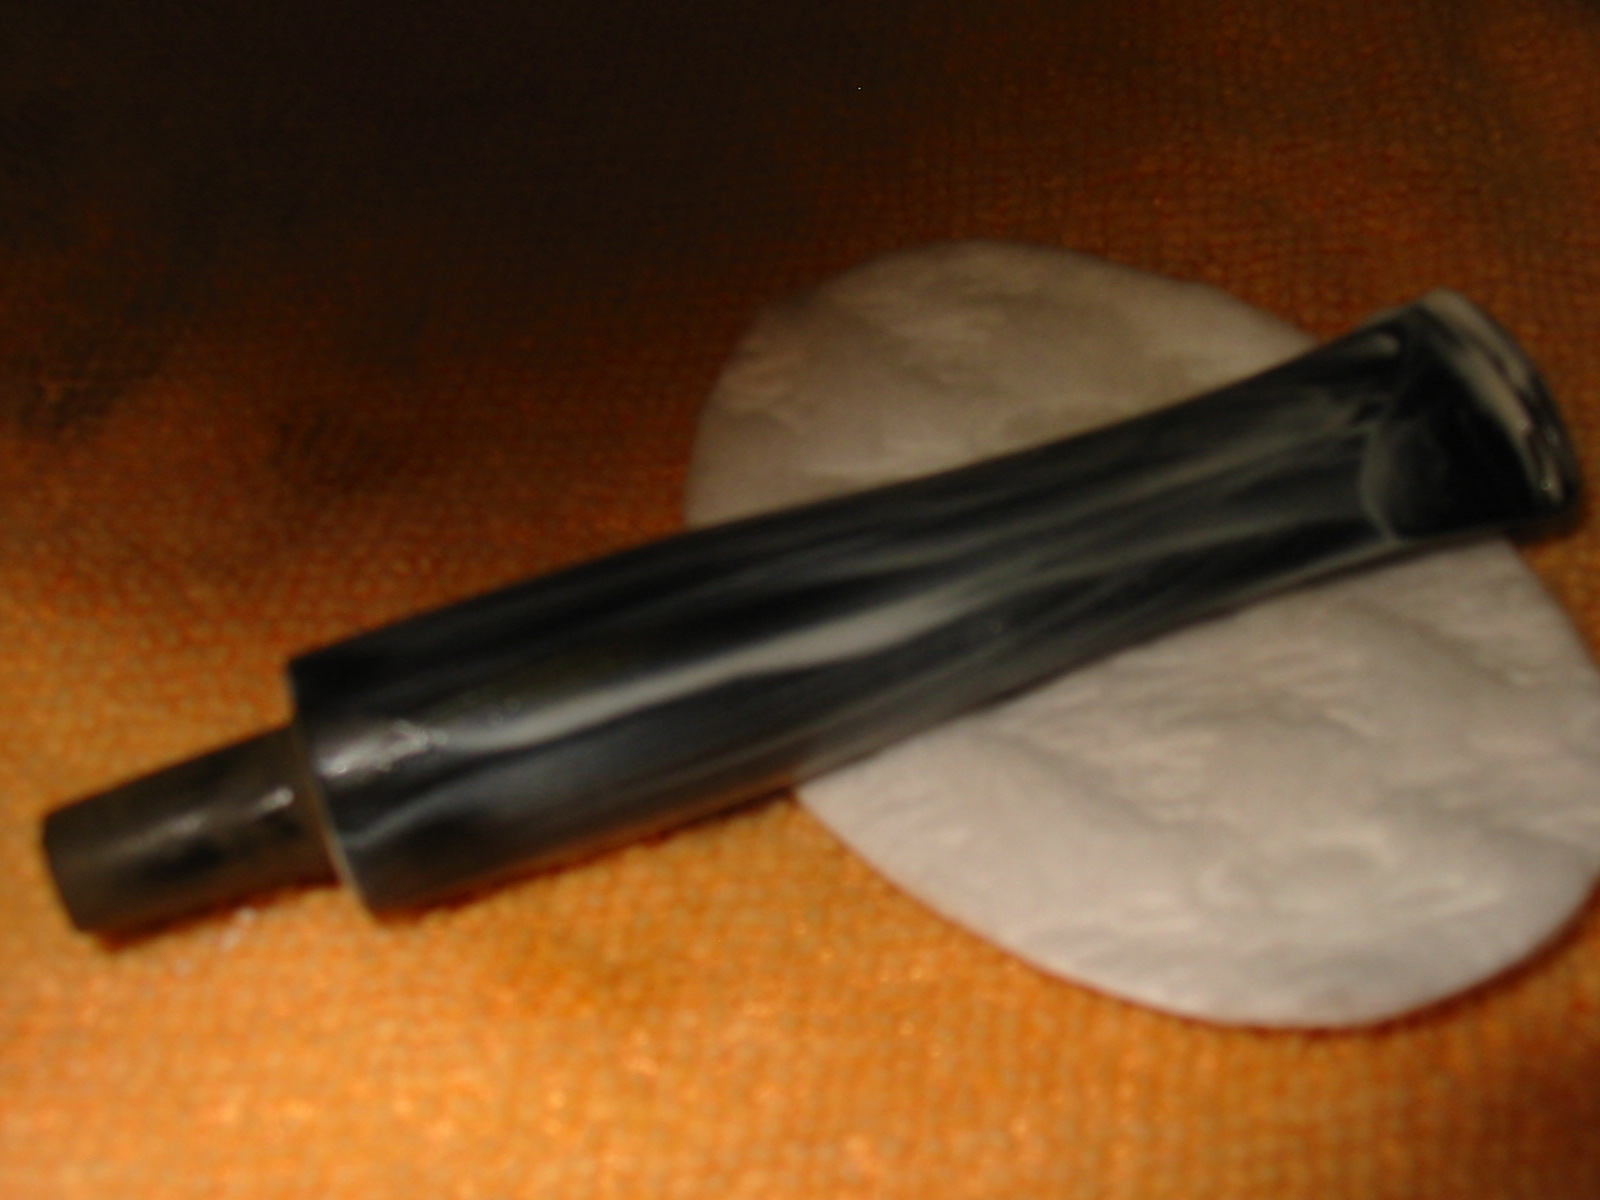
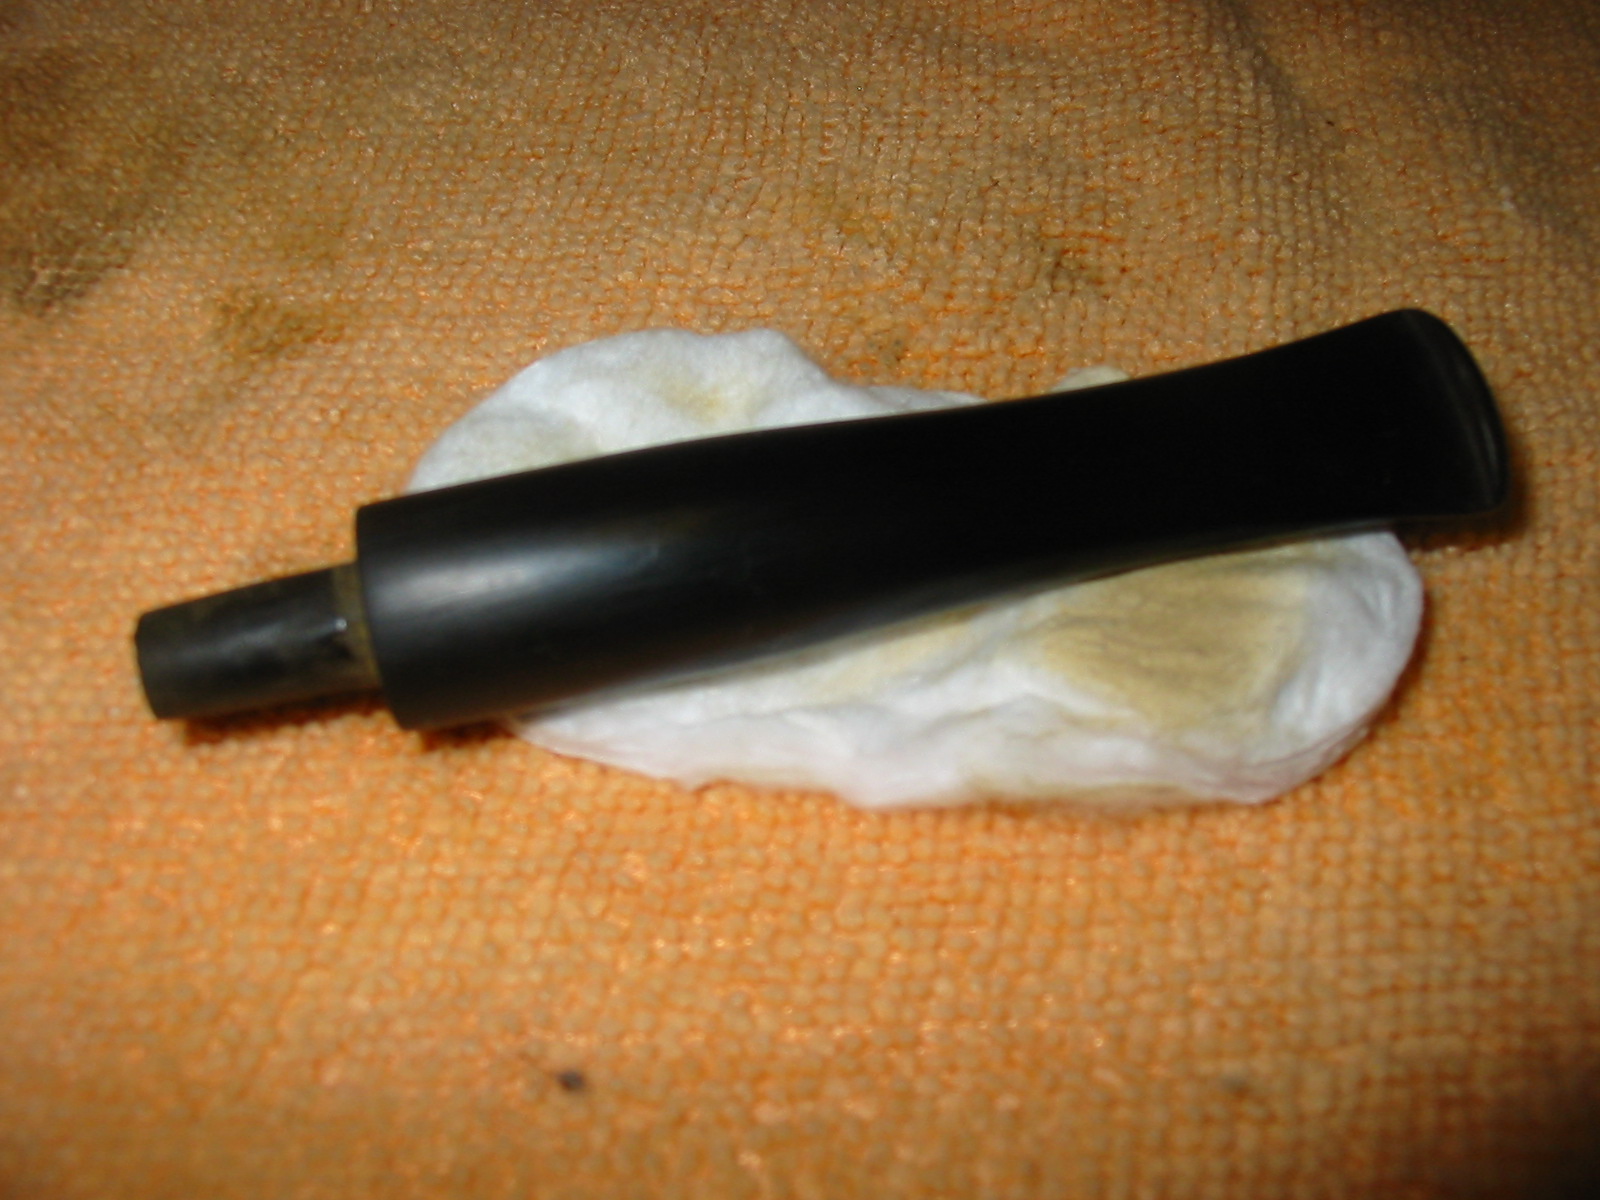
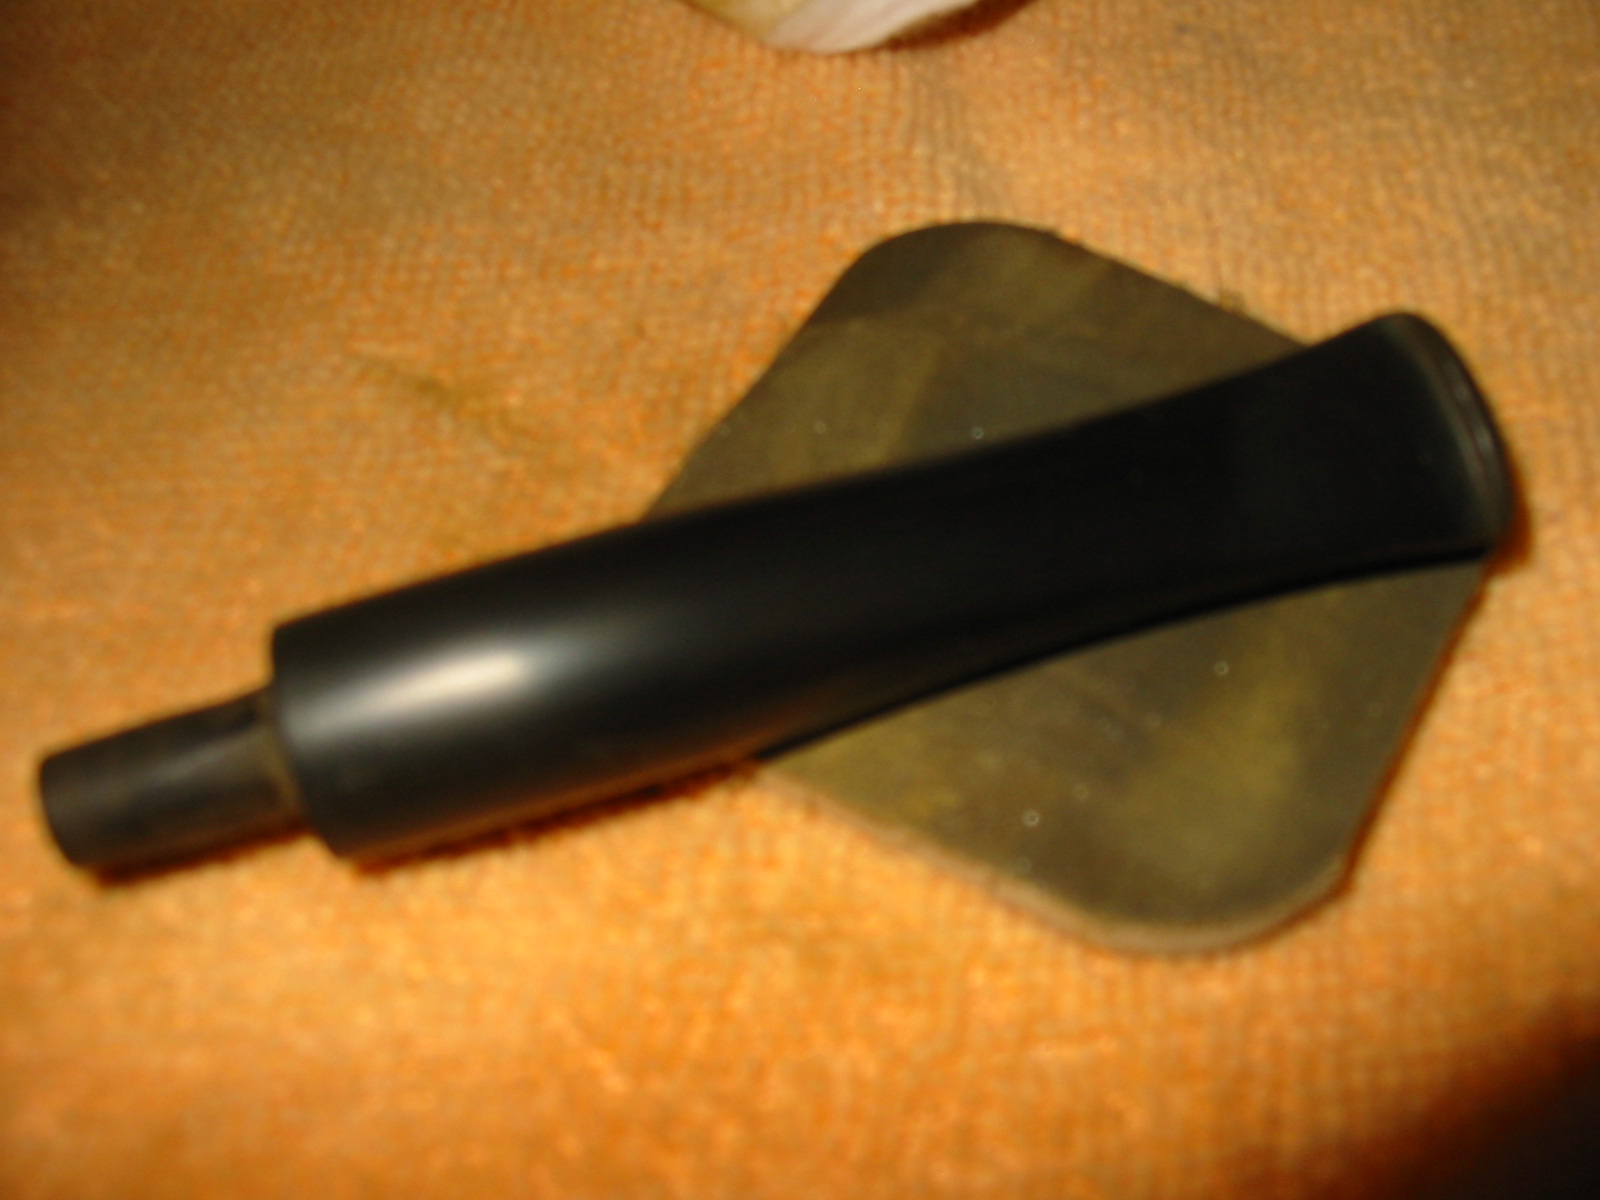
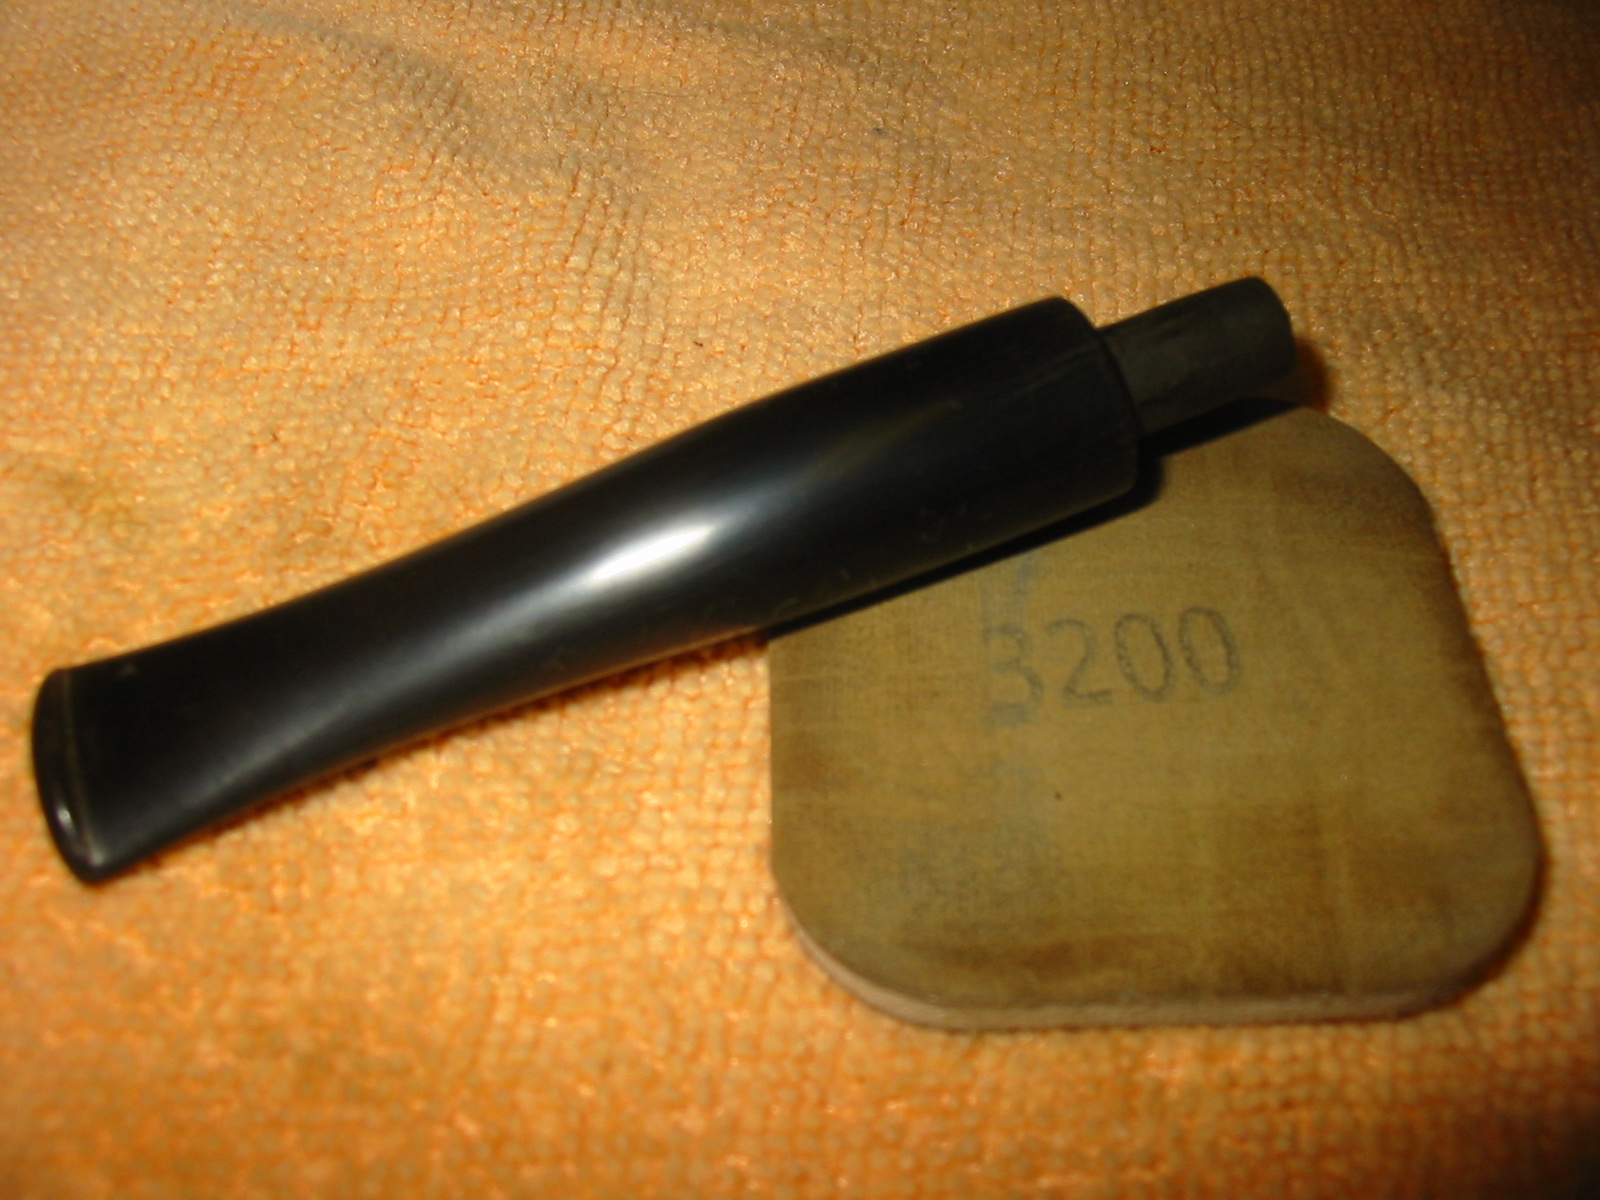
I used my Dremel with the sanding drum to cut away the excess material on the diameter of the stem. The next three photos show the stem after it has been shaped to close to the diameter of the shank. The rest of the work would have to be done by hand. The first one shows the state of the stem when I started with it. The second and third photos show the stem after I had sanded it with emery paper to remove the oxidation and the calcification.

ImageImageImage

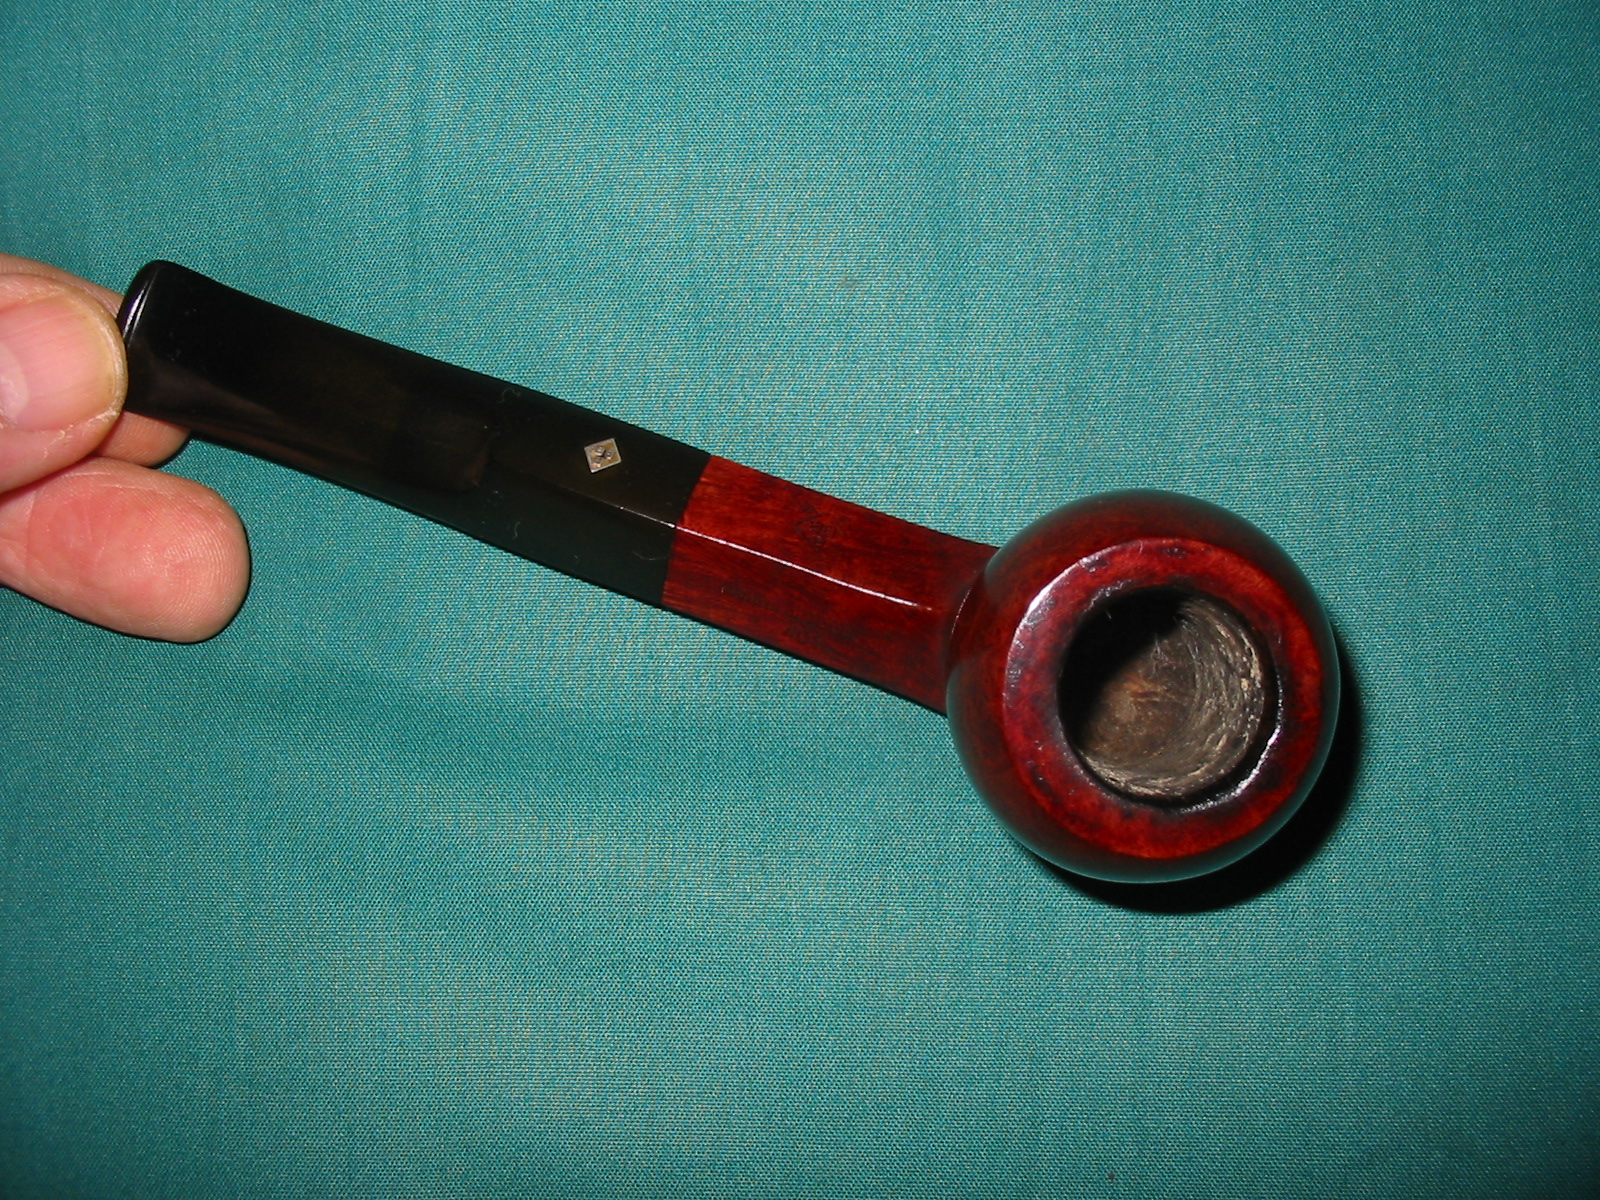
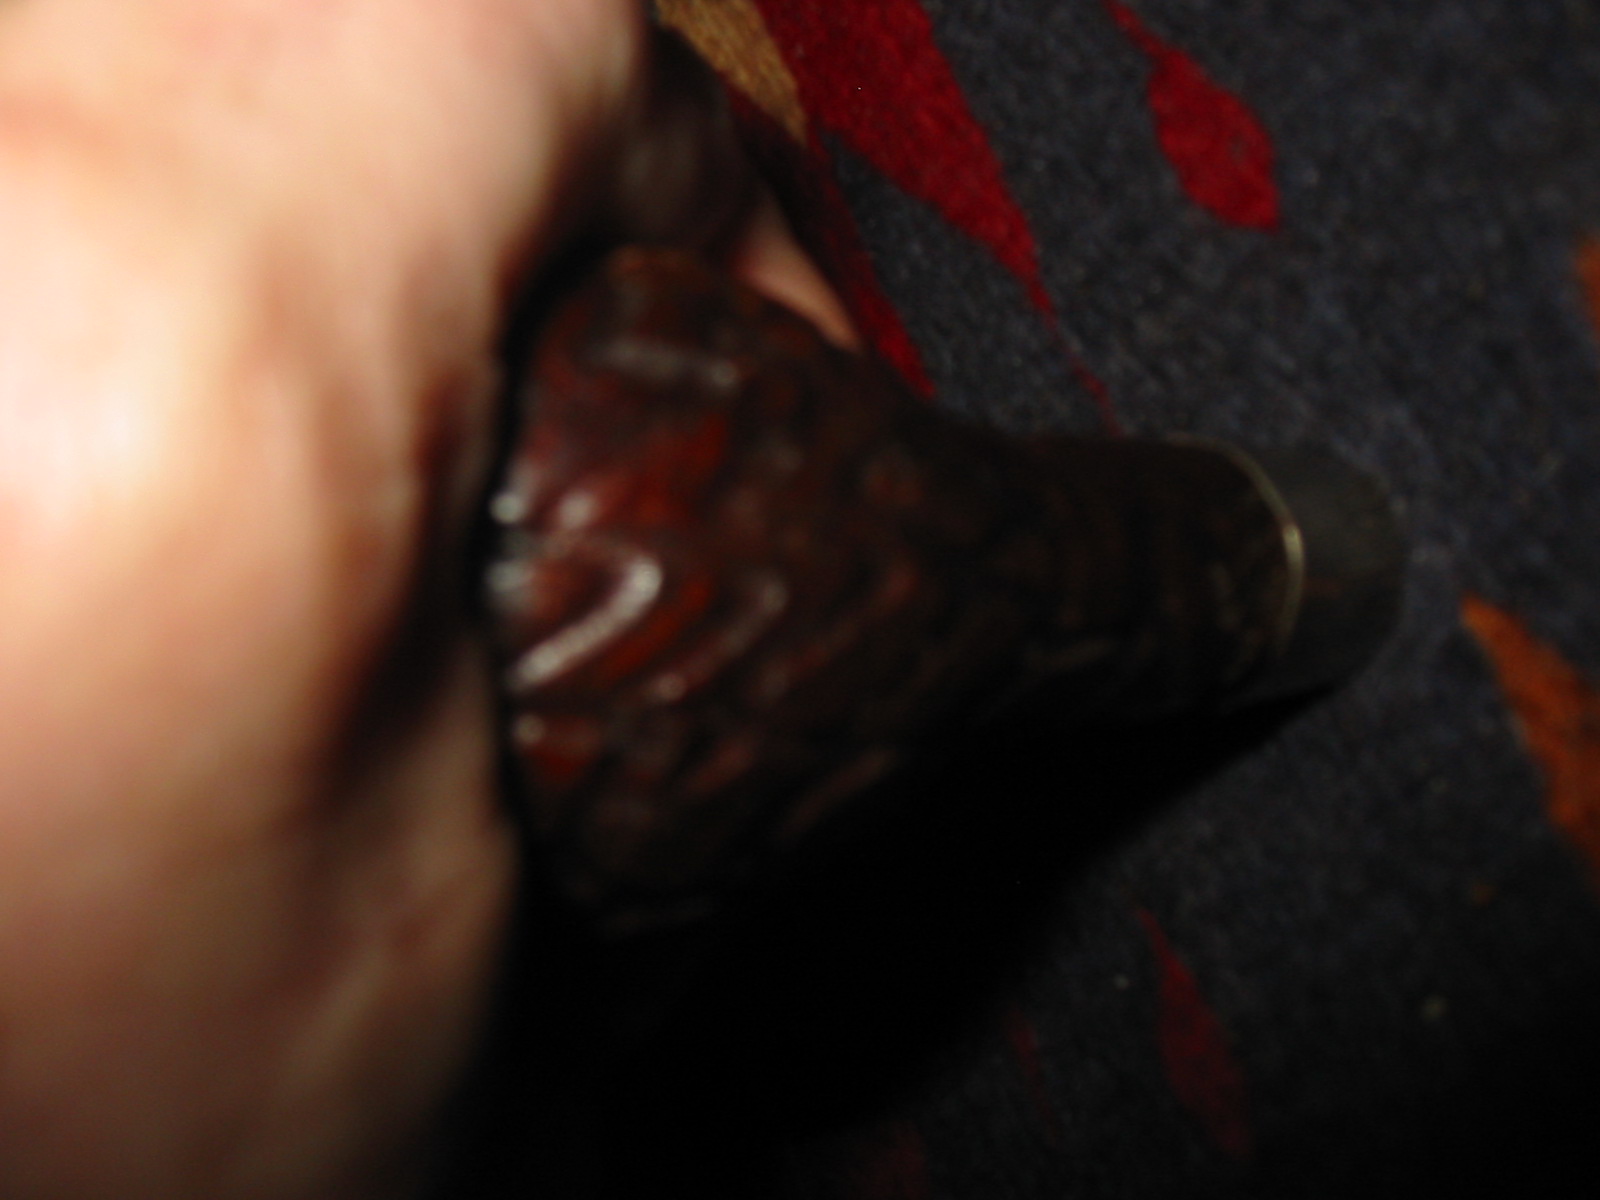
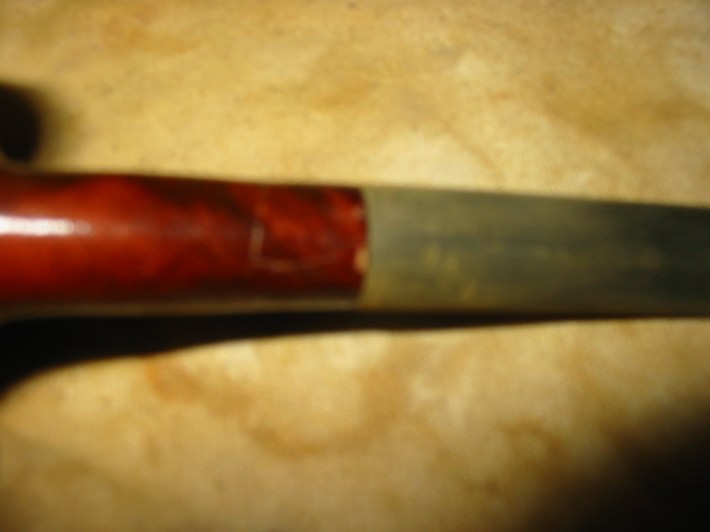
I wiped down the bowl with acetone and in doing so found a hairline crack in the shank on the underside of the pipe. I don’t believe this was done in fitting the stem as the fit is actually very precise and smooth. There was no stress on the shank from the new stem. The look of the crack also was dirty and showed that it had been there for awhile. The next two photos below show the crack in the shank on the underside.

ImageImage

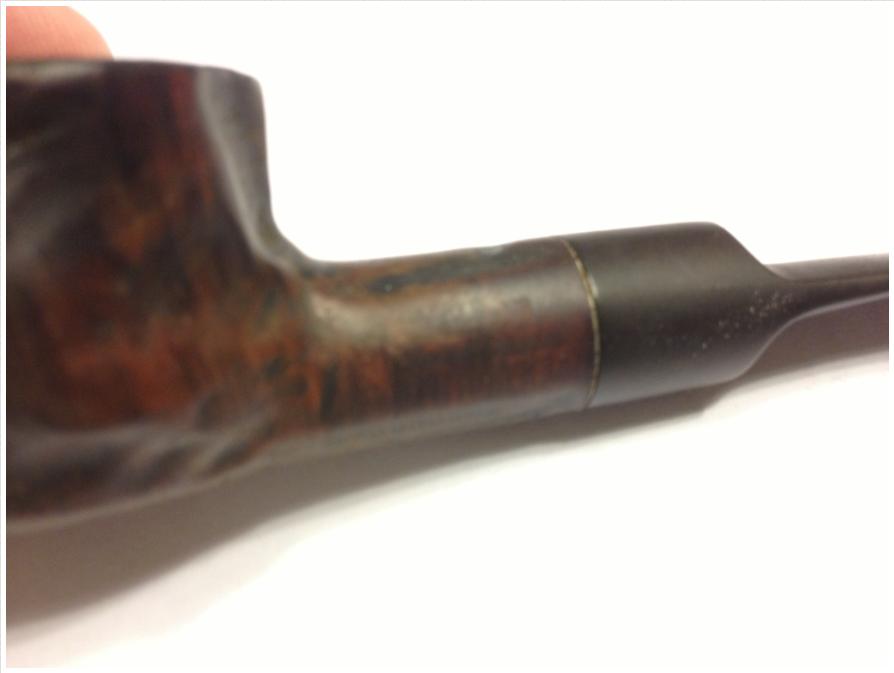
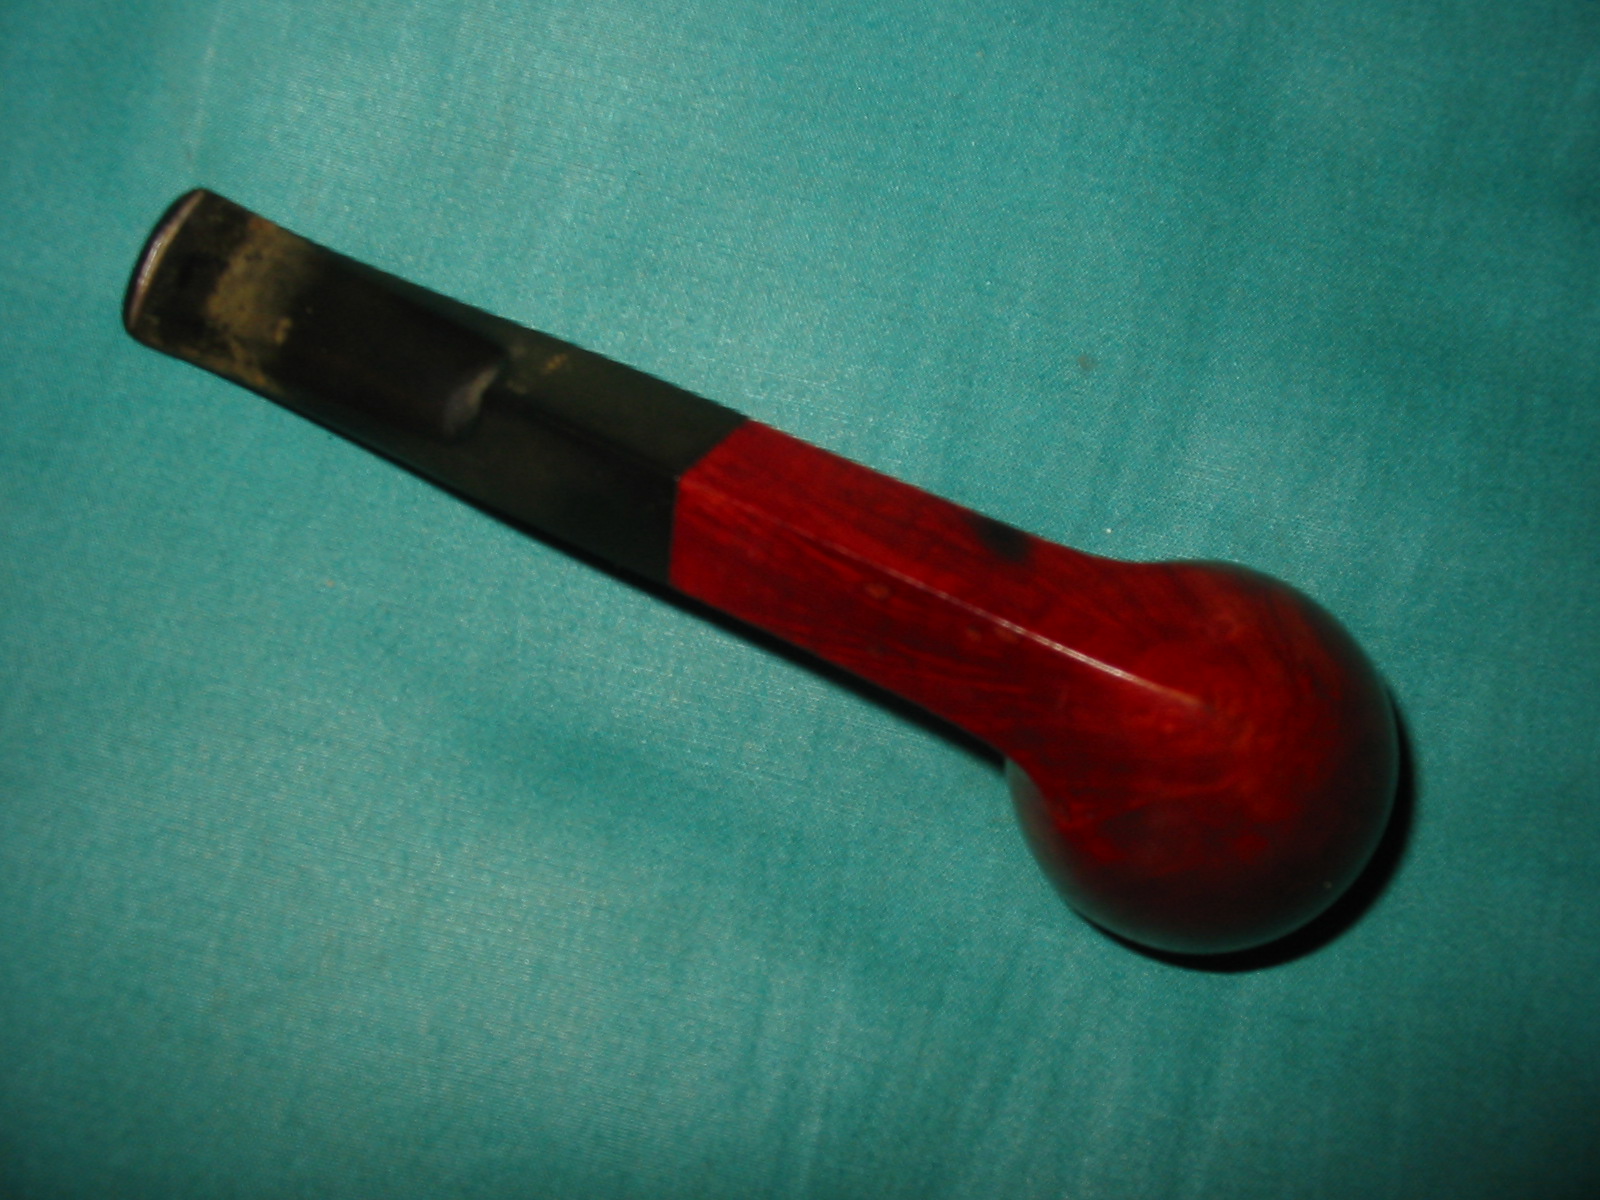
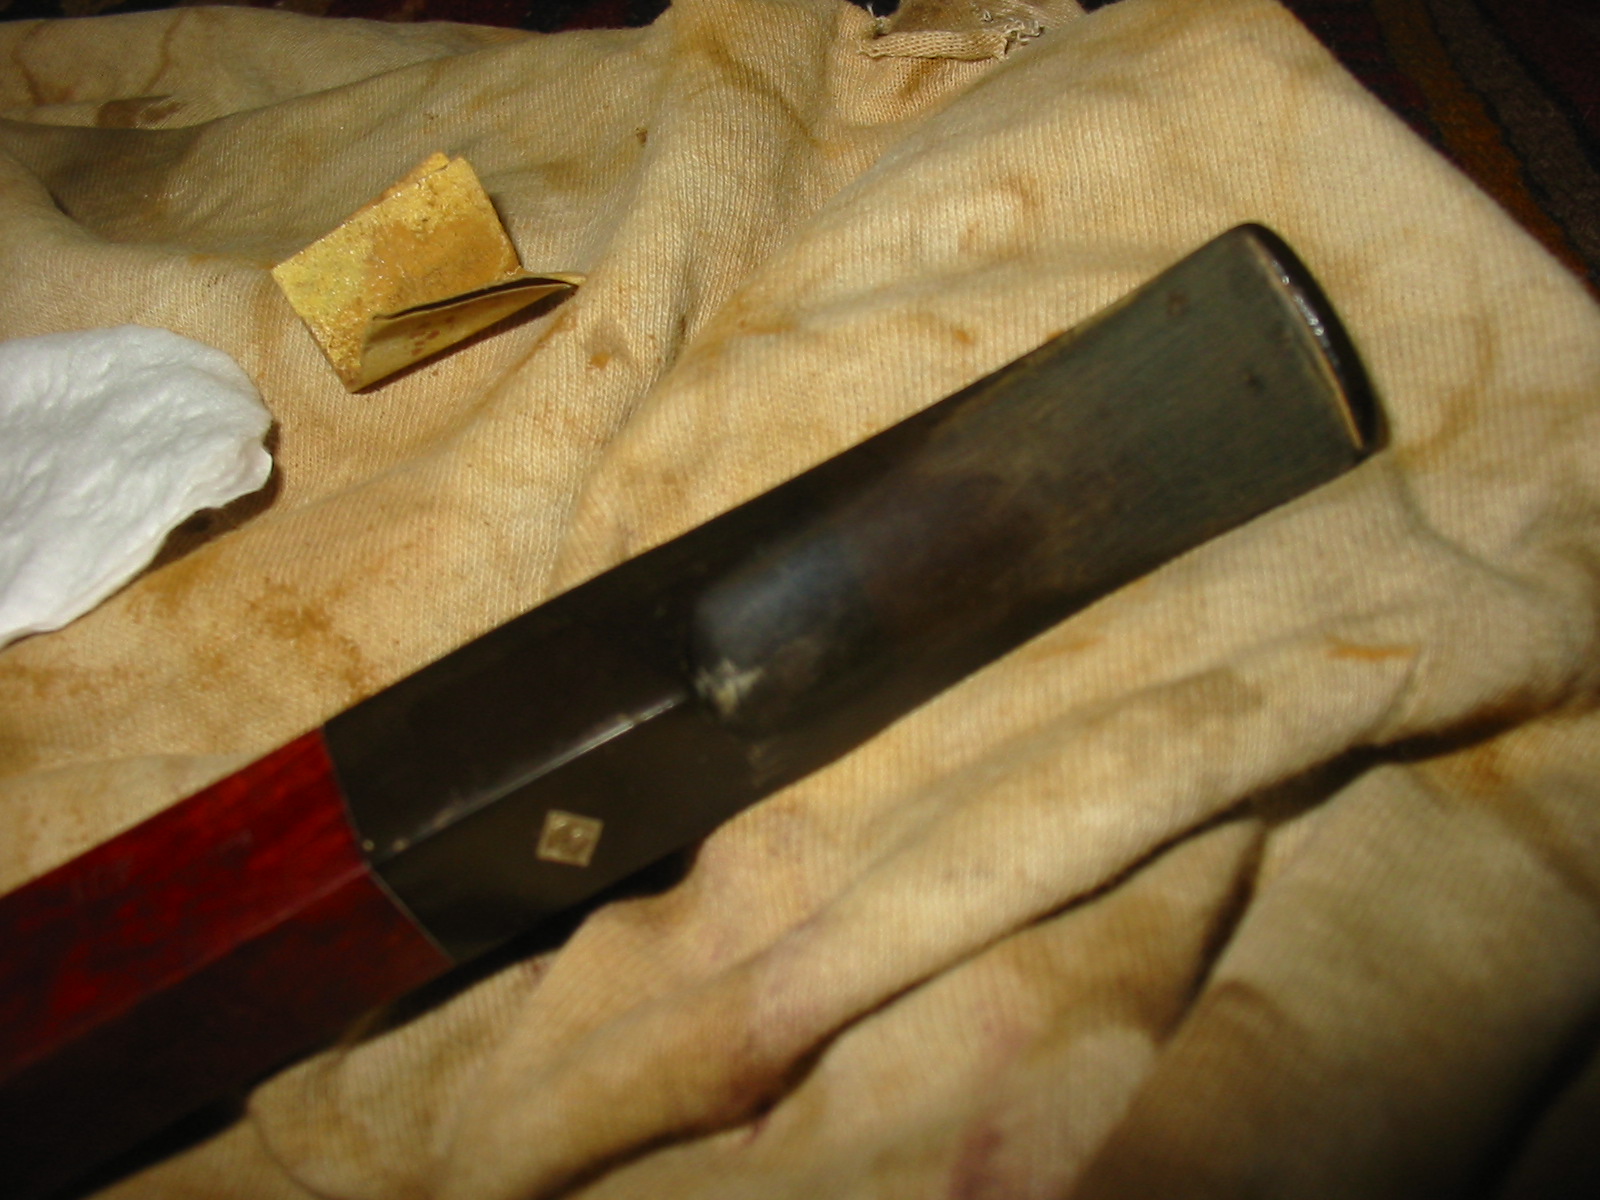
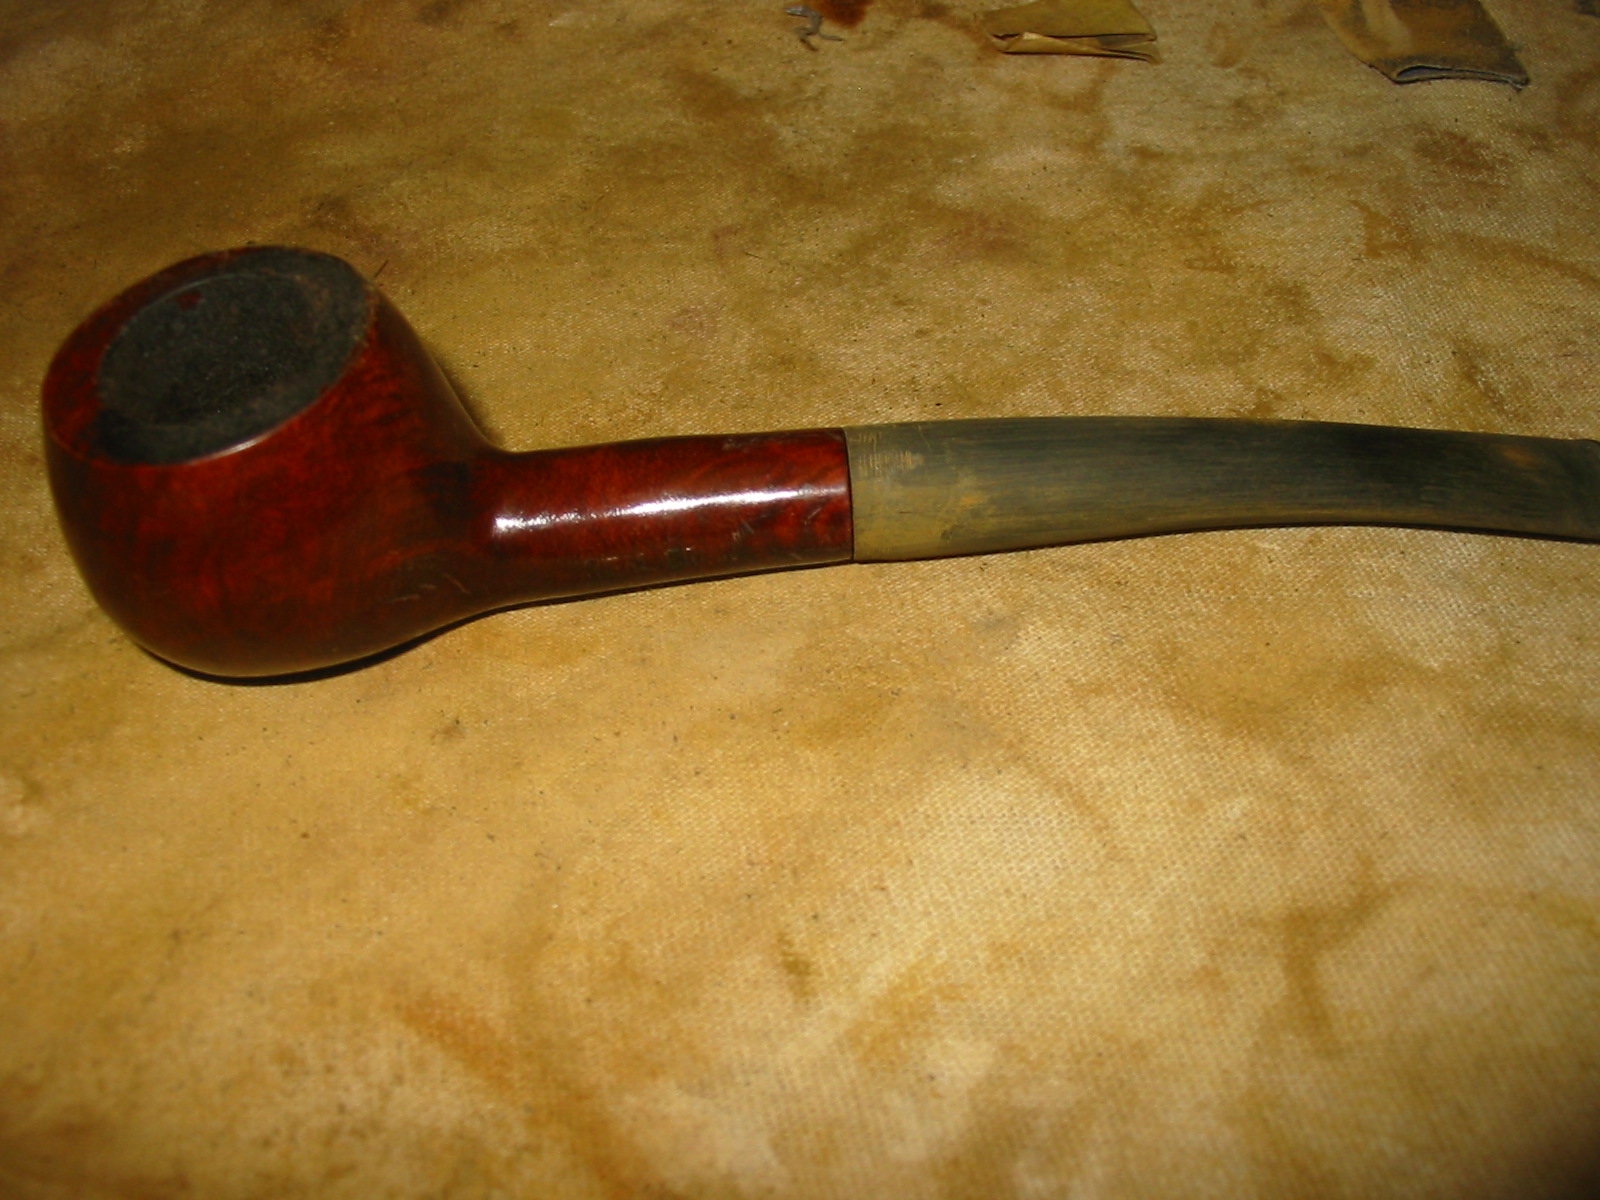
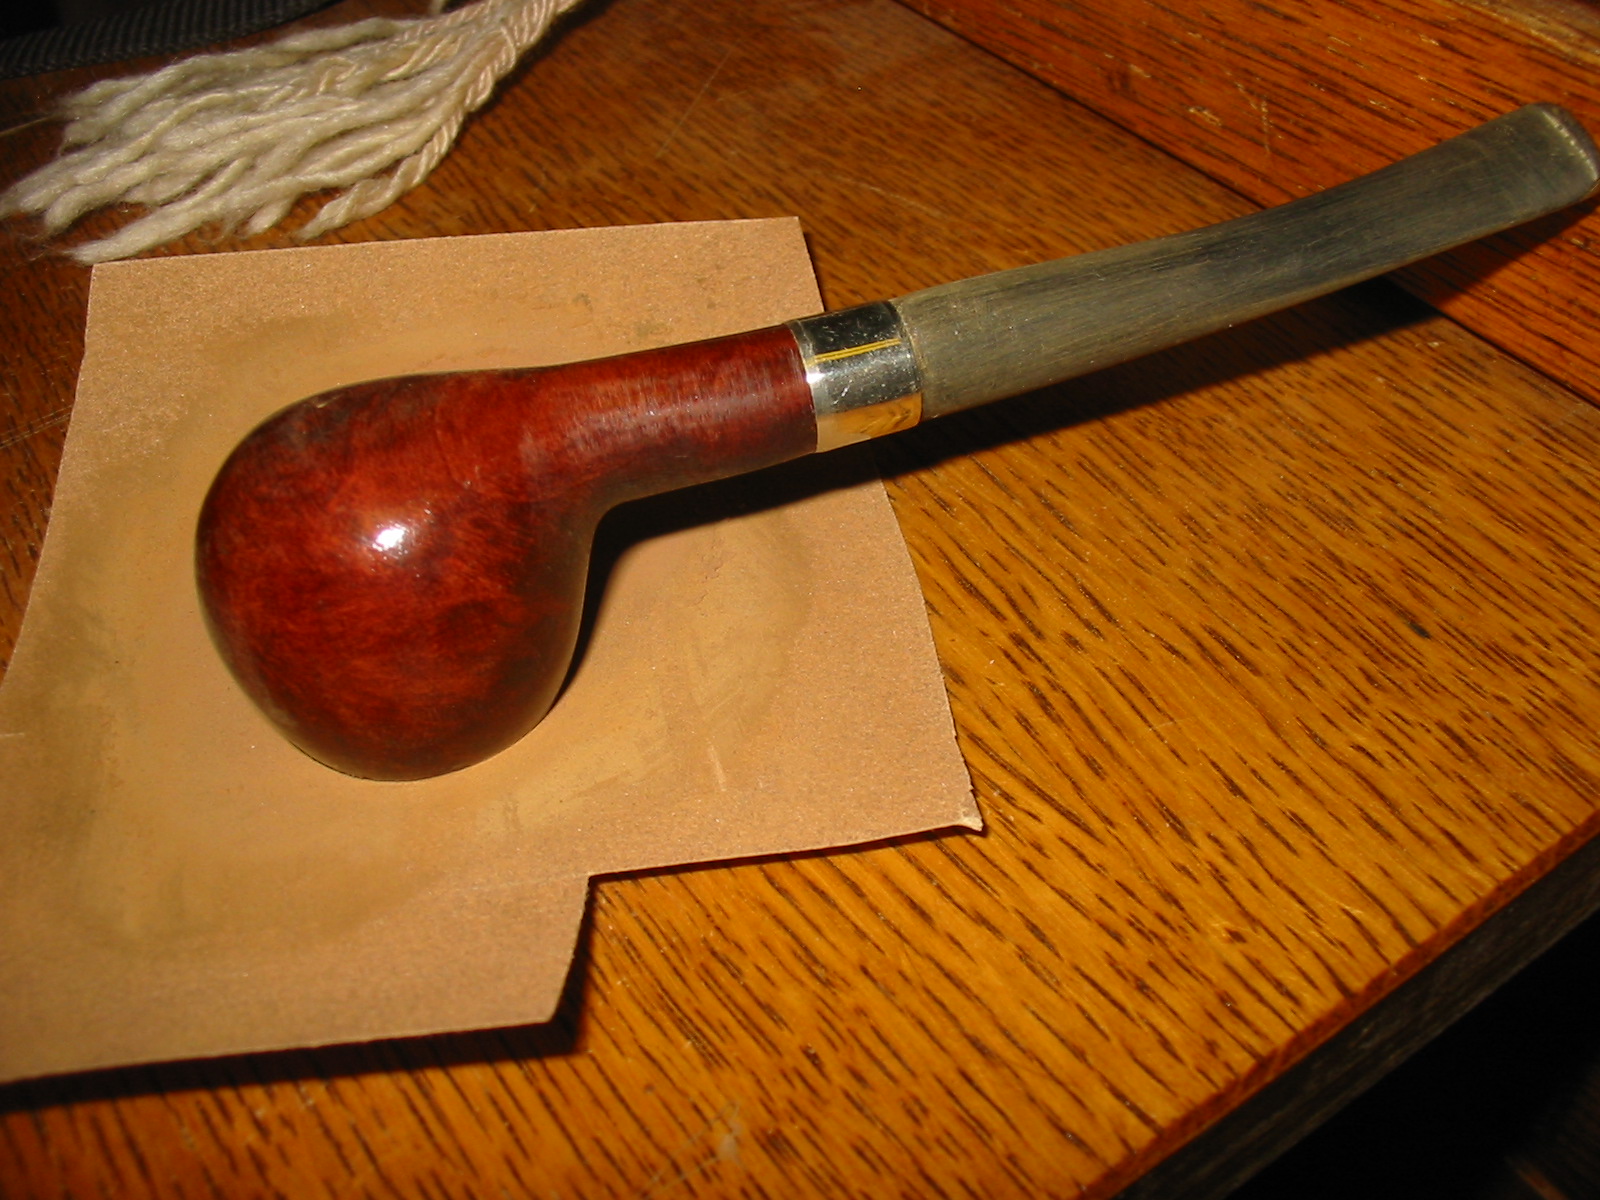
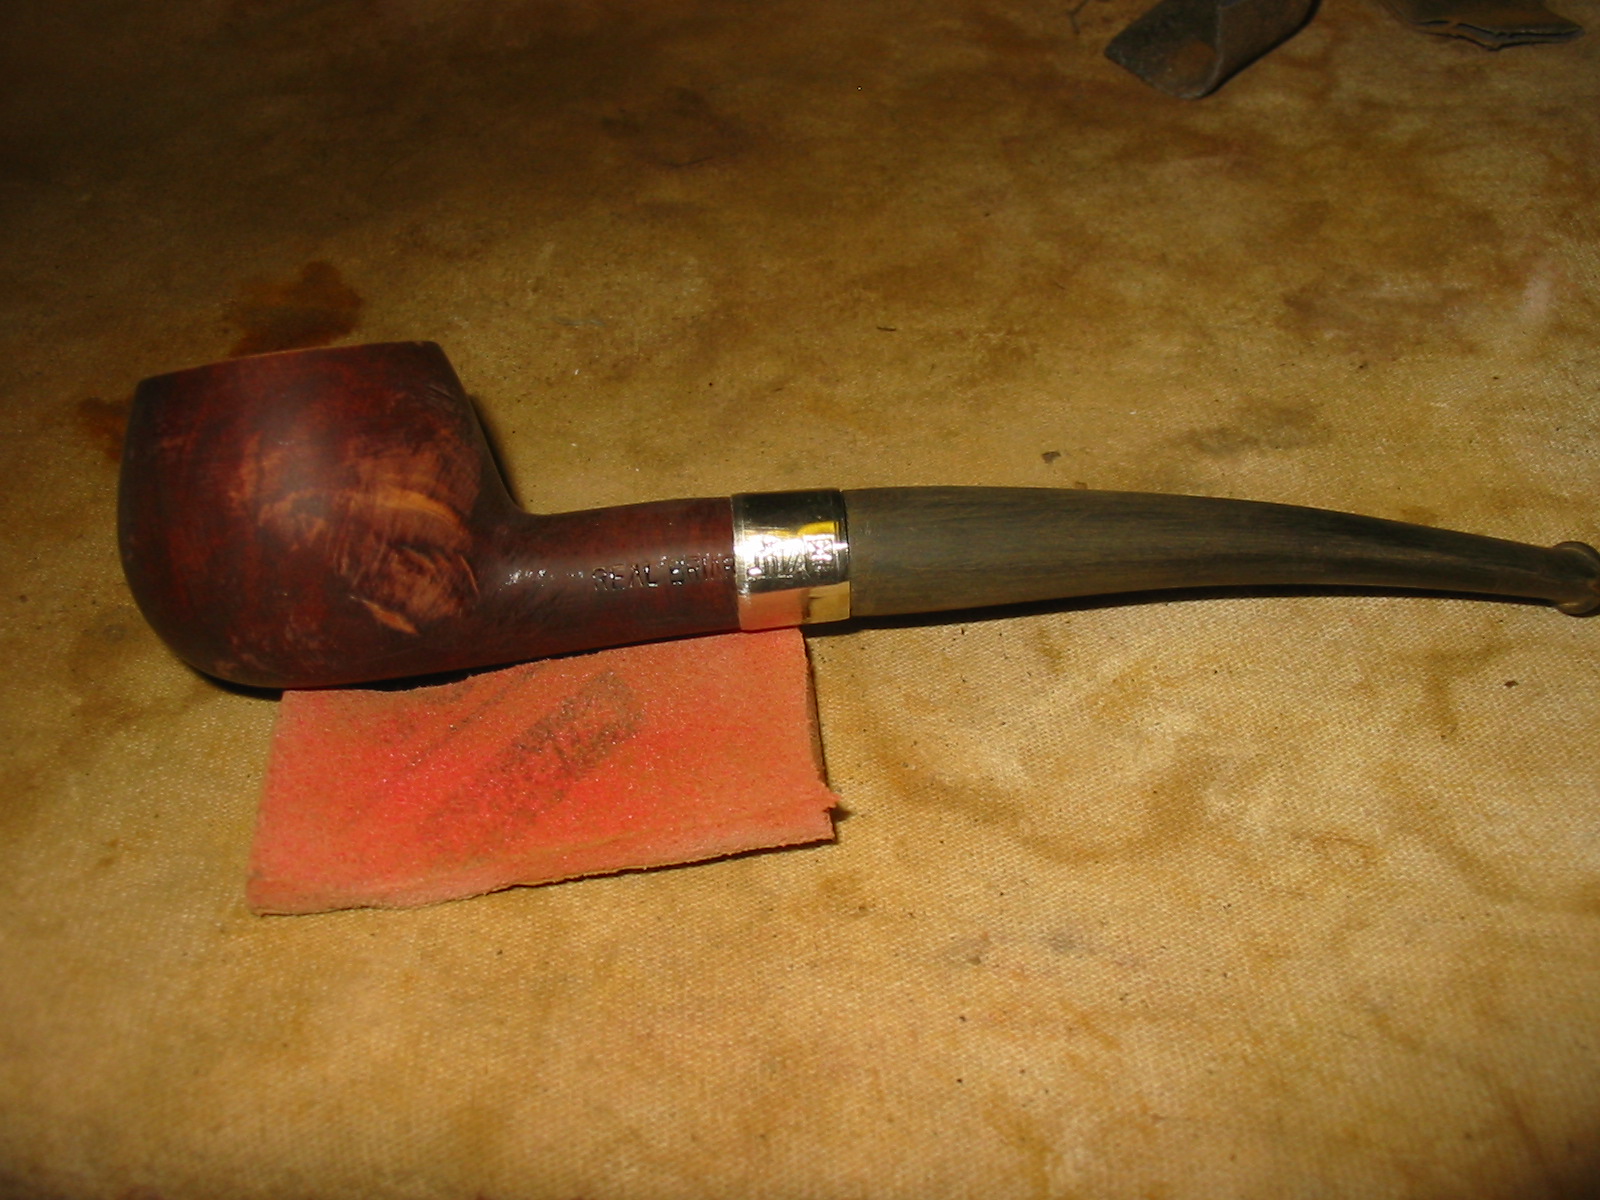
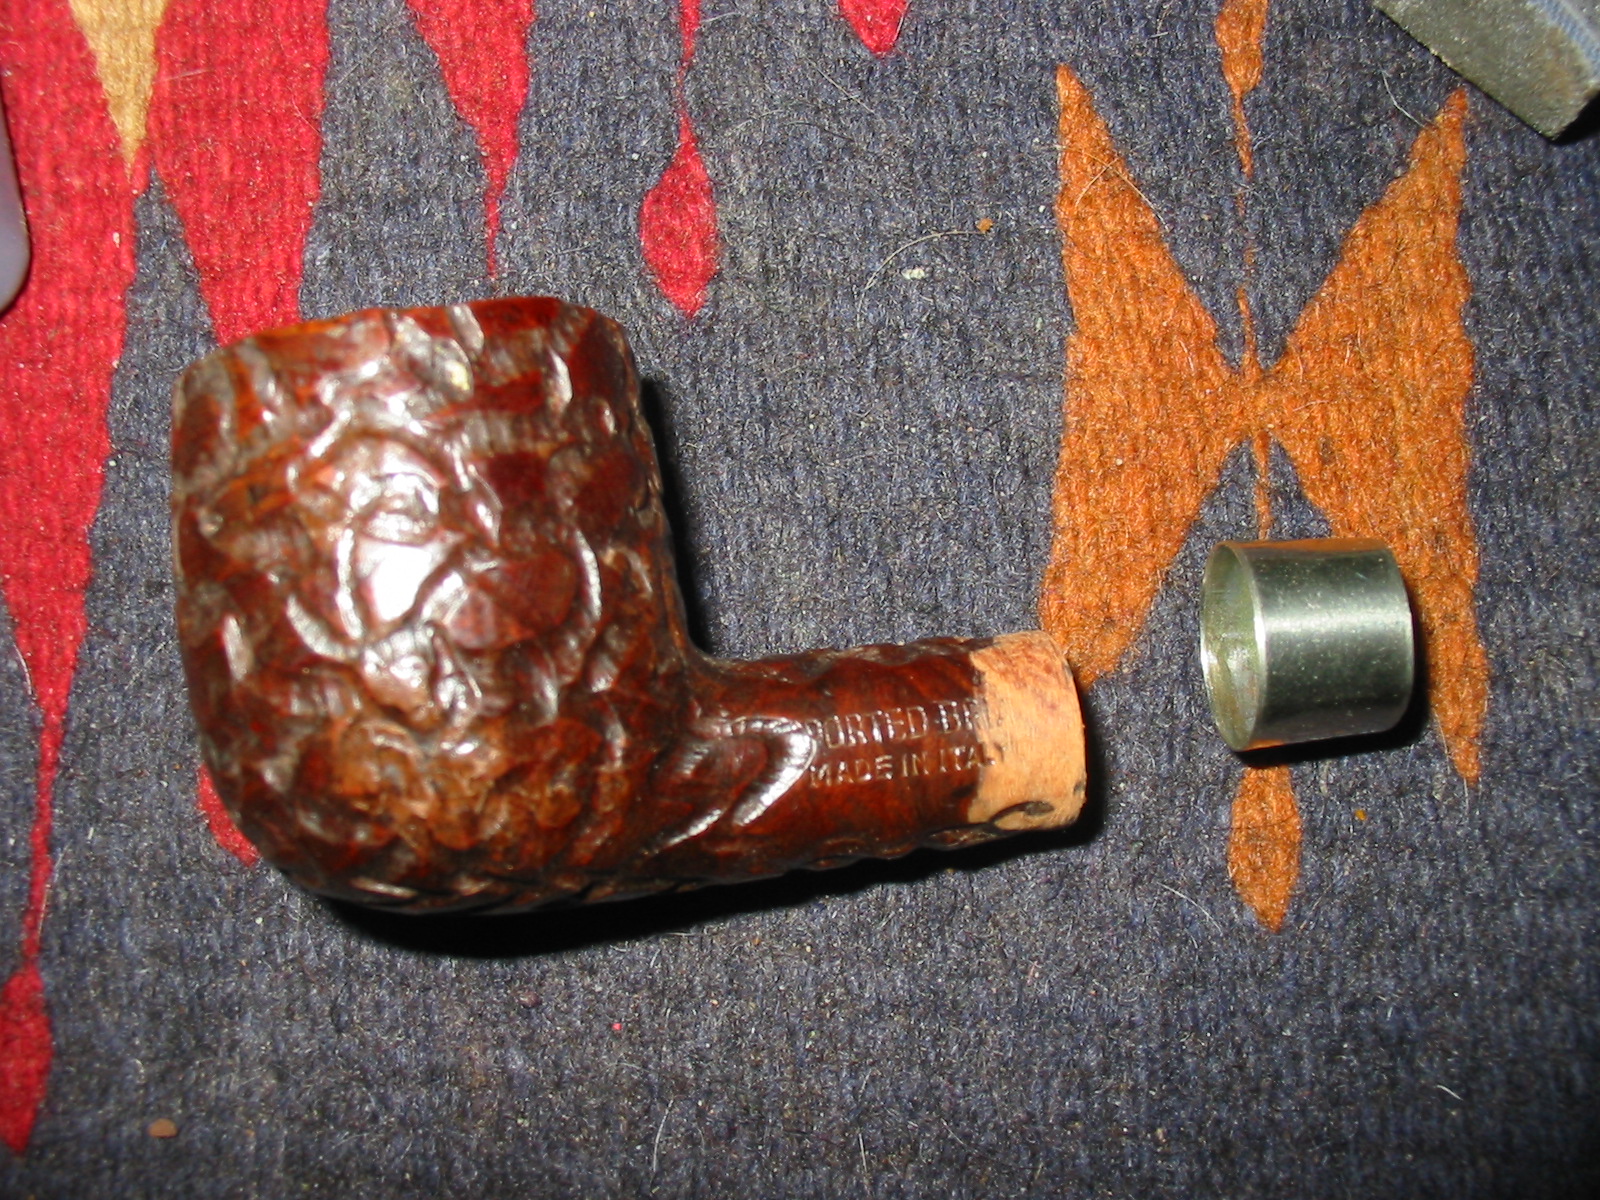
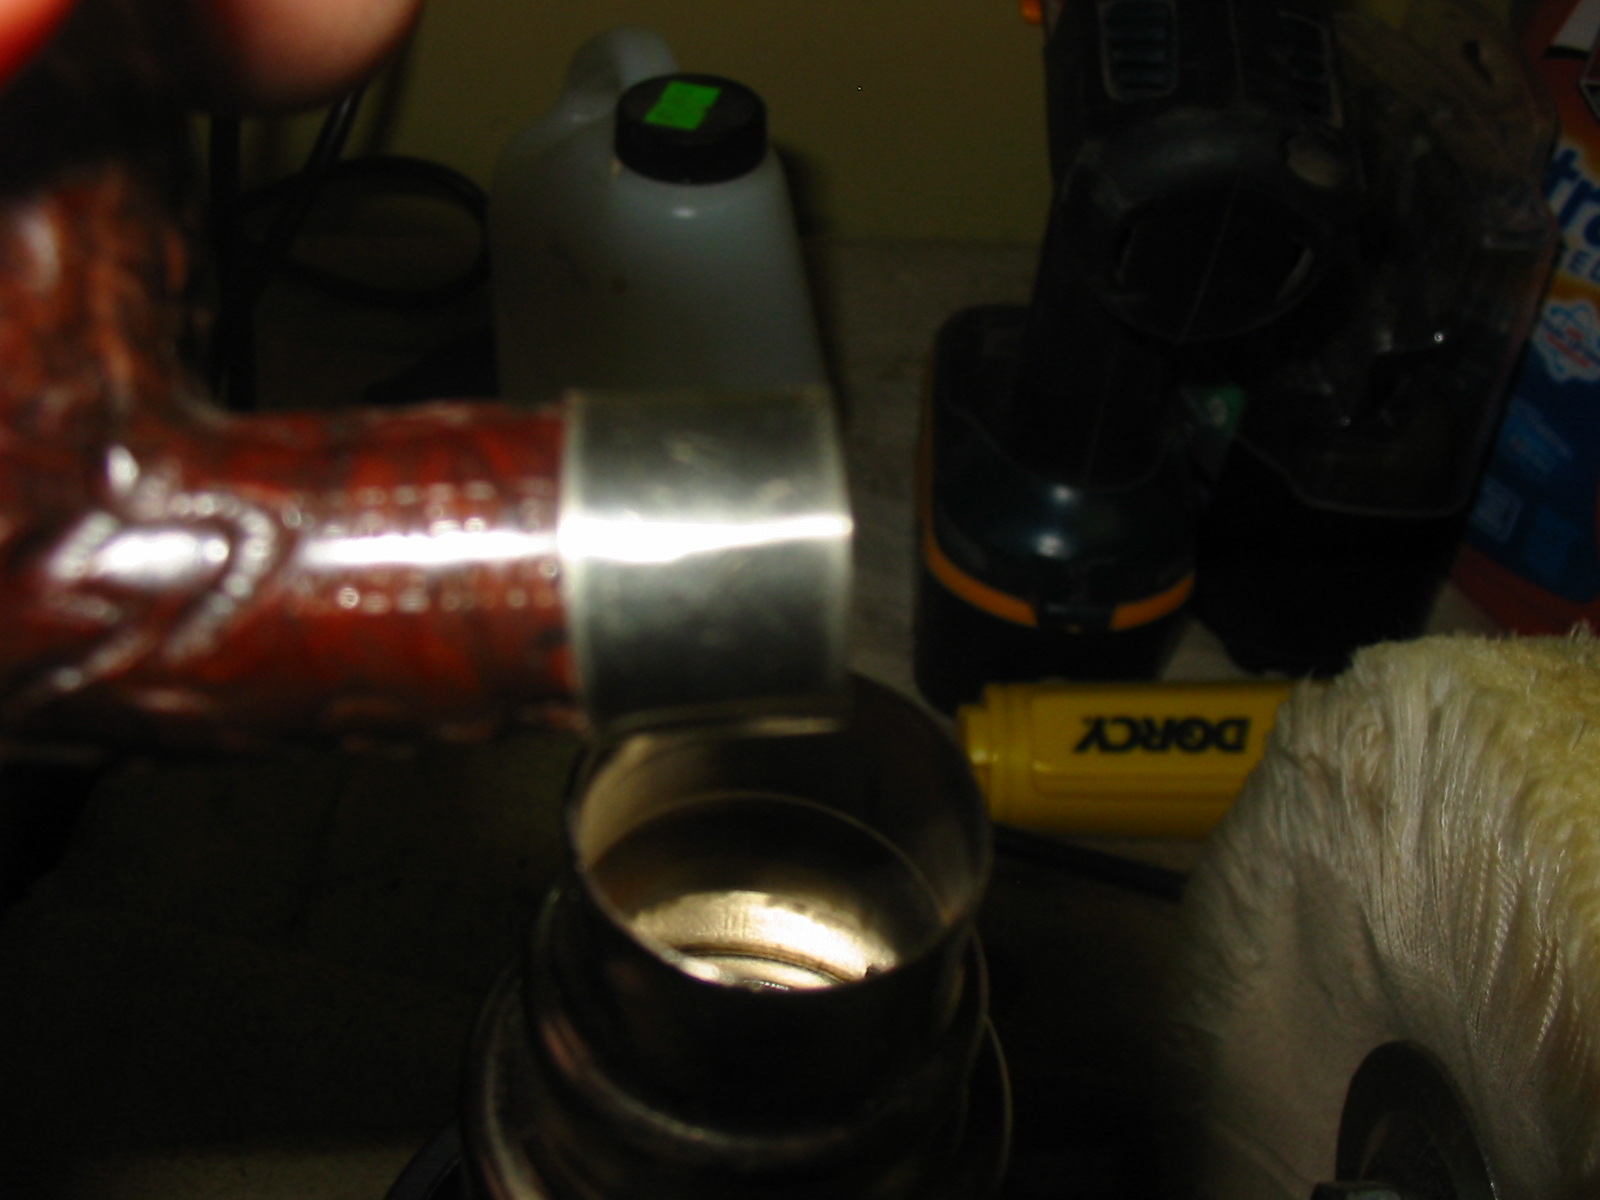
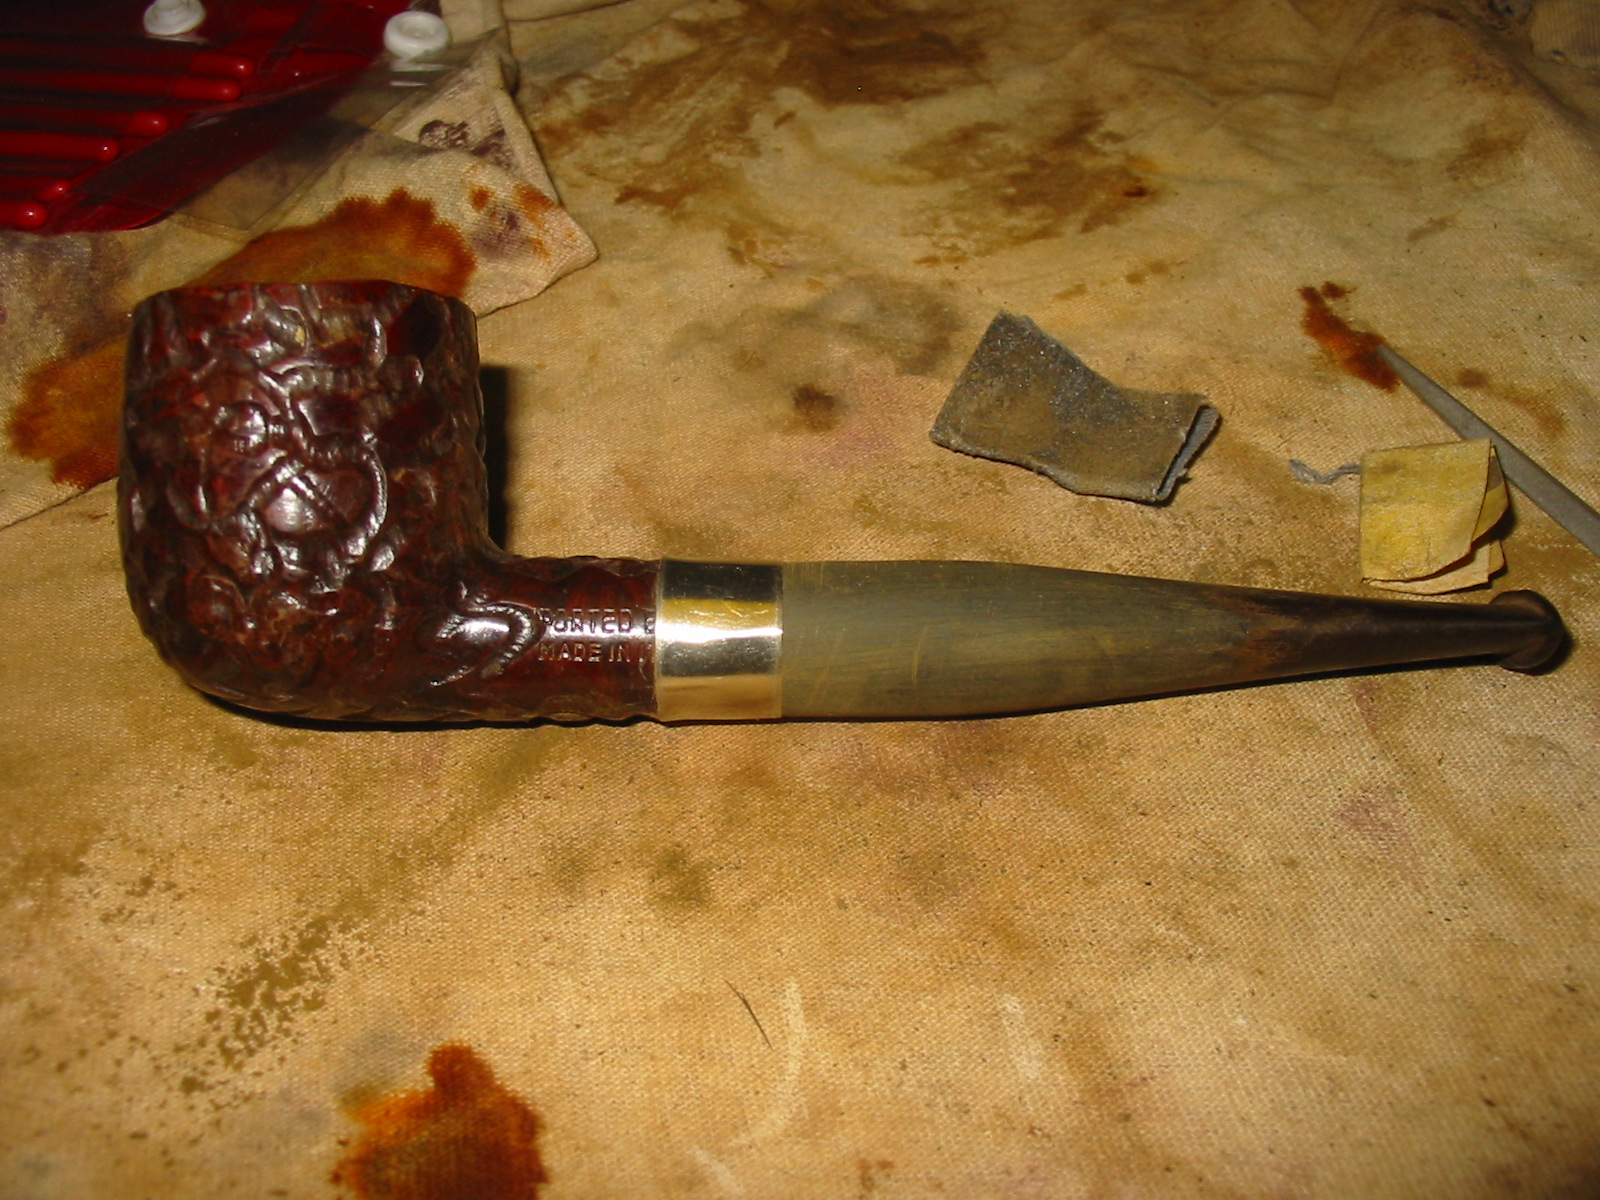
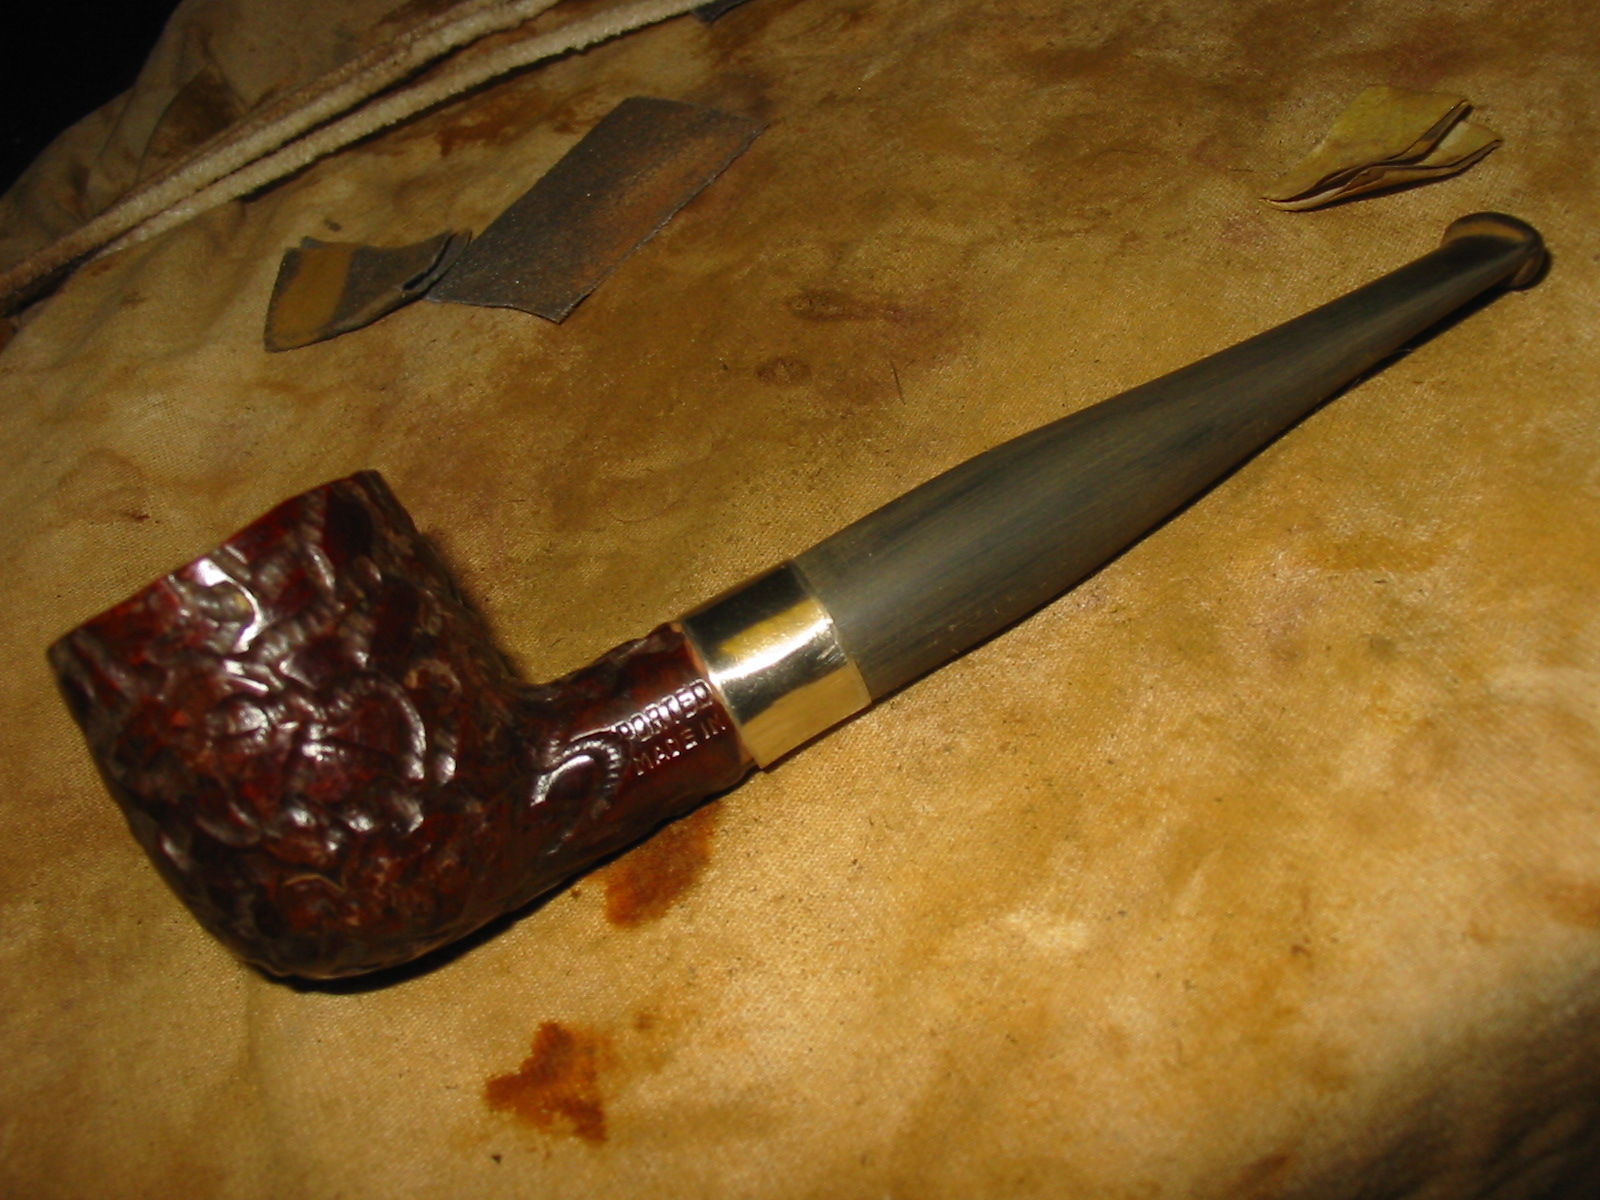
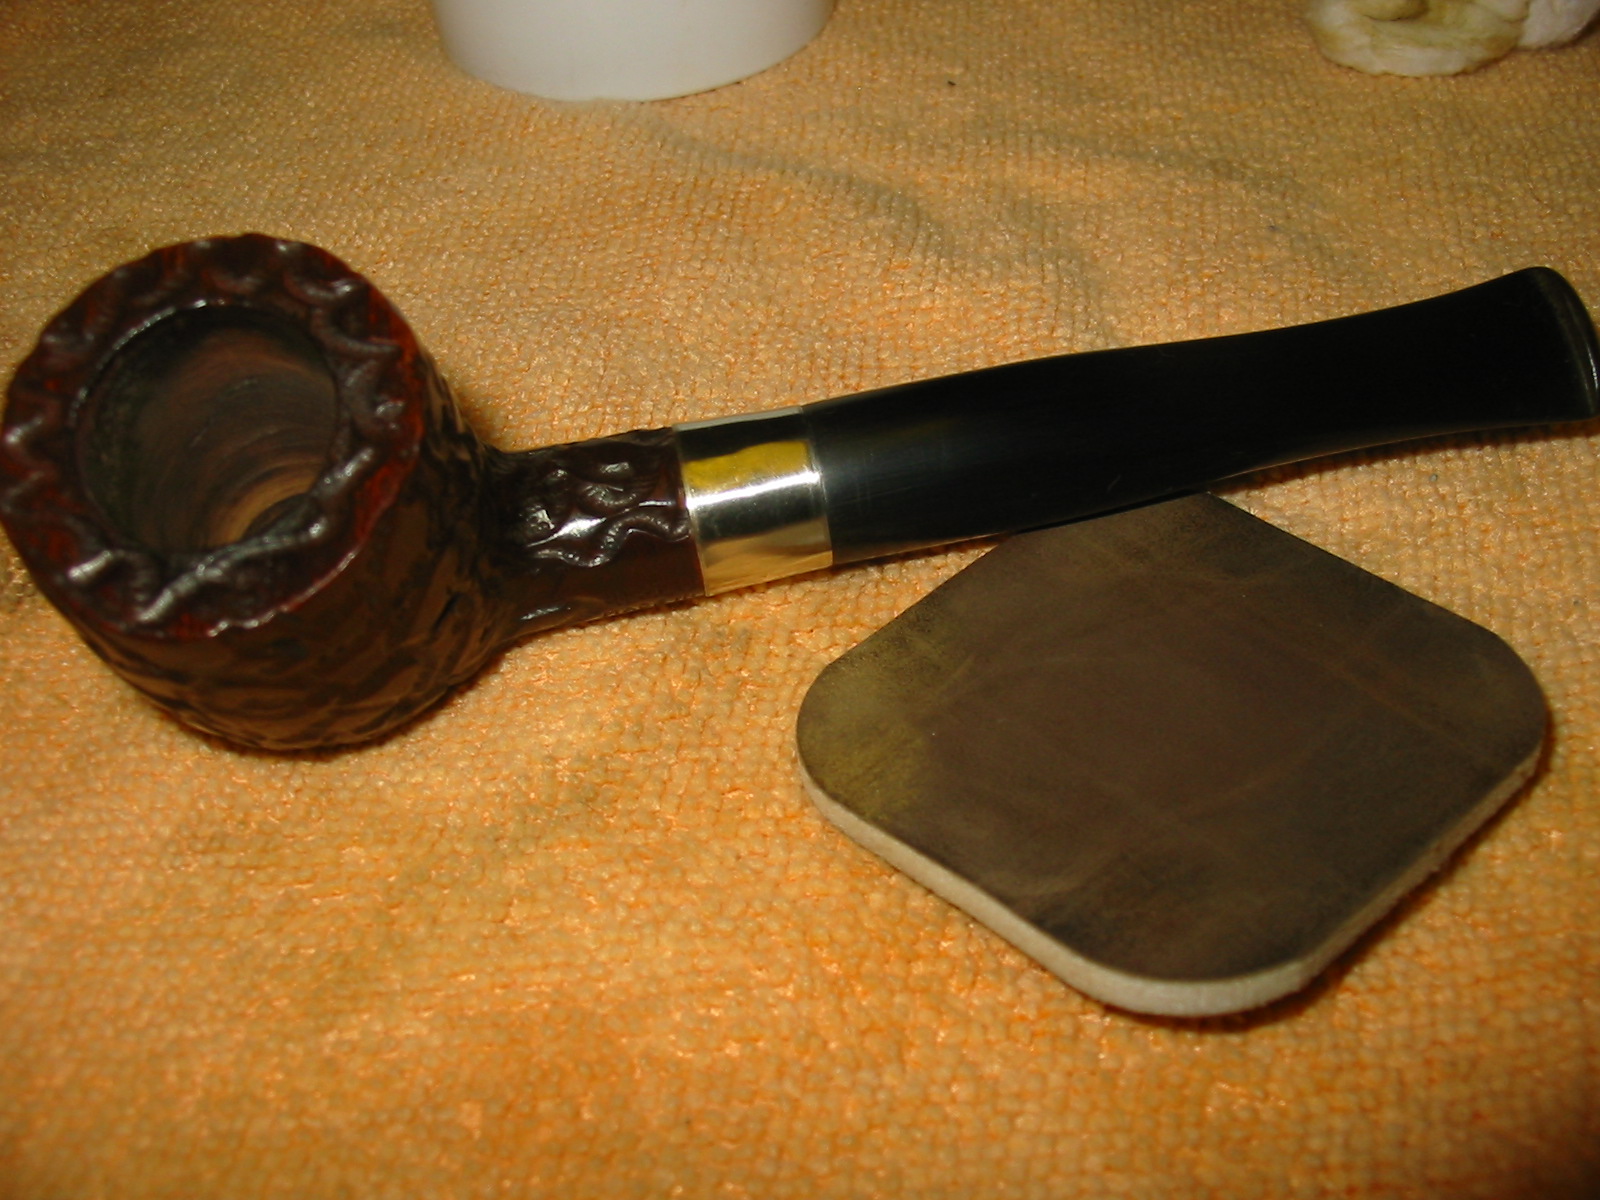
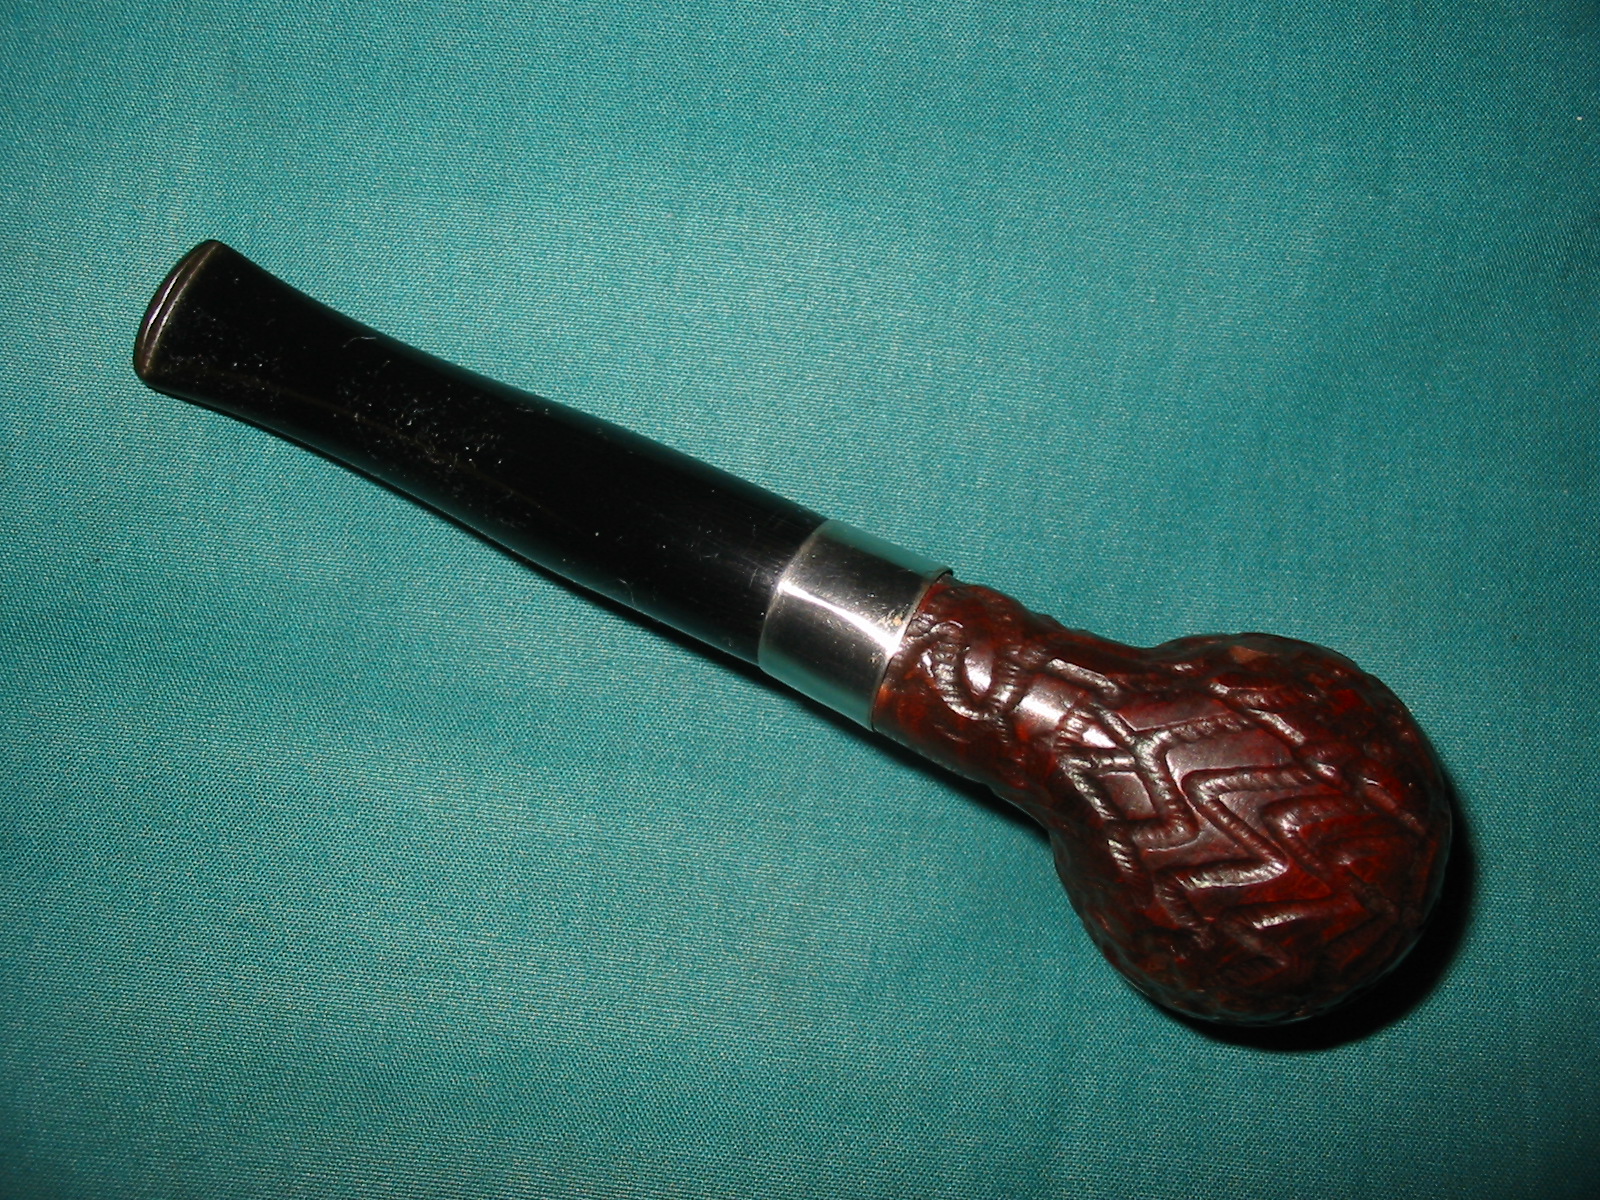
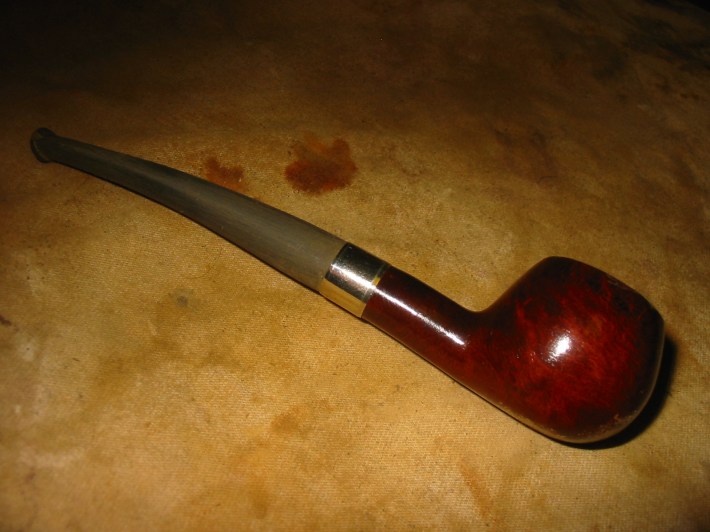
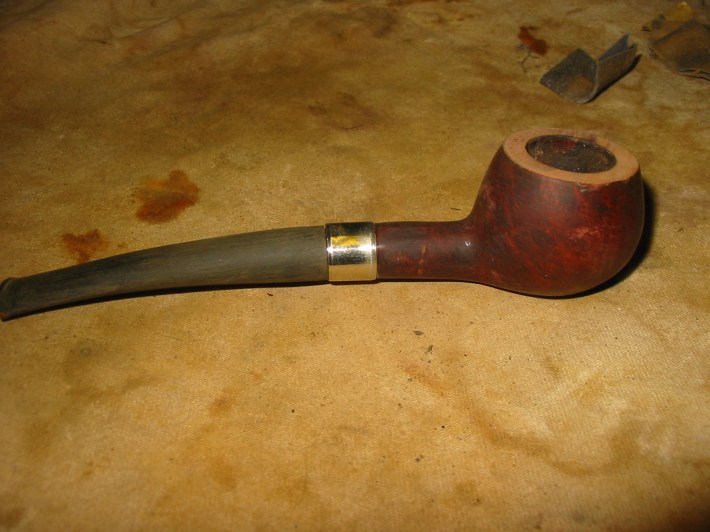
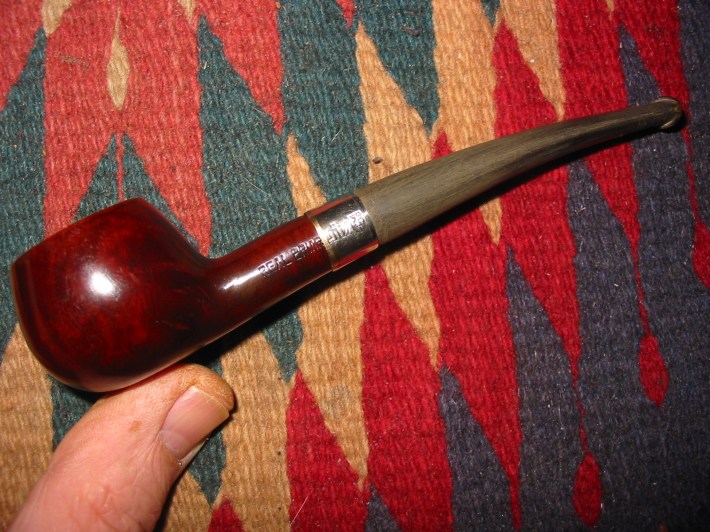
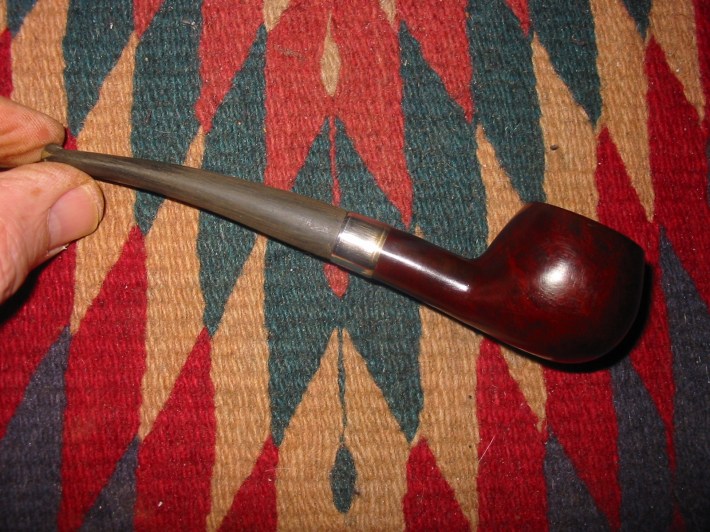
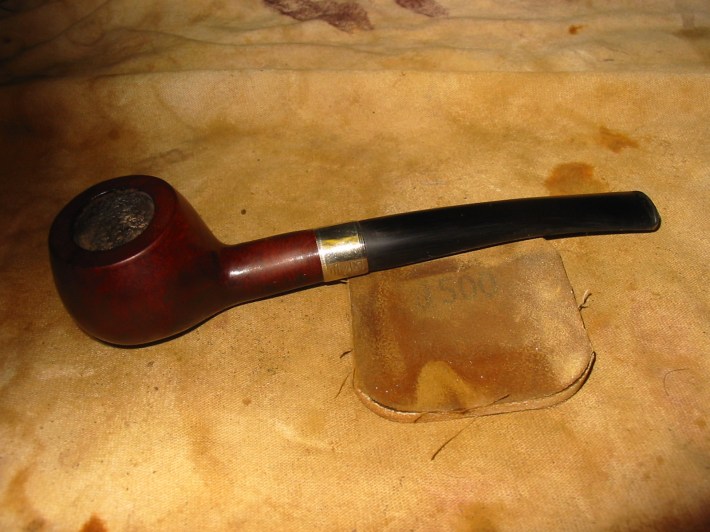
I dripped some superglue into the crack and then heated a nickel band and pressure fit it on the shank. I then took a little more of the stem material off so that the fit to the band would be smooth and not bulge. The next two photos show the band and stem fit. The band seems to really dress up this old Real Briar Prince.

ImageImage

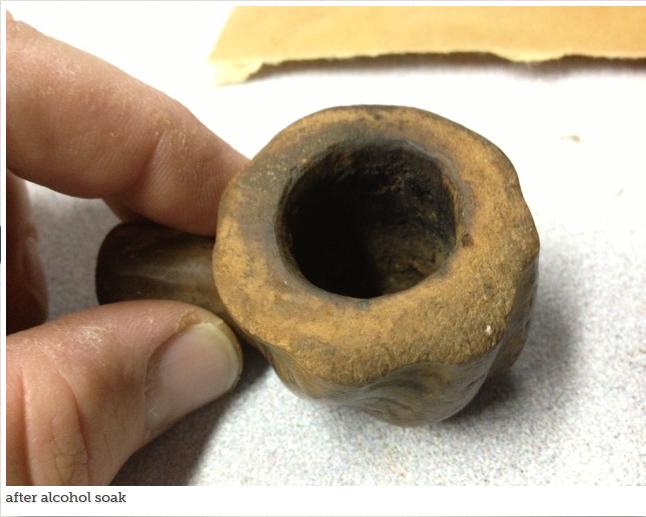
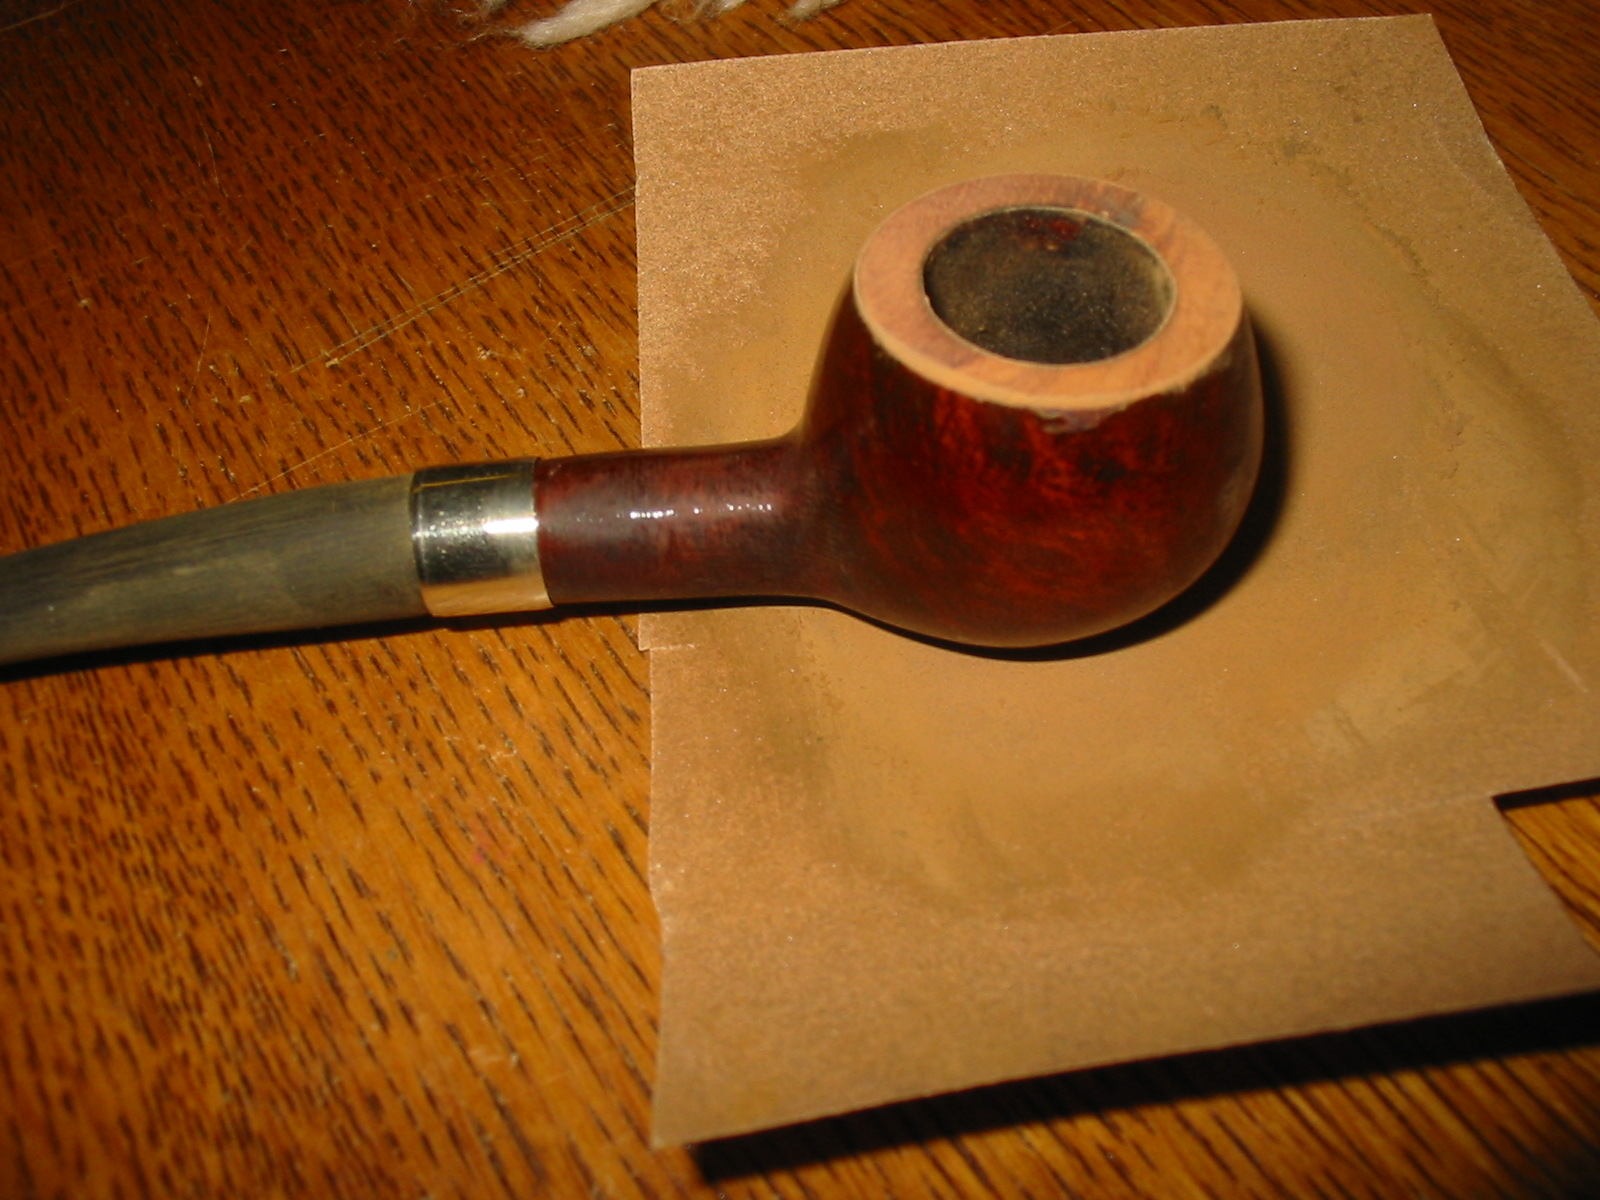
I wiped the bowl down with several more wipes of acetone on a cotton pad to break up the varnish coat. I have found that the acetone softens the varnish and makes it easier to sand off with sand paper. I also decided to sand off the rim to get rid of the hard tars. The next two photos show the process I use for sanding the rim. In this case since I was restaining the pipe anyway I did not care if the finish was removed from the rim.

ImageImage

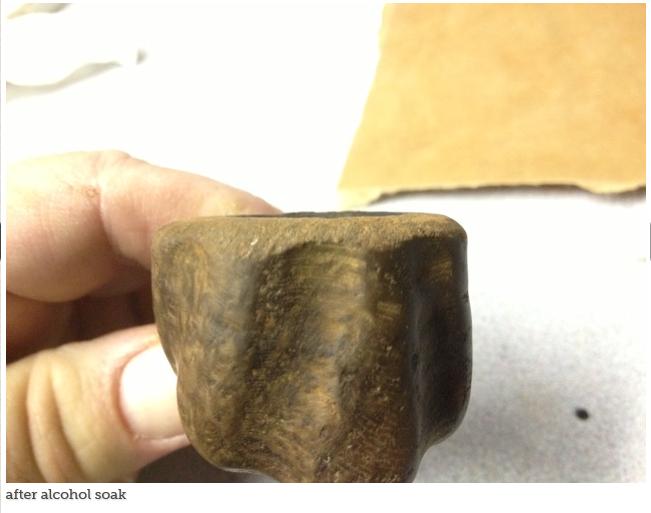
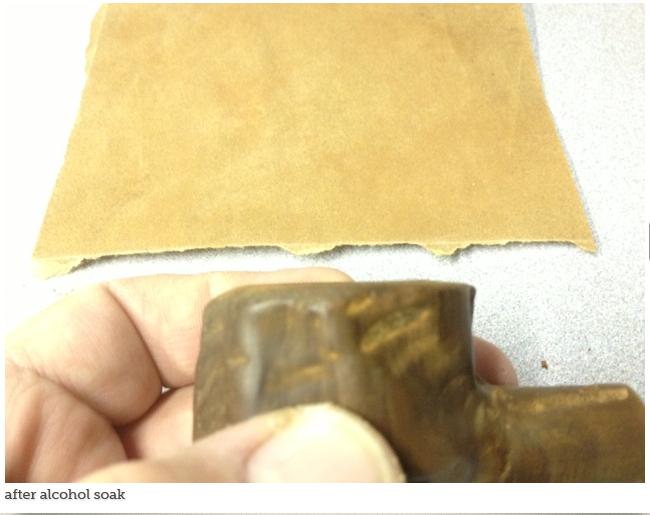
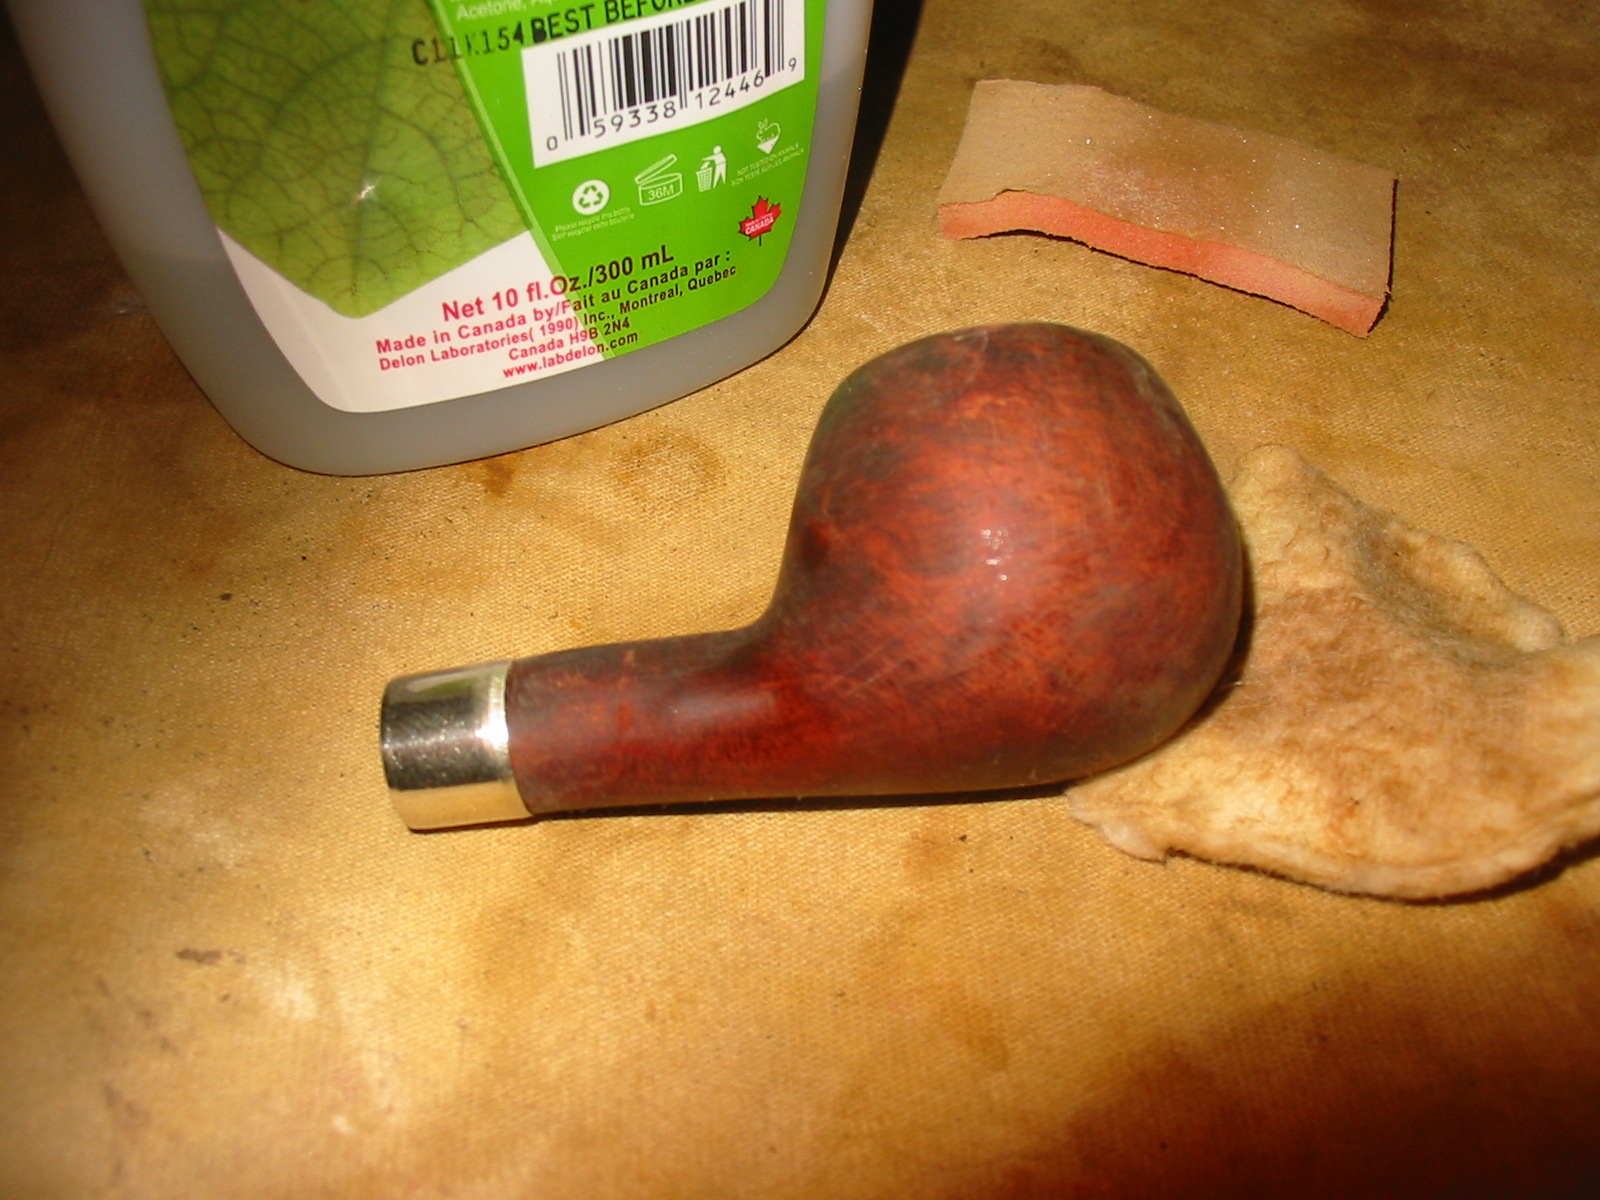
I then sanded the bowl and shank with a foam back medium grit sanding pad to remove the varnish coat. I sanded it until the bowl finish was foggy looking and then I wiped it down with acetone once again on a cotton pad. The next three photos show the result of the sanding and washing with acetone. The finish is finally beginning to break up and the briar is down to the stain coat.

ImageImageImage

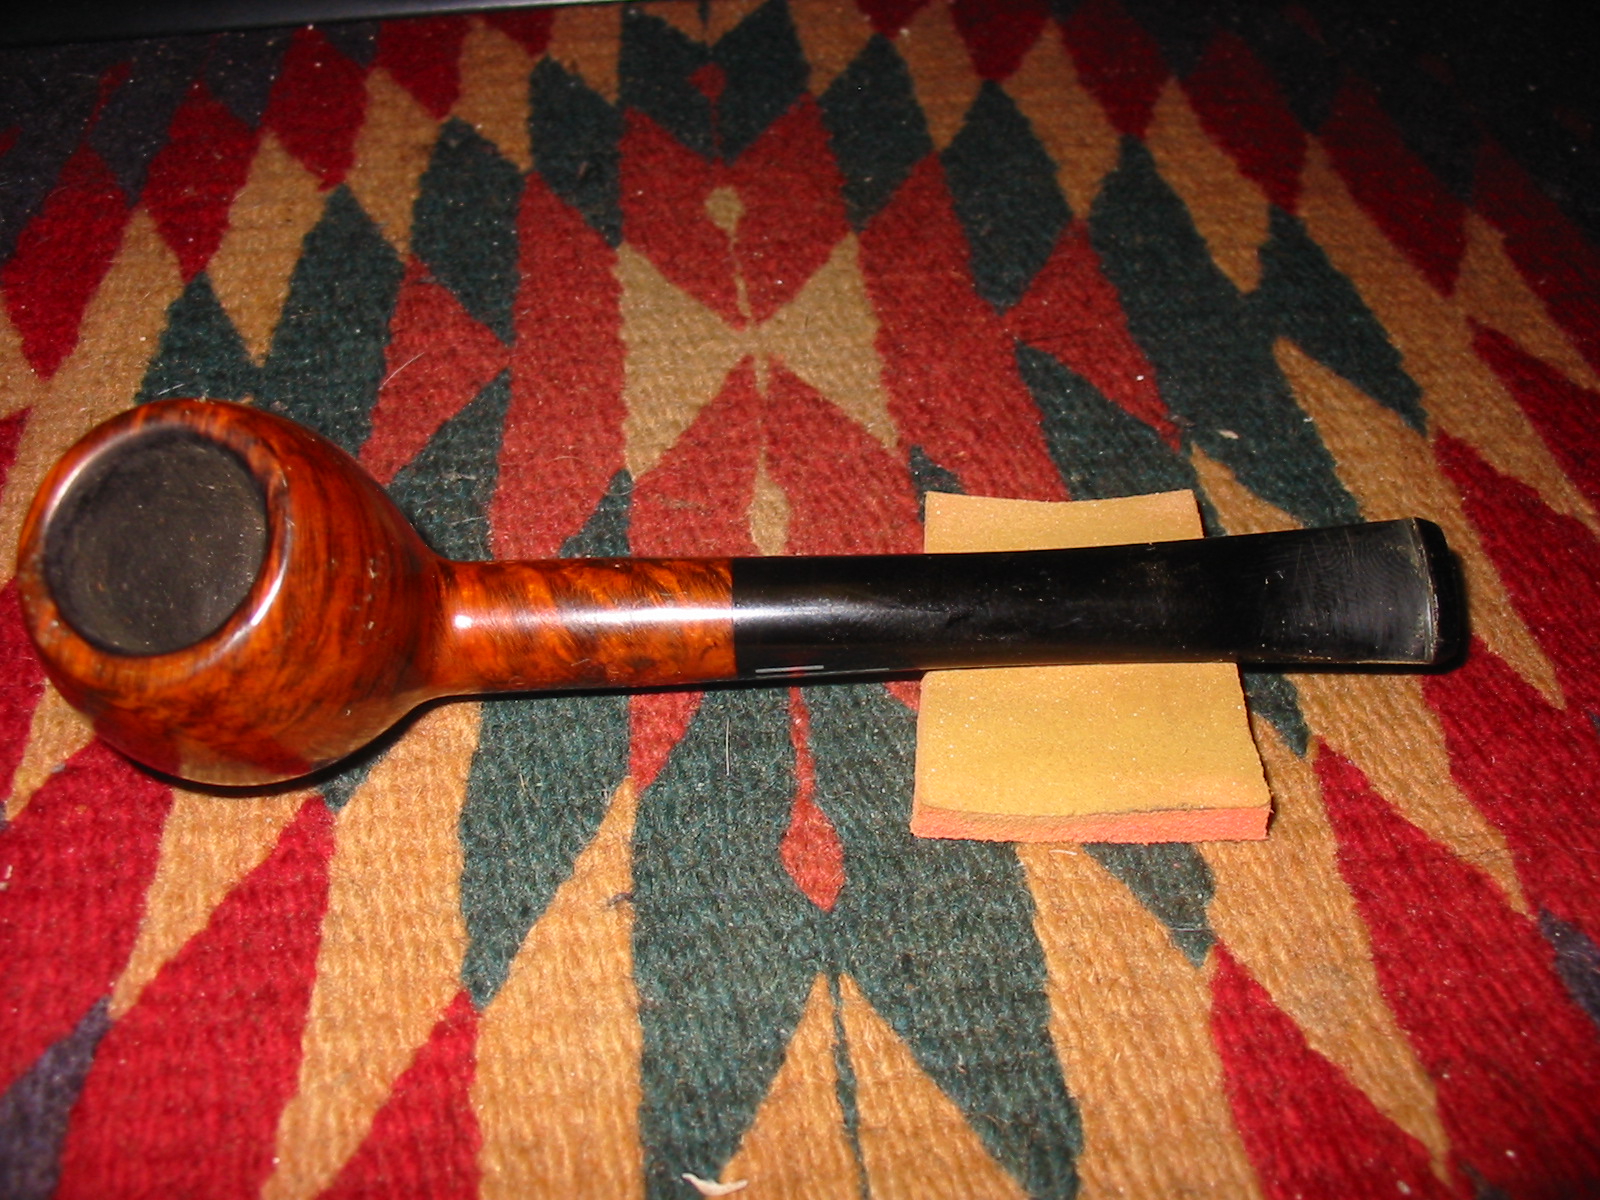
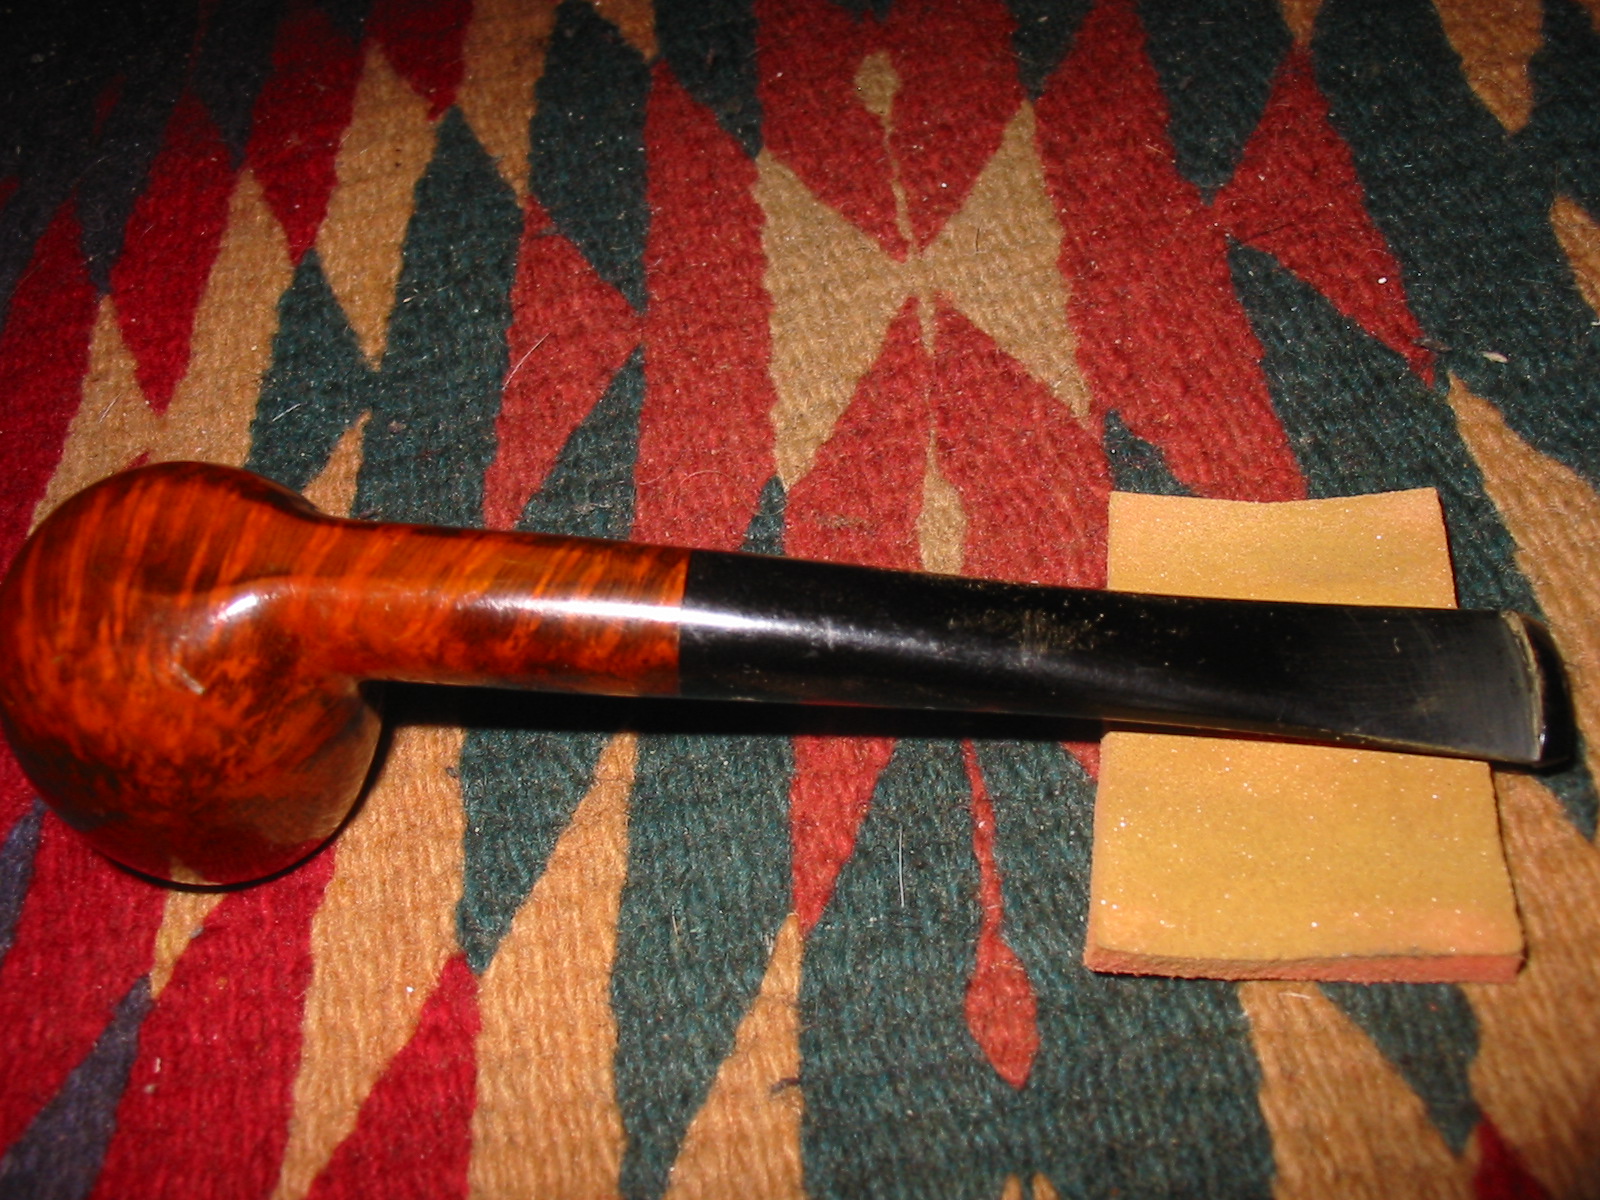
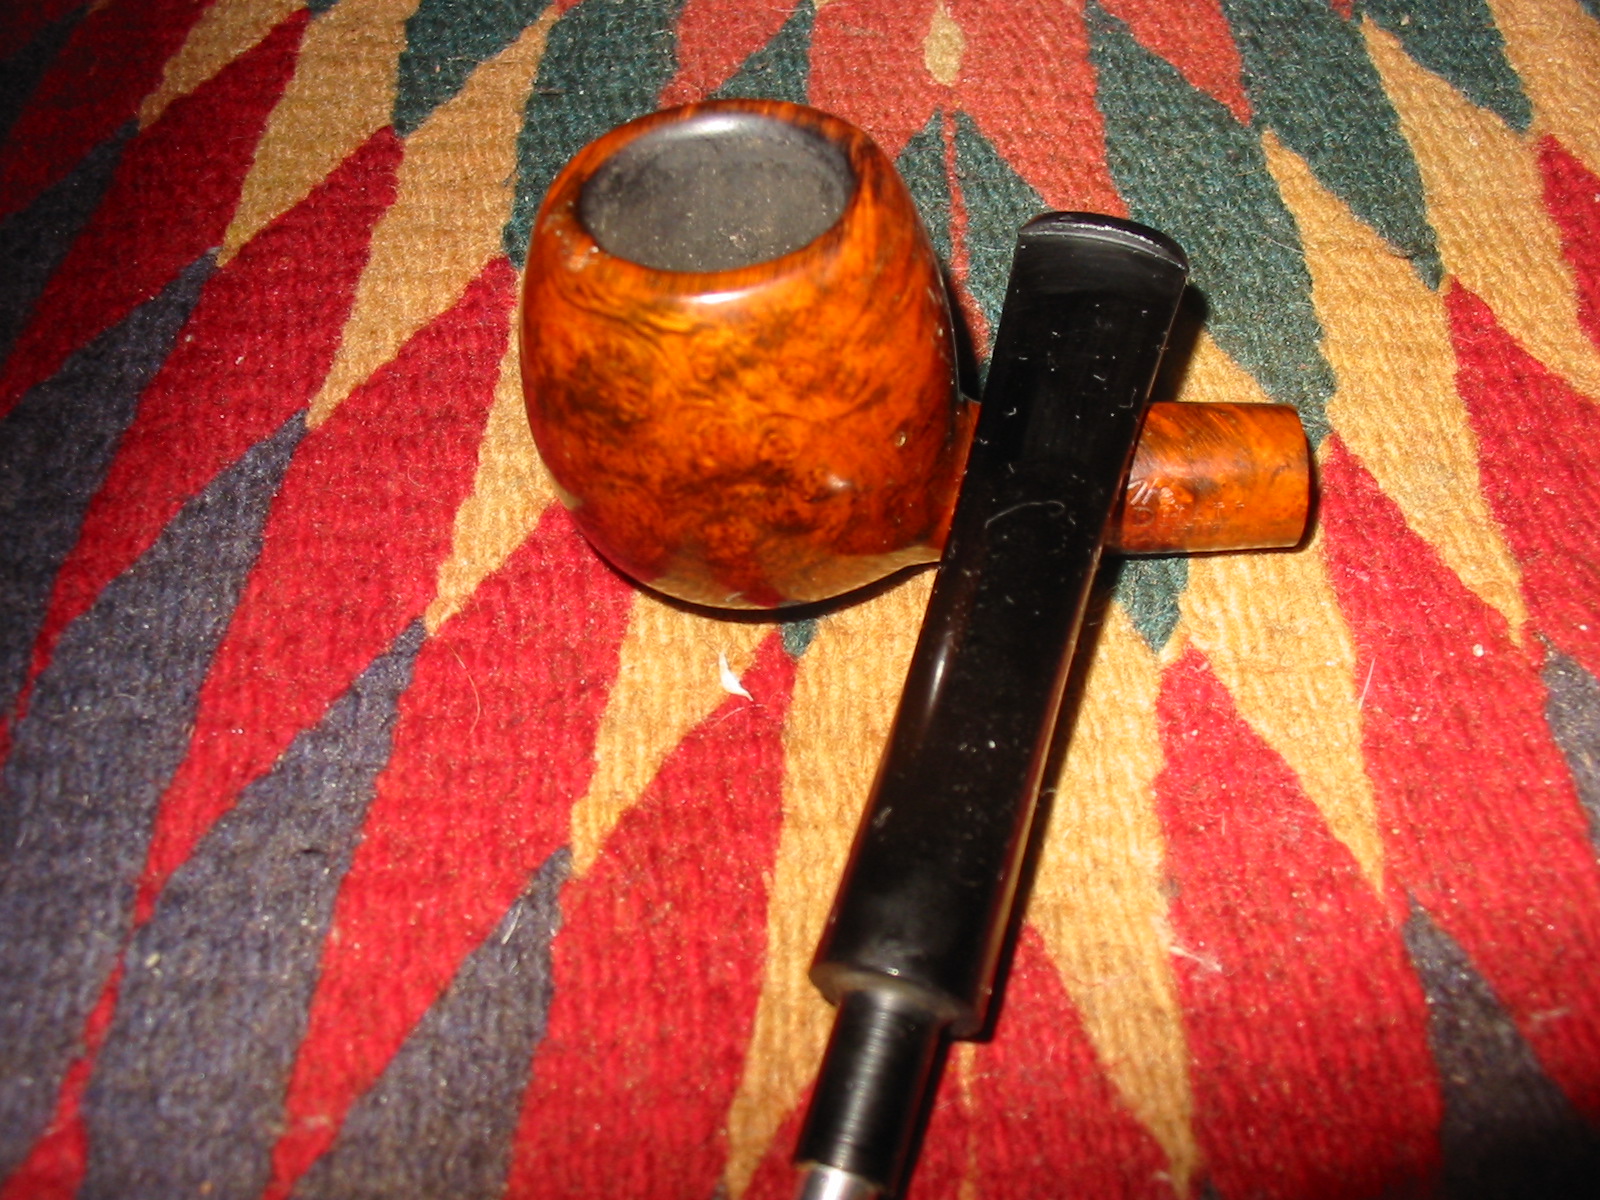
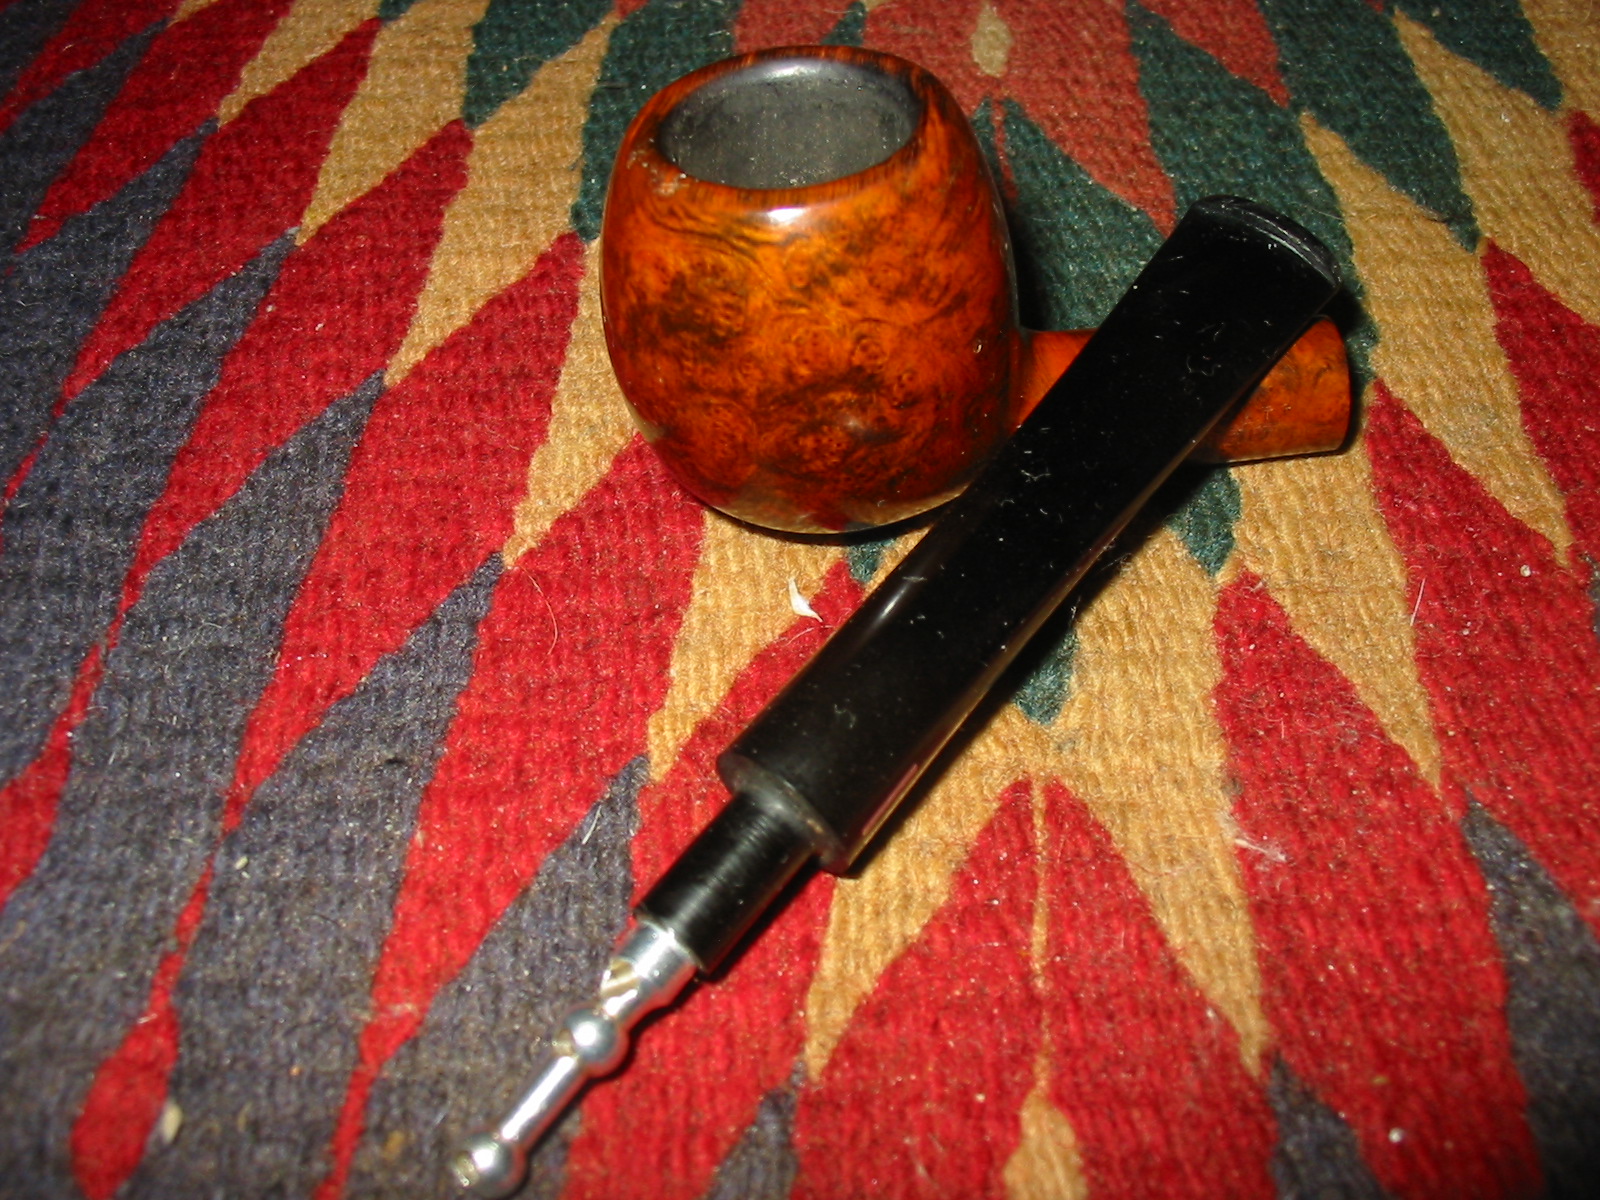
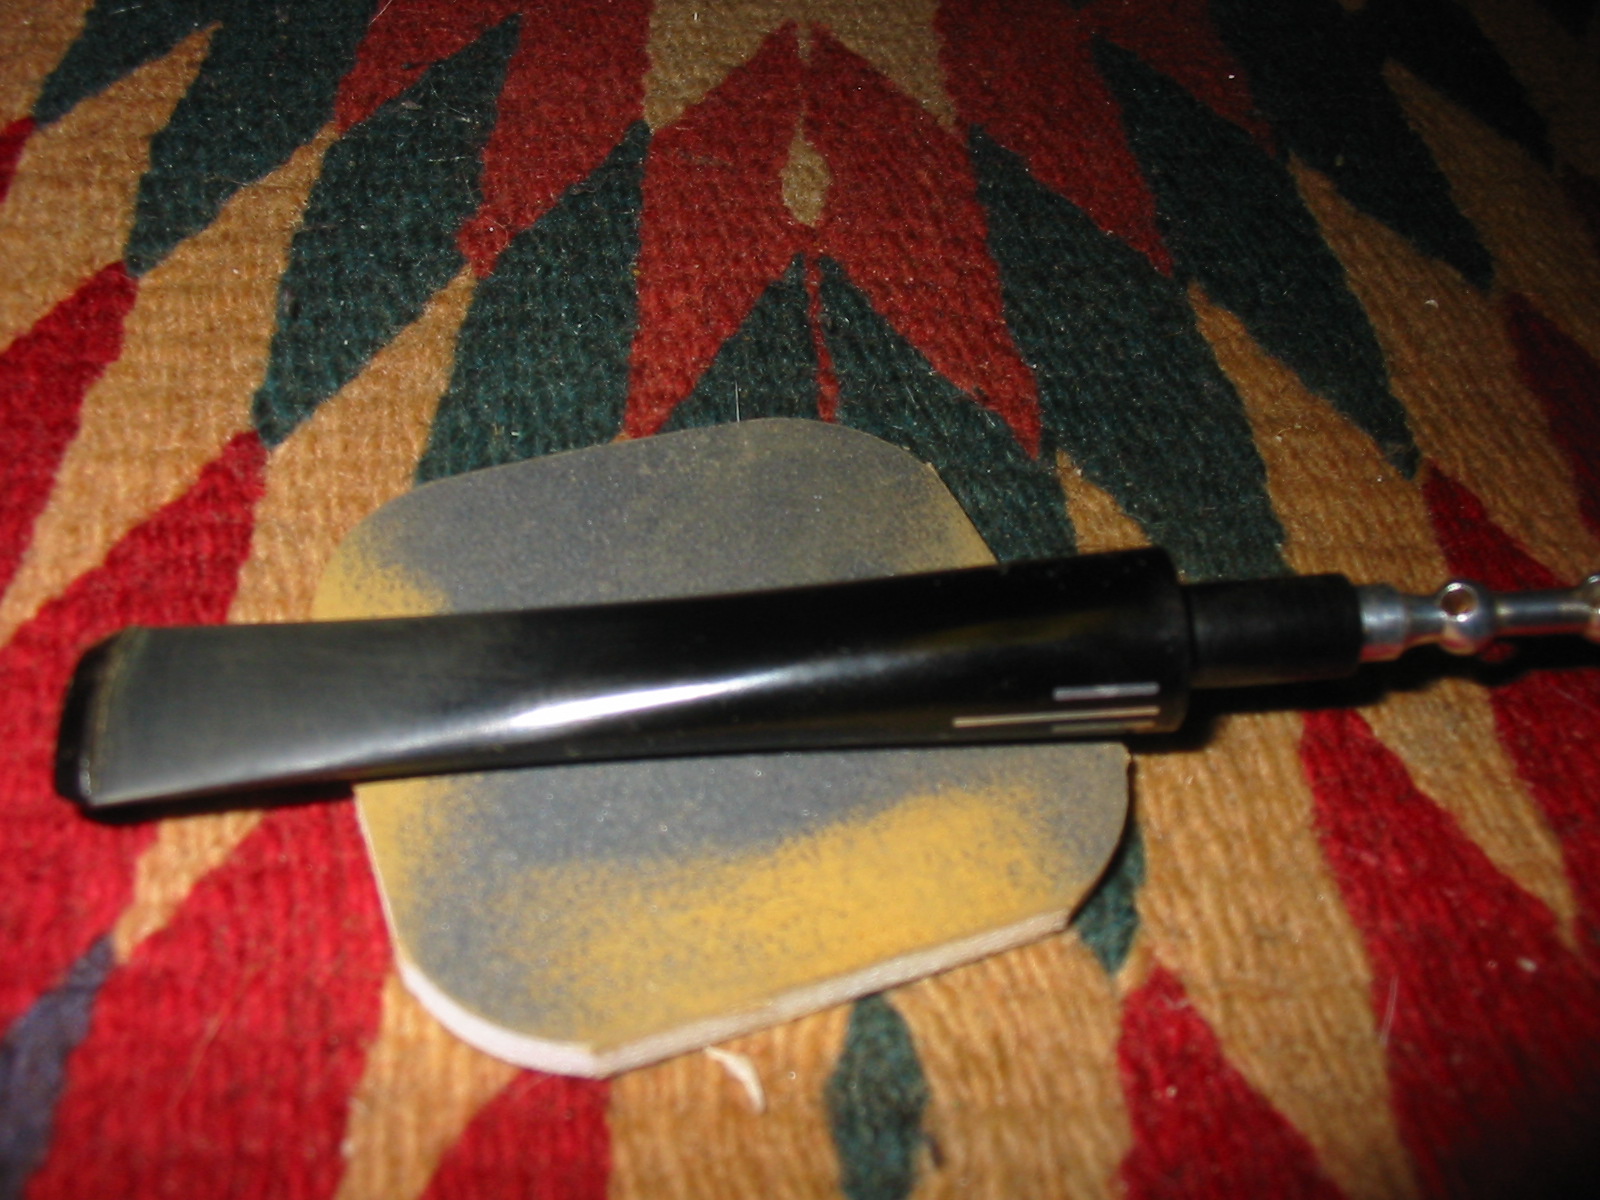
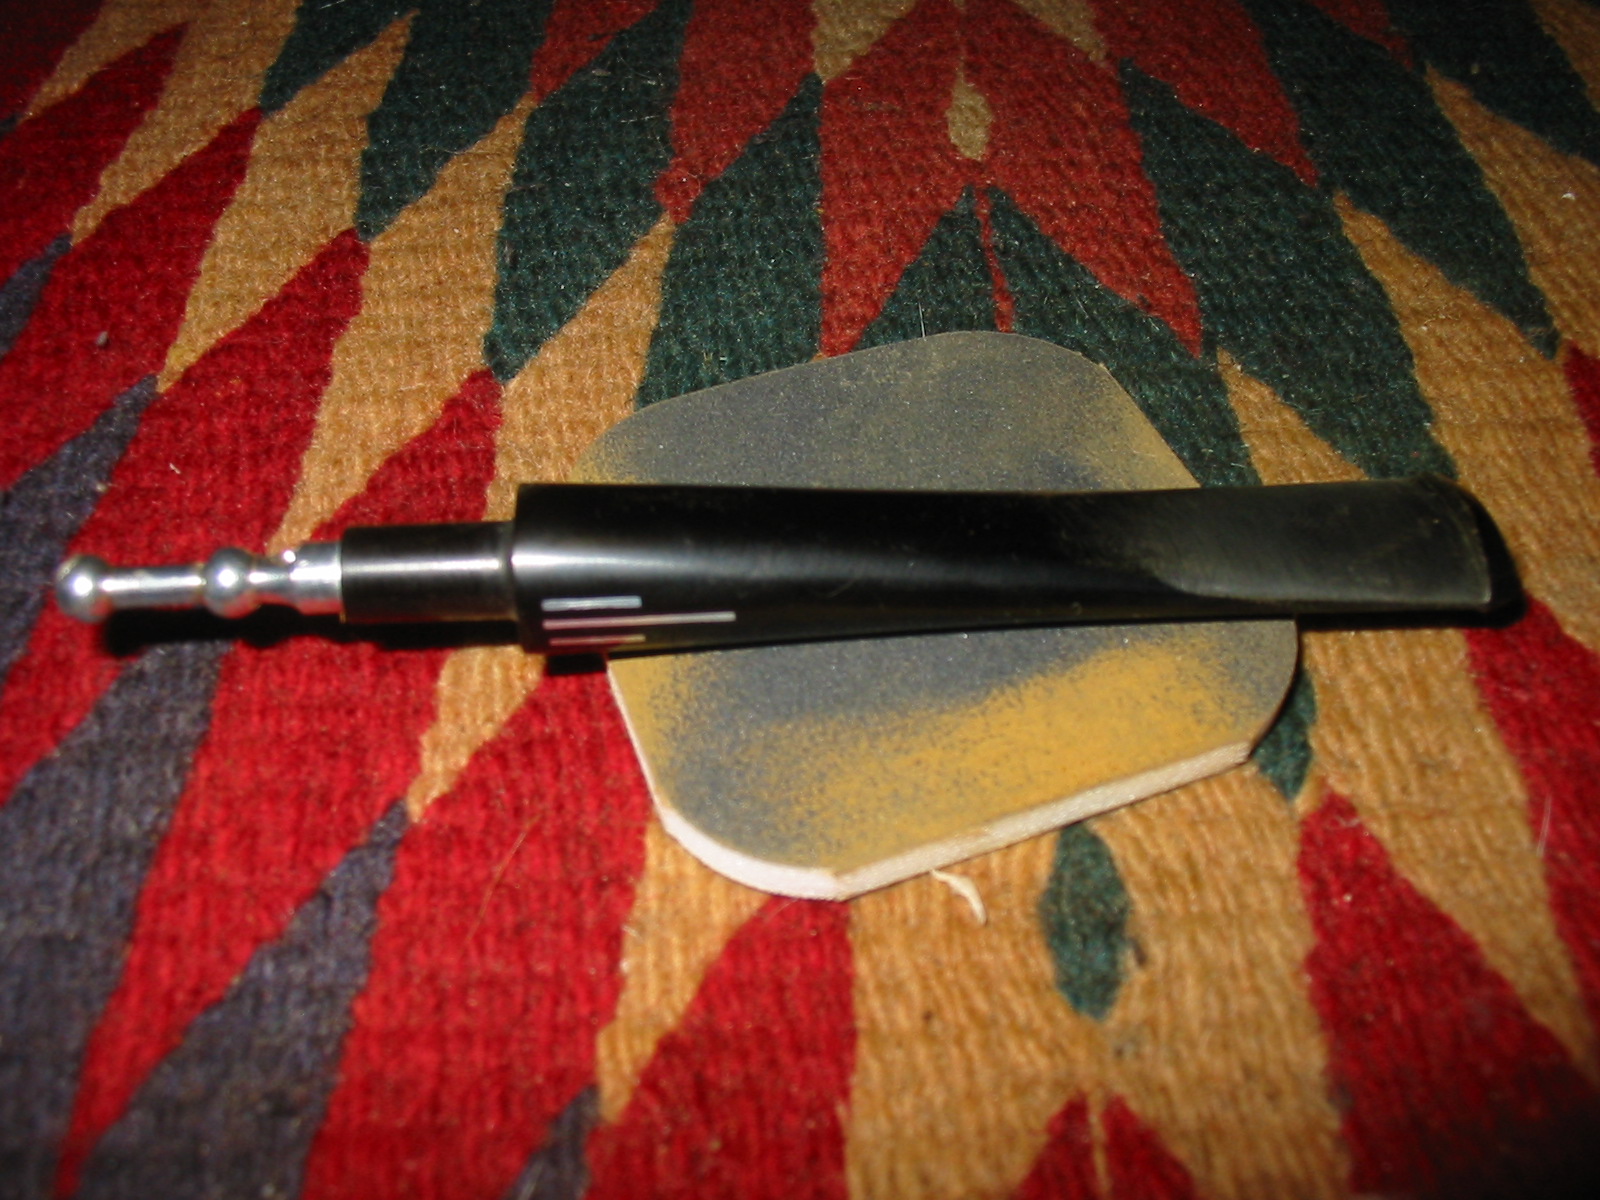
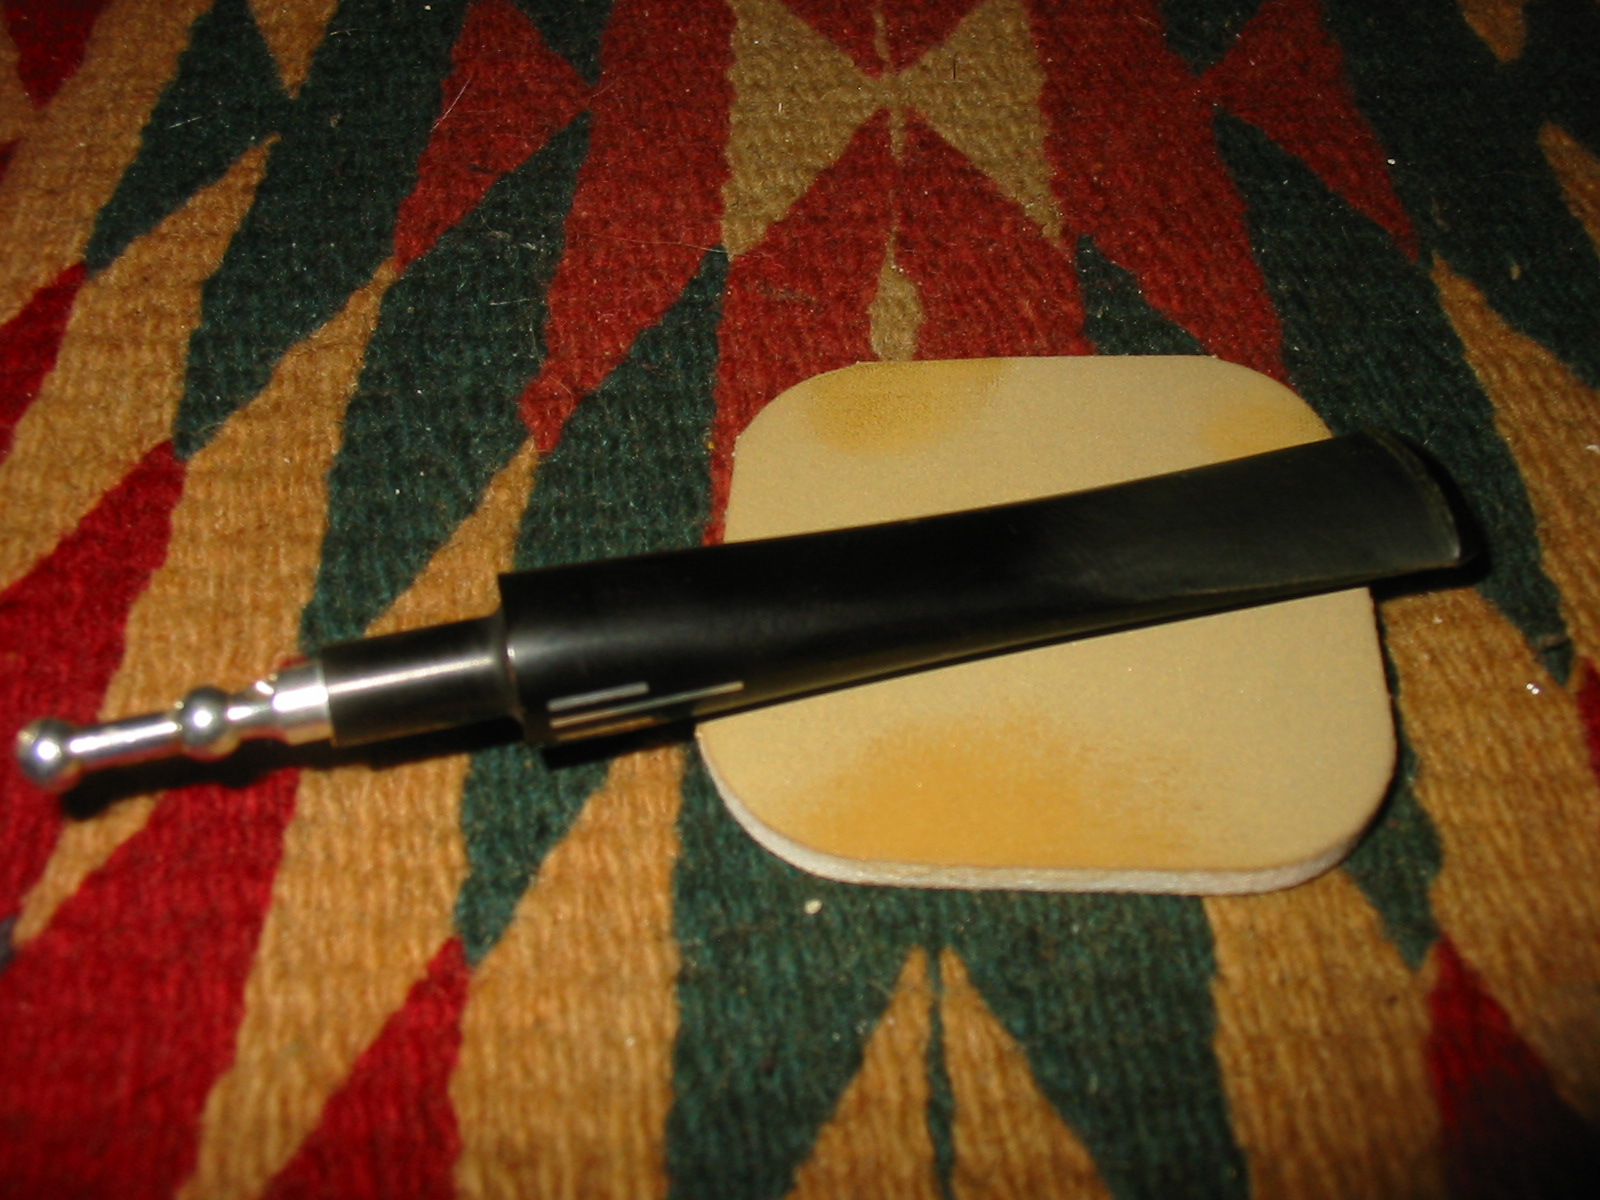
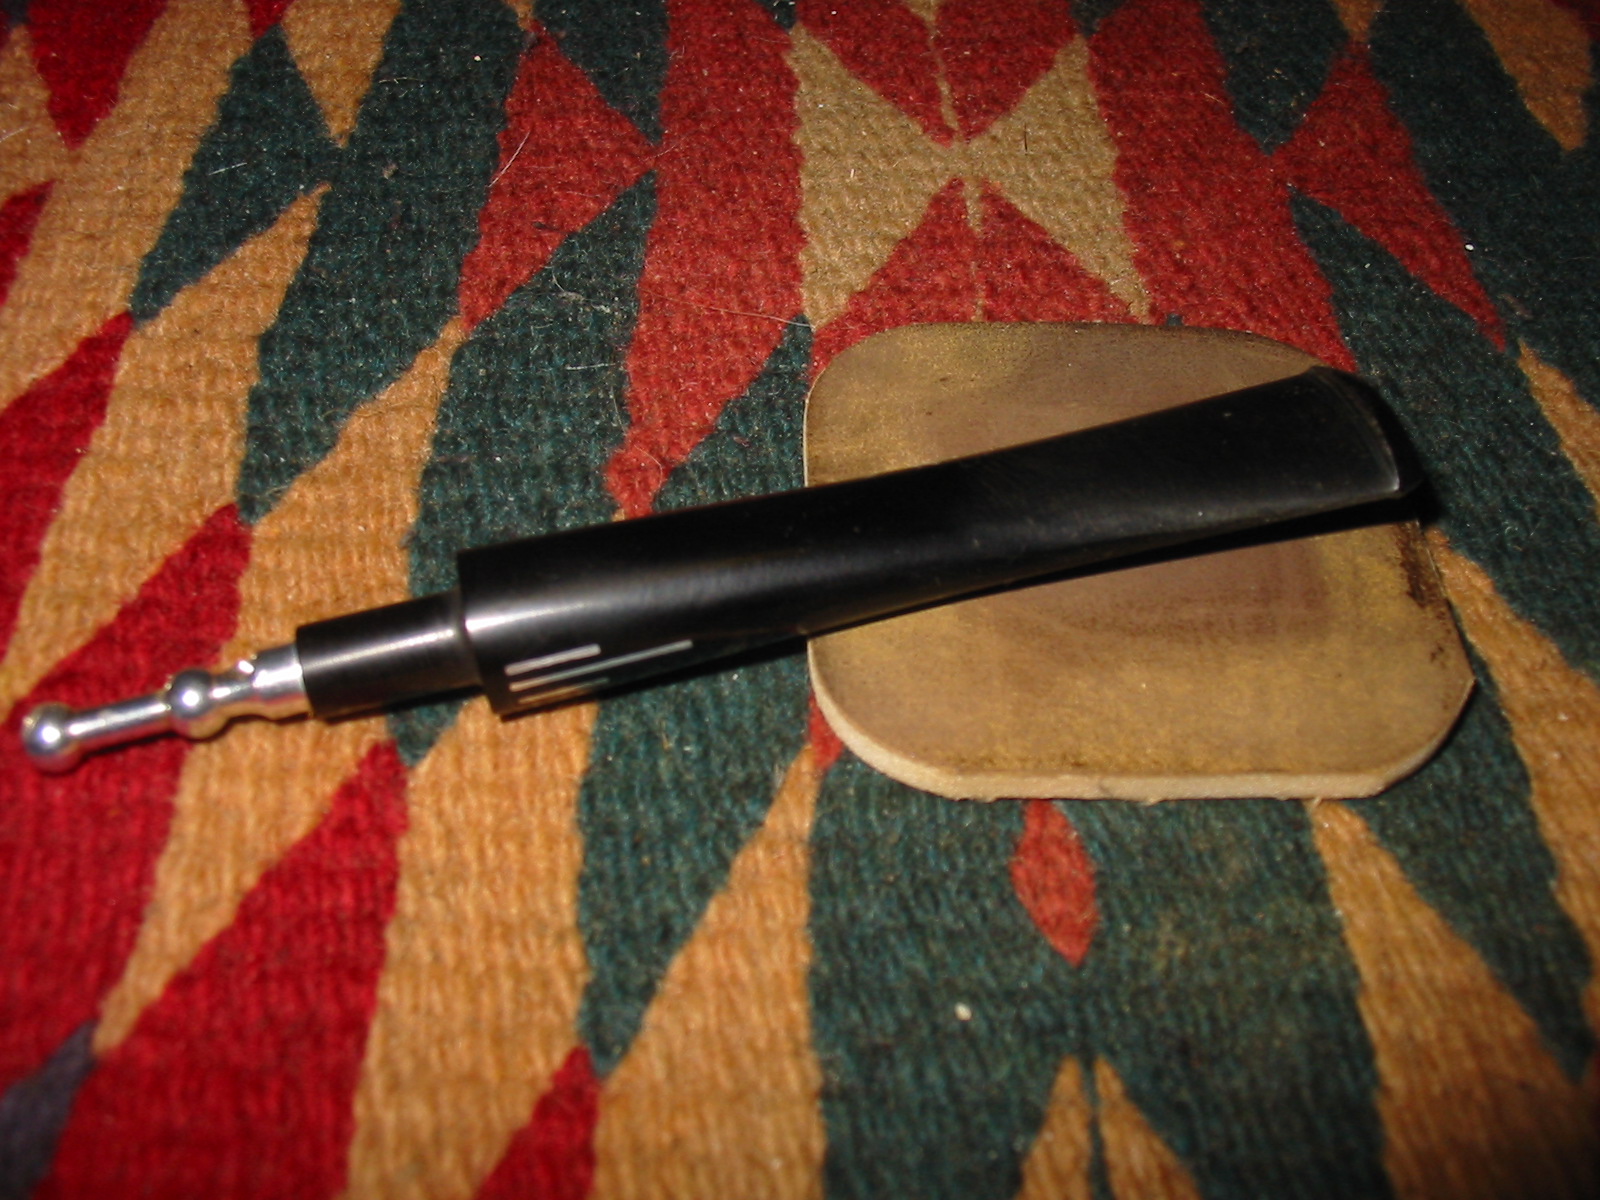
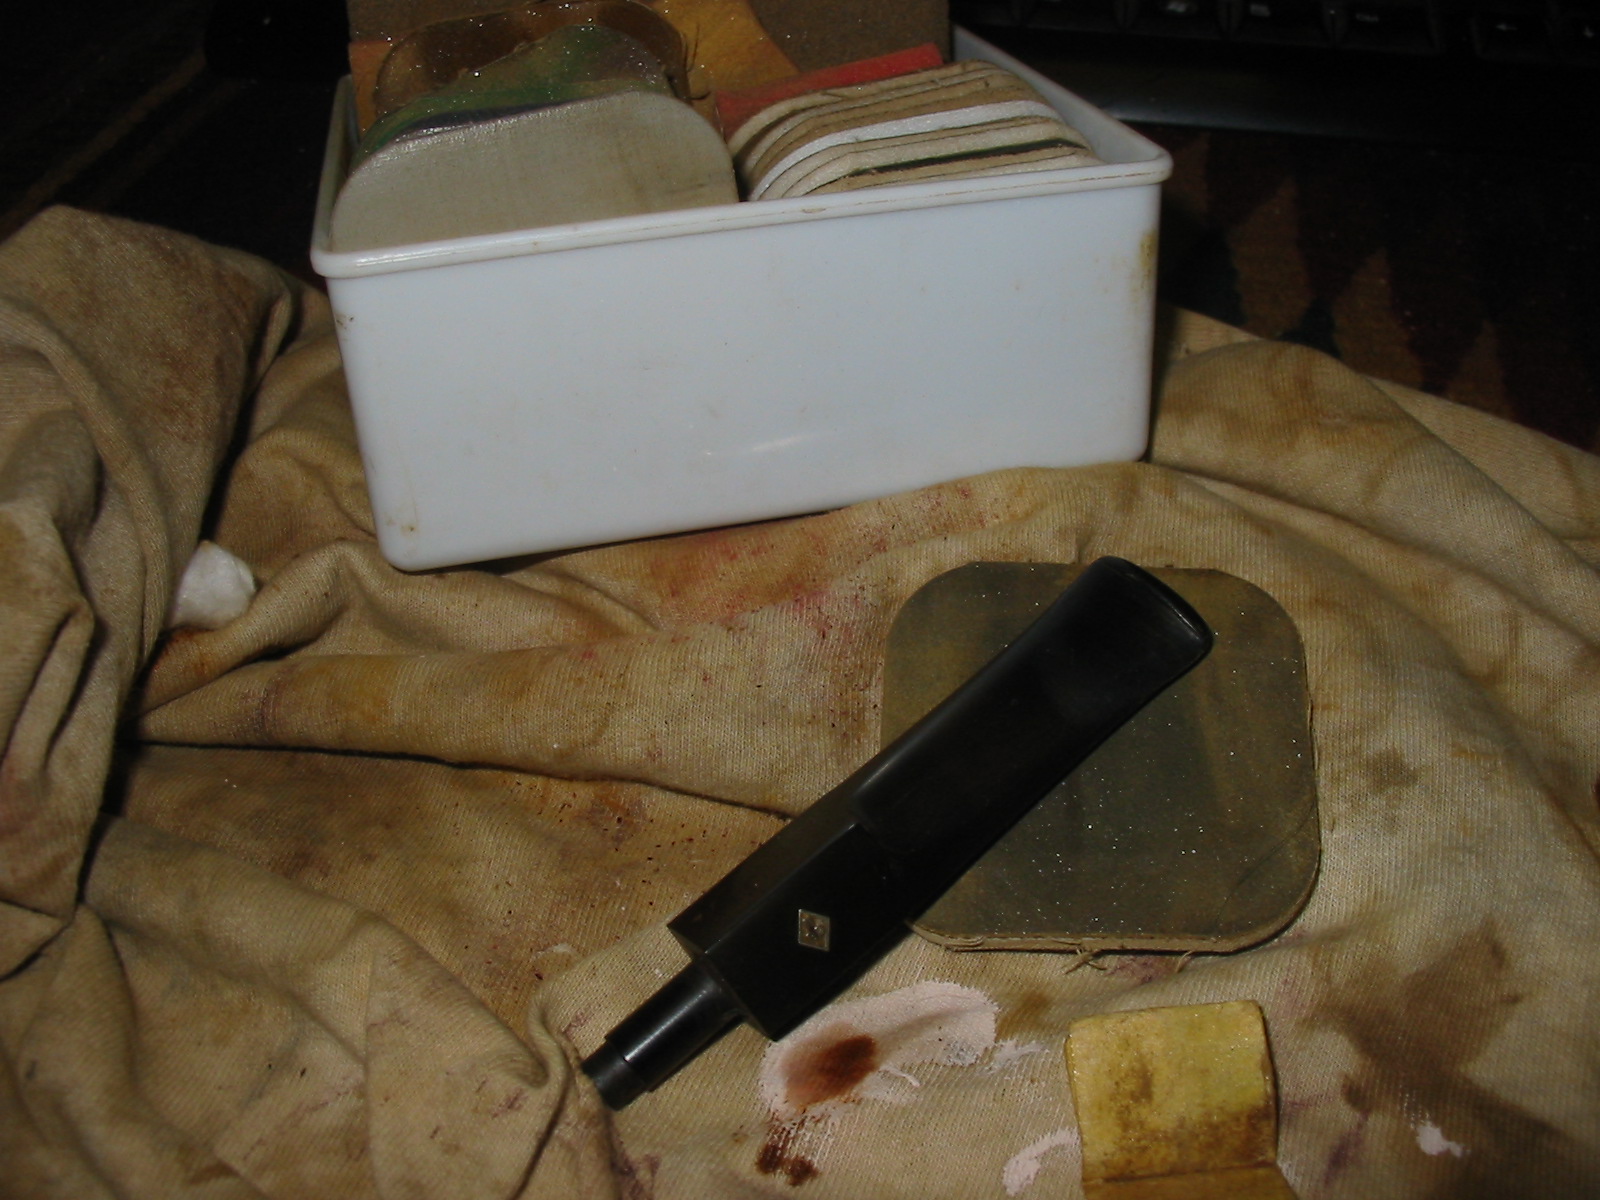
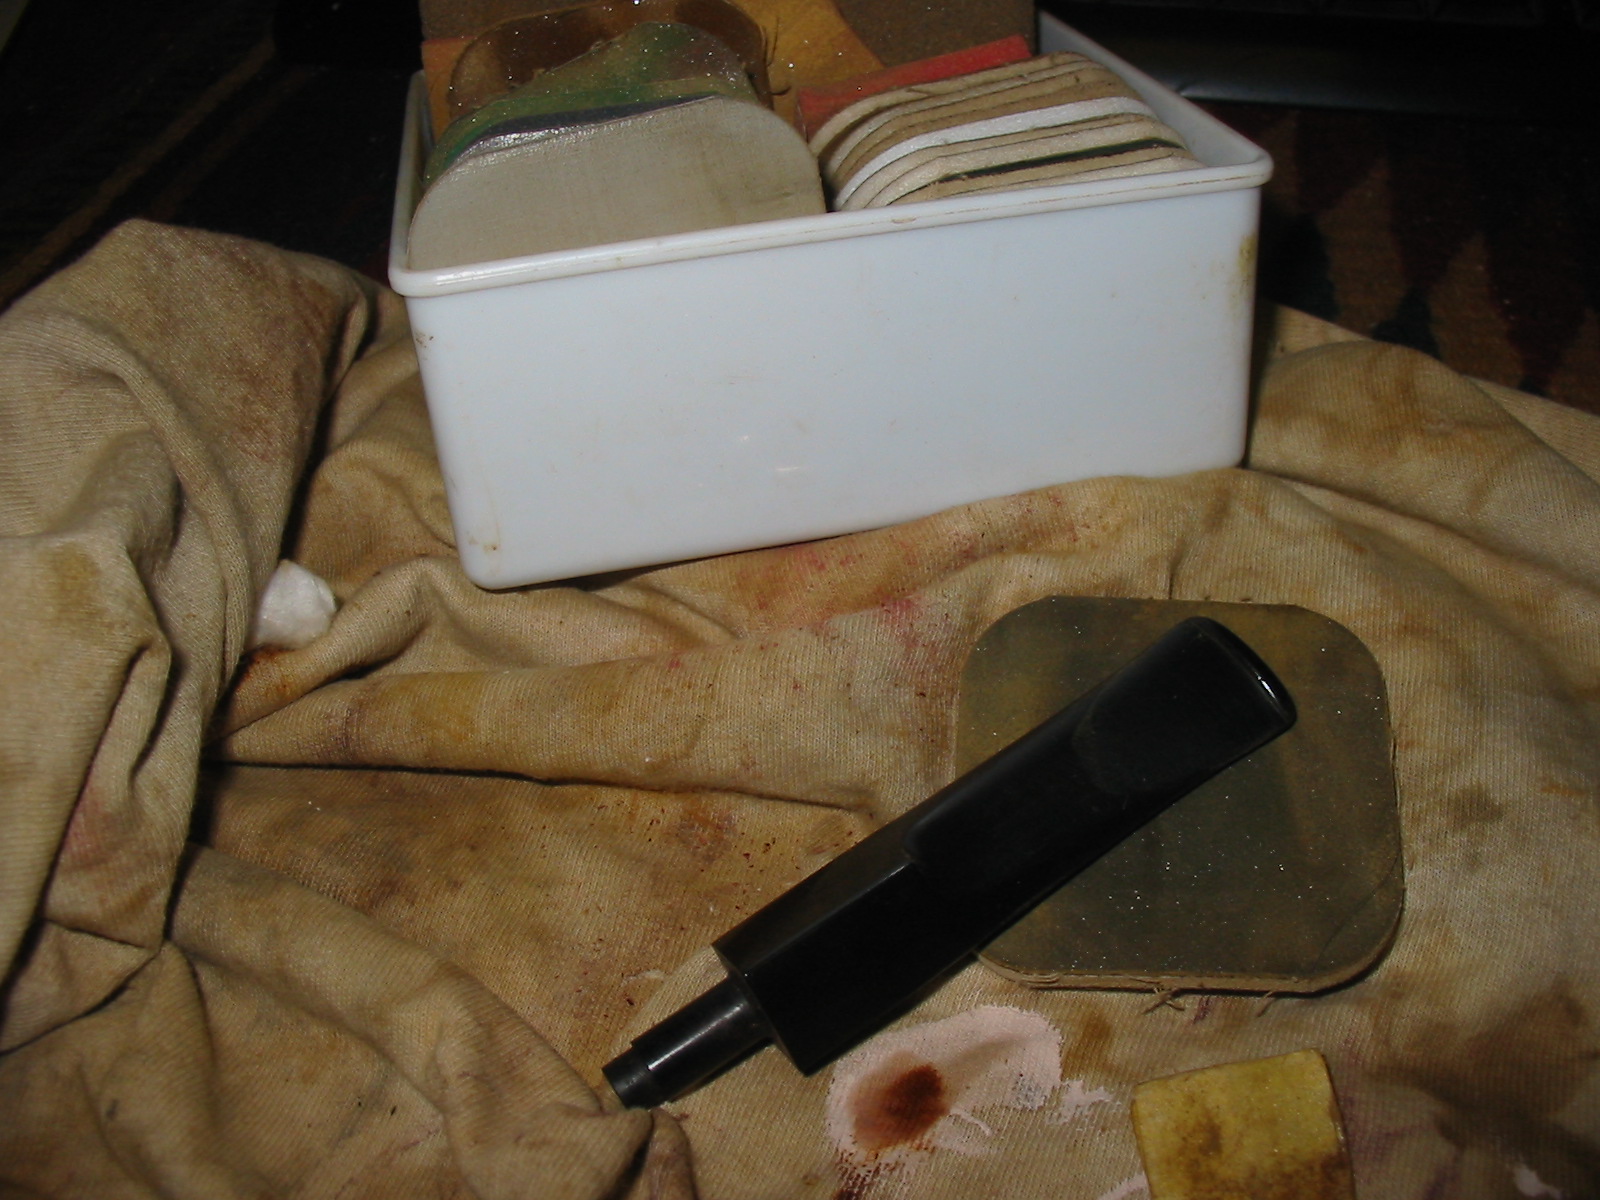
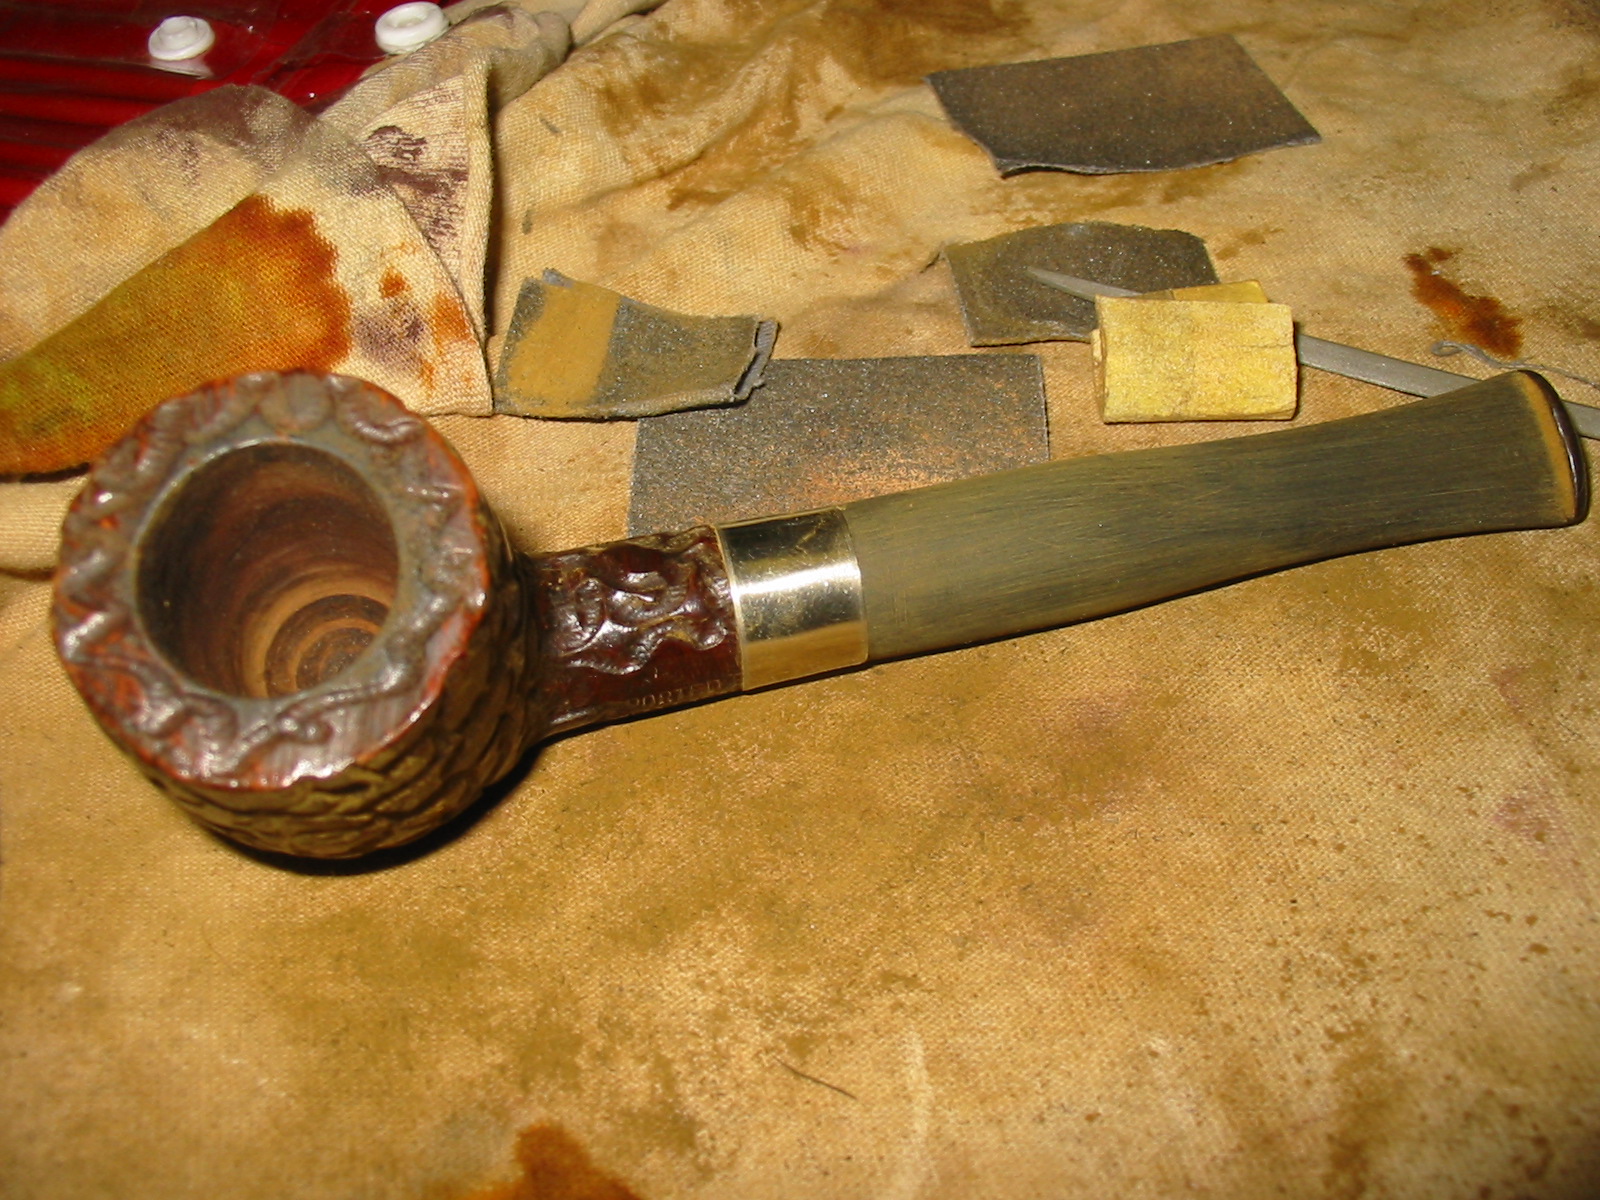
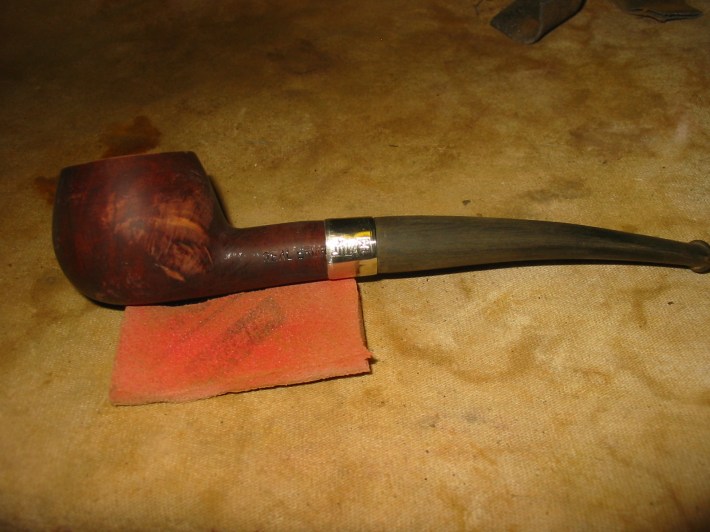
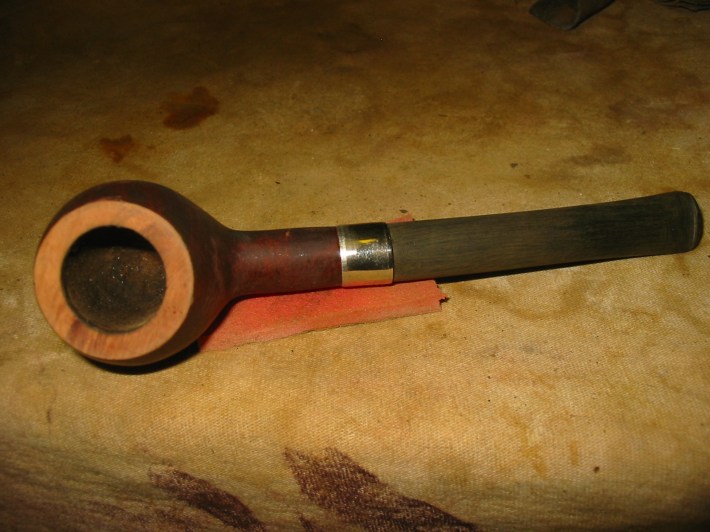
I put the stem on the bowl and continued to sand the stem and the bowl with the sanding sponge that is pictured with the pipe. The next three photos show the progress of the sanding. Once I was finished the sanding I wiped it down a final time with the acetone and cotton pad to prepare it for restaining.

ImageImageImage

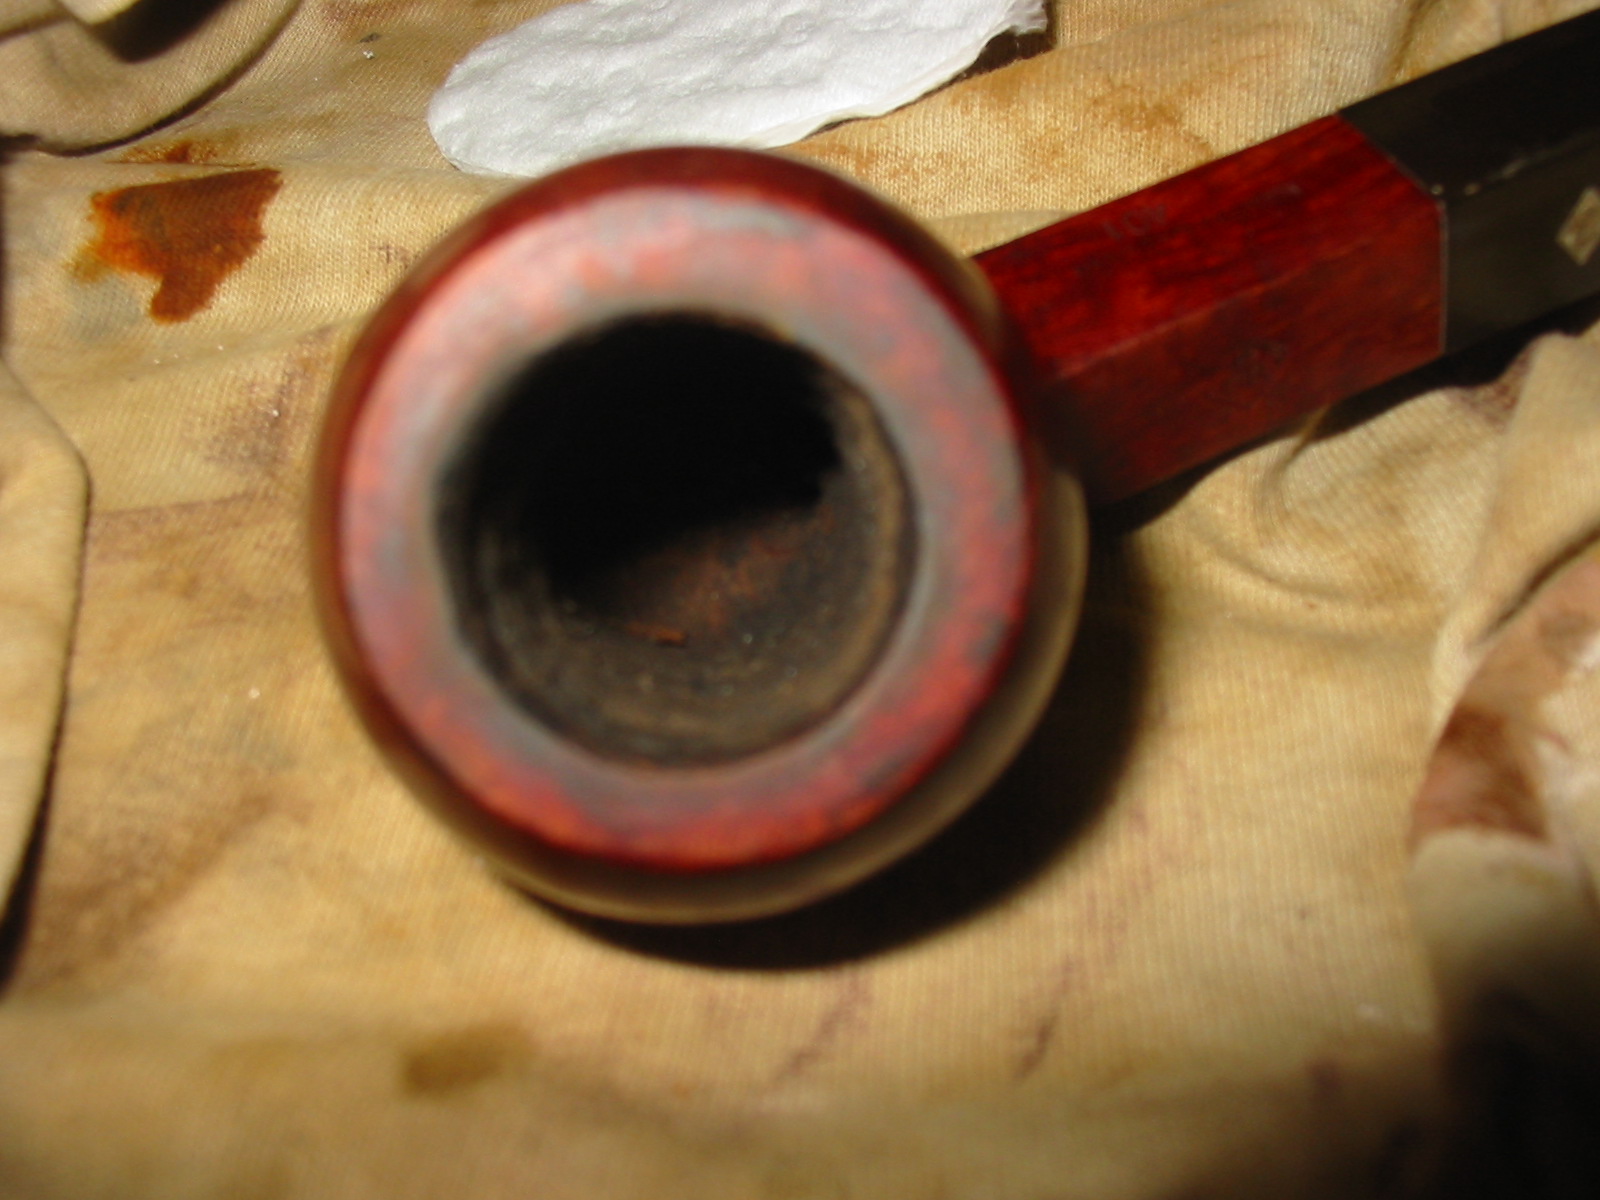
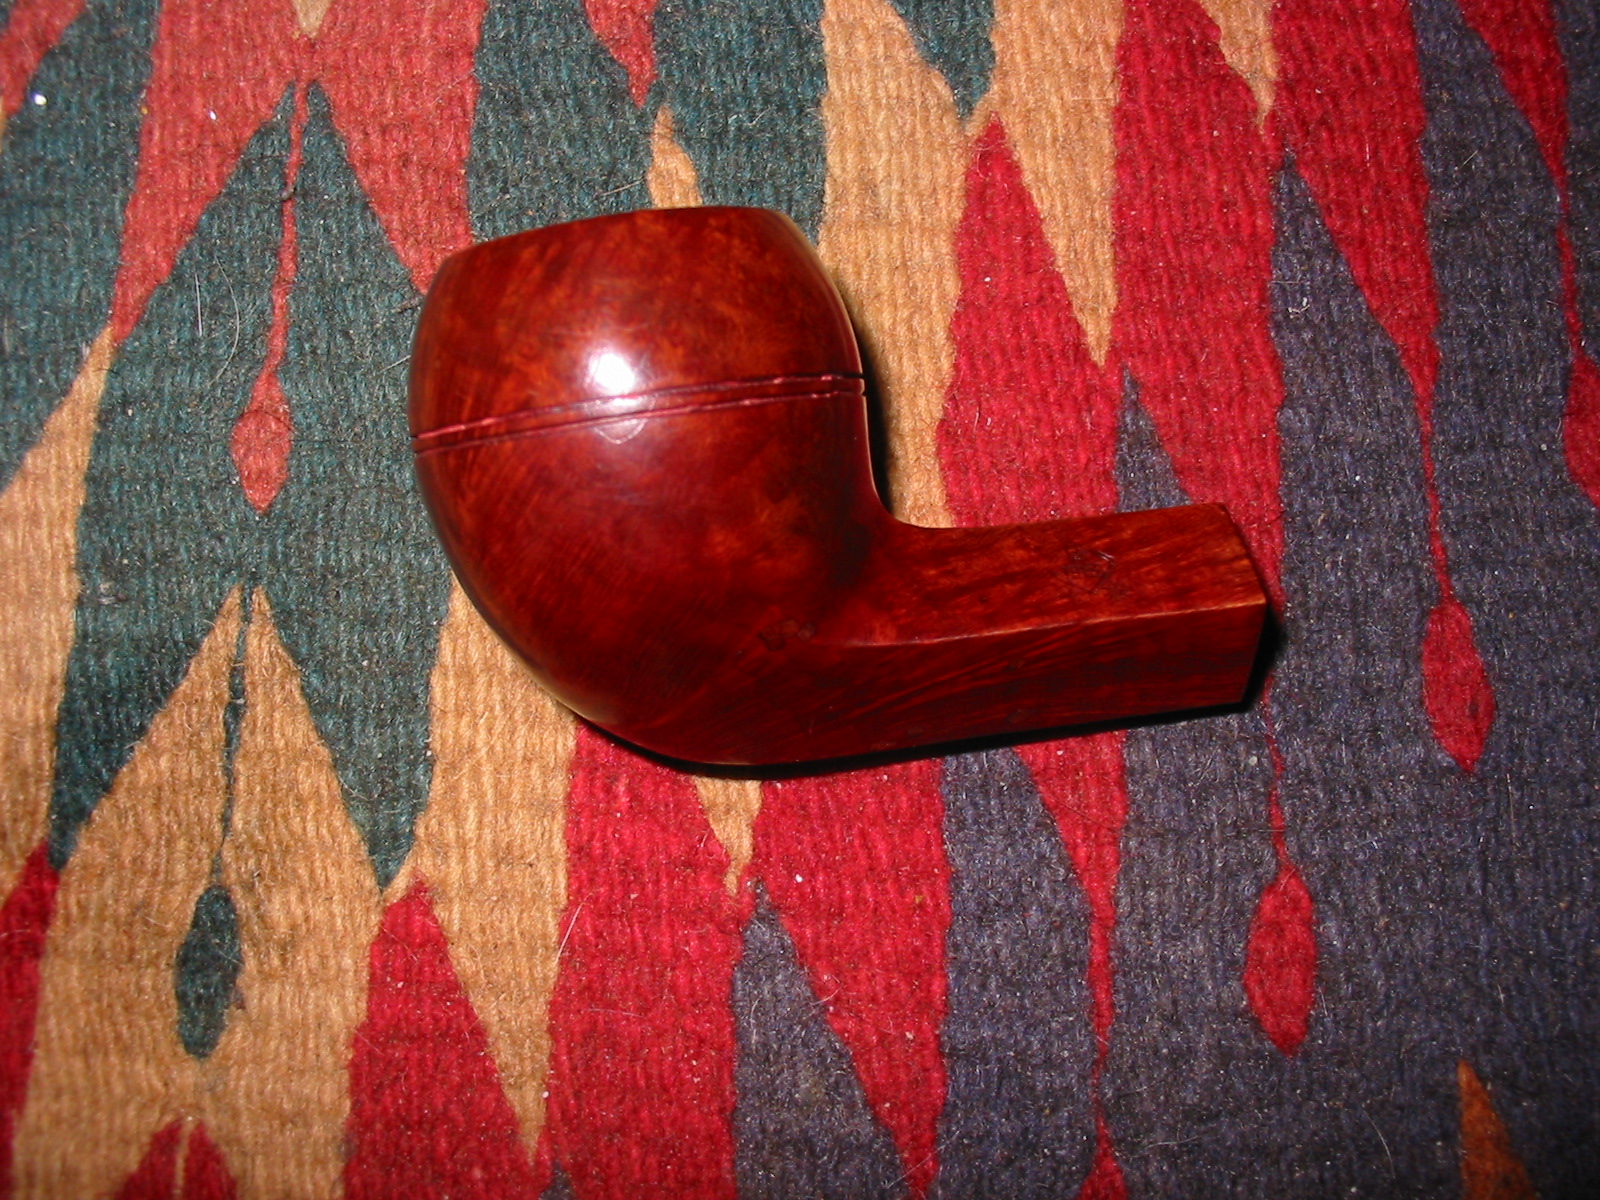
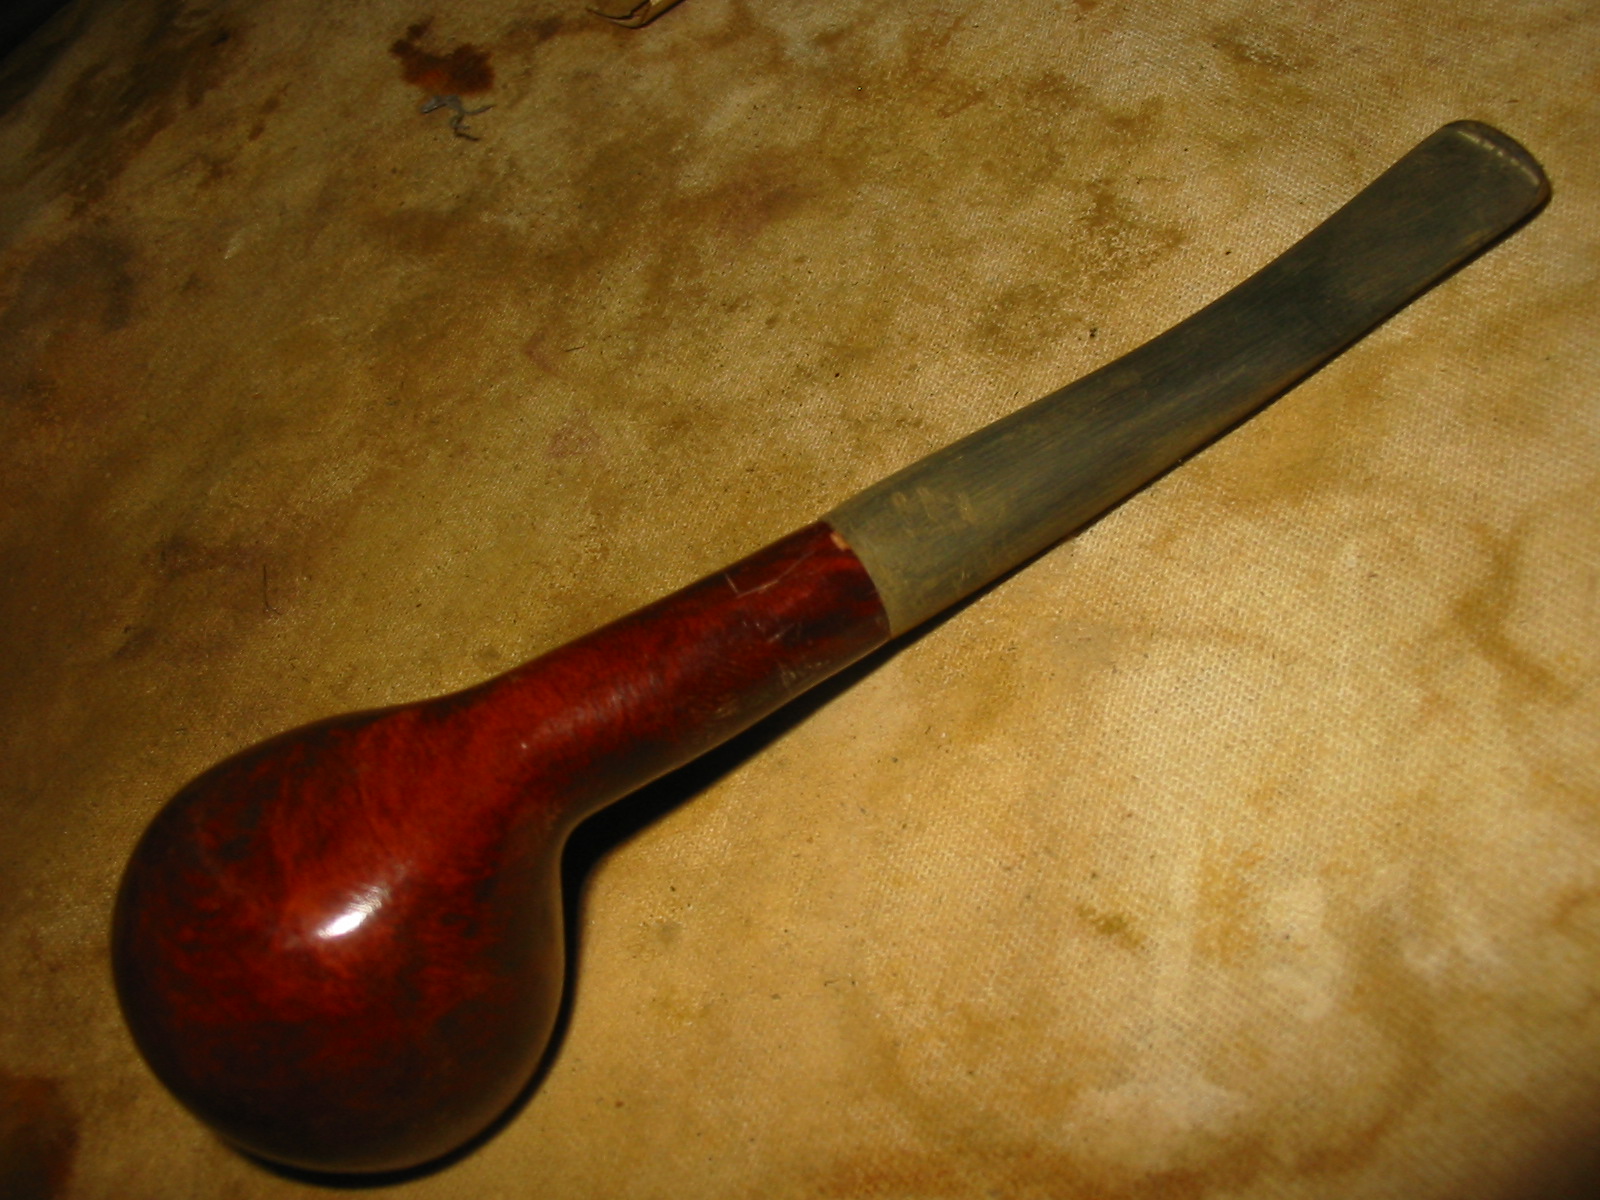
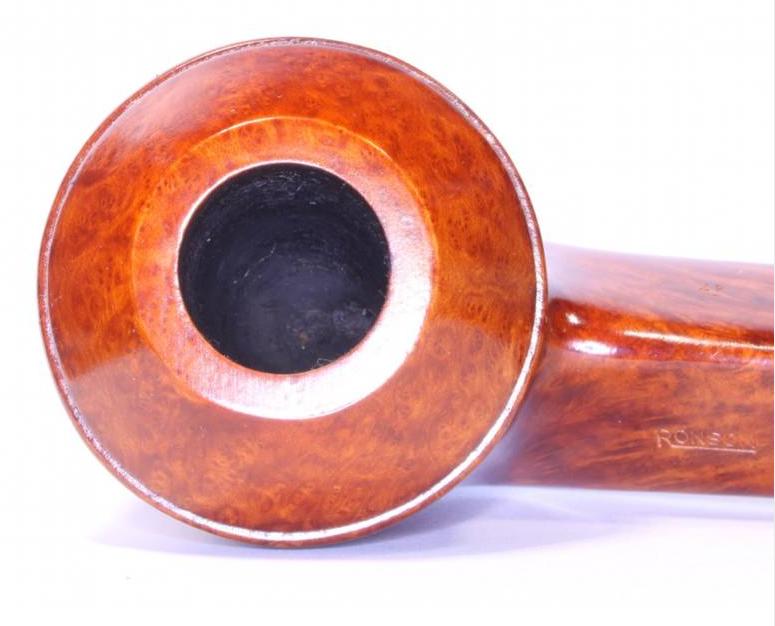
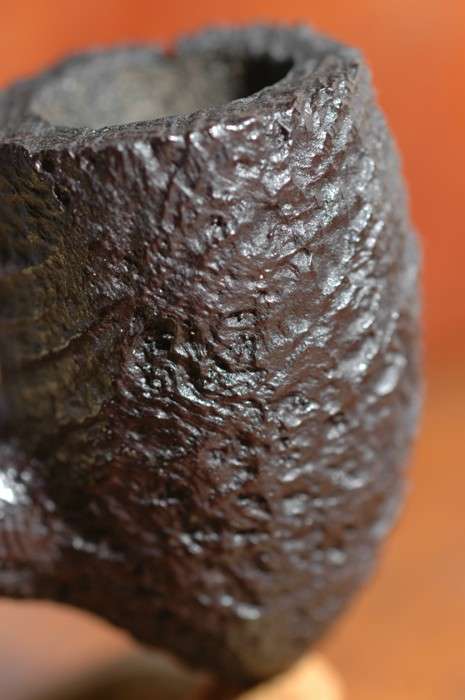
The next three photos show the bowl after I have stained, flamed, restained and flamed it again. I stained the rim three times to get it to be the same colour as the bowl. It took a bit of work to get the colours to match. I used a dark brown aniline stain mixed in a 2:1 ratio with isopropyl alcohol to attain the colour that I wanted for this pipe. I have learned that the mix is great for hiding unsightly fills and blending them into the rest of the bowl.

ImageImageImage

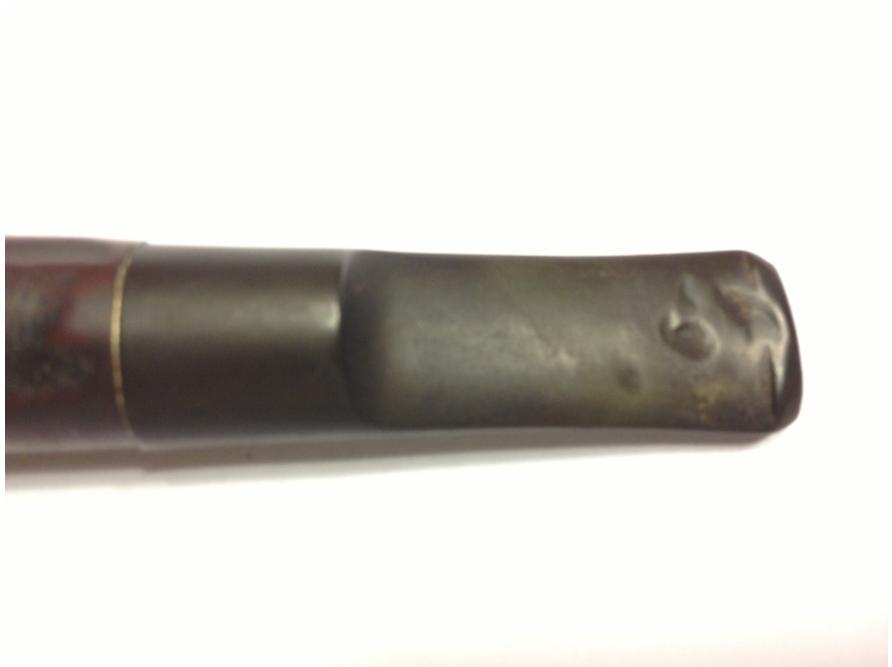
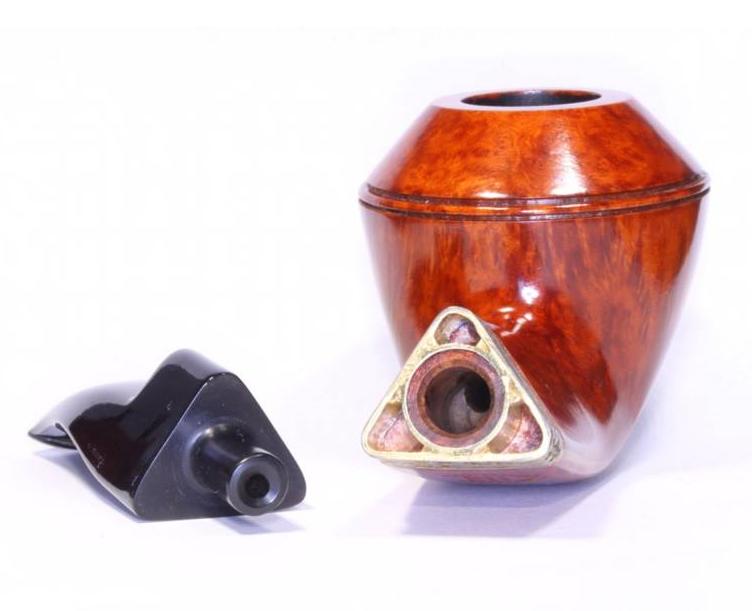
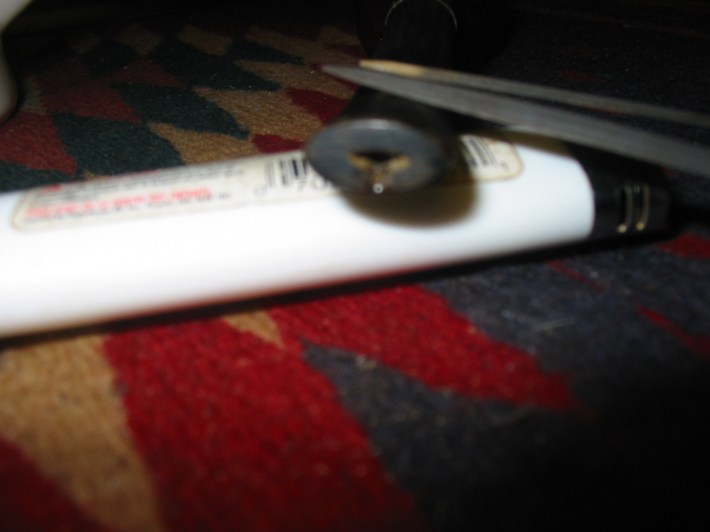
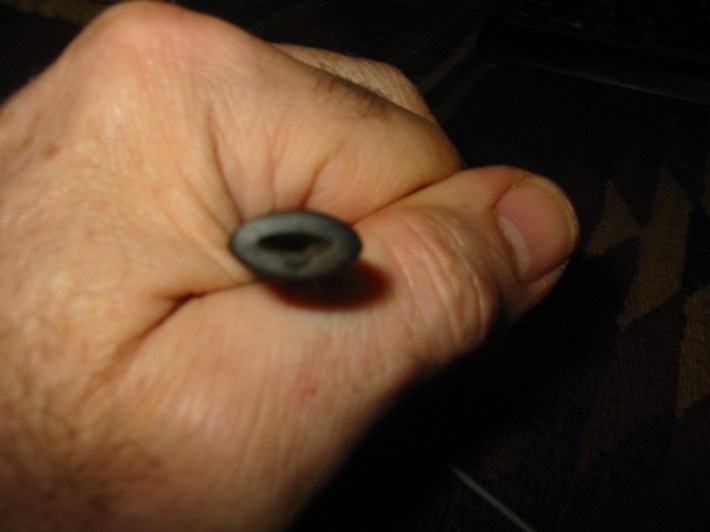
I removed the bowl and went to work on the button. The airway in the button was actually quite large and had been cut very close to the edge of the button. I examined it and could see that the damage was fairly surface. The airway inside the button was centered in the button so the edge would need to be built up to accommodate the new slot that I would cut into the button. I used a two part 5 minute epoxy that I mixed and inserted into the damaged edge of the airway with a dental pick. This took a bit of time to get it to the point that I was happy with. The first photo below shows the airway when I started on the repairs.

Image

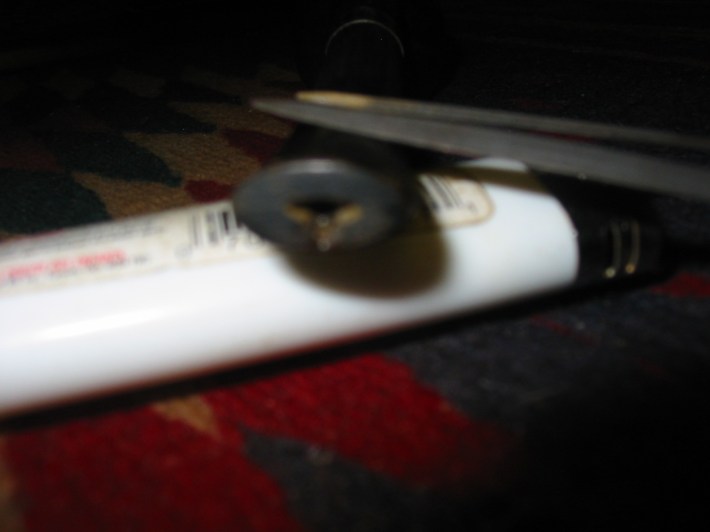
The next three photos, though a little blurry show the repair in process. To start with I used my needle files to open up the airway into a slot. I wanted to provide a straight edge to build up to on the airway so that I that the epoxy would stay put in the right place. The epoxy is wet and shiny in these photos and is visible on the bottom edge of the stem photos. The slotted airway is very clearly visible in these photos showing the process of rebuilding the airhole.

ImageImageImage

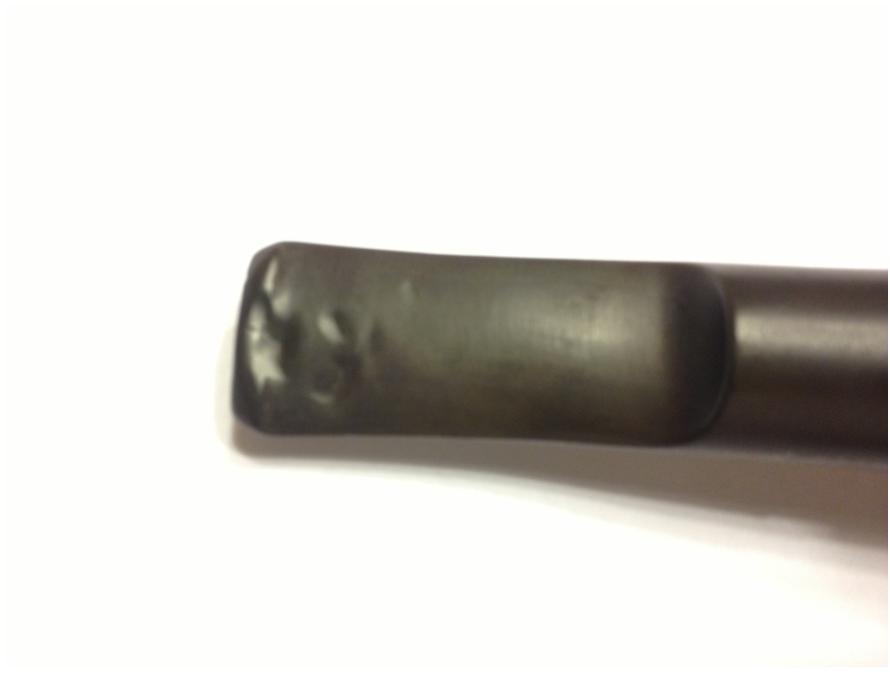
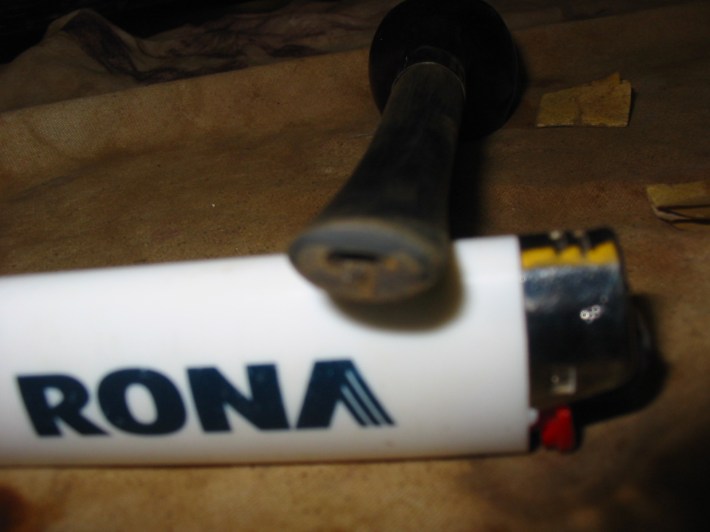
The next photo shows the dried patch in the airway and the even slot that is present in the button. I needed to let the epoxy harden before I finished the shaping of the slot to an oval that easily took a pipe cleaner.

Image

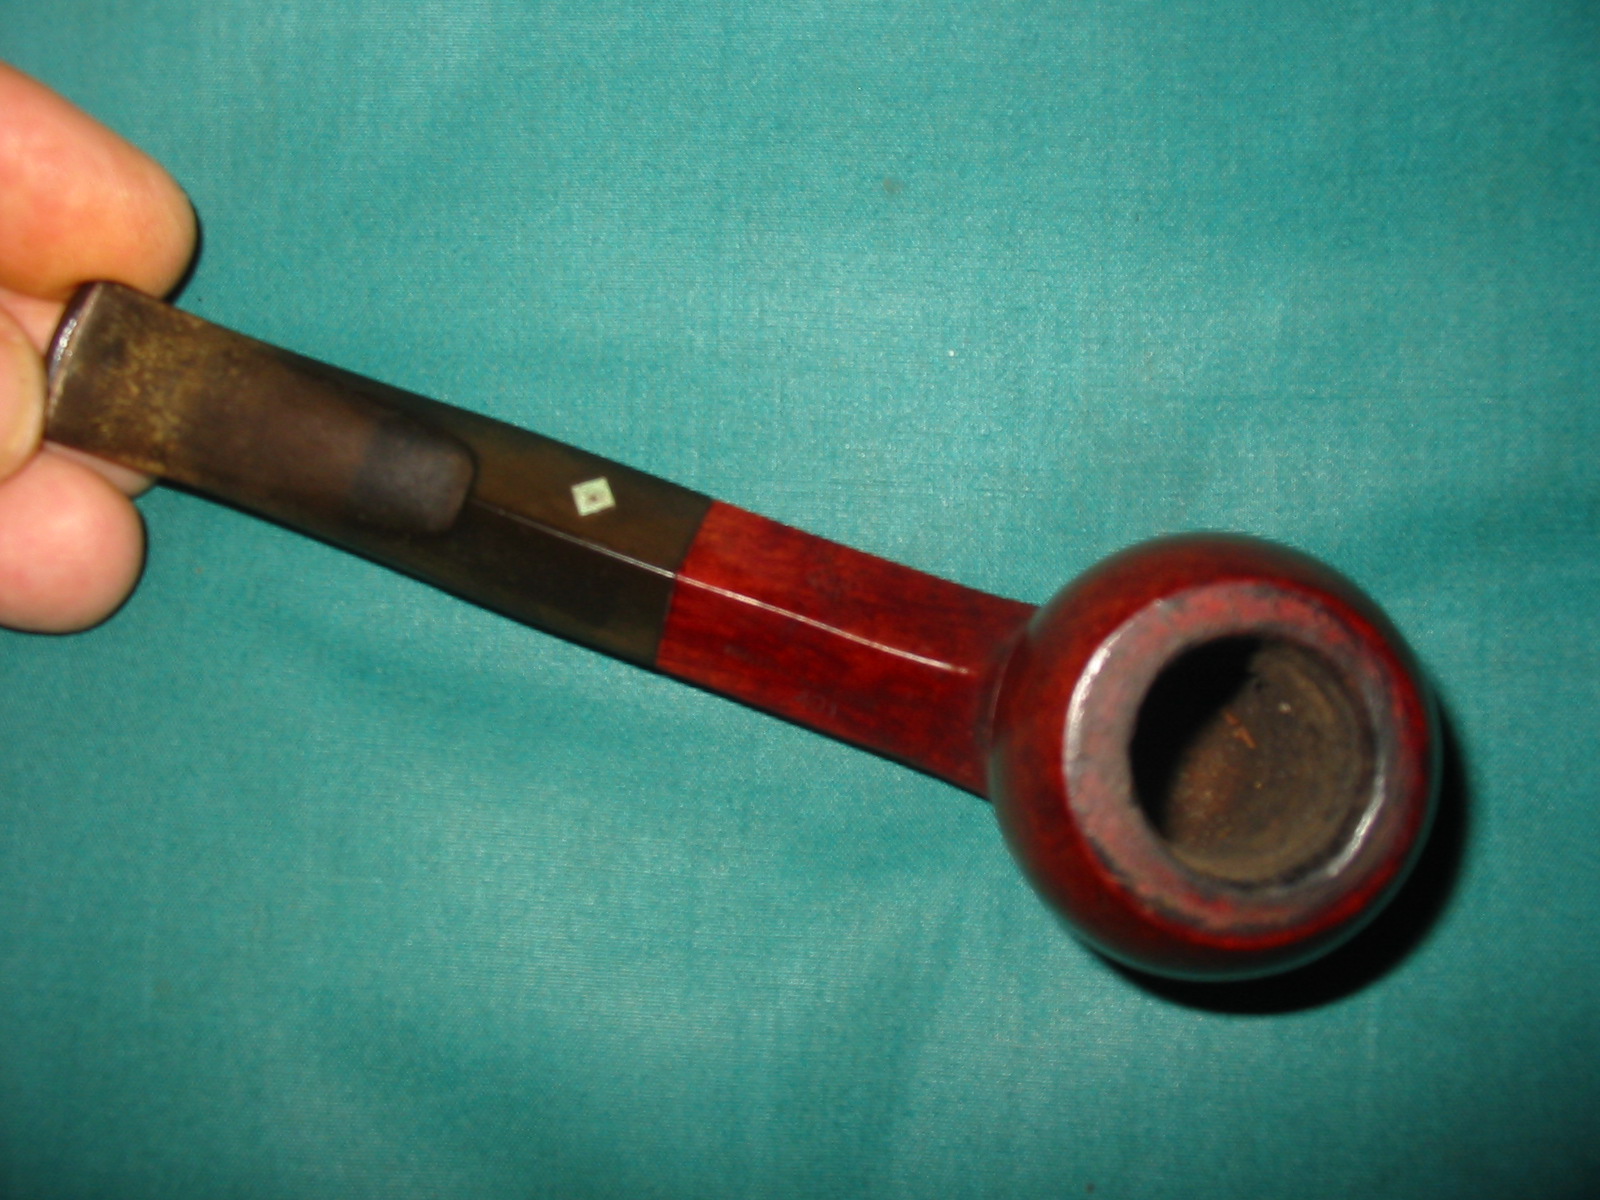
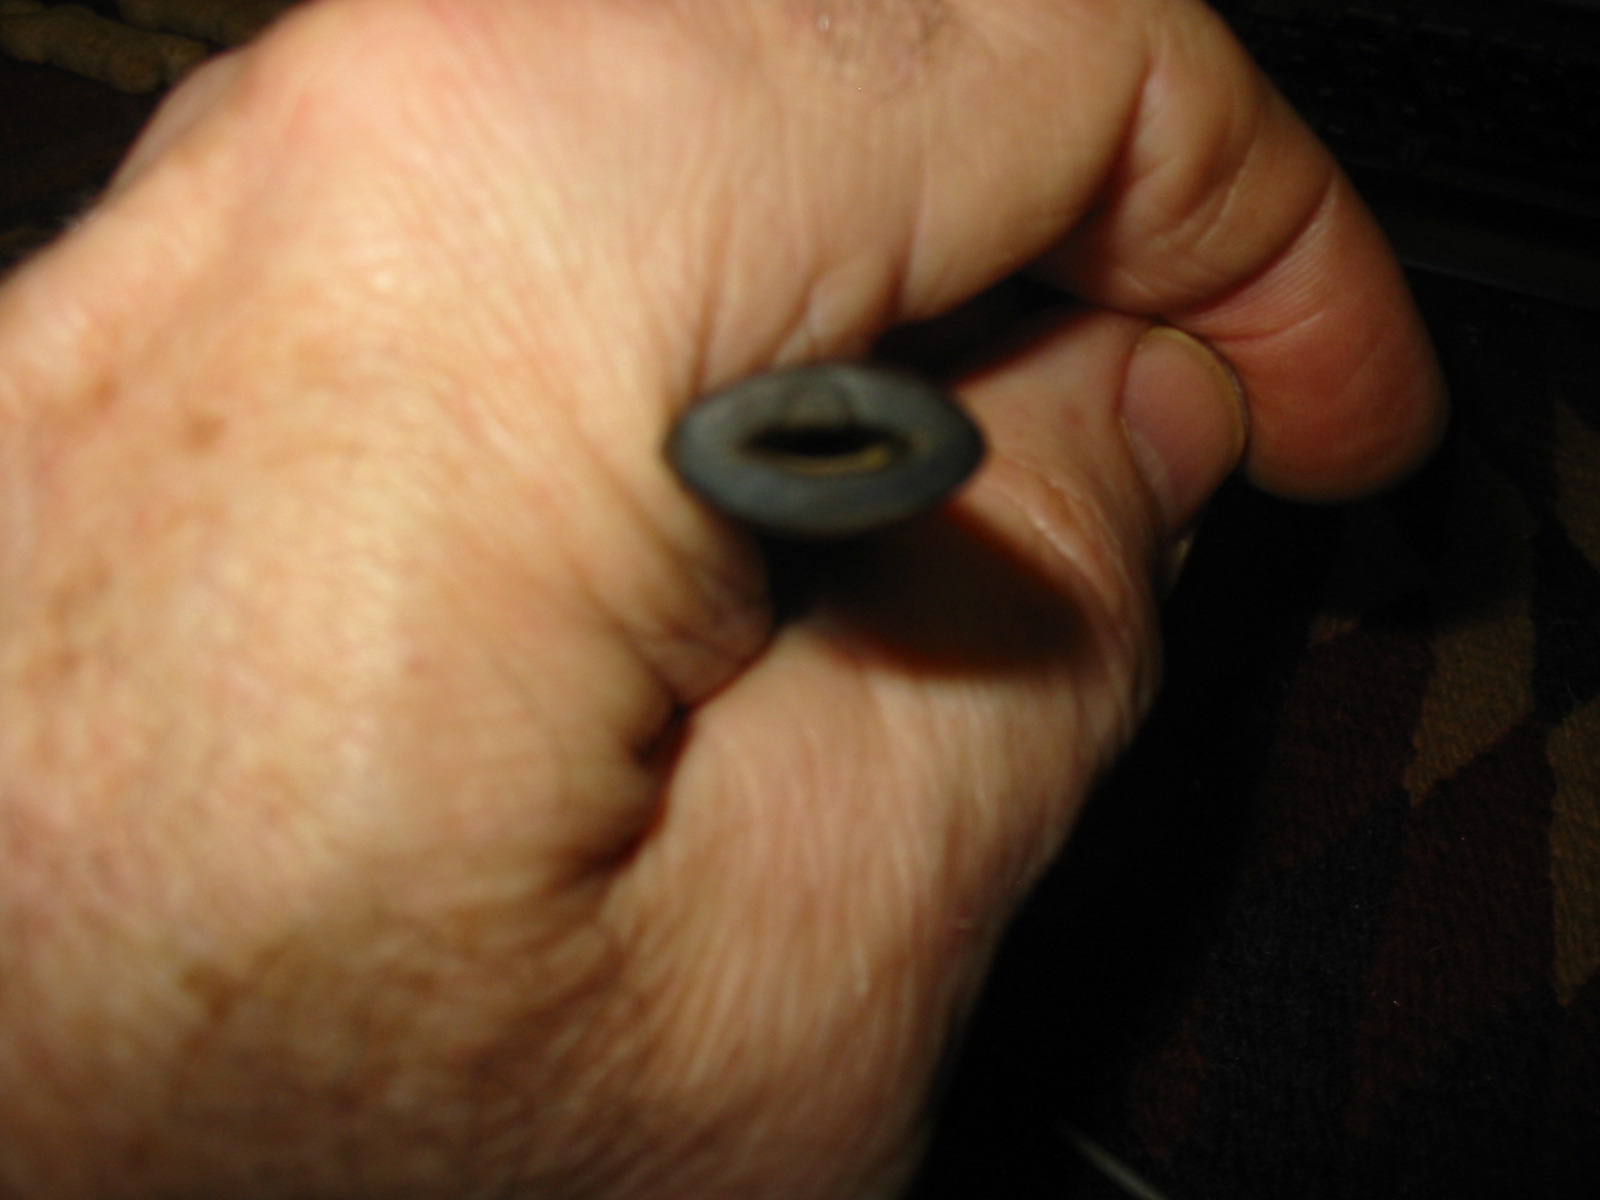
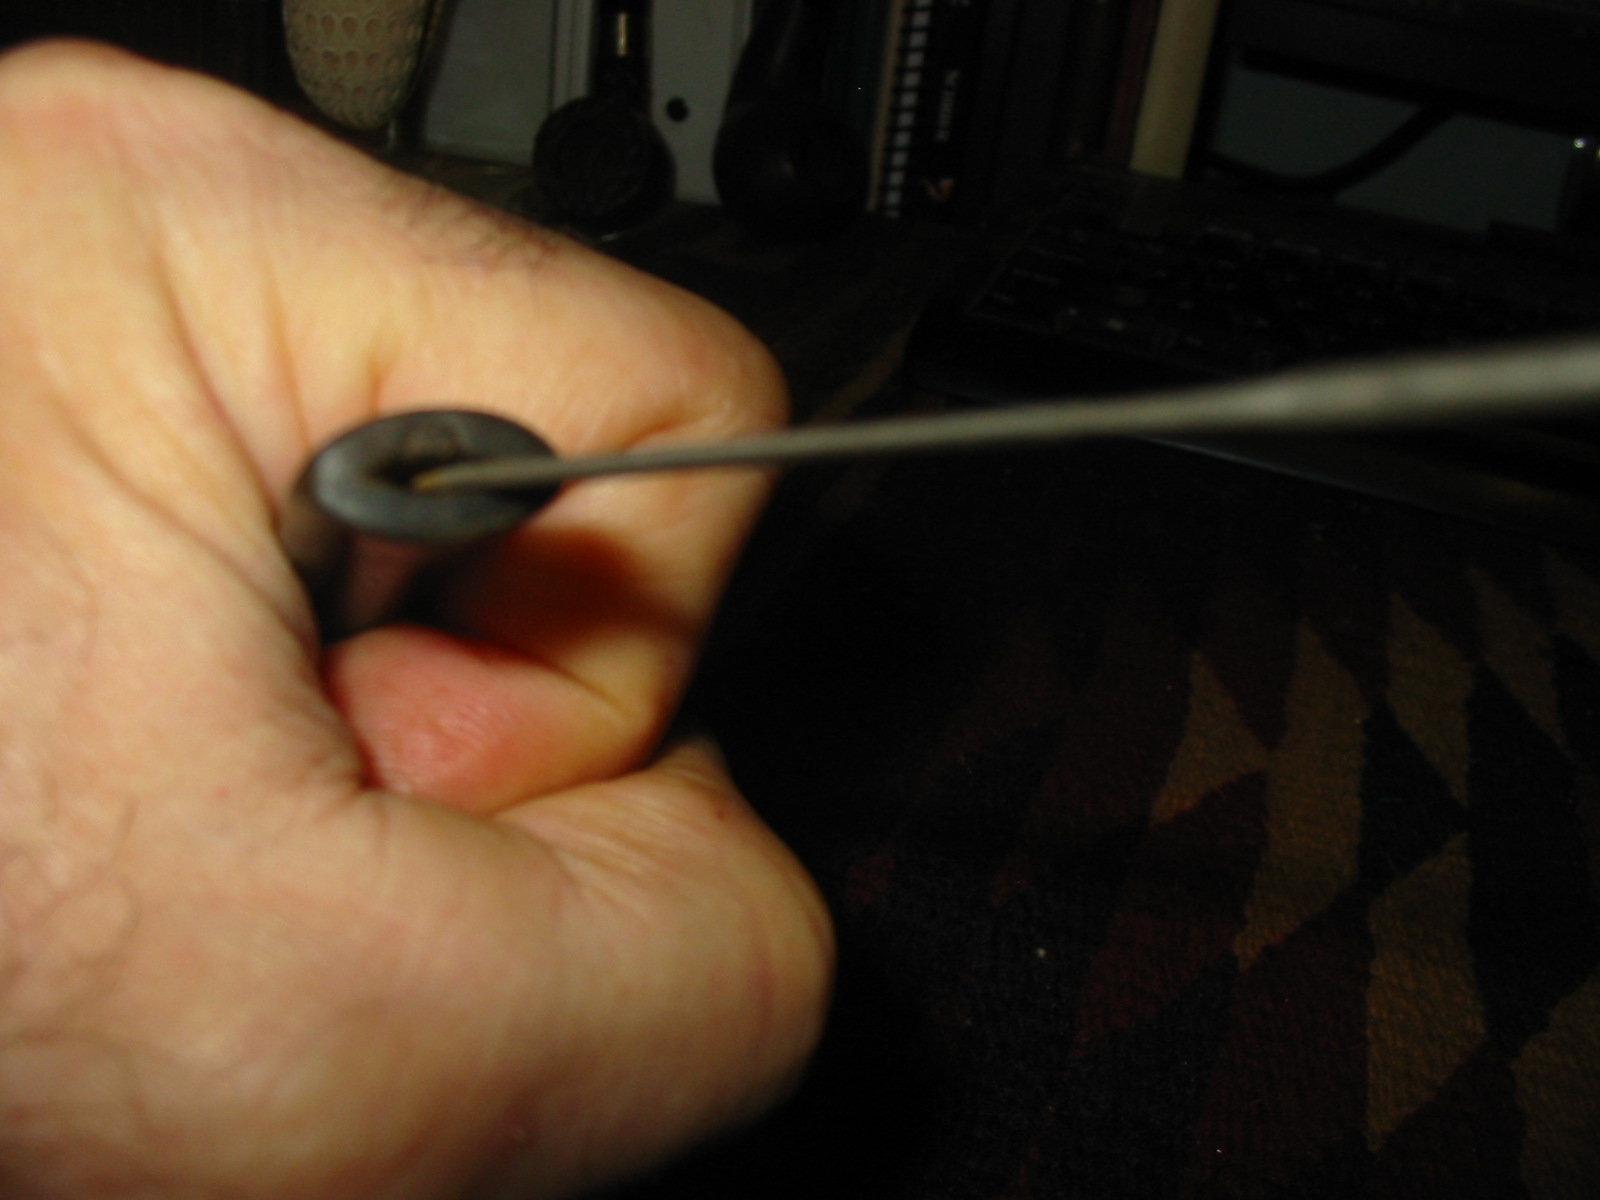
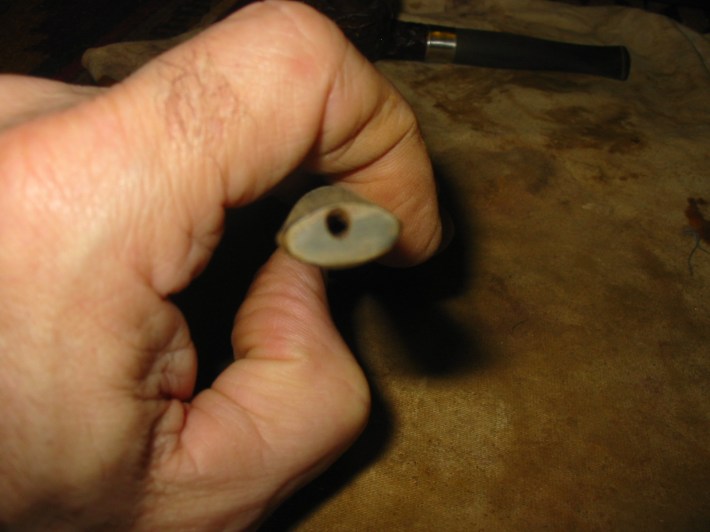
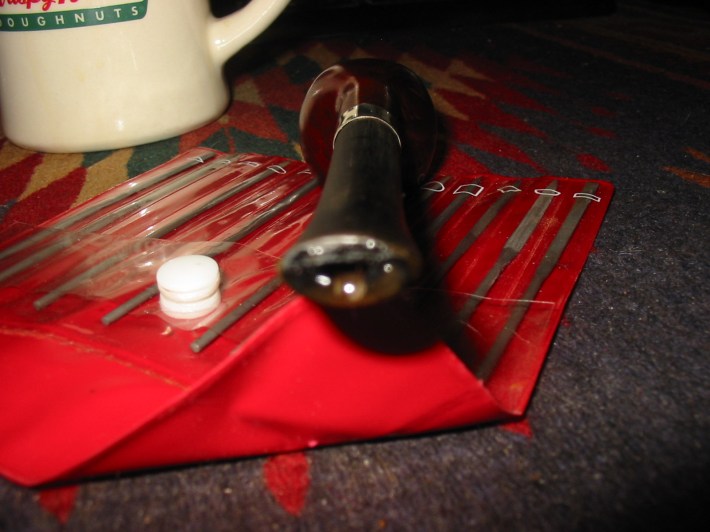
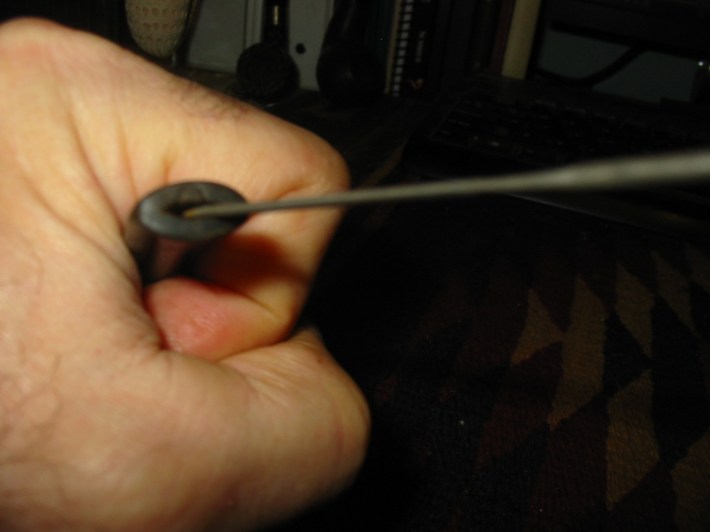
The next three photos show the repaired airhole and the newly cut slot in the button. The first photo shows the stem held in my hand upside down. The repair is visible at the 6 o’clock position in the picture and looks like a small divot in the slot. The slot itself is smooth and the divot is the patch. The second photo shows the stem right side up and the repair is visible at the 12 o’clock position. The final of the three photos shows the small oval needle file that I used to open the airway. I inserted it into the slot to give an idea of the size of the files that I use to do the work on these slots.

ImageImageImage

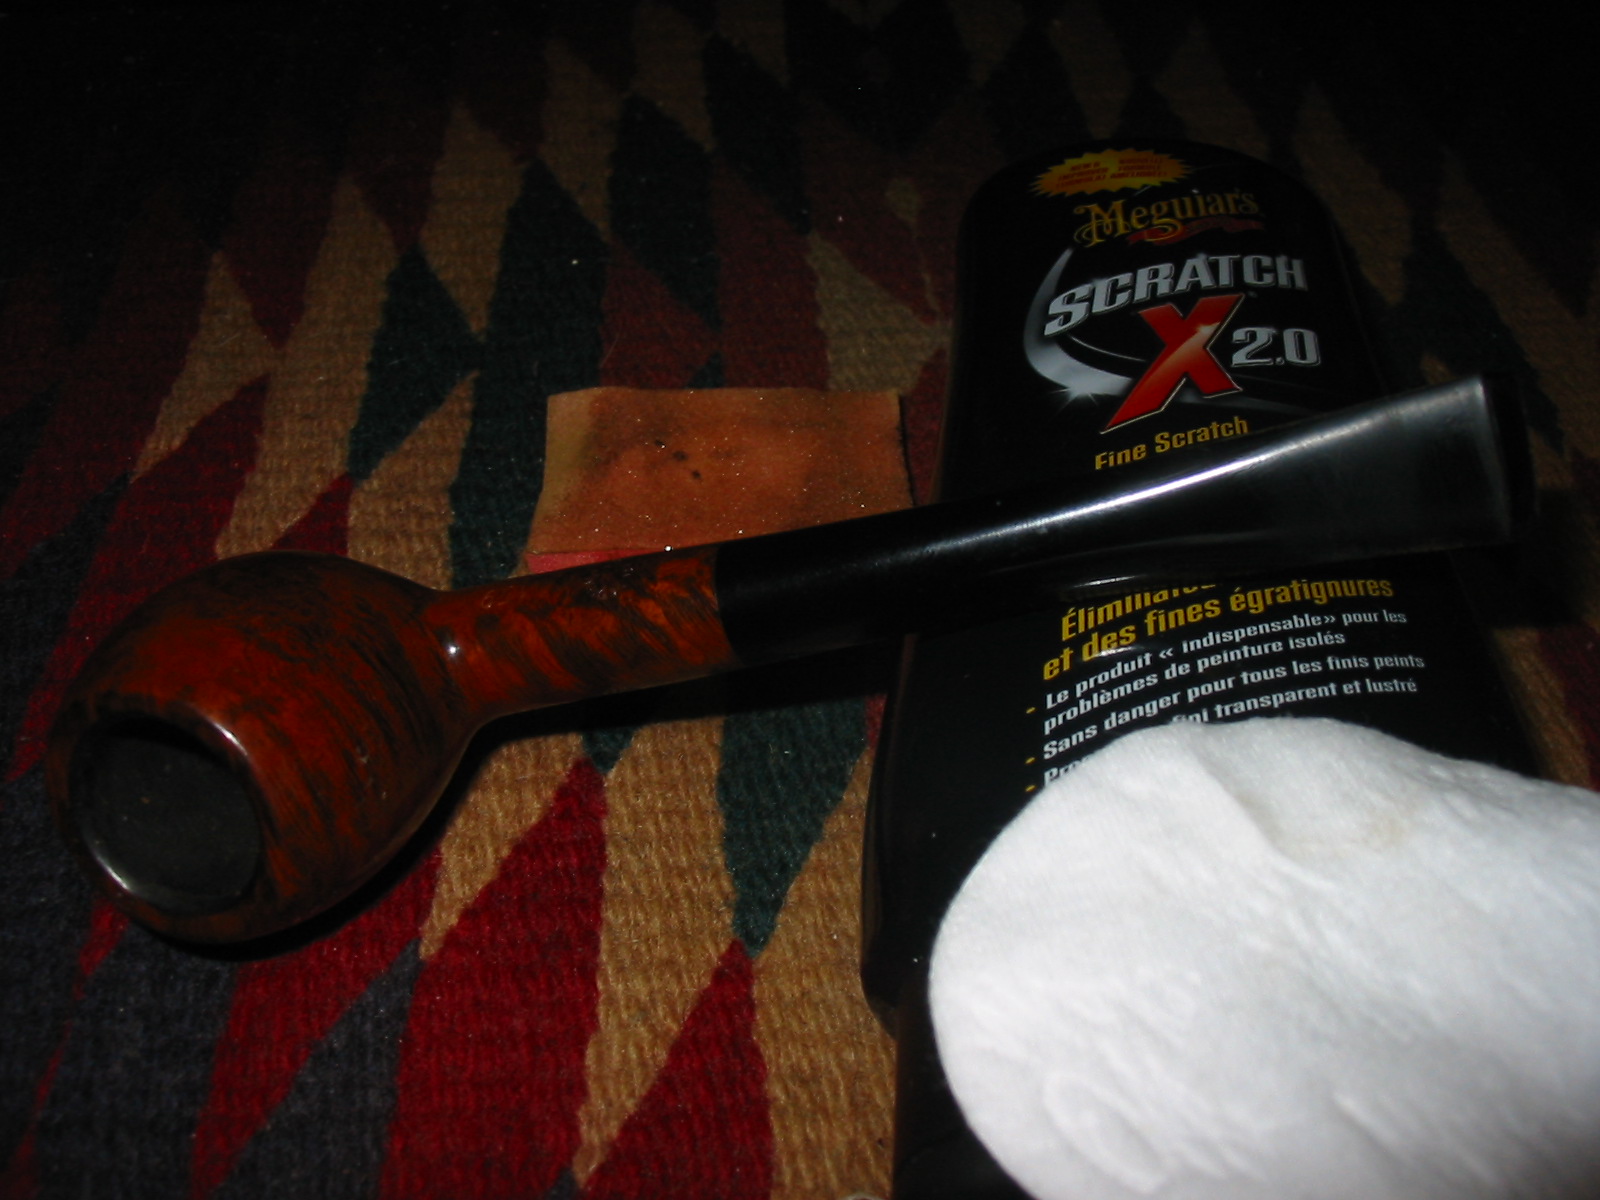
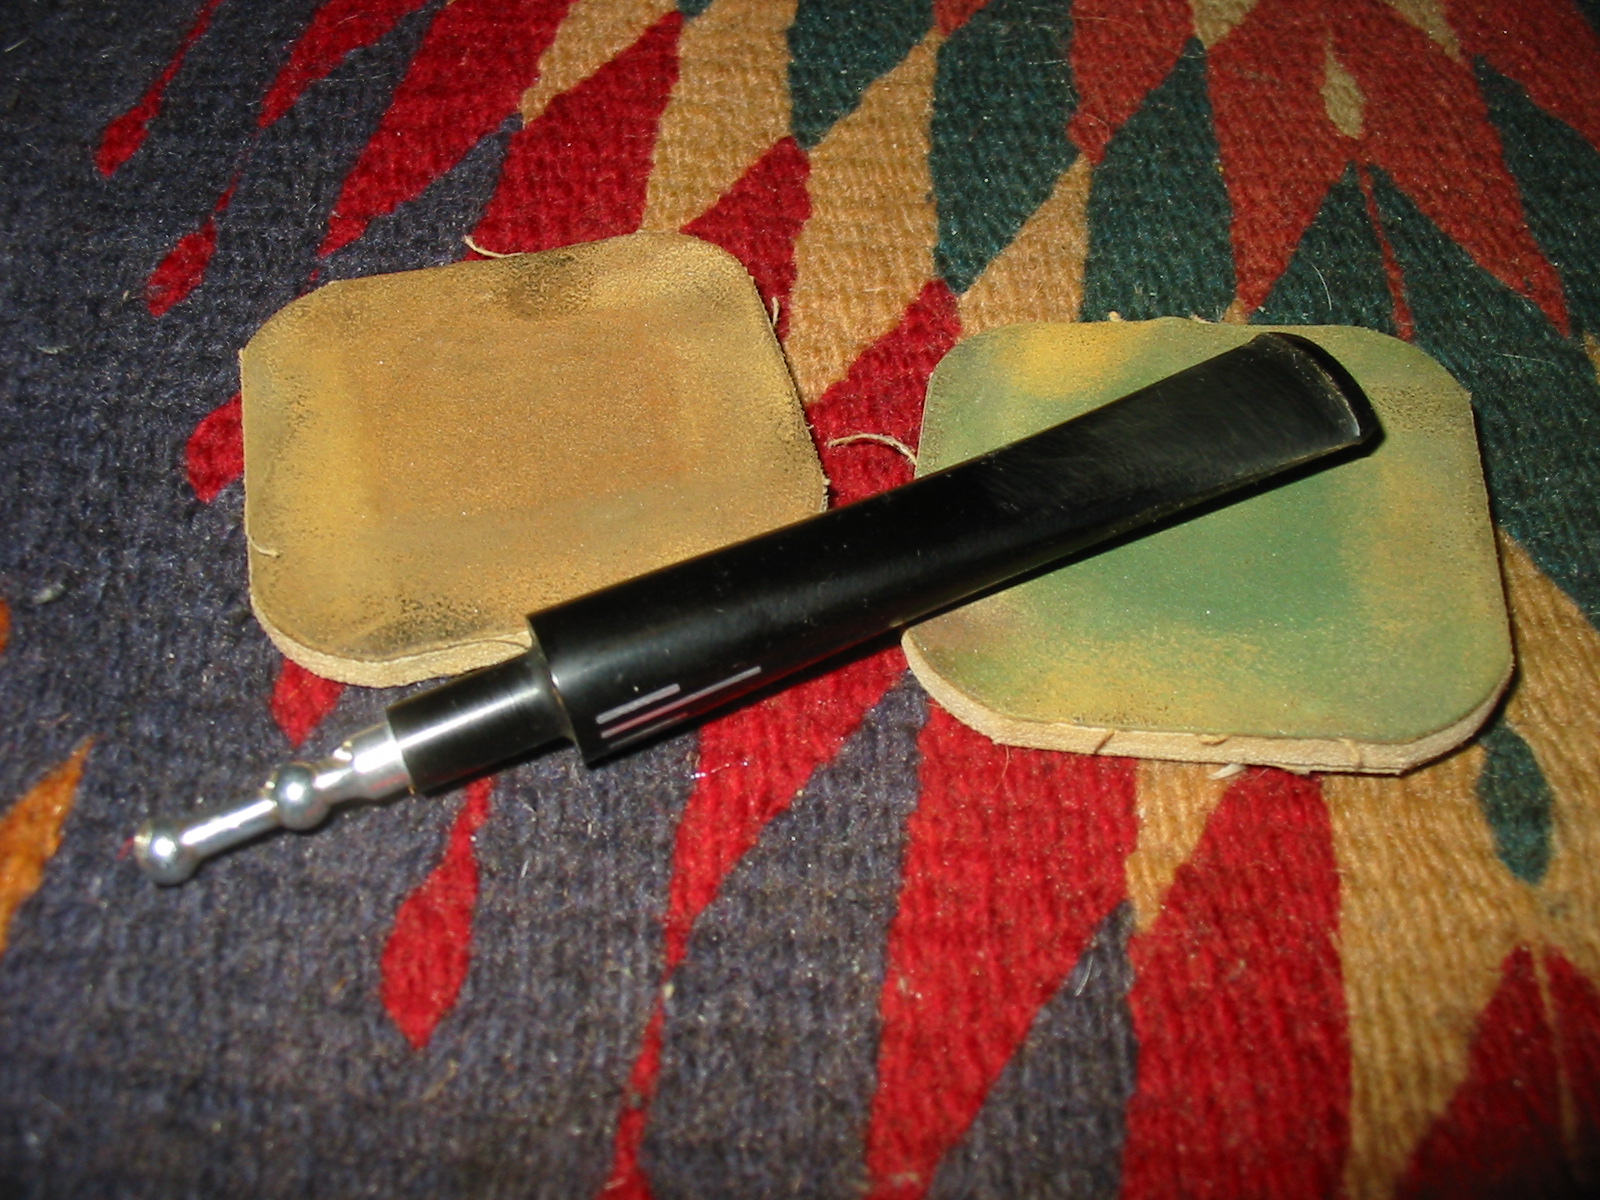
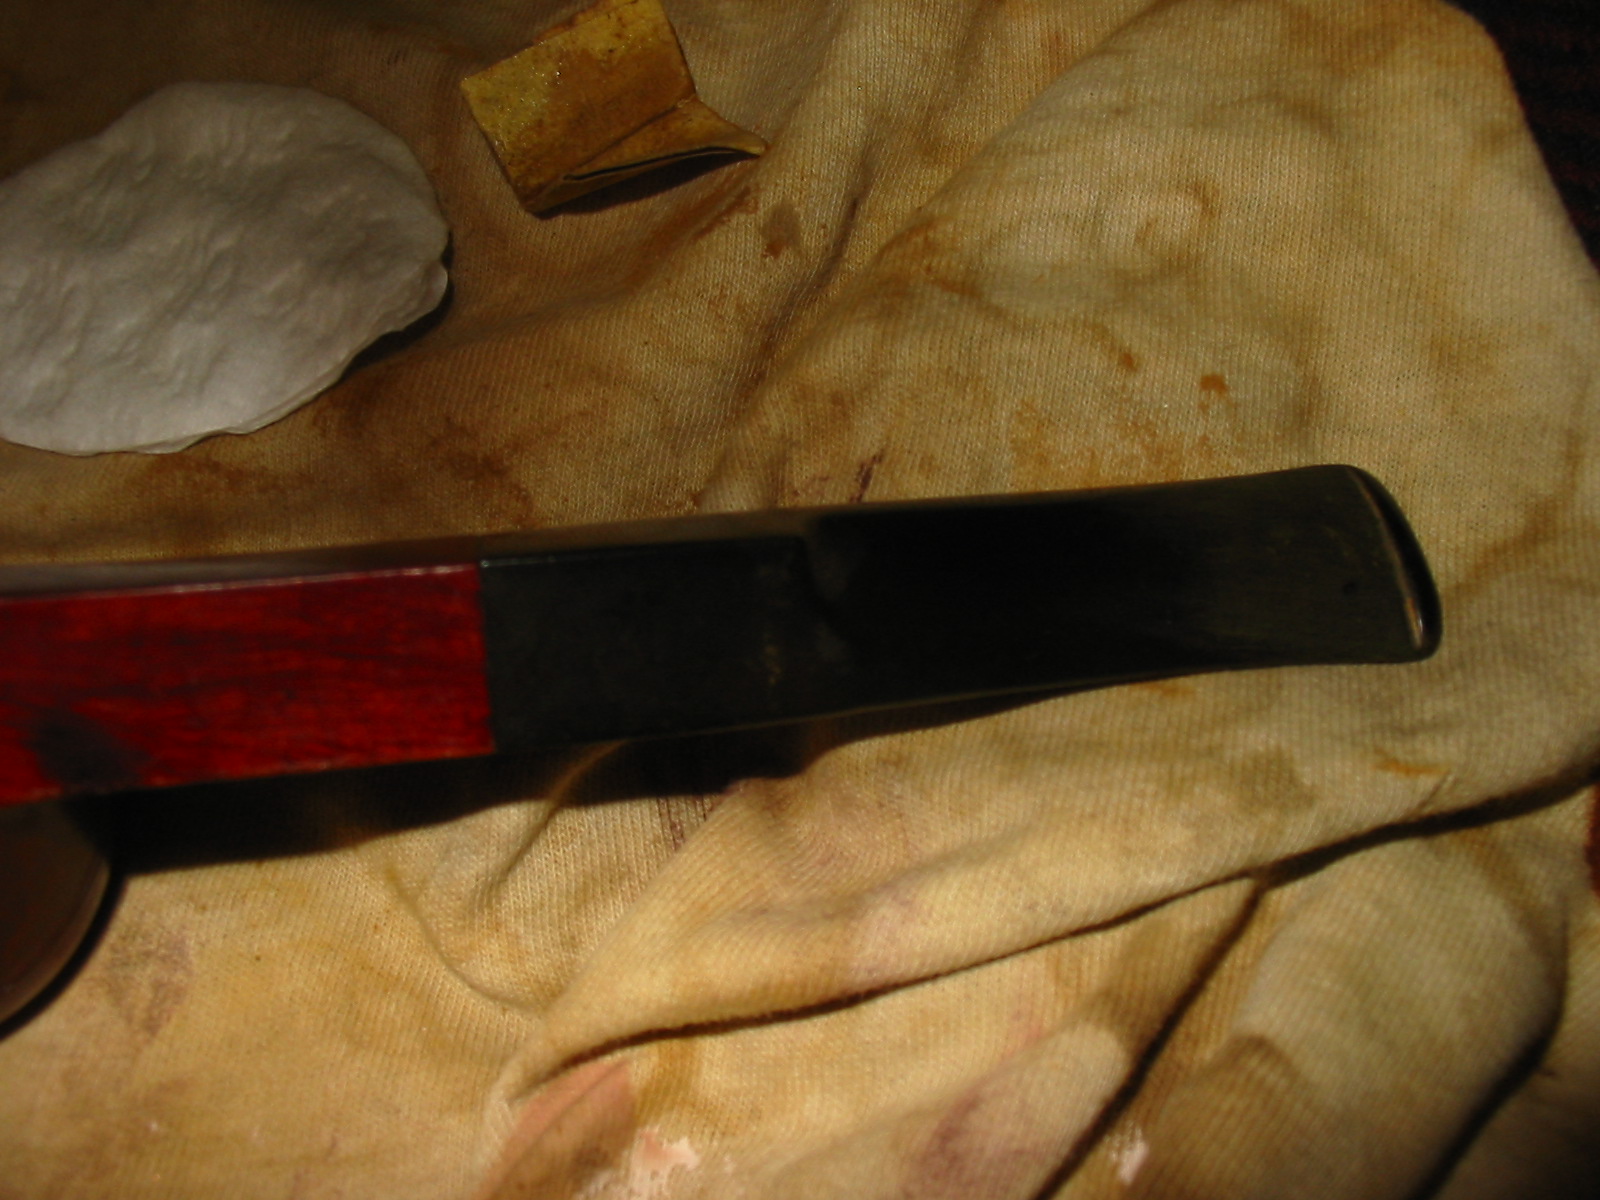
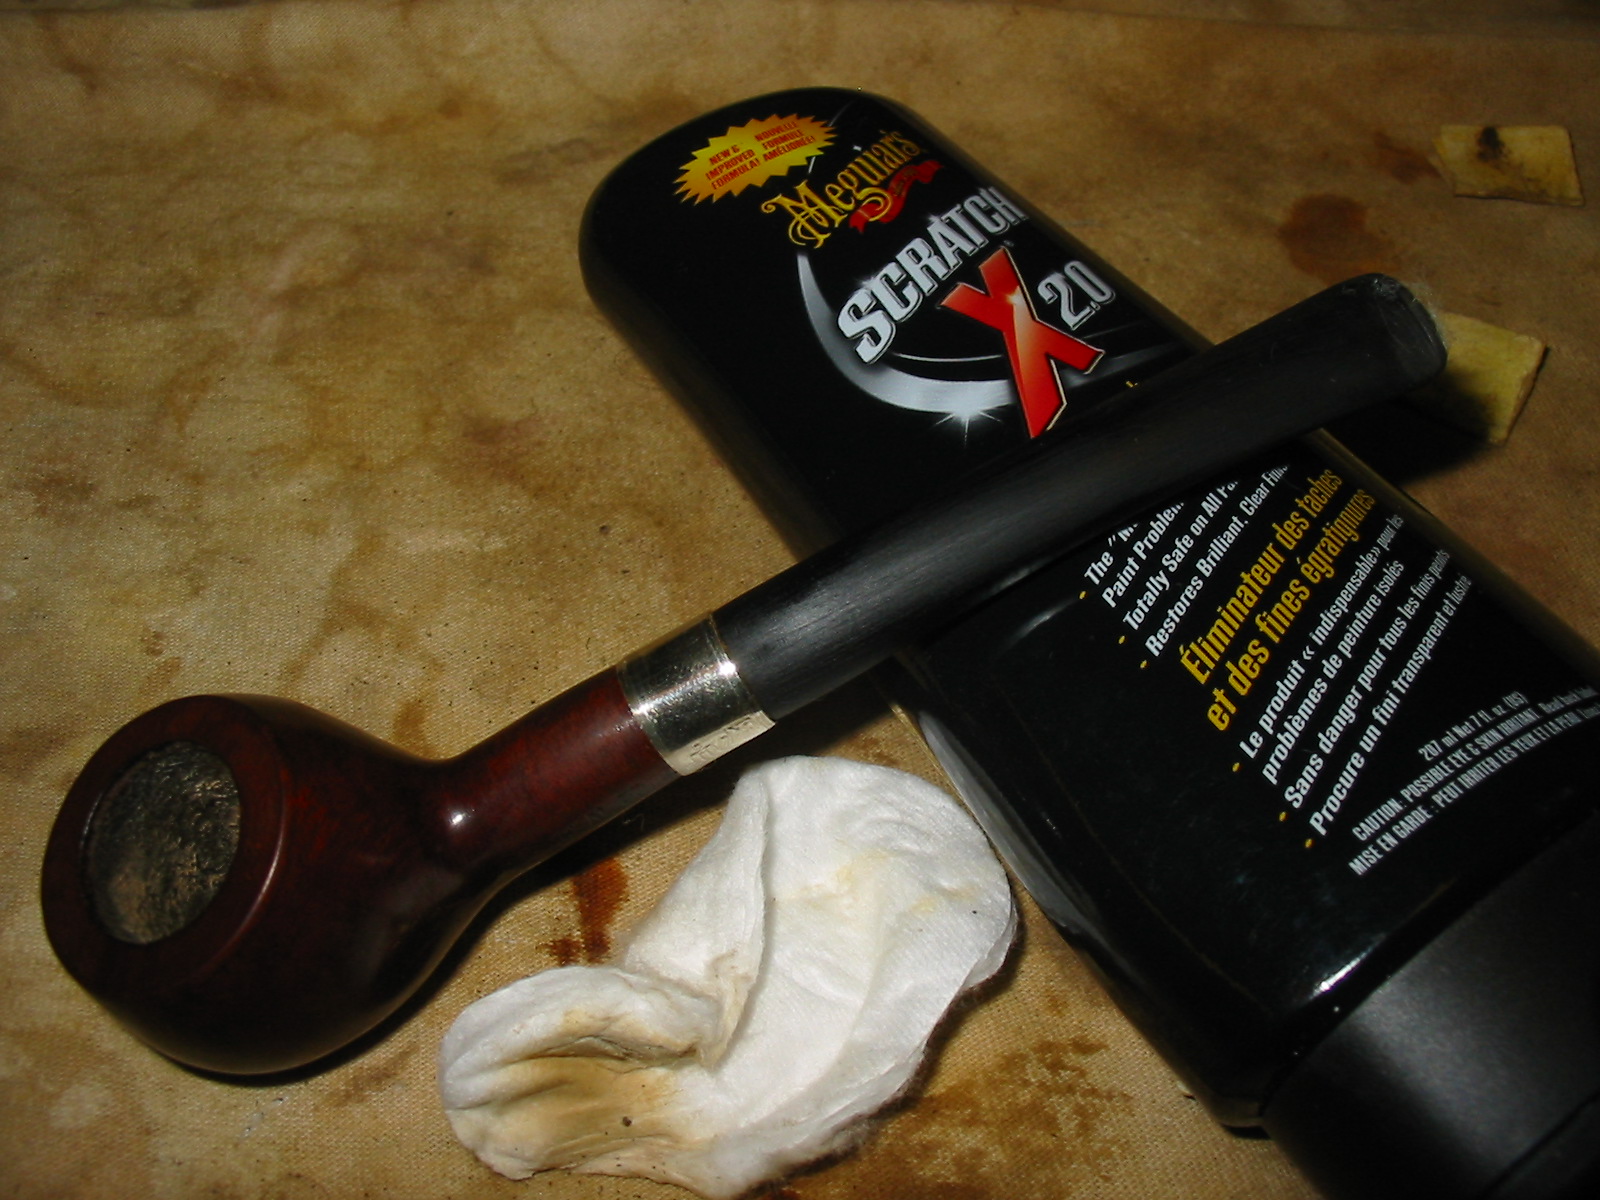
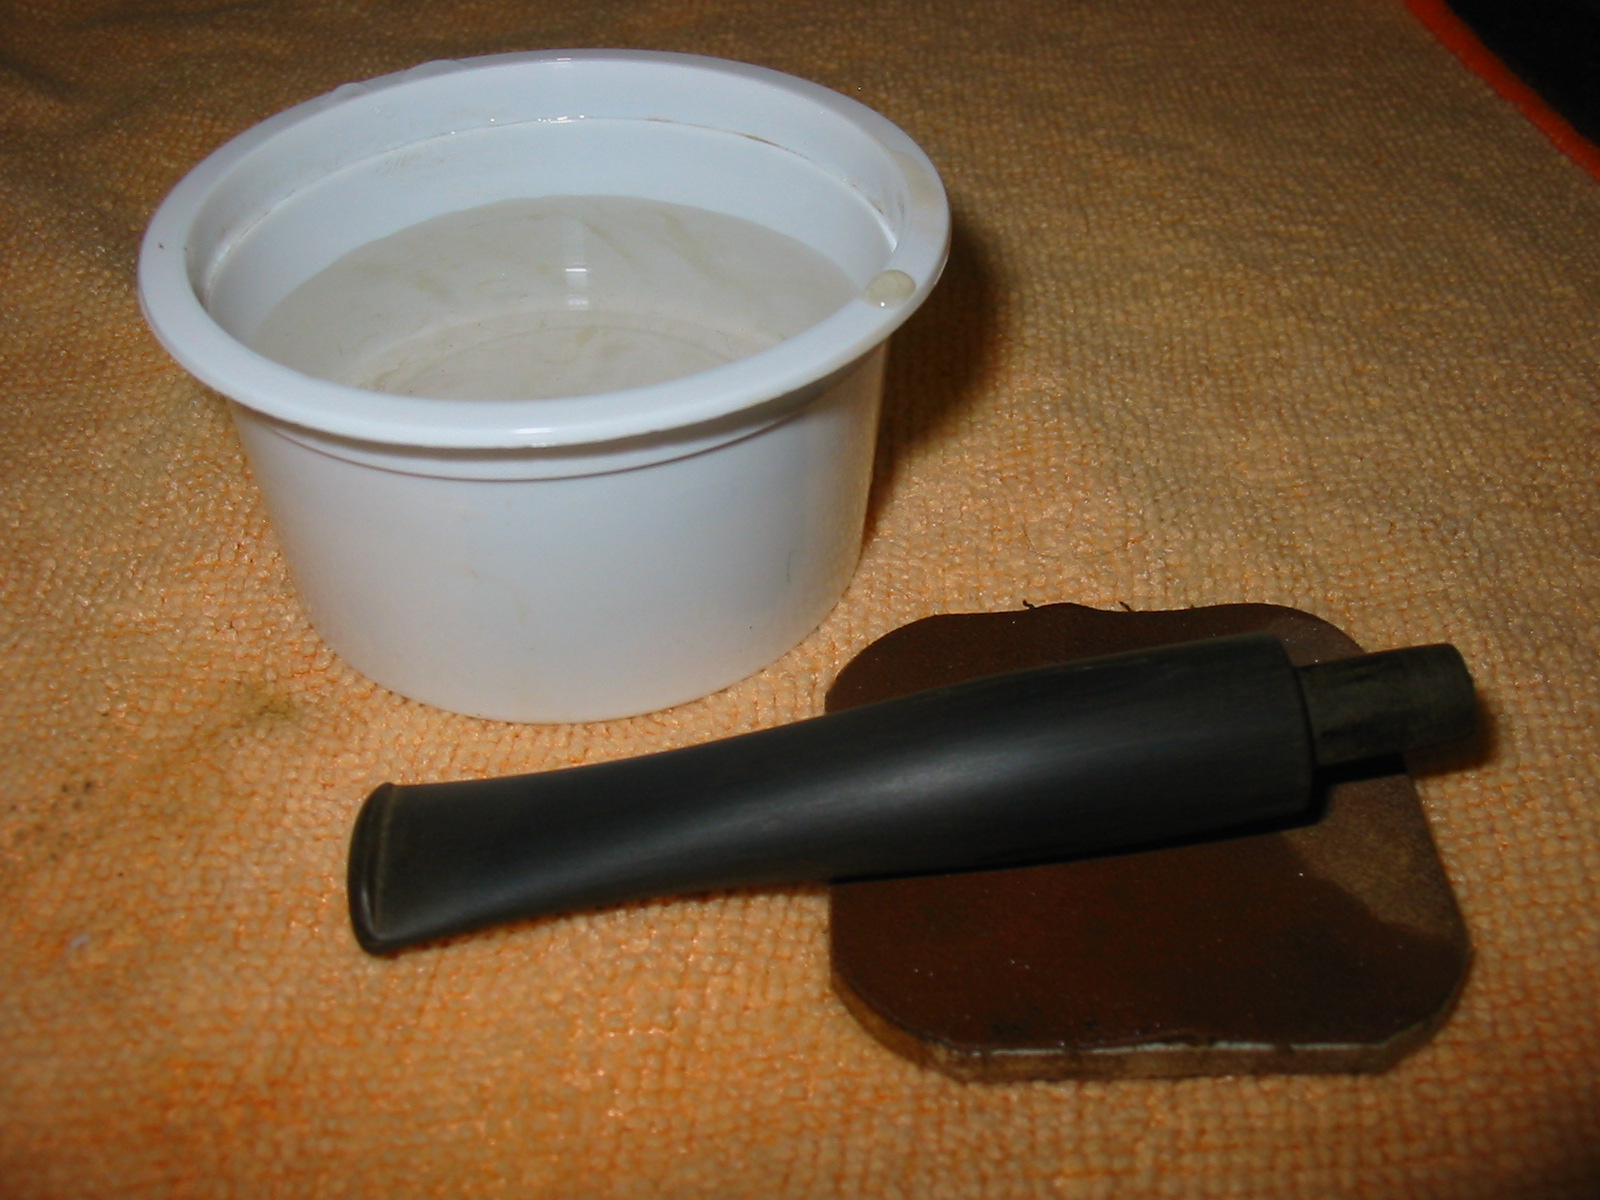
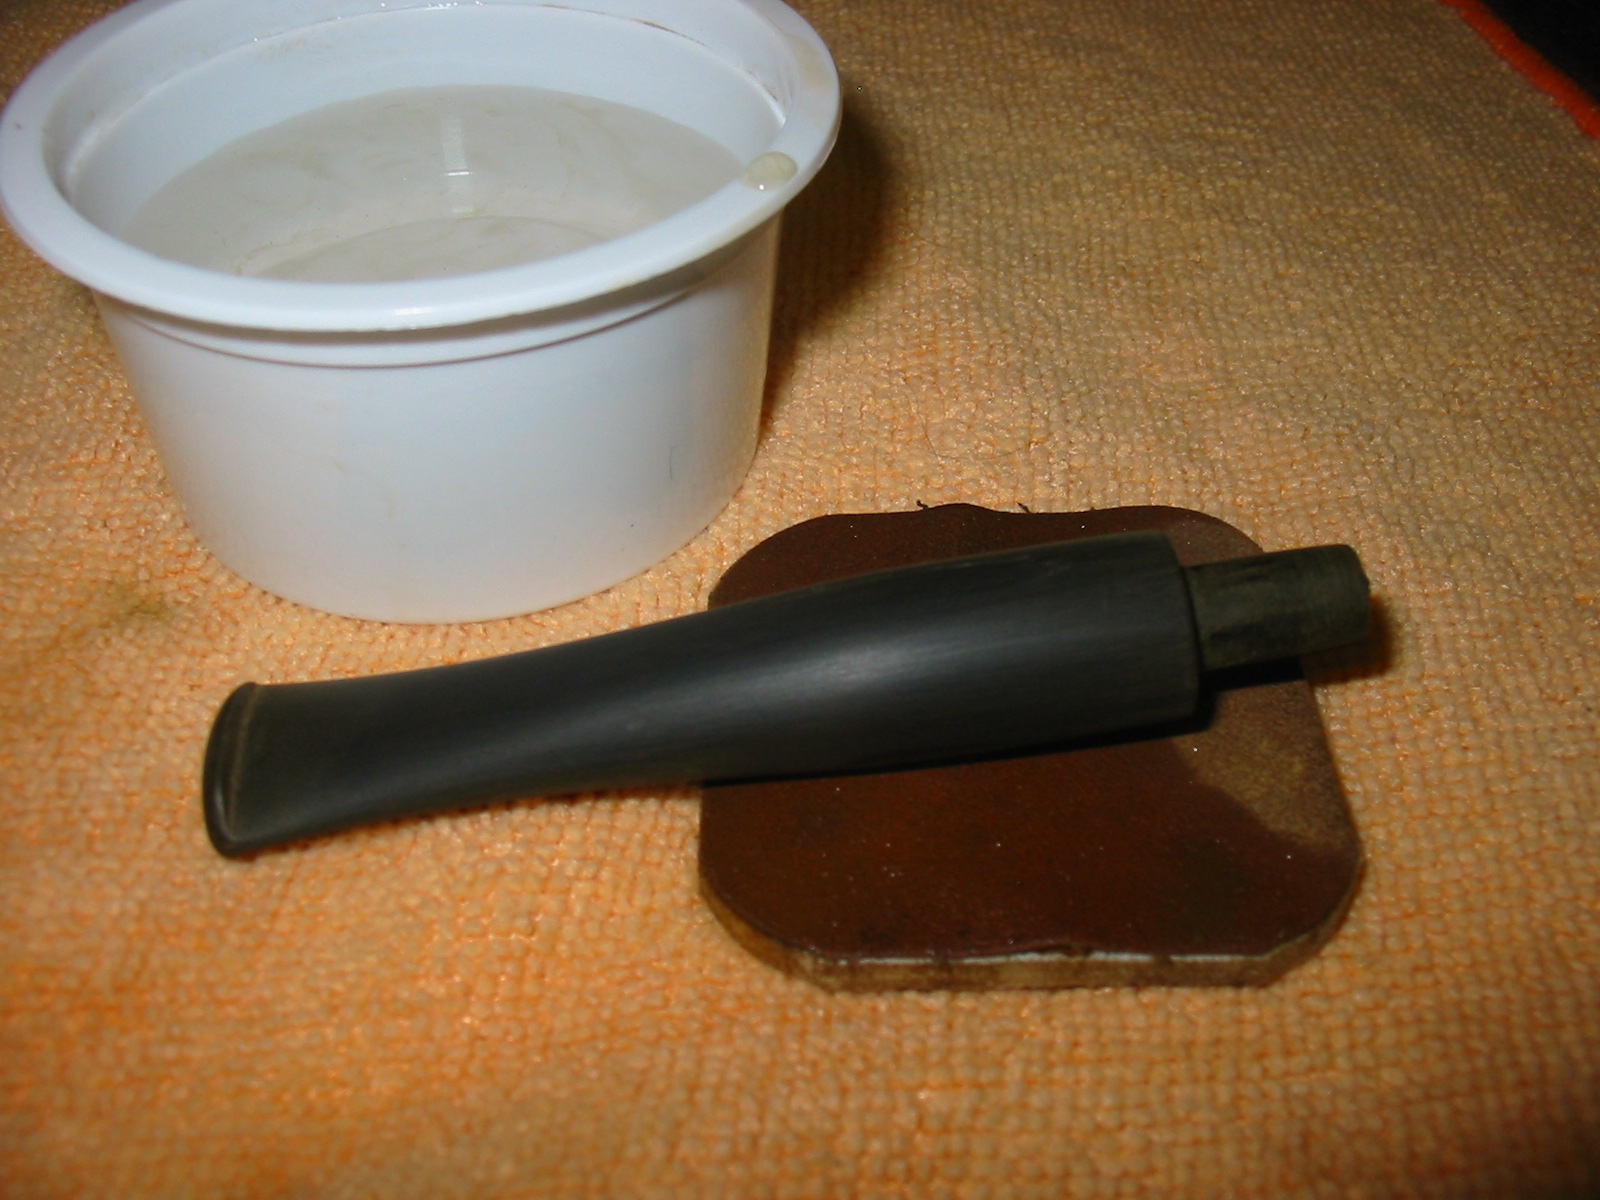
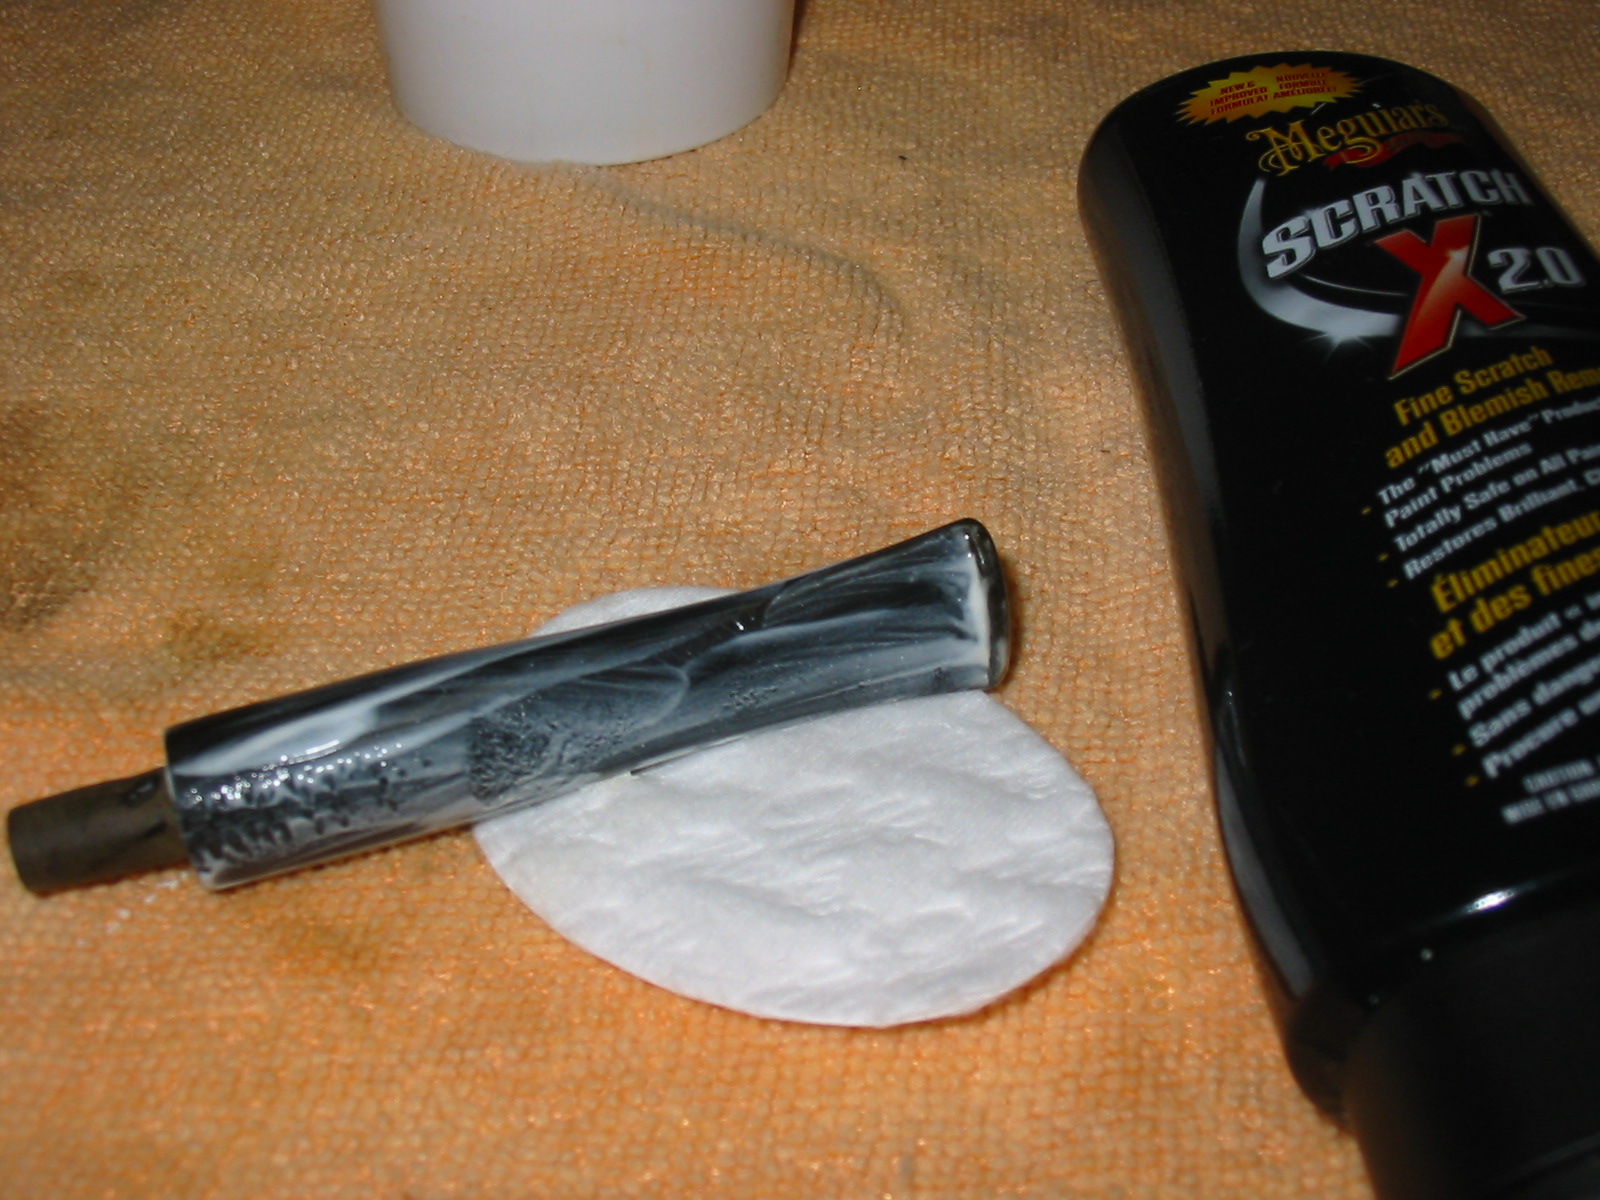
I then turned my attention to the stem itself. It needed a lot more sanding to clean it up and bring out a clean shine. The first photo below shows the polish that I gave it with the Maguiar’s Scratch X2.0. I rub this on with my fingers and then scrub it off with the cotton pad. The polish is white and when I rub it off it is the brown colour that stains the cotton pad in the picture below. Once I had finished with the polish I then sanded it with the micromesh sanding pads. I only took one photo (the second one below) to show the sanding process. I used 1500-12,000 grit micromesh sanding pads to remove the scratches and shine the stem.

ImageImage

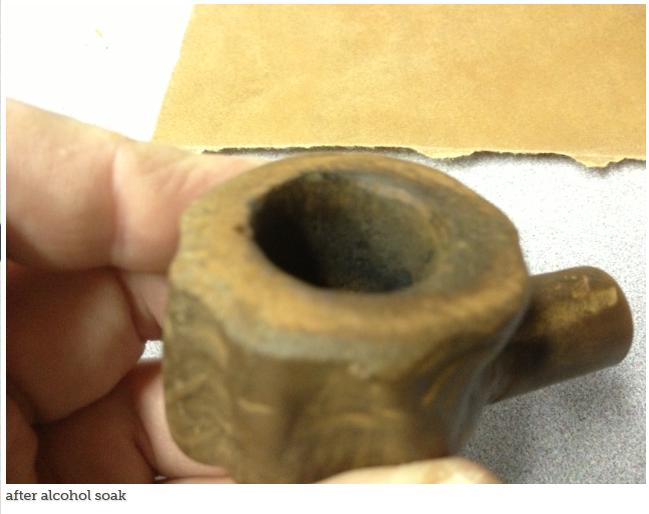
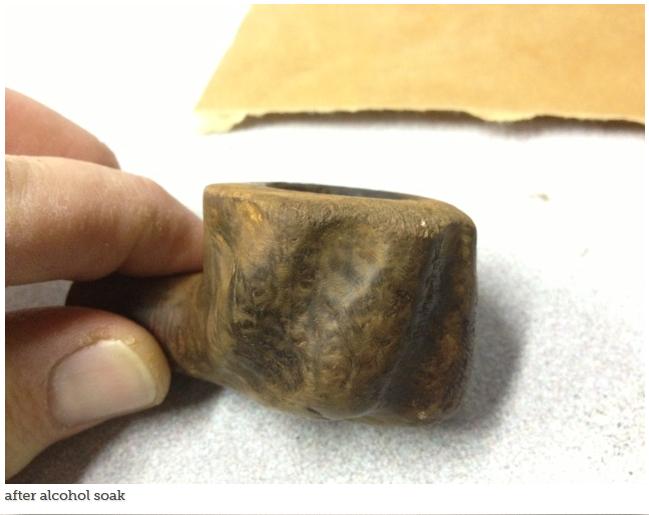
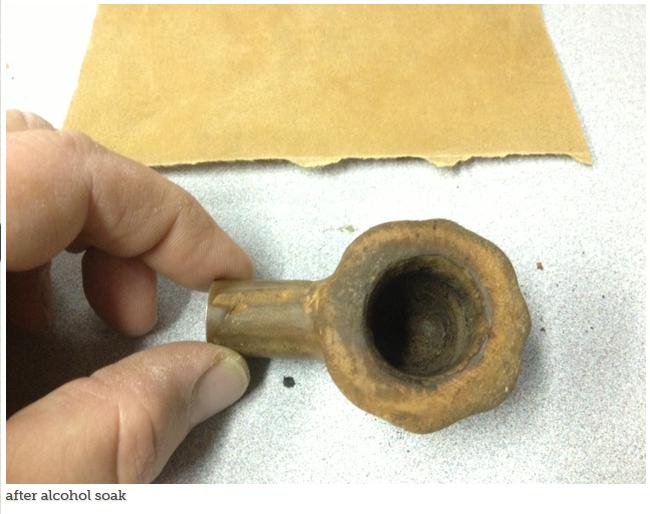
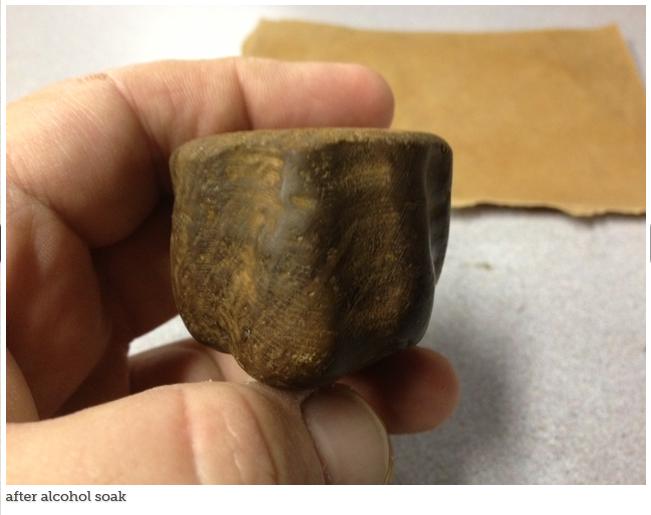
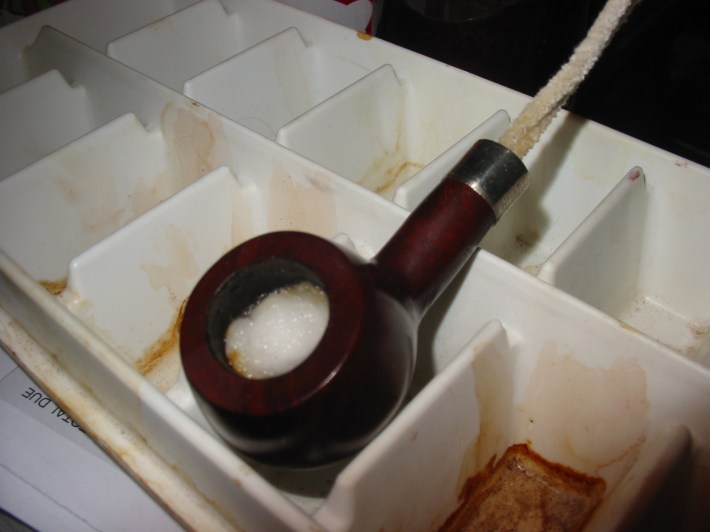
I continued to work on the stem but removed it from the bowl and gave the bowl a cotton bole and alcohol treatment to remove the strong sour smell that came from the bowl. I stuffed the bowl with a cotton bole, put a pipe cleaner in the shank and used my ear syringe to fill the bowl with Everclear. I left it to sit on the ice cube tray while I went hunting at the flea market. It sat for about 4 hours before I removed the cotton bole and flamed the bowl to remove the remaining alcohol. The first photo shows the pipe when I first set it up. The second one is how it looked four hours later when I returned home and removed the cotton.

ImageImage

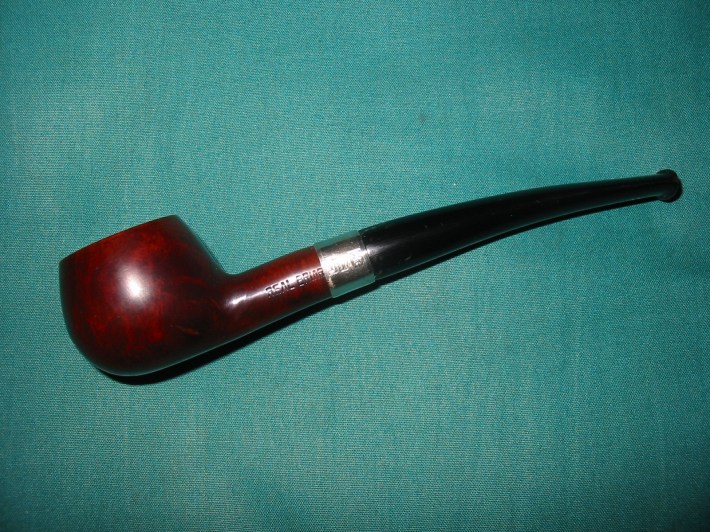
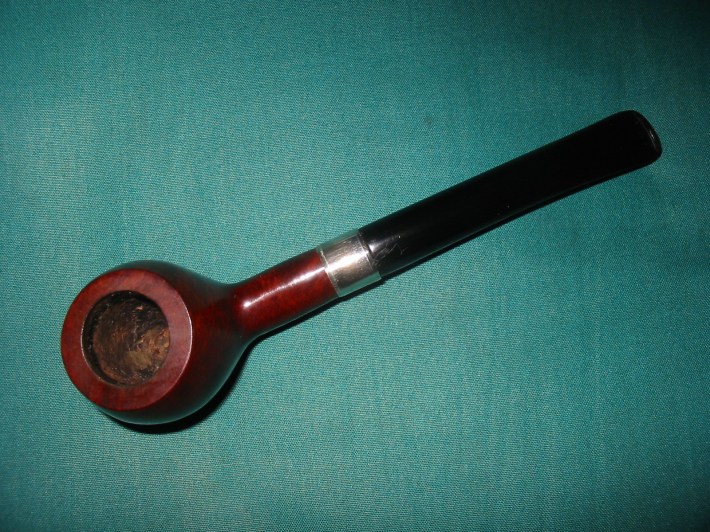
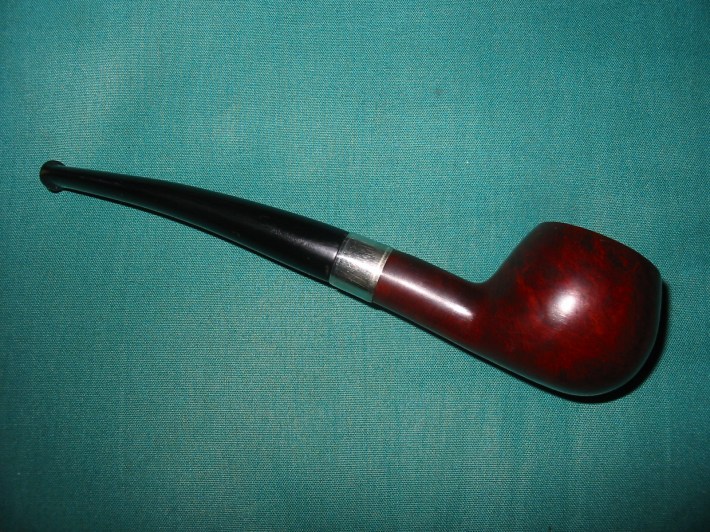
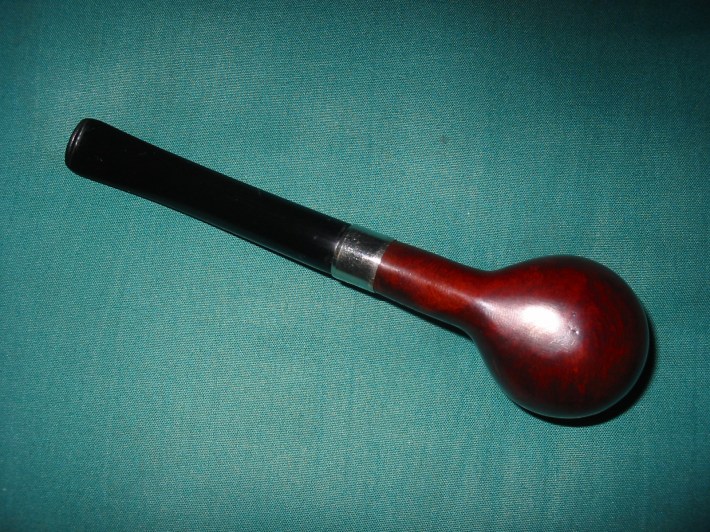
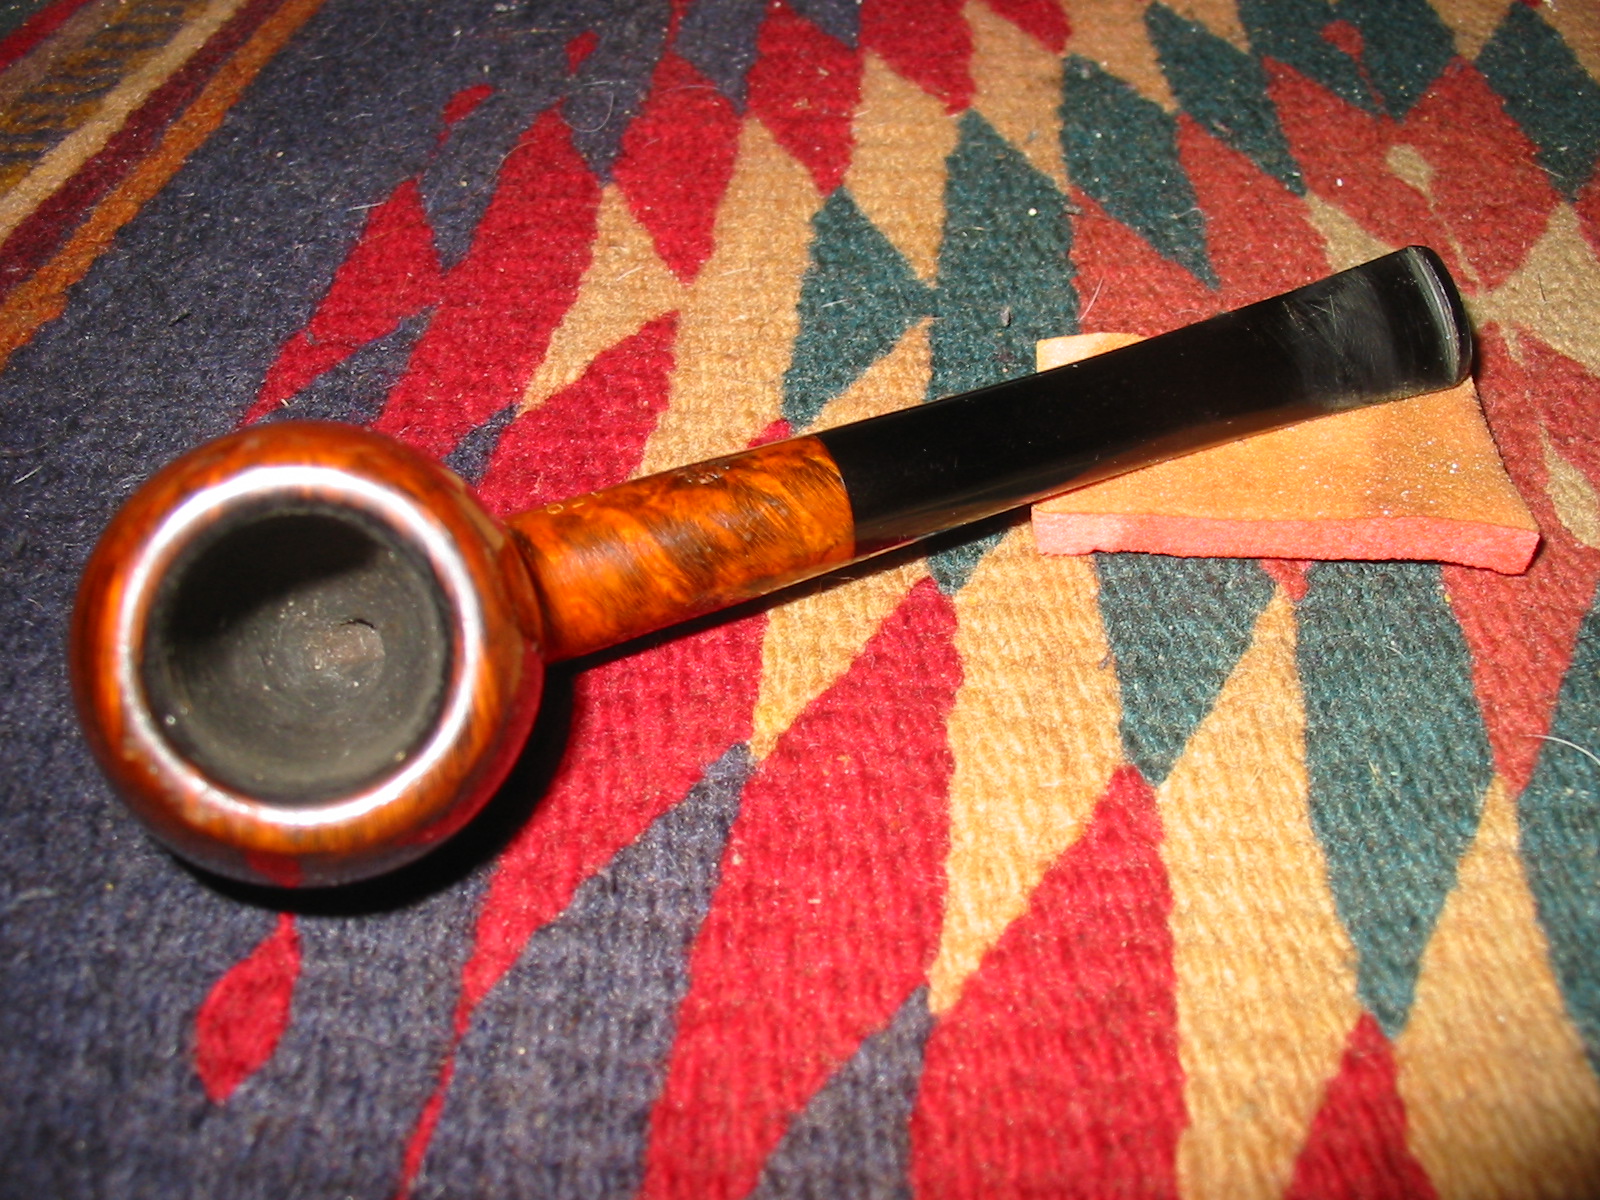
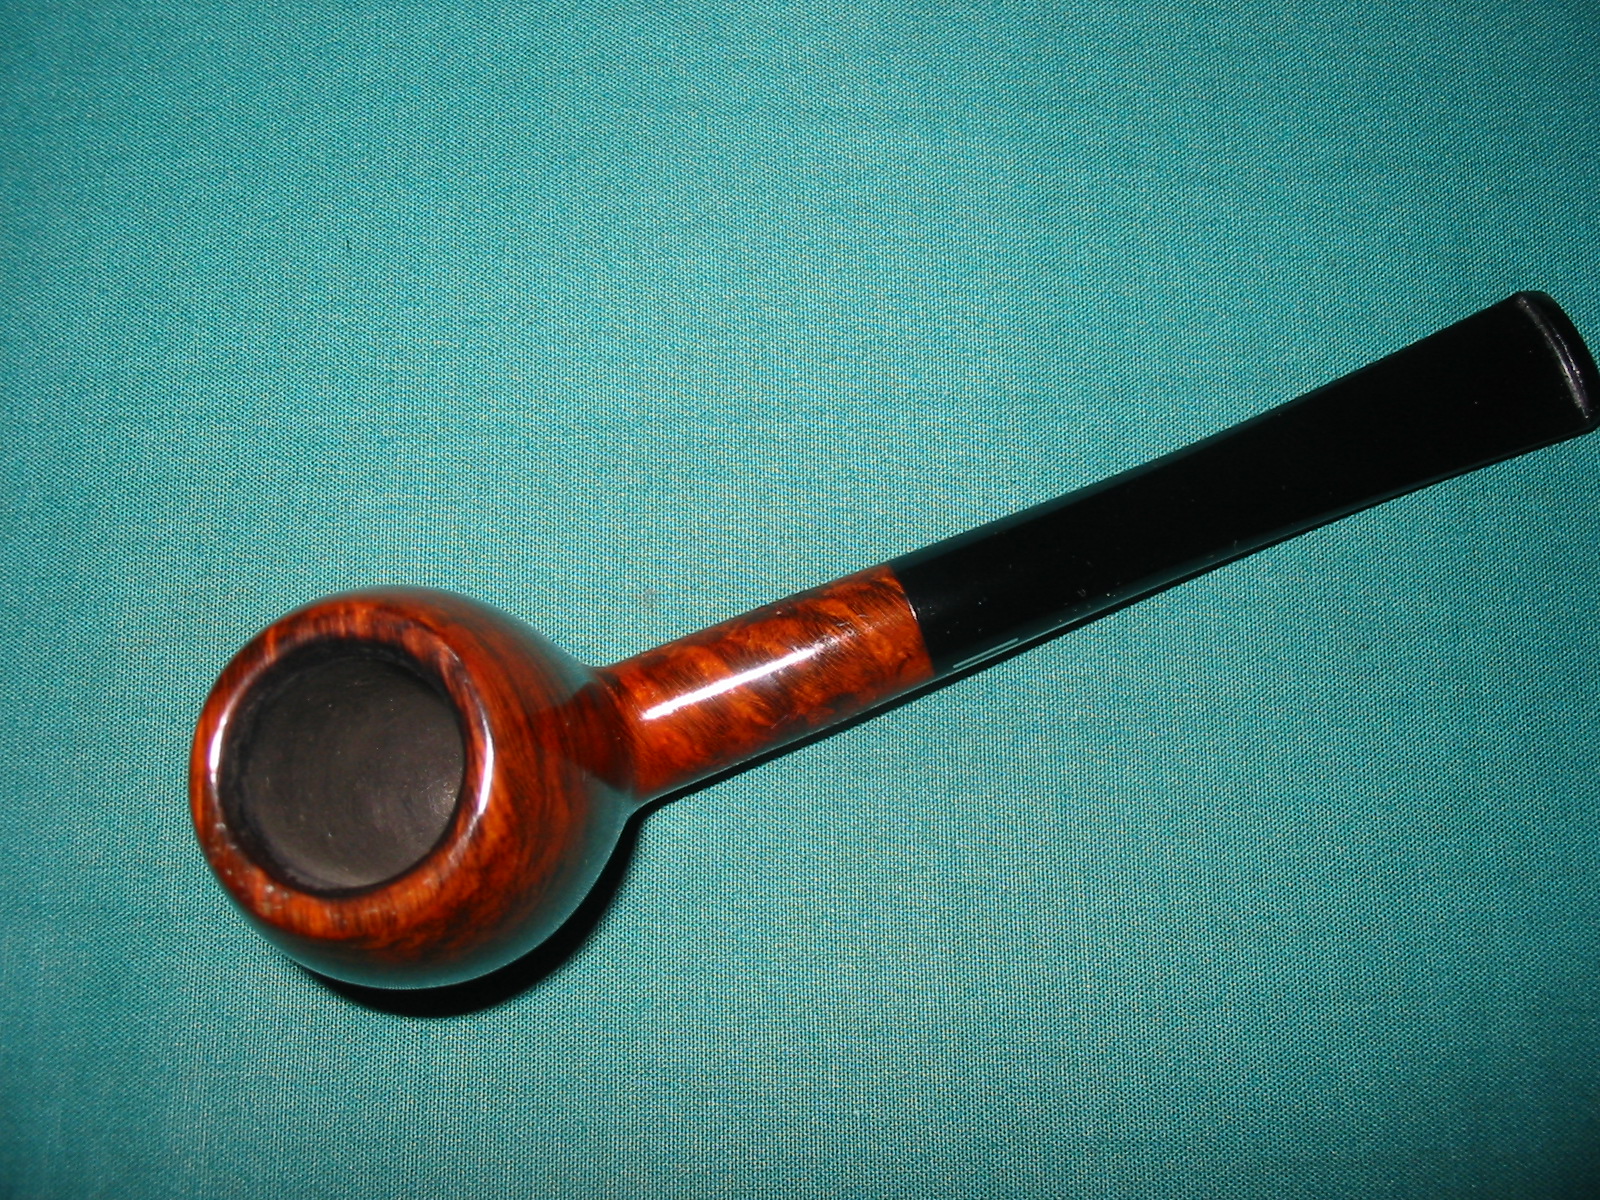
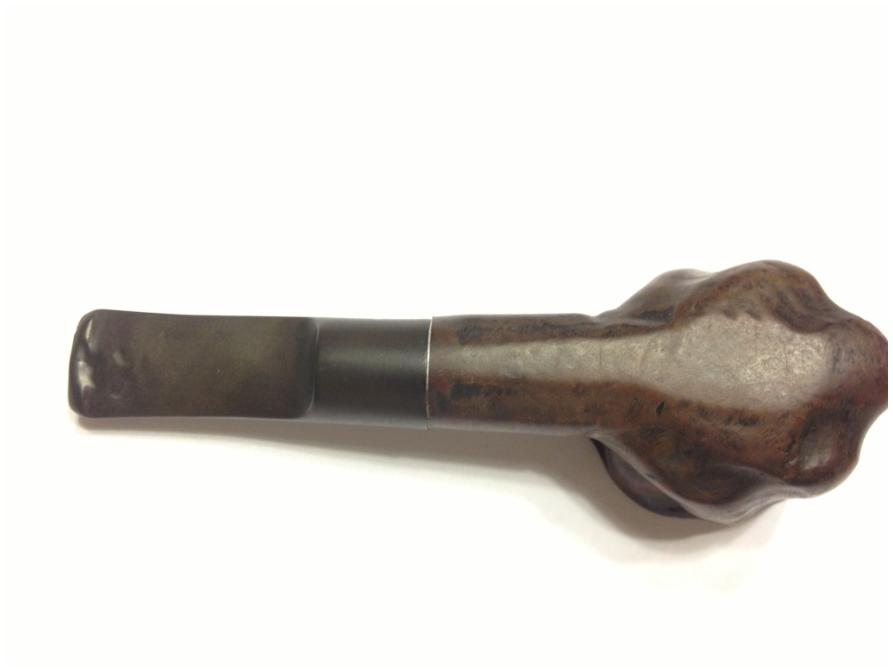
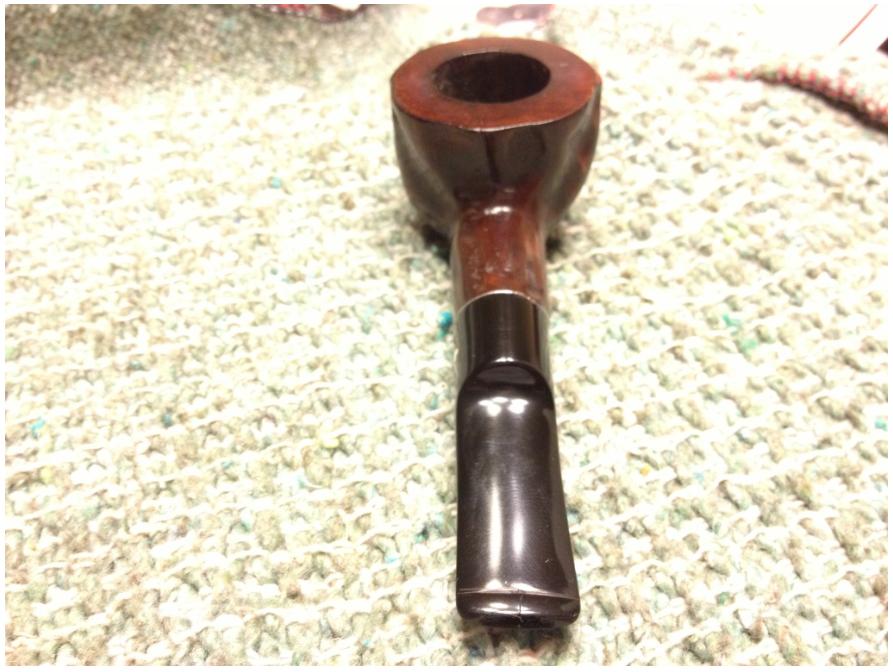
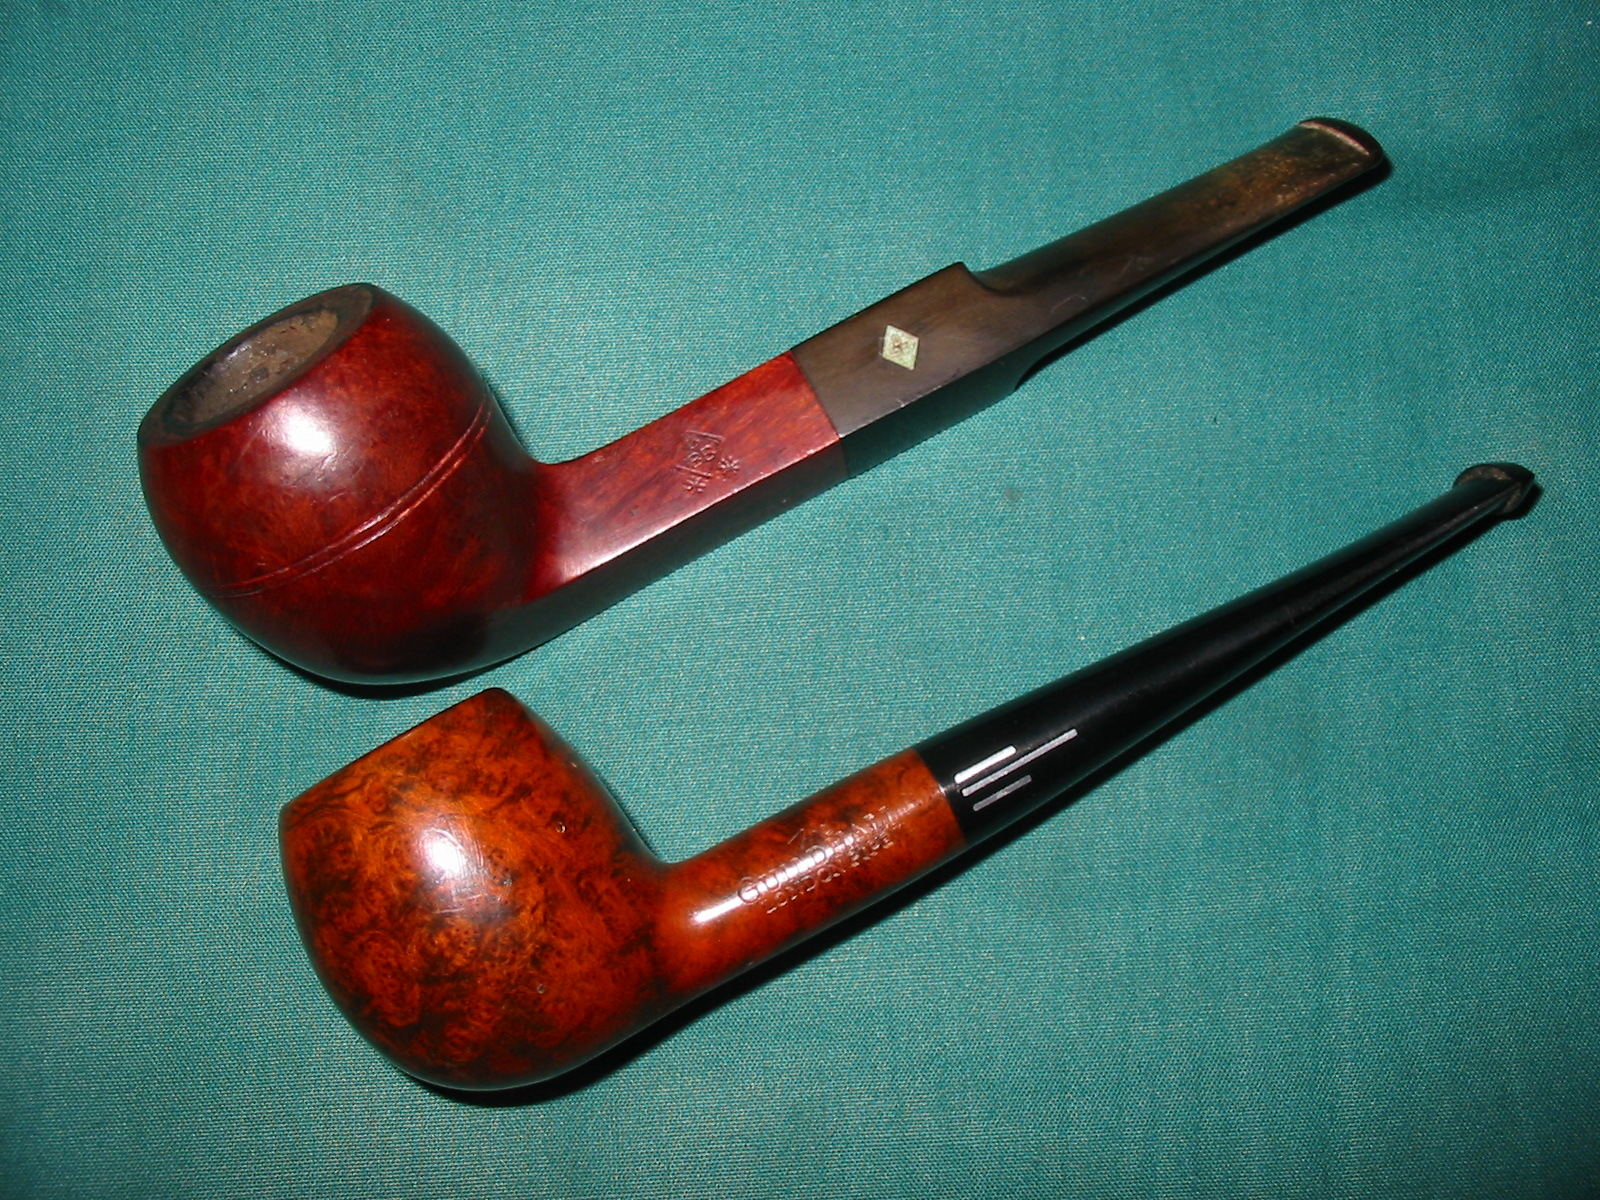
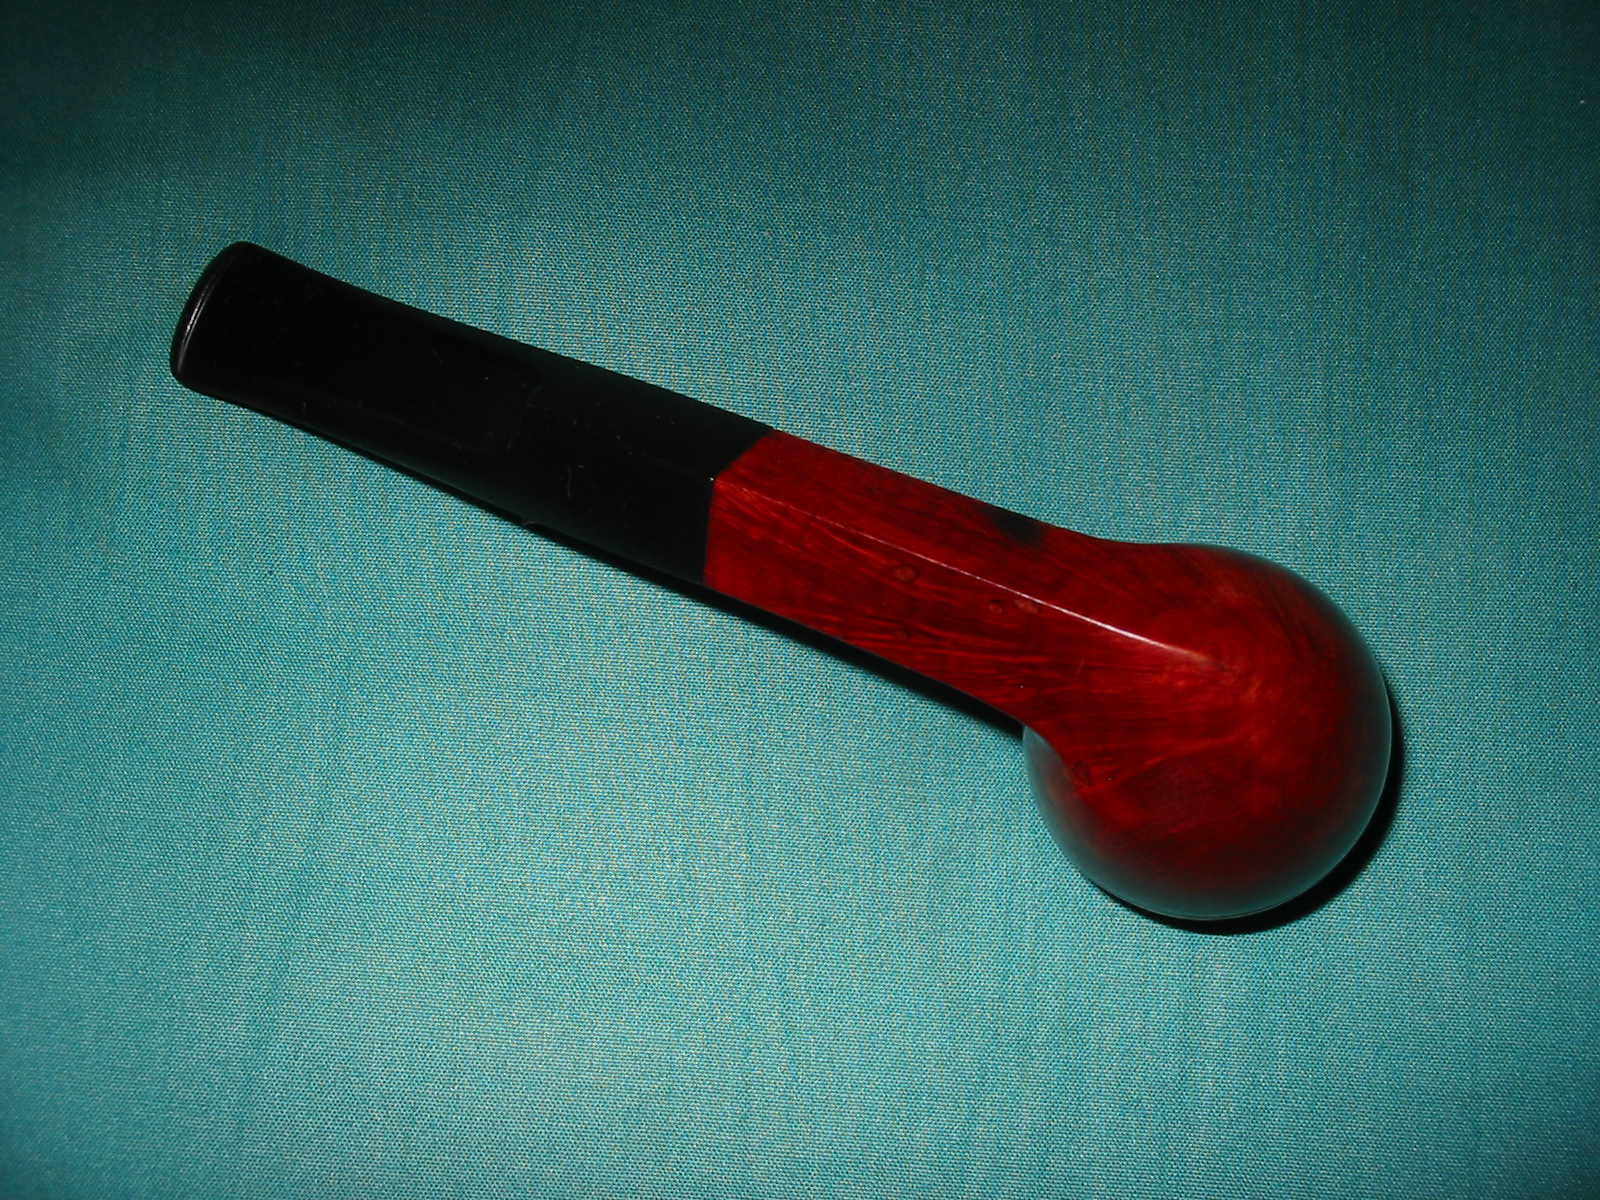
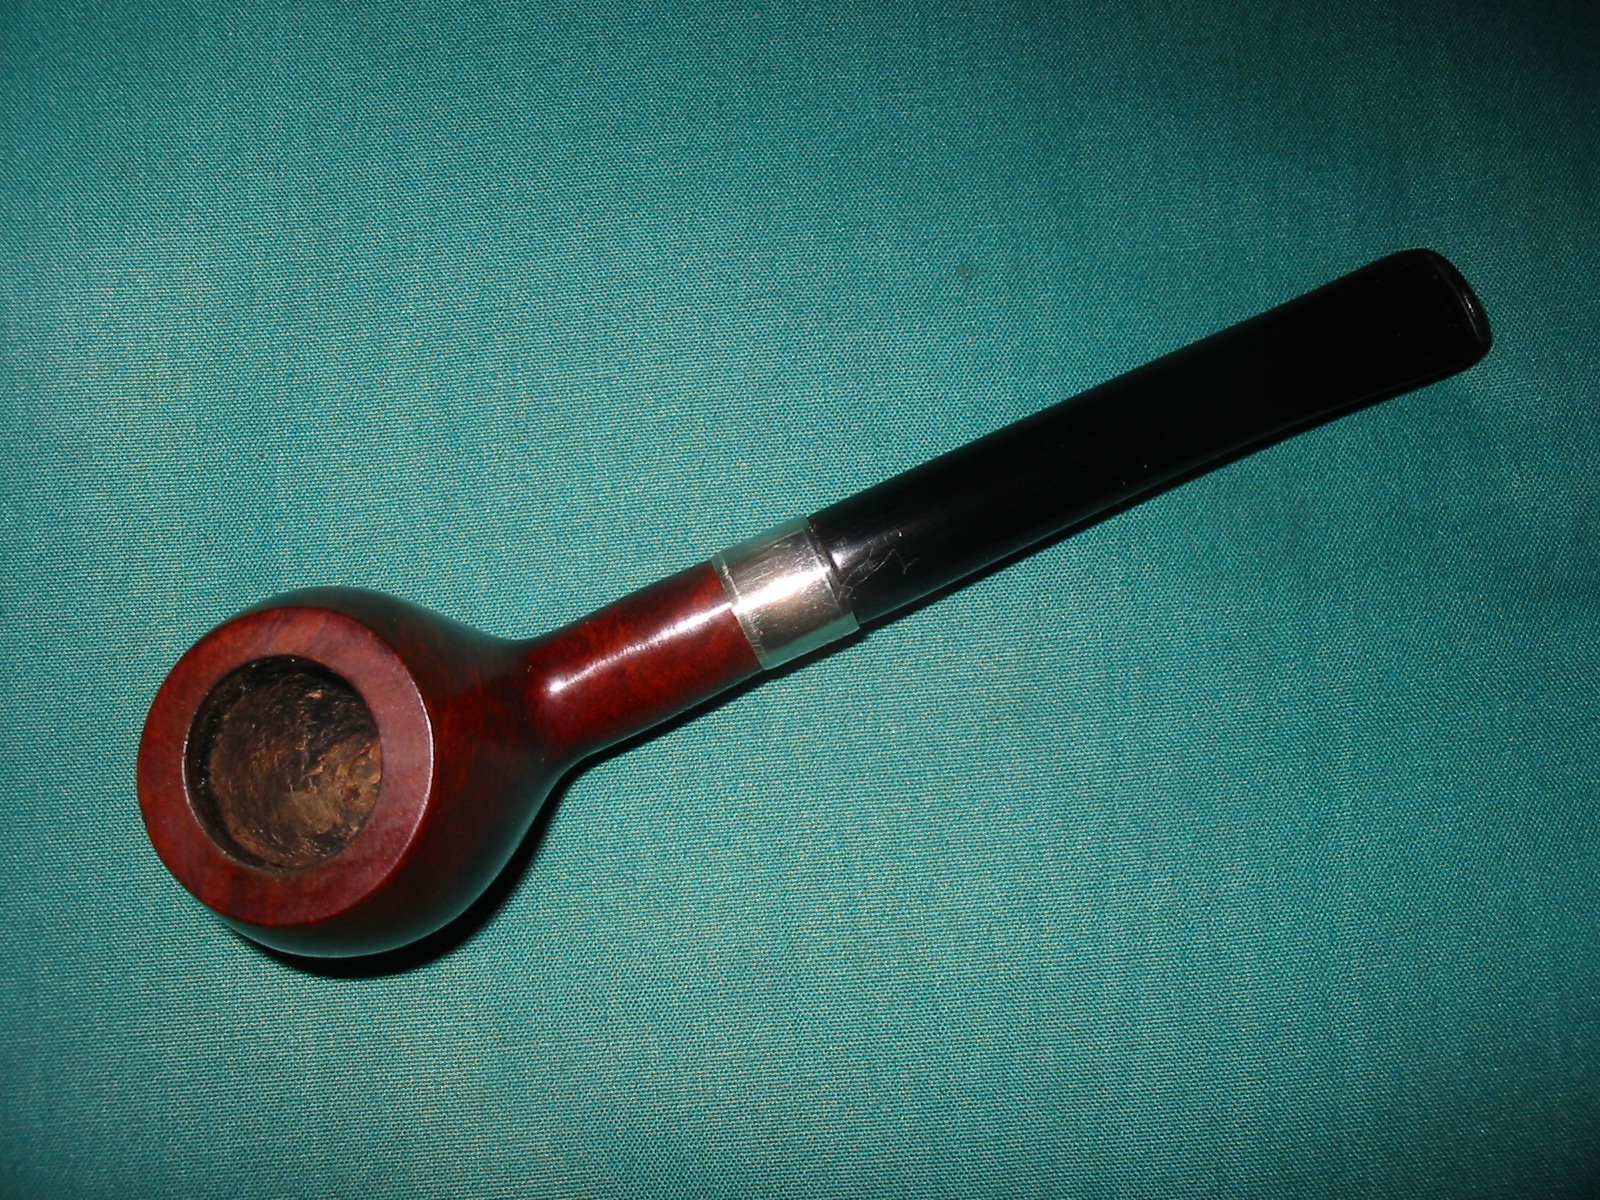
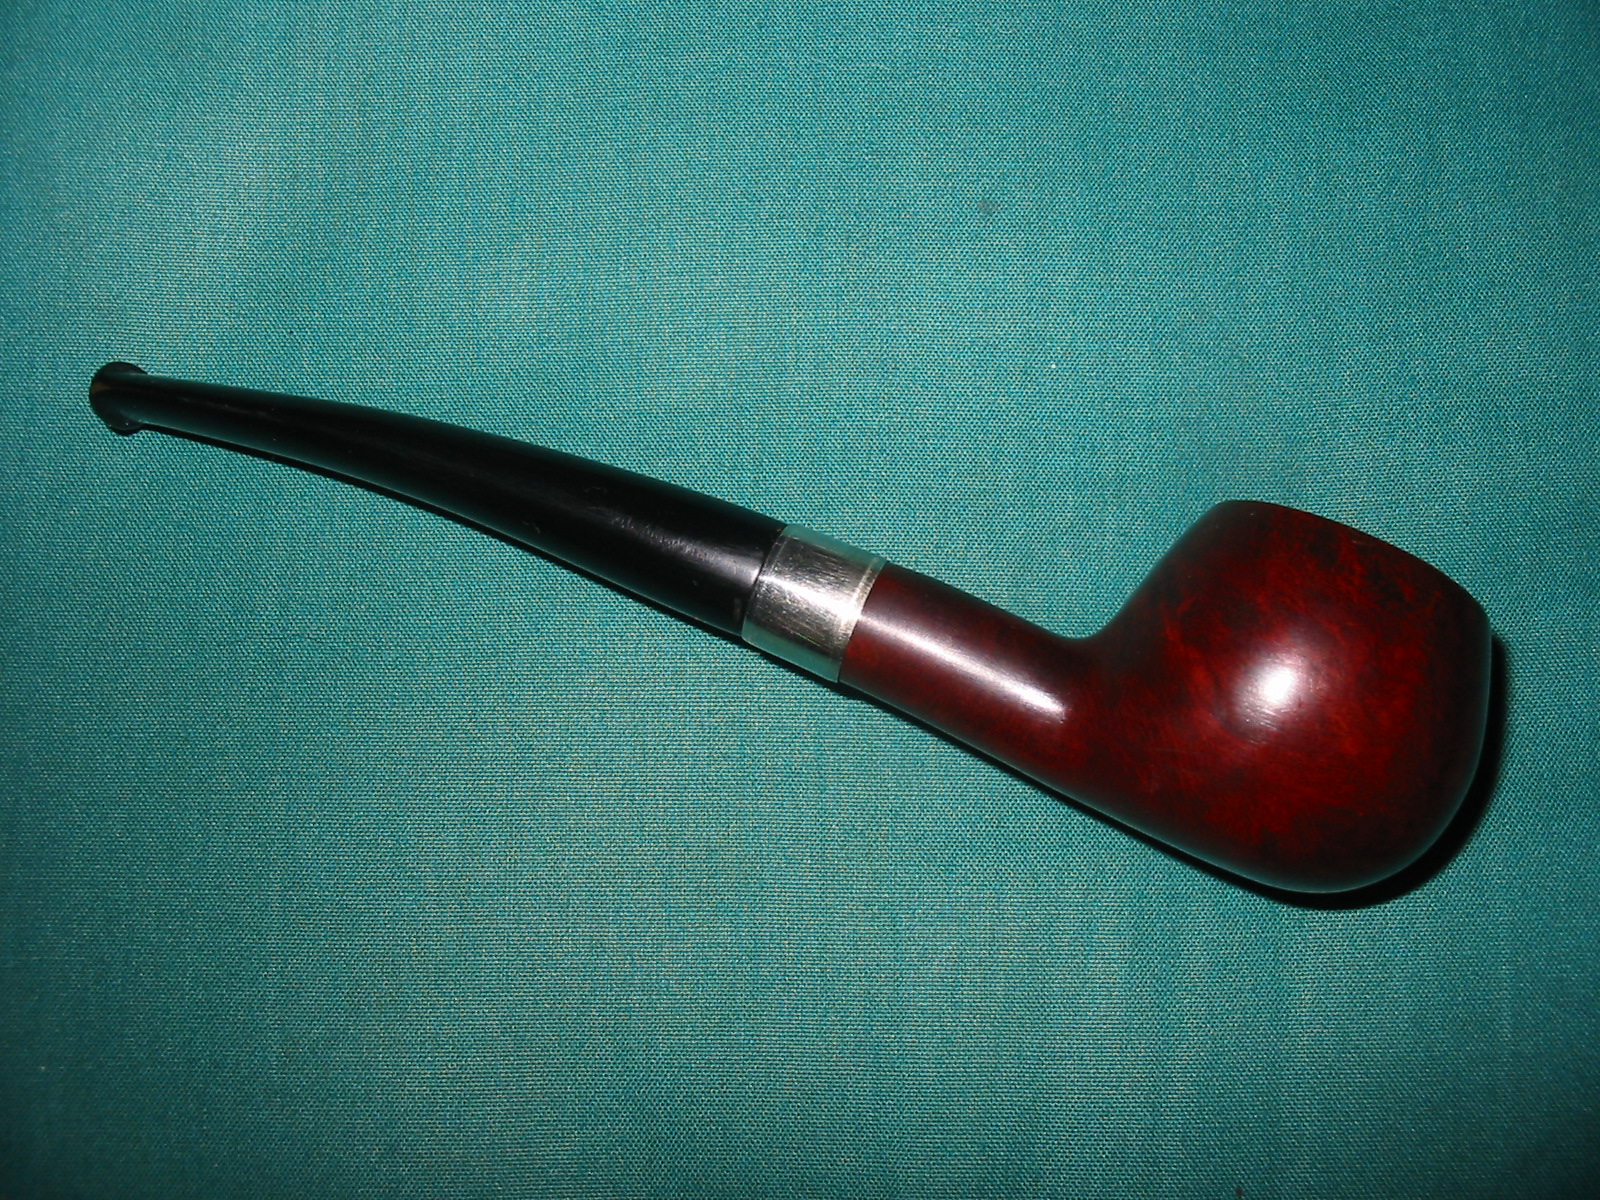
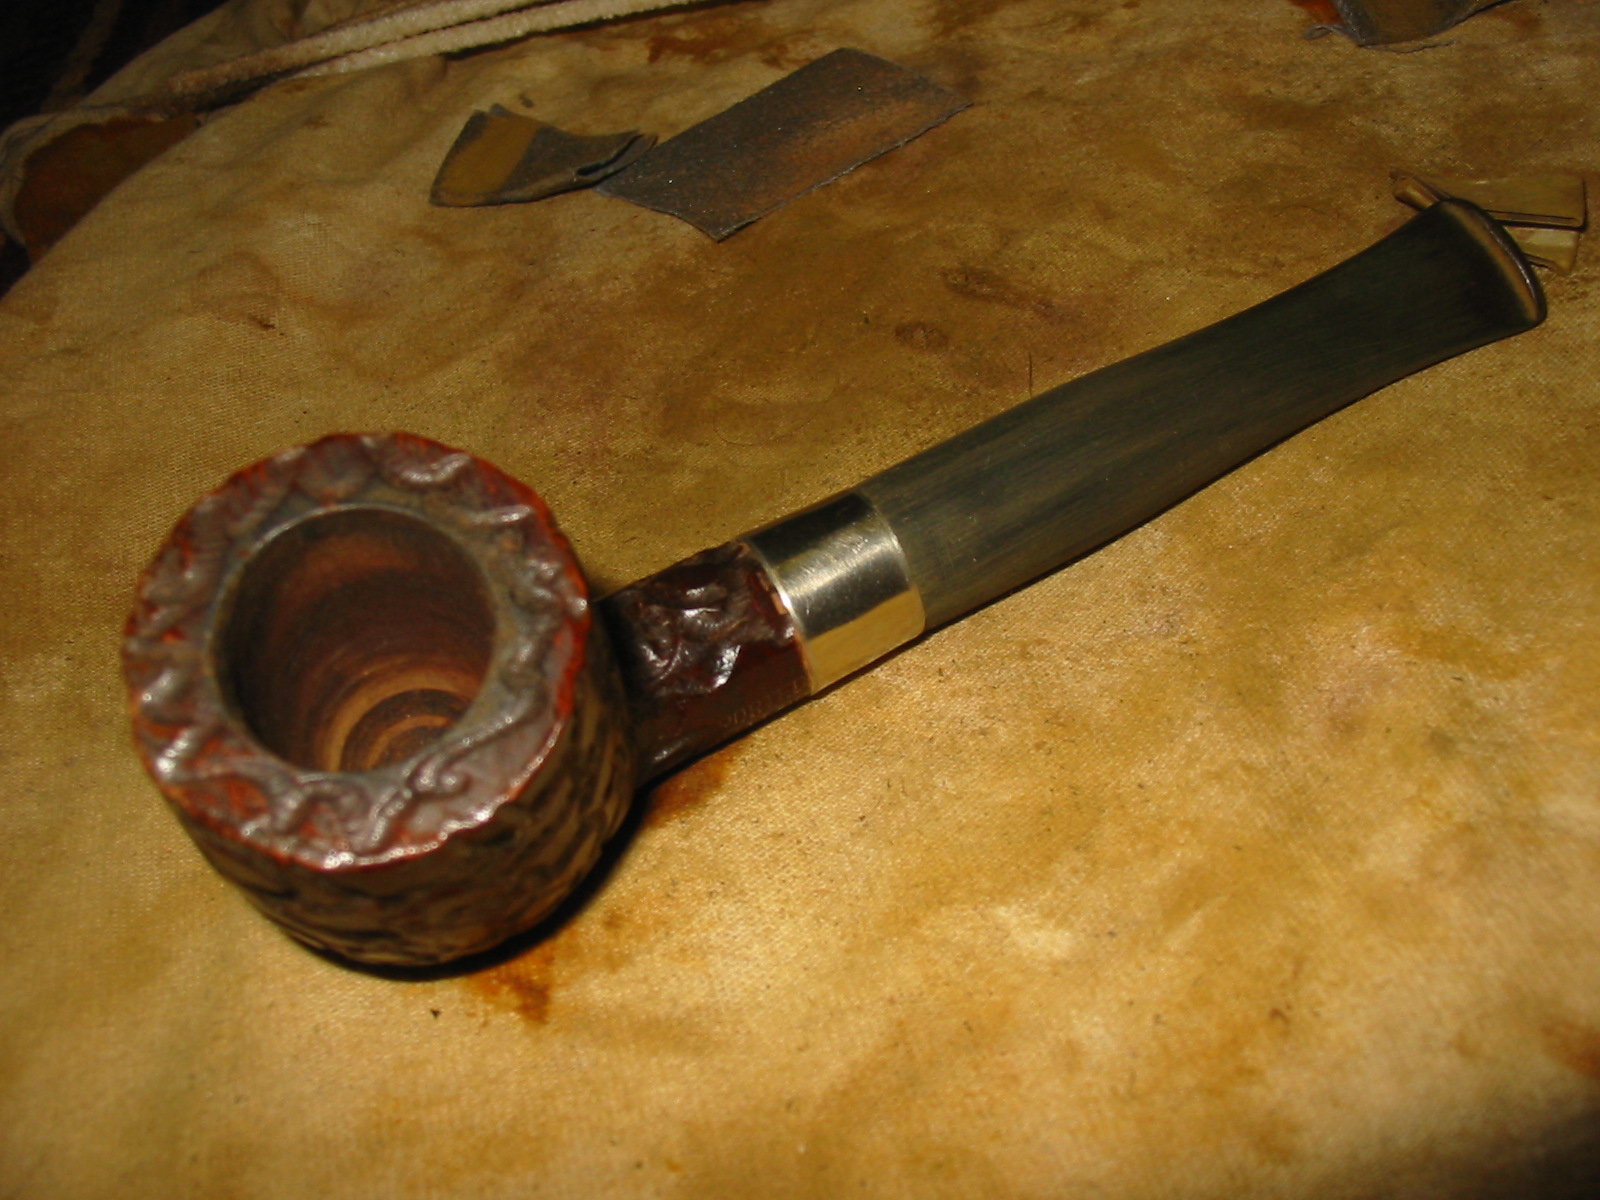
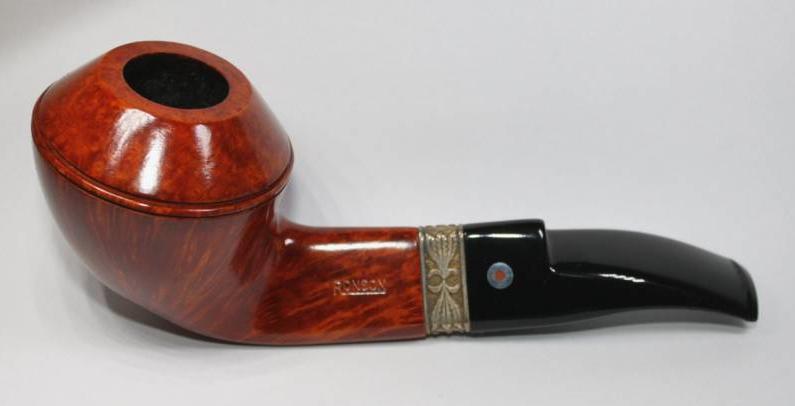
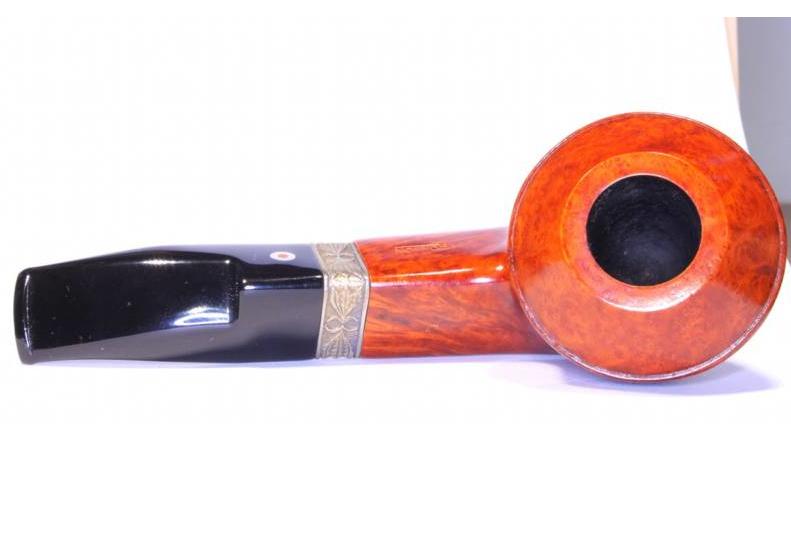
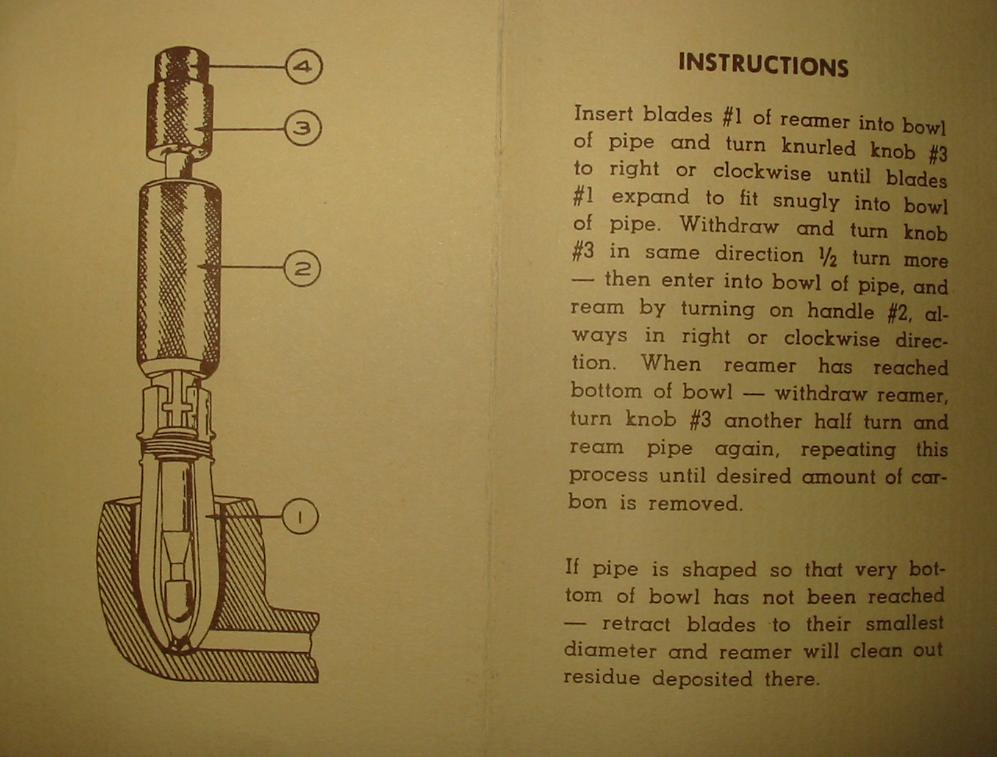
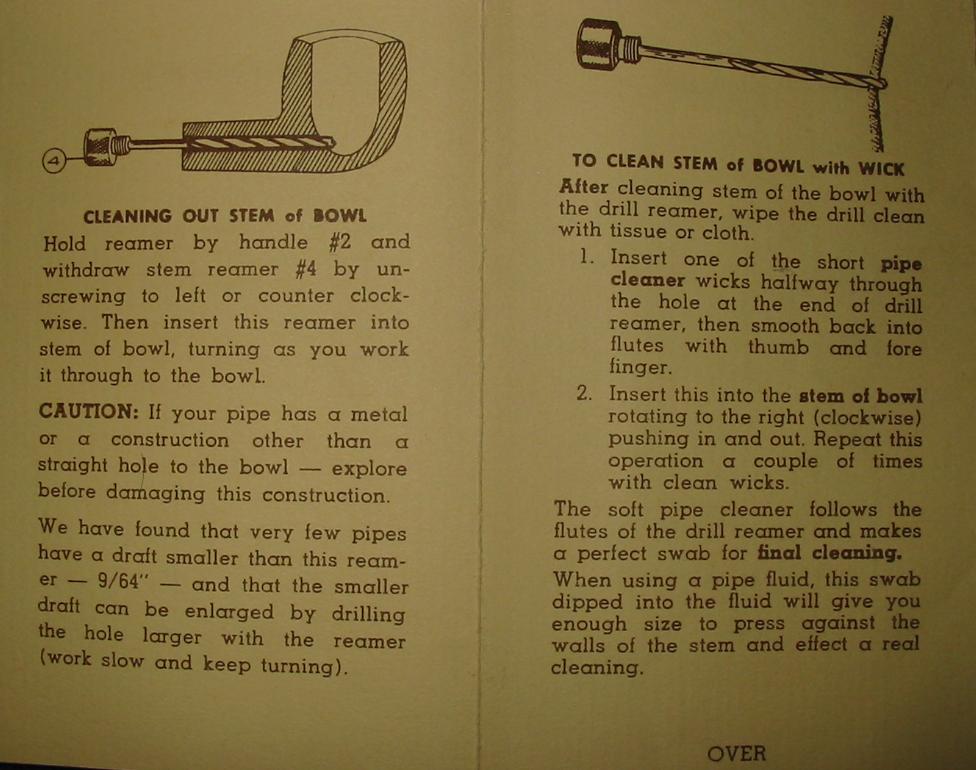
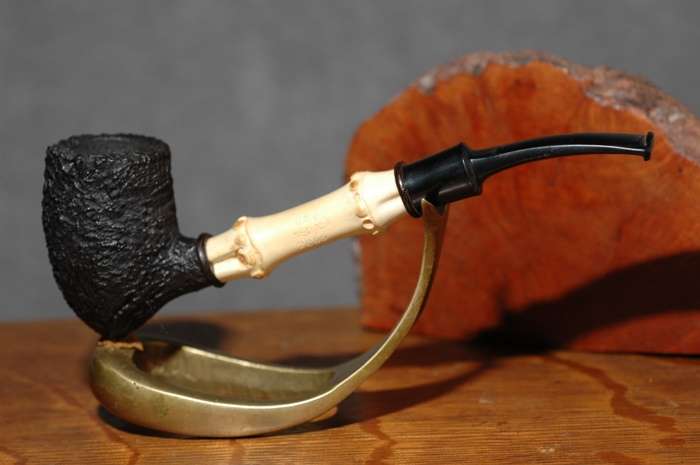
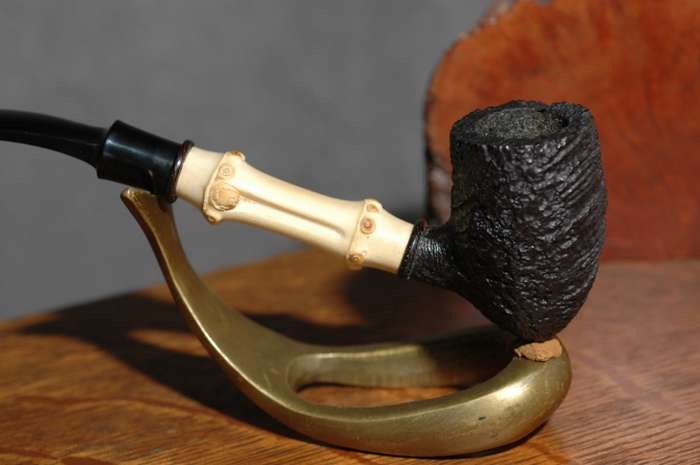
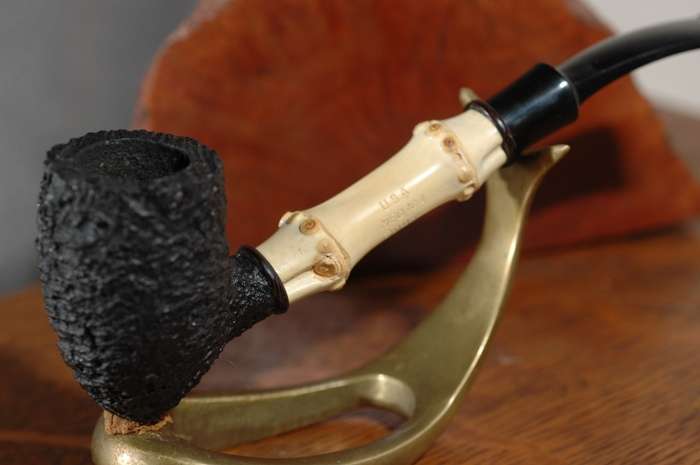
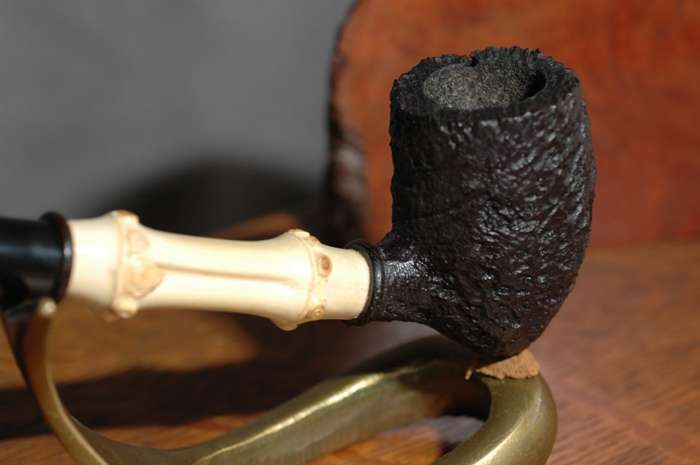
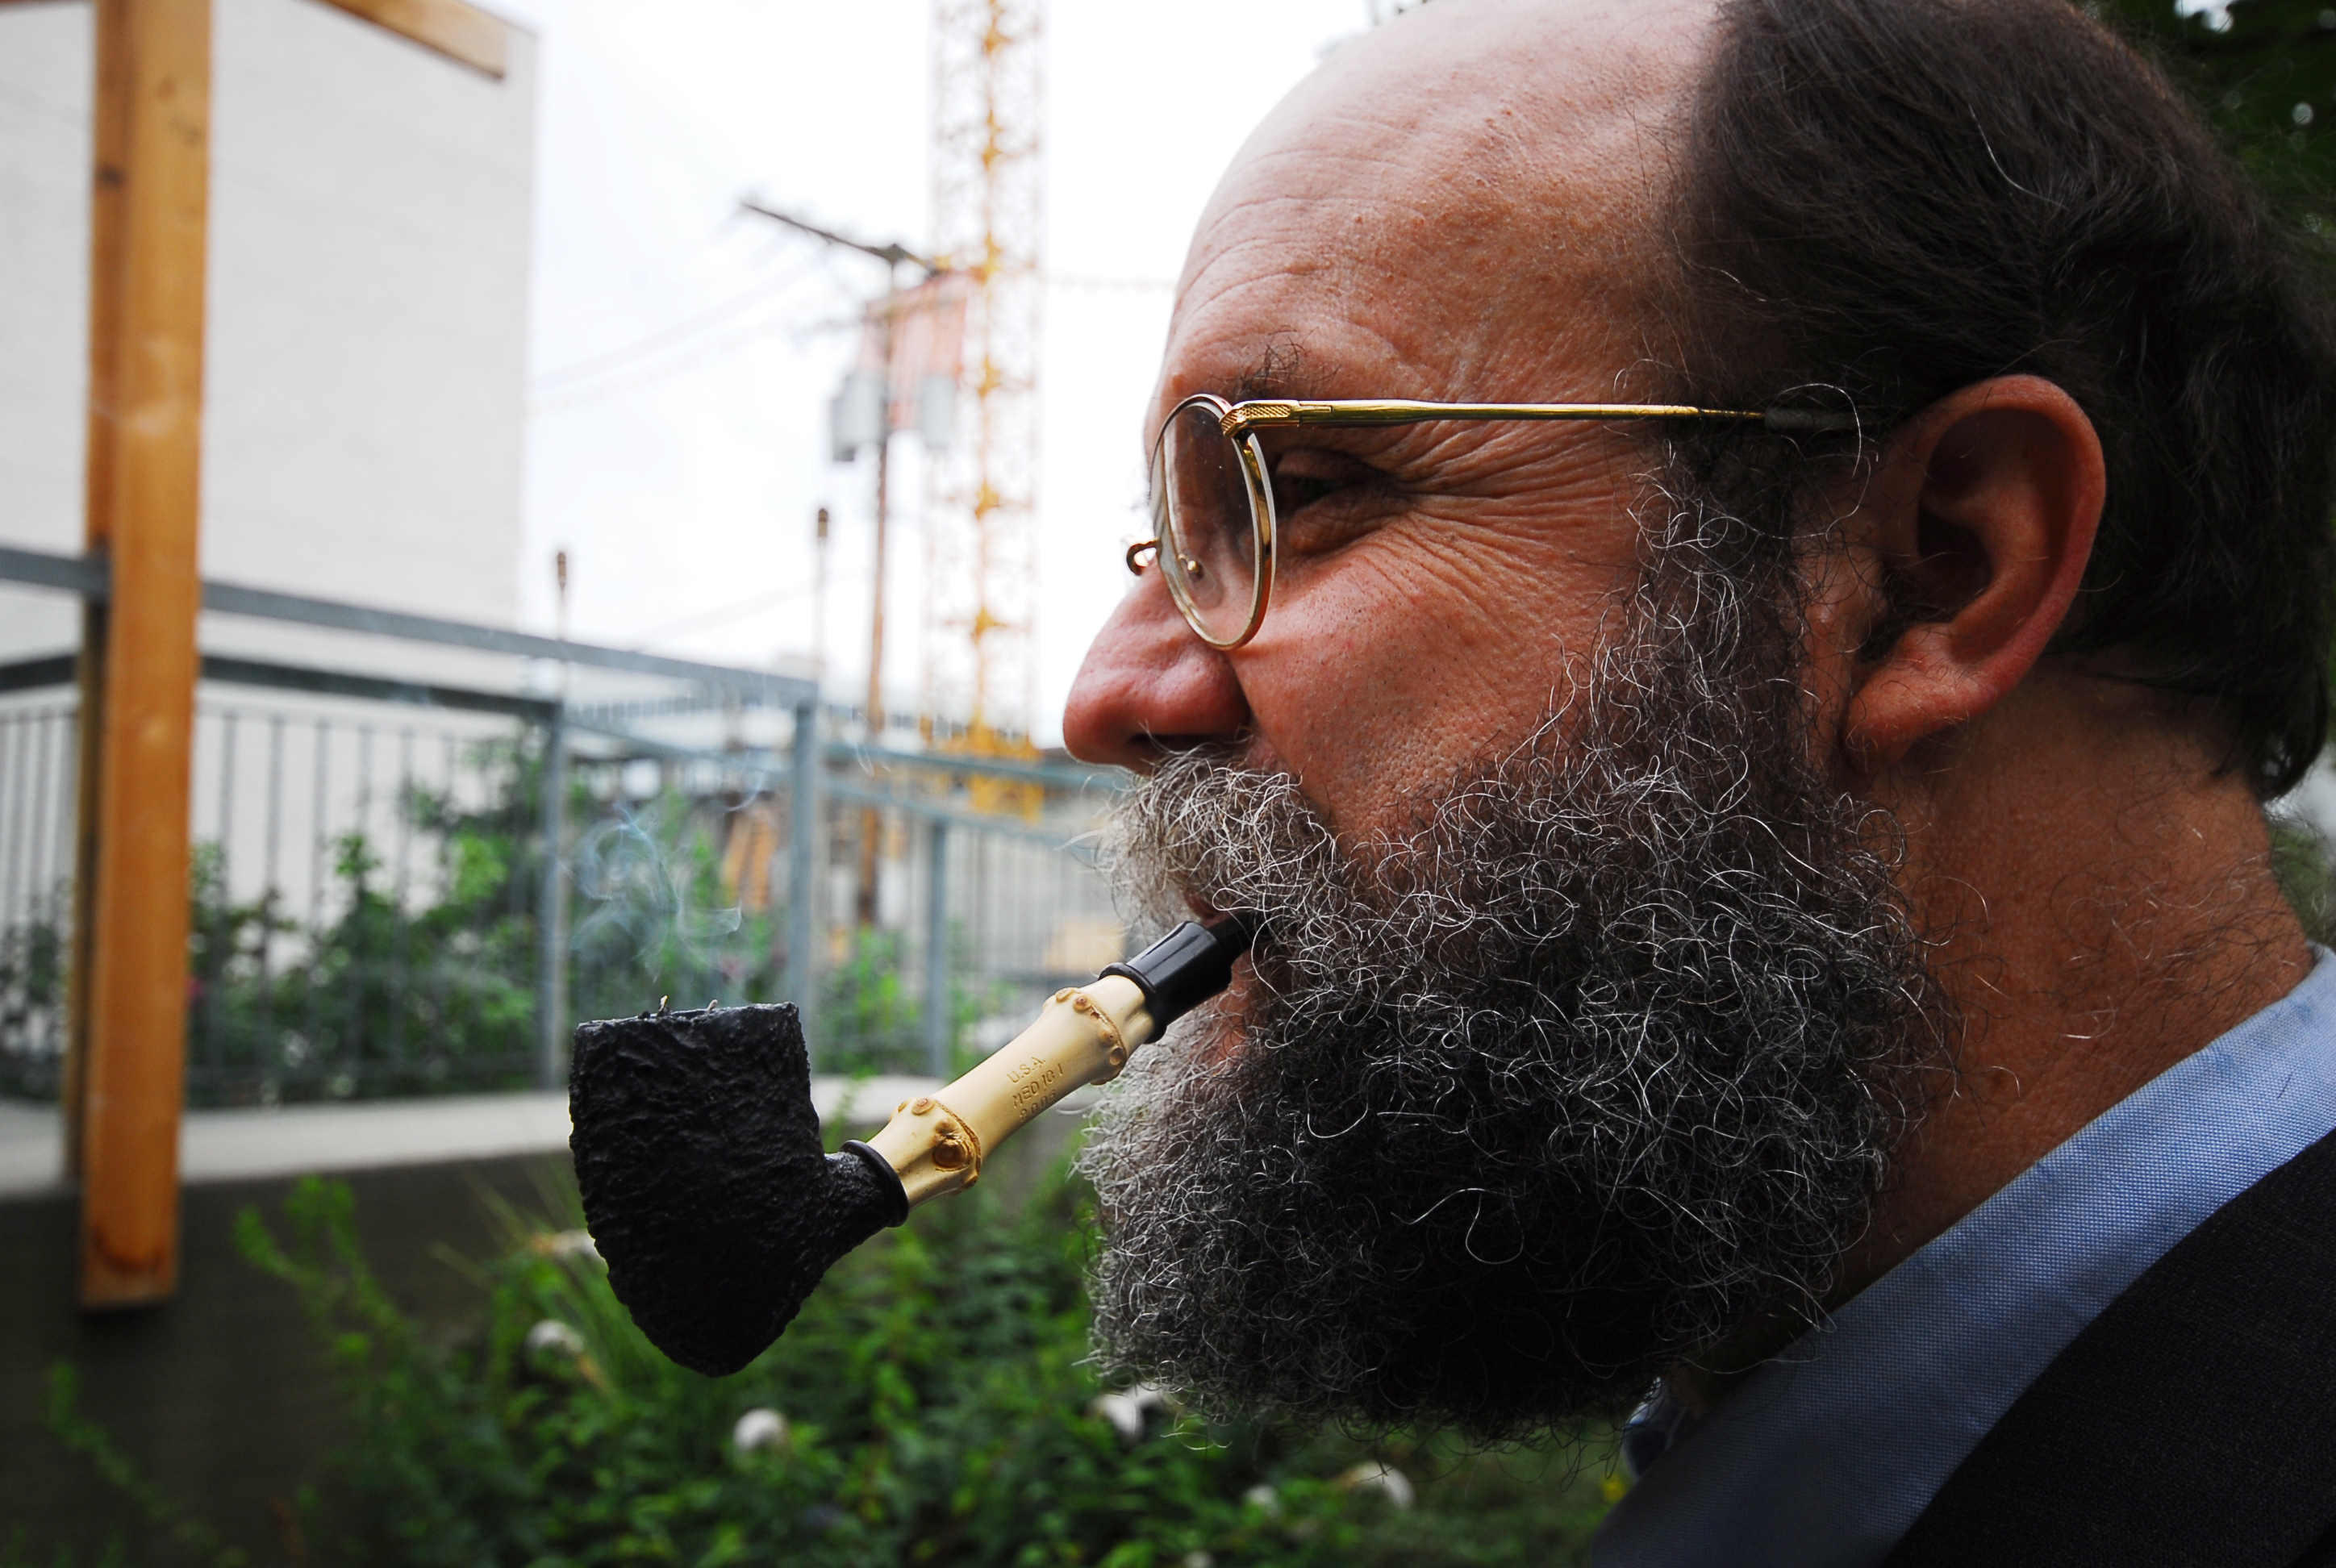
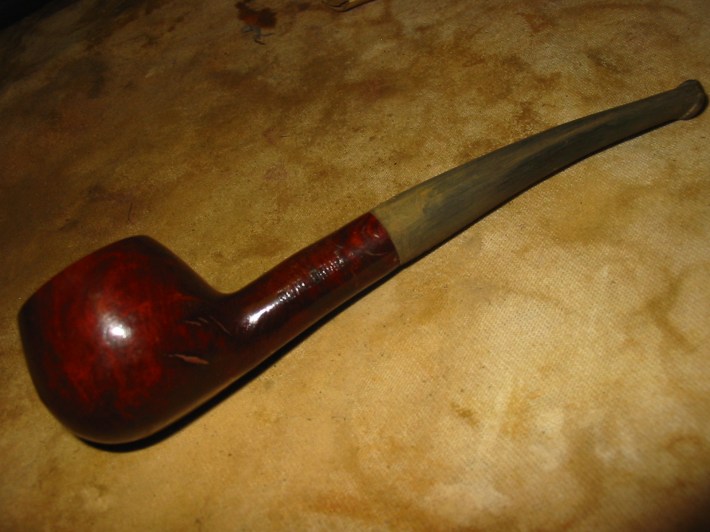
I cleaned the bowl and shank with pipe cleaners. I used my Kleen Reem drill bit to clean out the softened tars in the airway in the shank. The amount of gunk that came out is astonishing. I wiped it and ran the bit through several times to get the airway back to the briar. Then I used many pipe cleaners dipped in Everclear to finish cleaning the shank. Once I was finished I reinserted the finished stem on the bowl and gave it a coat of Obsidian Oil and then multiple coats of carnauba wax to give the pipe a finished shine. The next four photos show the finished pipe.

ImageImageImageImage

Italian Made Pot Refurbished and Reborn with a New Look


This was one of the stummels from a box of pipes without stems that are all that are left of a big lot of pipes I was gifted by a friend. There are about 30 left, I have restemmed many of them over the past year and given away many more. This one is a no name Italian Made that is stamped Real Briar in italics and stamped on the left side of the shank. It is a rusticated bowl and as can be seen in the picture below had a cracked shank. The stem that is in the pipe is one that I recycled from my can of stems. It needed to be cut down to make the diameter of the shank match the diameter of the stem. I also needed to band the shank to do a repair to the crack.

Image

The picture below show the bowl as it came to me. It had been reamed with something that scored the bottom of the bowl and left marks. It was however very clean. The rim had slight darkening but was otherwise clean as well. The inside of the shank was clean and fresh. The pipe took very little prep other than repairing the cracked shank to ready it for the new stem.

Image

To prepare it for banding I checked through my box of bands to find one that would give a good tight fit when pressure fit to the shank. I found one that would work but also found that the carved grooves in the finish of the pipe made a tight fit to the shank virtually impossible to obtain. I used my dremel to remove some of the grooves to the depth of the band width. I checked the band fit several times and took off enough of the briar to obtain a tight fit. I was able to step down one size in bands and got a perfect fit. The next two photos show the shank prepared for the fitting of the band. I also used some superglue to repair the crack in the shank. I pried it open with a dental pick inserted in the shank and applied pressure to open the crack enough for the superglue. I dripped the glue into the crack and squeezed it shut until it dried. IMG_9869

Image

I slid the band on to start the fitting and then took it to my heat gun. I heated the band on the shank and then pressed it into place. I repeated the process until the band was properly placed on the shank. The next two photos show that process – I heat the band and then press it on using the piece of carpet on my work table.

ImageImage

Once the band was in place I used my Dremel on the stem to remove the excess material on the diameter of the stem. I have found that if I run it at a medium speed I can control the sanding drum and not cut gouges in the vulcanite. It requires a steady hand and patience to get the work done without cutting too deeply into the stem and causing gouging that takes a lot of sanding to remove. After I cut away the necessary excess I also sanded the tenon for a proper fit in the shank. Once I had banded the pipe it no longer fit as easily. I wanted a smooth and snug fit but not one that would damage the shank. The picture below shows the stem after I have started sanding the stem with medium grit emery cloth to sand out the scratches and fine tune the fit against the band.

Image

I continued sanding with the emery cloth until the fit was what I wanted. The next two photos show the pipe with its new look. The band is in place and the stem fits. It is a nice chunky stem that I think matches the shape and flow of the bowl and shank nicely. I still had a lot of sanding to go. I continued with the emery cloth to remove the build up and oxidation around the button area. I decided to rework the entire stem and then polish it to a shine.

ImageImage

The next series of two photos show the progressive work on the stem. In the background of the pictures are some of the tools that I used in the work – a flat file, emery cloth and some 280 grit sandpaper. When I had finished the stem to this point all that remained was to work on it with some 320 grit and some 400 and 600 grit wet dry sandpaper before moving on to sanding it with the micromesh sanding pads.

ImageImage

At this point I decided to take a break from sanding – the old fingers were getting a bit sore. I used a brass tire brush to clean off the remnant of tars on the rim and then restained the pipe with a dark brown aniline stain thinned 2:1 with isopropyl alcohol. I applied it with a dauber and then flamed it and restained a second time and flamed it again. I then took it to the buffer and buffed it with Tripoli and White Diamond to give it a shine and remove the excess stain from the high spots on the briar and lend a little contrast to the darkened grooves. The next two photos show the restained bowl.

ImageImage

I filled my water bowl with warm water and took out the micromesh pads and began to sand the stem. I began by wet sanding with 1500, 1800 and 2400 grit micromesh pads that I wet with water and then sanded the stem. Between each pass on the stem I would wipe it dry to see how the scratch removal was progressing. The next three photos show the stem after sanding with the 1500 grit micromesh. The scratches are beginning to disappear. Before moving on to sanding with the 1800 grit I decided to polish the stem with Maguiars Scratch X2.0 I applied it by hand and the scrubbed it off with a cotton pad. The next four photos show that process with the applied polish and then the stem after wiping it off.

ImageImageImageImageImageImageImage

After wiping the stem down a final time I wet sanded it with 2400 grit micromesh sanding pads. I wanted to continue to remove the surface scratches from the vulcanite and begin to move toward a polish.

Image

The next photo shows the stem after dry sanding with 3200 grit micromesh. The shine is deepening in the finish of the stem.

Image

I then shifted to dry sanding with 3600, 4000 and 6000, 8000 and 12,000 grit micromesh sanding pads. I sanded and wiped them down between each grit change. By the time I got to the 6000 the shine was visible and the finish was very smooth. The difference after sanding with the 8000 and 12,000 is remarkable.

ImageImage

The final four photos below show the finished pipe. Once I had finished sanding it I gave it a final polish with the Maguiars and then took it to the buffer for a buff with White Diamond. I then rubbed it down with Obsidian Oil and finally gave it several coats of carnauba wax and a buff with a soft flannel buffing pad. The newly born Italian pot is ready to smoke and has a new streamlined look that I really like.

ImageImageImageImage

Review of a Nachwalter Dublin


I picked this Nachwalter pipe up for a good price from Mike at Briar Blues many years ago now. It seems that the older I get the faster time seems to spin. It is a nicely shaped Dublin. The pipe came with a cloth pipe sock in black velevet. (I am not sure this was one Mike threw in or whether it came that way from Nachwalter). The workmanship on this pipe is very nice. I have smoked it quite a bit over the years since I got it. It has been through at least two moves during that time and has survived both of them with a time of storage between them both. This is a third review I am writing today since I had the day off. The length of the pipe is 5 3/4 inches and the bowl height is 2 ¼ inches. The outer diameter of the bowl is 1 ¾ inches. The chamber diameter is 1 inch and depth is 1 1/2 inches. It is a large bowled pipe and is light for its size. It sits well in the nook of the hand formed by the thumb and index finger on either hand. The stamping is on both sides of the shank. It is stamped on the left side in an oval. The outer ring of the oval is stamped THE BRIAR WORKSHOP on the top of the oval and DESIGNERS/PIPEMAKERS on the bottom side of the oval. In the centre of the oval it is stamped CORAL SPGS over FLA. USA. On the other side of the shank it is stamped in script Elliot Nachwalter and under that is stamped his signature.

Image

The pipe has a smooth finish and the staining choice highlights the great grain. The bowl is surrounded by flame grain/straight grain. The top of the bowl cap and the bottom of the bowl and shank has some beautiful birdseye grain. This pipe is larger than it looks and with the 1 inch diameter bowl, holds a lot of tobacco. Regardless of the size it fits well against the thumb and rests comfortably in hand. The stain appears to be made up of several coats. There seems to be a dark understain that makes the grain stand out. Over this is a coat of reddish brown, it is not an oxblood but more of a mahogany looking stain. The rim is crowned, almost a reversed chamfer. The inner edge is beveled into the bowl and the out edge is sharp to the sides. The crowned top gives the pipe slightly curved top look from the side.

The stem is a well-made taper crafted from ebonite or vulcanite. It is a softer feel in the mouth and on the teeth than acrylic. The stem tapers gradually back to the button and is just the right thickness at the portion that rides in the mouth – not too thick or too thin. It is also durable and is made of quality material as it has not oxidized in the years I have had it and appears to have remained black for the previous owner as well. The snowflake logo that is on Nachwalter pipes is faded slightly but the impression is still visible on the left side of the stem. The tenon is an integral part of the stem and is chamfered/ countersunk and well-polished. The button is well shaped – thin at the edges with a very slight rise to the centre top and bottom, forming an eye shaped end view. The lip on the button is very slight but still fits well behind the teeth for a comfortable feel. The draught hole in the end of the button is also funneled to deliver a mouthpiece that has the same diameter from start to finish. Comfortable and well executed. A pipe cleaner passes easily through the pipe with no obstruction.

Internally, the pipes made by the Briar Workshop that I have had over the years, have all had exceptional mechanics. The bowl chamber on this one is large – drilled to a 1 inch diameter. The inner edge of the bowl us beveled to the rim. The outer edge is sharp and clean. The outer edges are slightly sanded so that the edges where the top and sides meet are not sharp but gently rounded. This pipe was purchased as an estate but I don’t believe that the bowl was coated with any bowl coating. When I bought the pipe it was still barely smoked and the walls on the lower part of the bowl were still clean briar. The cake built up on the bowl very easily. The draught hole is centered at the bottom of the bowl and seems to have a slight funnel leading into the shank and stem. There is a very easy and open draw to the pipe. The fit of the stem to the shank is excellent – smooth and tight with no light showing at the joint. The tenon fits well in the mortise and seems to sit deep in the mortise against the bottom. The airway is in the centre of the mortise and aligns with the airway in the tenon. The edges of the tenon have been polished and rounded and the airhole countersunk so that it meets the airway in the mortise. The pipe does not whistle or gurgle when smoked. Looking at the airways with a flashlight it is clear to see that they are smooth and polished with no rough edges.

I have smoked this pipe many times since I received it from Mike at Briar Blues. Because of the large bowl I do not reach for it as often as I used to because I tend to favour smaller bowls at present. I have found that it is a good flake pipe. It is one I used when I folded and stuffed flakes. It smokes cool and easily and delivers good flavor with the Virginias that I choose to smoke in it.

Review of a Ronson Centenary Bulldog


Blog by Steve Laug

I picked this pipe up for a really cheap price on EBay. It came in a beautiful handmade wooden box lined with dark blue velvet on the inside of the box and the lid. The lid also has the golden Ronson logo. Ronson is famous for the lighters that they make but after receiving and smoking this beauty I would also say they make a fine pipe. The pipe came with a leather pipe sock and a certificate of authentication for the Centenary version of the pipe. The workmanship on this pipe is very nice. I have smoked it quite a bit since that time and it is a great smoke. Since I had the day off today I decided to also write a review on this one. The length of the pipe is 5.8 inches and the bowl height is 2 inches. The chamber diameter is .8 inches and depth is 1.8 inches. It is a large pipe but weighs 78 grams. It is a good fit in the hand. The overall shape is something like a bent bulldog. There is a sterling silver band on the shank with sheaves of laurels. The stamping is on the sides and the bottom of the triangular shank. It is stamped on the left side Ronson using the Ronson logo type and on the right side 47. On the underside of the shank it is stamped RONSON over CENTENARY over 1896-1996 and surrounded by Laurels. That dates the pipe to 1996. It came to me unsmoked.

Image

The finish on the outside of the pipe is smooth and has some great grain. The bowl is surrounded by flame grain/straight grain. The top of the bowl cap and the bottom of the bowl and shank has some beautiful birdseye grain. This is a big looking and feeling pipe but it is comfortable in the hand. The carvers have achieve a carving that fits equally well in both the right and the left hand. The double rings turned into the bowl to separate the bowl from the bulldog cap are really nicely cut. The band is integrated into the shank and has a smooth band on the shank side and the stem side with sheaves of laurels cast or carved into the centre space of the band. The stain appears to be multilayered with a black understain to highlight the beautiful grain on the briar and then topped with a light brown and possible an orange over stain. I believe it is also topped with a shellac coat to give it a great shine.

ImageImage

The stem is a well made half saddle stem handcrafted from acrylic. The blade of the stem is well tapered, quite short and thin without sacrificing durability. The saddle meets the blade on the top surface at a 90 degree angle and has been polished to a shine. The logo insert on the stem is a steel circle with an orange centre that matches the stain on the briar. The triangular shape of the stem to the saddle is nicely done and almost pinched looking where it sits against the band.Image

Interestingly the shank and stem are the same dimensions on all three sides. From the 90 degree saddle the blade is flattened and curved toward the edges giving it a very refined look. It tapers very gradually back to the button. It is a comfortable bit in the mouth. The tenon is an integral part of the acrylic stem and is chamfered/countersunk and well polished. The button thin at the edges with a very slight rise to the centre top and bottom, forming an eye shaped end view. The lip on the button is very slight but still fits well behind the teeth for a comfortable feel. The draught hole in the end of the button is also funneled to deliver a mouthpiece that has the same diameter from start to finish. Comfortable and well executed. A pipe cleaner passes easily through the pipe with no obstruction.

ImageImage

The internal mechanics of the pipe are very well executed. The bowl chamber is drilled to a ¾ inch diameter. The inner edge of the bowl us straight and clean to the rim. The outer edge is sharp and clean. The top rim is smooth and nicely covered with birdseye. The side of the cap taper perfectly to the double rings carved into the bowl. The sides taper up to meet the double rings. The bowl was coated with what appeared to be a carbon coat not sure if it is water glass or an organic coating. I do recall that the first smoke did not have any residual taste coming through from the bowl coating. The cake built up on the bowl very easily. The draught hole is centered at the bottom of the bowl and seems to have a slight funnel leading into the shank and stem. There is a very easy and open draw to the pipe. The fit of the stem to the shank is excellent – smooth and tight with no light showing at the joint. The band is applied in a unique way as can be seen from the picture below. It is cast with a centre ring that encloses the mortise area and then truss like sides leading out to the edges of the band. The look leads me to think that it is a strongly made connection. I really like the way the shank was cut to house the banding structure. The band is thus an integral part of the shank rather than just an appliqué. The tenon sits deep in the mortise against the bottom. The airway is at the top of the mortise rather than centered in the middle of the mortise but does not seem to inhibit the use of a pipe cleaner during the smoke. The fit of the tenon is smooth and tight. The edges of the tenon have been polished and rounded and the airhole countersunk so that it meets the airway in the mortise. The pipe does not whistle or gurgle when smoked. The airways are smooth and polished with no rough edges.

ImageImage

I have smoked this pipe many times since I received it from EBay. It was nice to be the one who smoked the inaugural bowl in this pipe. I chose to smoke English blends in it as it delivers a very full and flavourful smoke that allows the intricacies of Latakia to really come through. I really like smoking Blue Mountain in this pipe as I get to taste the dimensions of that tobacco really well with the pipe. The tobacco packs easily and burns well after the second light. It ends up being a pipe that I sit and enjoy on the porch. It is heavy in my mouth so I sit and hold the bowl and enjoy the sights and sounds of the neighbourhood as smoke it. The draught on the pipe is superb delivering a smoke that is uncomplicated and effortless. The Italian carver who made this pipe for Ronson did a superb job and delivered a beautiful Centenary pipe for the company to sell to its customers. I am glad to have acquired this beauty.

Image

The Kleen Reem Reamer Instruction Booklet


This morning while organizing my workspace I came across the instruction booklet for my Kleen Reem Pipe Reamer. I thought I would put the booklet here on the blog for others to access. It is a great read.

Book1

Book2

Book3

Book4

Review of a Hand Made Medici Bamboo Acorn


When I first saw this Medici Bamboo Acorn pipe I knew that I had to have it. The Medici mark is made by or for Todd Johnson of Todd Johnson pipes. I bought this one and later found out via Adam Davidson that it was carved by him when he worked with Todd. I bought it from a fellow Smoker’s Forums in late 2006 or early 2007. And I have been smoking it since that time and it is a great smoke. Since I had the day off today I decided to write a review on this beauty. The length of the pipe is 6 inches long and the bowl height is 2 inches. The chamber diameter is 3/4 inches and depth is 1 1/2 inches. It is great sized pipe and very light weight. It is comfortable in the hand. The overall shape is something like a ¼ bent acorn with a nicely done bamboo shank extension. The stamping is on the bamboo shank. It is stamped USA over MEDICI over 2006.

Image

The finish on the outside of the pipe is a gnarly sandblast that highlights the ring grain on the front and the back side of the pipe and birdseye on the sides of the bowl. I have come to love the tactile feel of the sandblast on this pipe. The bamboo shank is a two knuckle piece that is very light coloured and natural looking. There is an ebony ring that is on the shank where it meets the bowl and where it meets the stem. The shank is joined to the bowl by a stainless steel tenon and the stem also has a stainless steel tenon. The shank is unlined bamboo between the mortise and the joint at the bowl. The staining on this appears to be a black but in the light it has highlights of a burgundy or red that shines through.

Image

The stem itself is a well made saddle stem handcrafted from acrylic. The blade of the stem is well tapered and thin without sacrificing durability. The saddle and blade have been carved in such a way to make it look almost like a military bit with the blade meeting the saddle on a rounded platform. The blade is flattened on the sides tapering back to the button. It is a comfortable bit in the mouth and it so light that it makes an easy clencher. The tenon is stainless and sits against the ebony ring/disk that caps off the open end of the bamboo. The disk is applied in such a way that is forms a band around the end of the bamboo. The button is exactly the way I like them – thinner on the edges with a gentle rise at the centre top and bottom. It fits well behind the teeth for a comfortable feel. The draught hole in the end of the button is also funneled to deliver a mouthpiece that has the same diameter from start to finish. Comfortable and well executed. A pipe cleaner passes easily through the pipe with no obstruction.

Image

The internal mechanics of the pipe are very well executed. The bowl chamber is drilled to a ¾ inch diameter. The inner edge of the bowl us straight and clean to the rim. The outer edge is sharp and clean with the blast coming right to inner edge of the rim. I don’t believe the bowl was coated. It is actually hard to remember back to the time of the first smoke of this one and it now has a nice solid cake of Virginia tobacco. There were no flaws or visible pits in the interior. The draught hole is centered at the bottom of the bowl and seems to have a slight funnel as well – like a shallow Y- leading into the shank and stem. There is a very easy and open draw to the pipe. The fit of the stem to the shank is very good – smooth and tight with no light showing at the joint. The tenon sits deep in the mortise against the ebony ring/disk. The fit of the tenon is smooth and tight. The edges of the stainless tenon have been polished and rounded so there are no sharp edges. The drilling of the draught in the bamboo shank is straight and centered in the back of the mortise. The air pulls clearly through the pipe with no whistling at all. Using a light to shine through the various airways reveals smoothly executed airways on the inside. It also appears that the stainless tenon that attaches the bamboo and the disk on the bowl is also polished and smoothed out as there is no catch when a pipe cleaner is pushed through the airway.

Image

Since I was writing this up today I decided to smoke a bowl in while I took down my Christmas light. I loaded a bowl of aged McClelland’s 5100 and puffed on it as I unwound the lights from the columns on the porch. The tobacco packed as easily as I had remembered and kept burning after the second light. I love that about this pipe. Sitting outdoors or inside the thing almost smokes itself. The draught on the pipe is superb. The smoke was uncomplicated and effortless. It was just as I remembered it from the first bowl many years ago. It has always smoked incredibly well and delivered a flavourful and effortless smoke.

Image

I end this post with a picture taken by a friend of me with the pipe in my mouth. I had just received it in the mail and had decided to save it for this occasion. What was the occasion you might ask? It was the wedding of a good friend. He had asked me to officiate at is wedding and when it was over I had gone outside to fire up this pipe for the first time. I did not notice but his photographer shot this picture. It was a gorgeous Vancouver afternoon and a perfect day for a smoke outside the church under one of the trees along the curb.

Image

Thanks Adam for crafting a beautiful and great smoking pipe. Thanks for providing me with over five years of great smoking. This pipe is a veritable Virginia machine.