Blog by Steve Laug
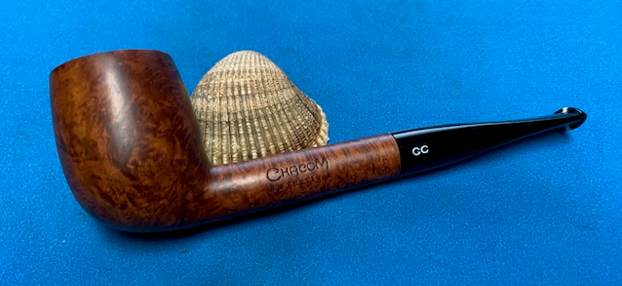
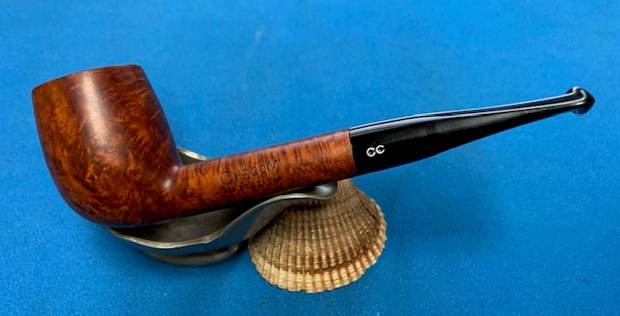
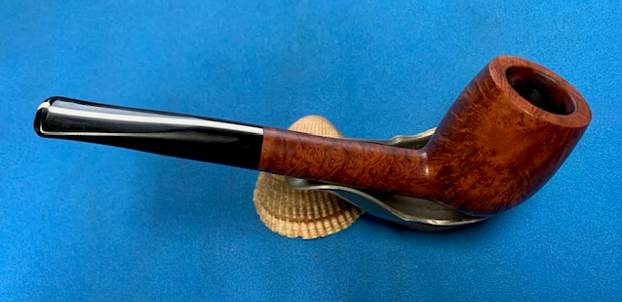
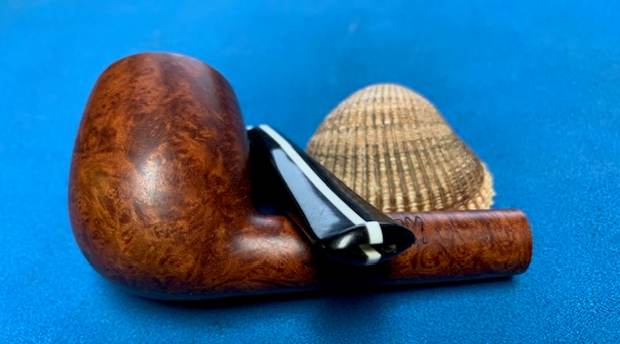
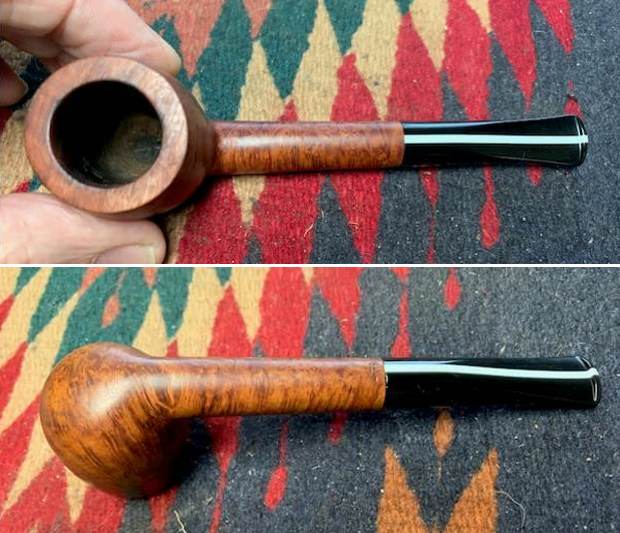
 The next pipe I have chosen to work on is a nice looking smooth brown straight Billiard with a black acrylic stem with a white stripe running from the button to the end of the tenon. I picked it up on 01/26/2023 from a fellow we buy pipe from in Copenhagen, Denmark. The stamping on the left side of the shank reads Chacom [over] New Festival. On the underside it was stamped with the shape number 438 at the shank/stem junction. The acrylic taper stem has a stamped white CC Chacom logo on the left side. The pipe is a nice looking pipe with a medium brown finish that highlights the grain. The striped stem works very well with the bowl. It is light weight and comfortable pipe to hold. Jeff sent me the following photos of the pipe to show the condition it was in before he worked on it.
This is what I saw when I over the pipe.
- The finish was very good with only some light dust and grime ground into the finish around the bowl sides. The medium brown stain is dull but the it really highlights the grain around the bowl sides and shank
- The smooth rim top looked very good and the inner and outer edges look very good. There was some light lava build on the top and some darkening on the inner edge of the bowl.
- There was a light cake in the bowl. That also showed some raw briar on the bottom 1/3 of the bowl. Once the bowl was cleaned up we could confirm the condition of the bowl.
- The acrylic taper stem has a white stripe that runs the length of the stem from the button and also on the tenon and button end. It is obviously cast into the acrylic stem when it was made.
- There is a white CC logo stamped into the acrylic on the left side that identifies it as a Chacom pipe. It is in excellent condition with just some light tooth marks and chatter on the top and underside ahead of the button.
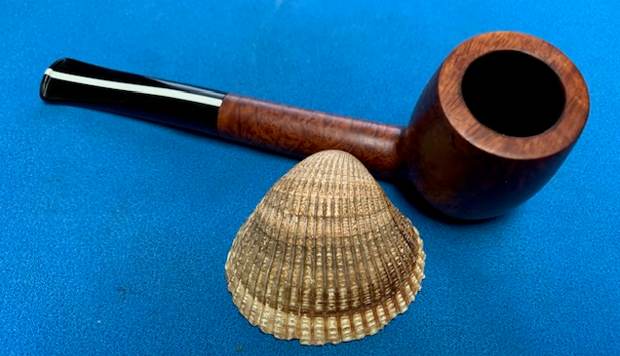
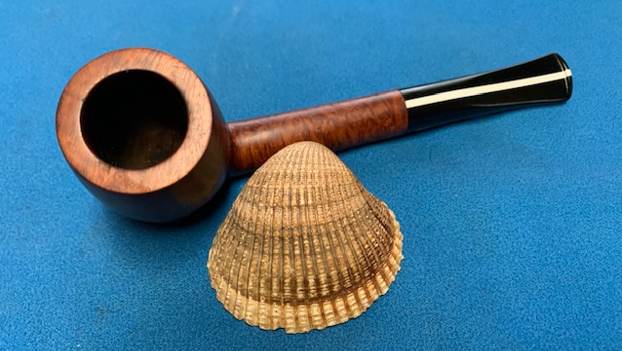
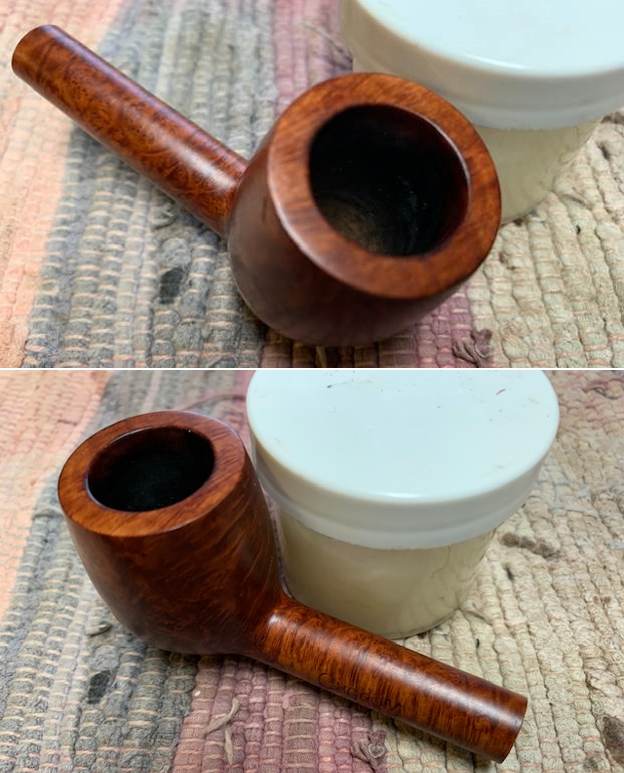
To summarize what I saw – this Chacom New Festival 438 Straight Billiard is a well made pipe. It is a little dusty but otherwise in good condition. The acrylic stem is lightly tooth marked but otherwise undamaged. There does not appear to be any calcification on the stem surface. The look and feel of the pipe in the hand is great. It is going to clean up very well. Here are photos of the pipe taken before Jeff started the clean up. 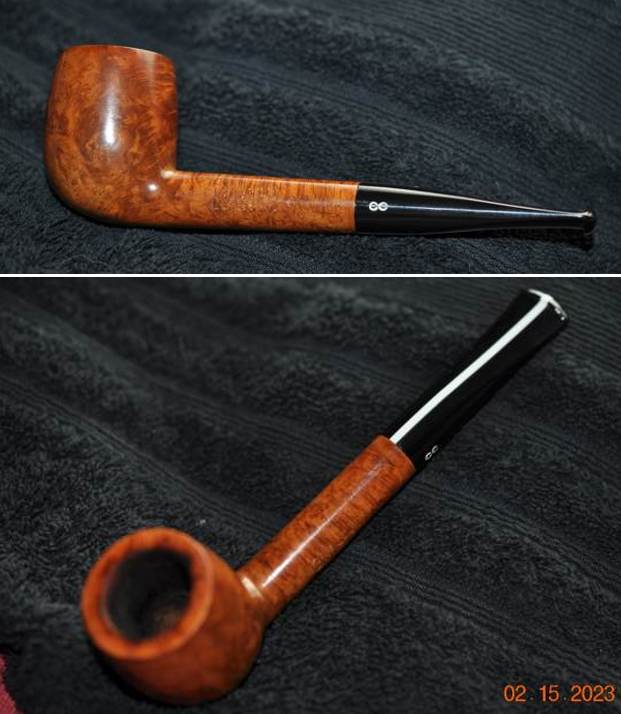 Jeff took close up photos so that I could have a clearer picture of the condition of the bowl, rim edges and top. The rim top photos confirm my assessment above. The cake in the bowl is not too thick – lightly coated on the walls of the bowl. The rim top has some light spots of lava coat and has some darkening on the inner edge and top toward the back of the bowl. The inner edge looks to be in good condition otherwise. This is what I look for when assessing a pipe. I look forward to viewing it in person after the clean up work.
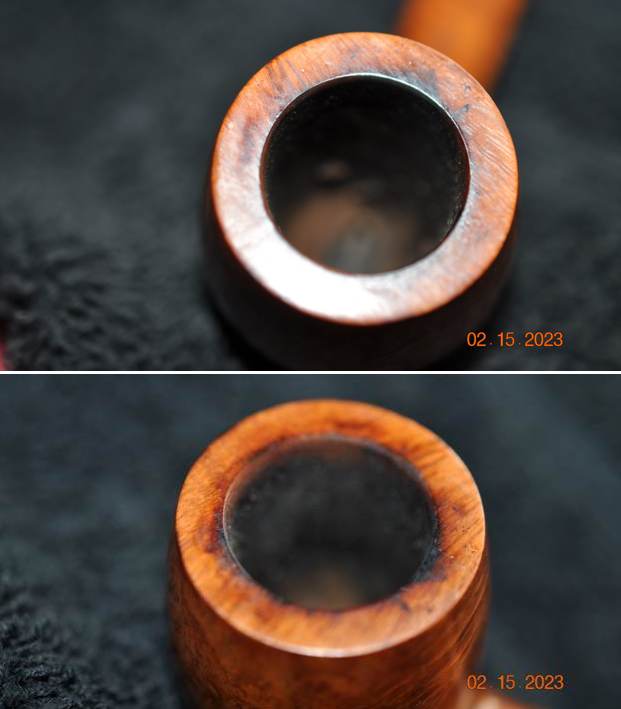

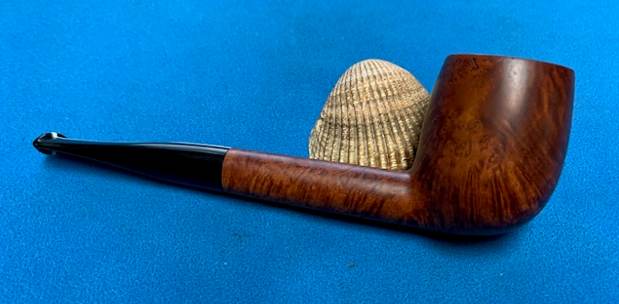
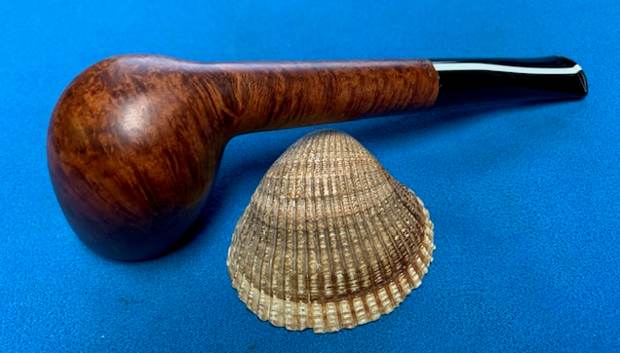
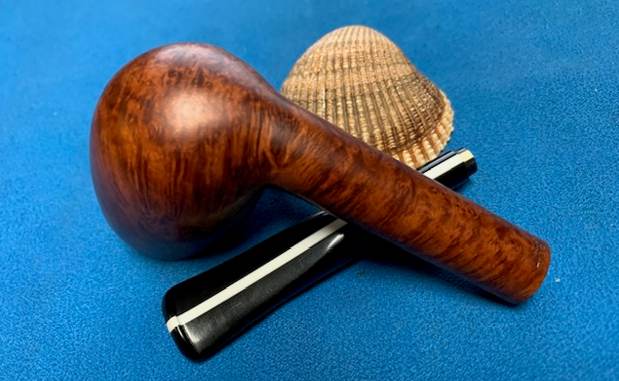
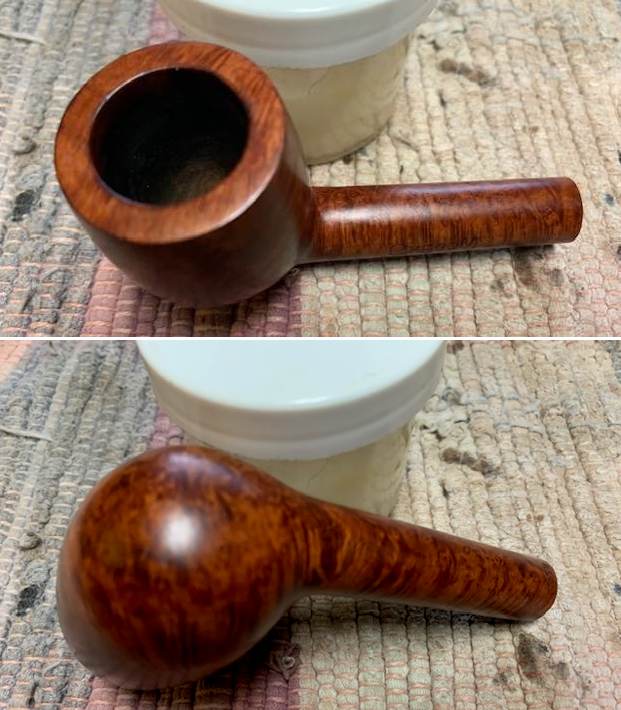
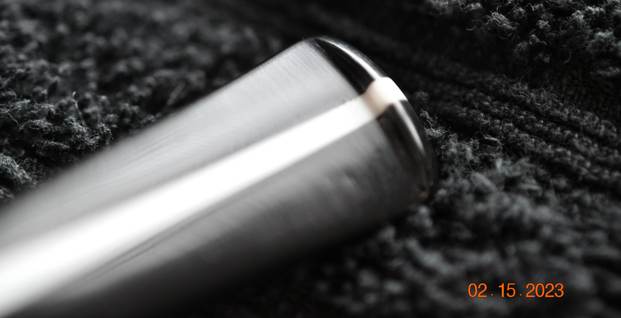 Instead of telling you what I see in the next photos of the sides of the bowl and the heel I want to hear from you. Tell me what you see? What does the finish look like to you? Are there any visible problems or issues that stand out to you? Are the cracks or scratches in smooth finish of the bowl? Are there visible flaws or fissures in the briar? What does the grain look like Is there a pattern to it? Any visible issues on the heel of the bowl? These questions should help you to see what I am looking for when I see these photos.
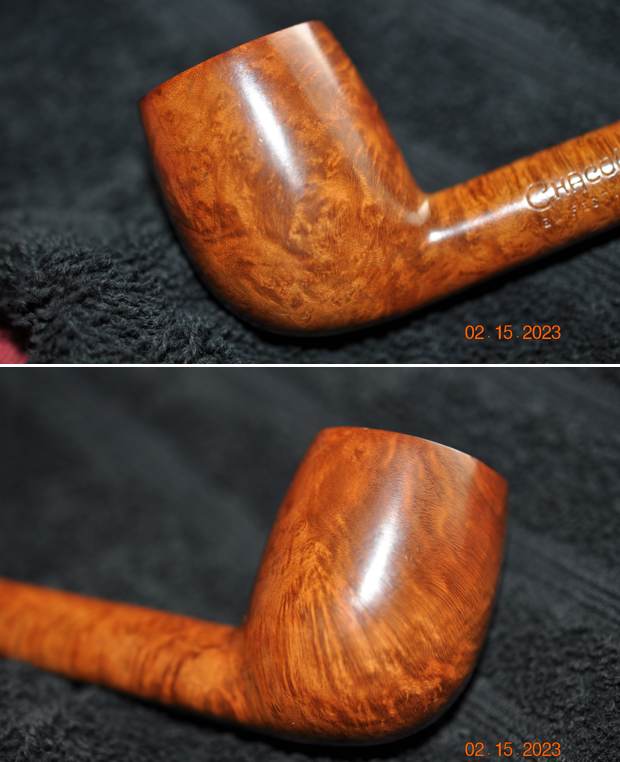
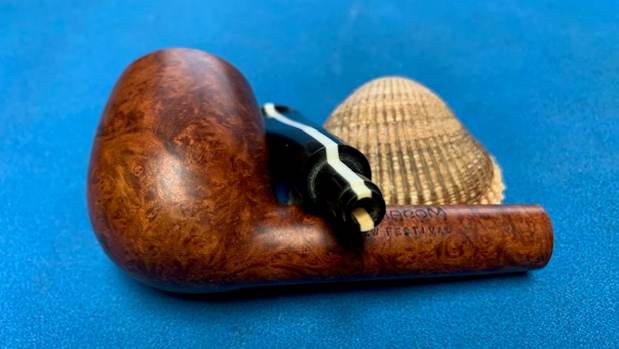
 He took photos of the stamping on the left side of the shank. On the left side it is stamped with the Chacom [over] New Festival and on the underside it is stamped with the shape number 438. The striped acrylic is stamped with the expected Chacom CC logo on the side of the taper. What stands out for you in the photos of the stamping? What do you look for in the stamping? It is dirty but what do you see underneath the grime on the surface of the briar?
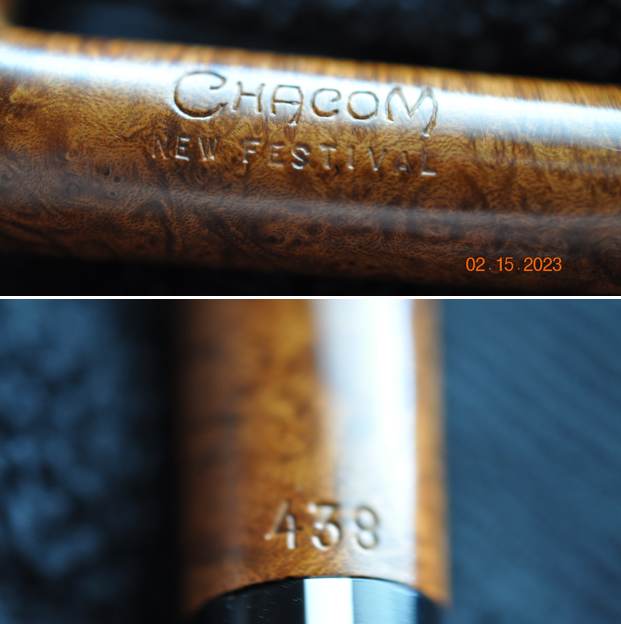
 I am sure many of you will shake your head and ask maybe even out loud, “Why is he including this again?” However, please remember that the point of these blogs is not to wow your with the work or make you shake your heads but I want you to know the details of the work we do so you can do your own. Back in 2020 Jeff wrote a blog about his cleaning process. I am including a link to that now so you can see what I mean about his process. Do not skip it! Give it a read (https://rebornpipes.com/2020/01/20/got-a-filthy-estate-pipe-that-you-need-to-clean/). Here is the introduction to that blog and it is very true even to this day.
Several have asked about Jeff’s cleaning regimen as I generally summarize it in the blogs that I post rather than give a detailed procedure. I have had the question asked enough that I asked Jeff to put together this blog so that you can get a clear picture of the process he uses. Like everything else in our hobby, people have different methods they swear by. Some may question the method and that is fine. But it works very well for us and has for many years. Some of his steps may surprise you but I know that when I get the pipes from him for my part of the restoration they are impeccably clean and sanitized. I have come to appreciate the thoroughness of the process he has developed because I really like working on clean pipe!
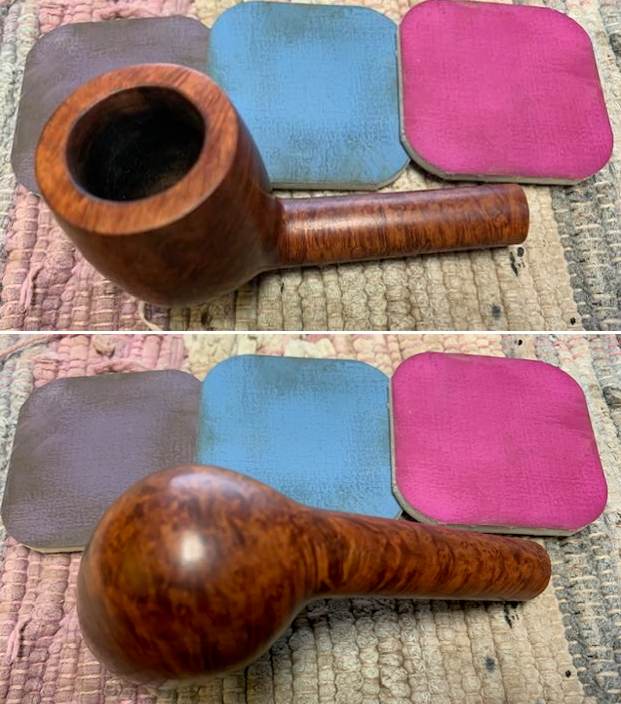
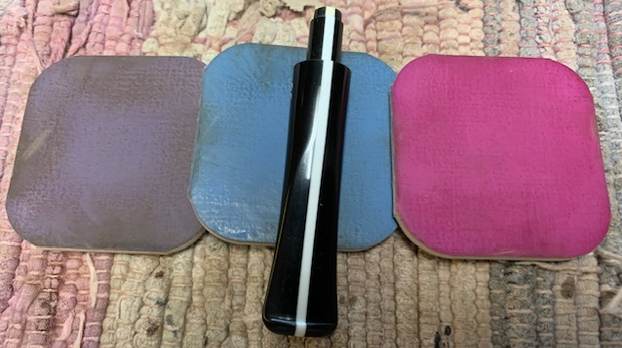
For the benefit of some of you who may be unfamiliar with some of the products he uses I have included photos of three of the items that Jeff mentions in his list. This will make it easier for recognition. These three are definitely North American Products so you will need to find suitable replacements or order these directly on Amazon. The makeup pads are fairly universal as we were able to pick some up in India when we were with Paresh and his family.
In the blog itself he breaks his process down into two parts – cleaning the stem and cleaning the bowl. Each one has a large number of steps that he methodically does every time. I know because I have watched him do the work and I have seen the pipes after his work on them. He followed this process step by step and when the pipe got to me it was spotlessly clean and ready for my work. The inside of the stem, shank and bowl were clean and to me that is an amazing gift as it means that my work on this end is with a clean pipe! I cannot tell you how much difference that makes for my work.
- The finish is clean and the grime and grit have been removed from the finish on the bowl. The smooth grain looks very good as well. It cleaned up very well and has some shine already that reveals the grain.
- The lava, grime and darkening on the rim top has been removed and it has revealed that the inner and outer edges are clean and burn free.
- With the cake reamed out the walls of the bowl are clean and they look very good with no checking or burn damage to the walls.
- The acrylic taper stem has a white stripe that runs the length of the stem from the button and also on the tenon and button end. It is obviously cast into the acrylic stem when it was made.
- There is a white CC logo stamped into the acrylic on the left side that identifies it as a Chacom pipe. It is in excellent condition with just some light tooth marks and chatter on the top and underside ahead of the button.
Hopefully the steps above show you both what I look for when I go over the pipe when I bring it to the work table and also what I see when I look at the pipe in my hands. They also clearly spell out a restoration plan in short form. My work is clear and addressing it will be the next steps. I took photos of the whole pipe to give you a picture of what I see when I have it on the table. This is important to me in that it also shows that there was no damage done during the clean up work or the transit of the pipe from Idaho to here in Vancouver. 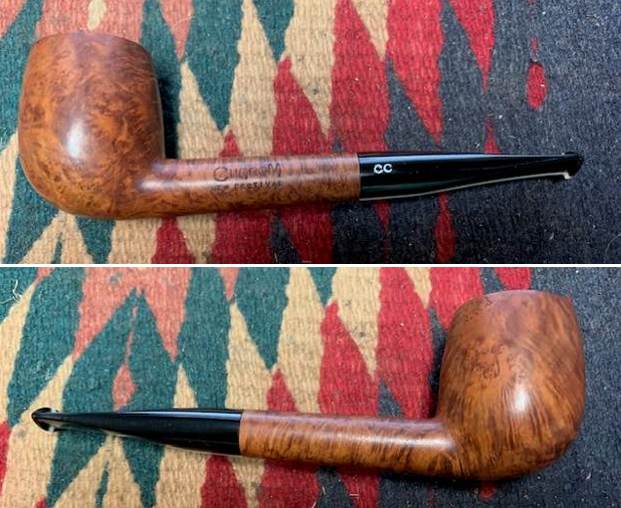
 I carefully went over the bowl and rim top to get a sense of what is happening there. In this case once the rim top and edges were cleaned the rim top and inner edge looked very good. A bit of polishing would bring it back well. I also go over the stem carefully. The fit to the shank is snug and the transitions are smooth. There were some light tooth marks and chatter on the surface of the stem but the button was in excellent condition. The acrylic stem surface was clean and looked very good. I took photos of the rim top and stem sides to show as best as I can what I see when I look at them.
 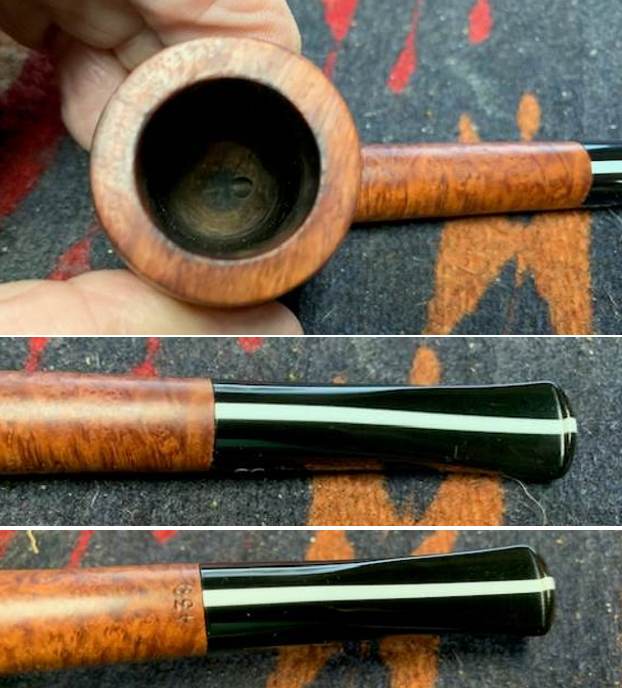 I always check to make sure that the clean up work did not damage the stamping on the shank sides in any way. It is in excellent condition and is very clear and readable. I love just looking at the lay of the pipe and the proportion of the hand made pipes. I took the pipe apart to get a sense of what was in the mind of the pipe maker when he crafted the pipe. The photo shows its beauty in flow and shape.
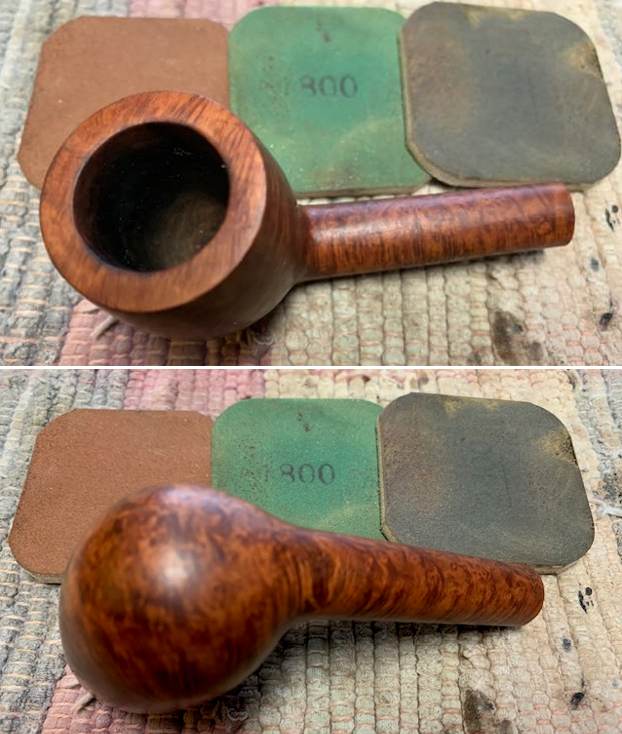
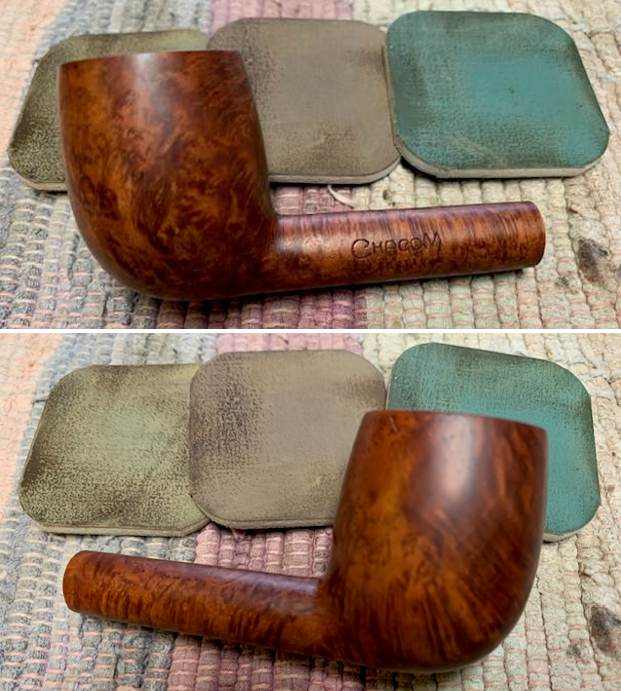
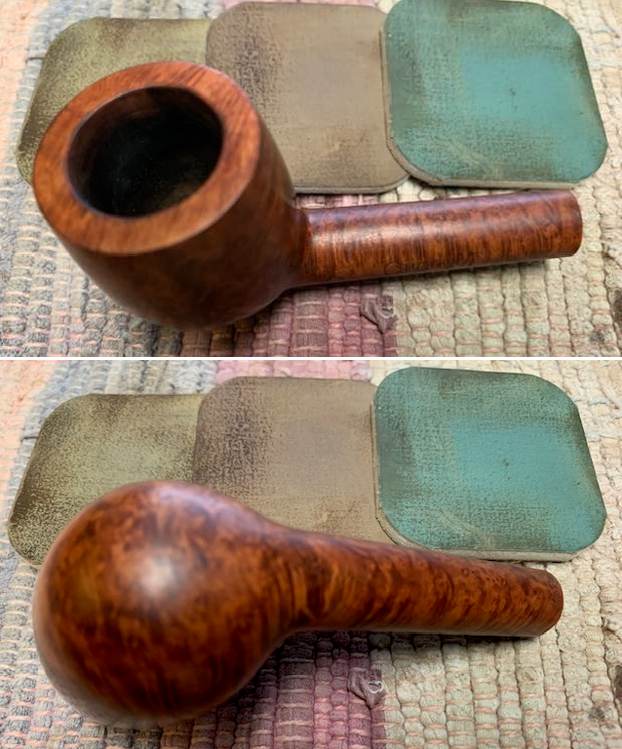
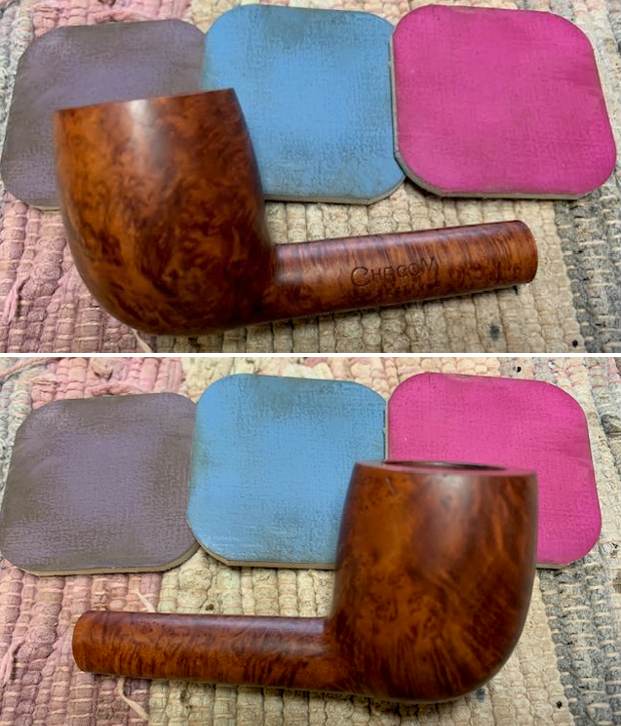
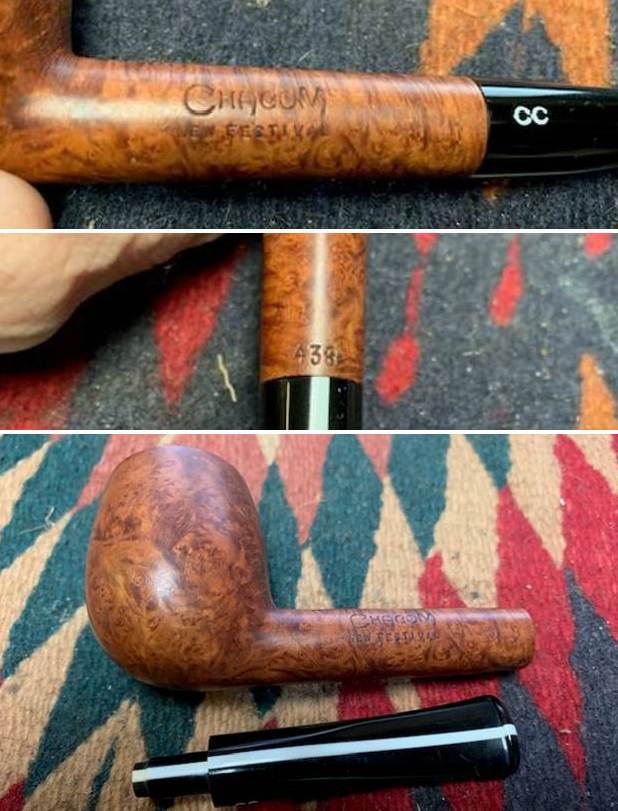 I polished the smooth portions of the briar with micromesh sanding pads. I choose to dry sand the briar rather than wet sand it. Again it is a matter of personal preference. I prefer to use the pads dry and find they work very well on the briar. I sand with each pad (9 in total) and group them by threes for ease of reference. I wipe the bowl down after each pad with a damp cloth to remove the sanding debris and check the briar. I love seeing the developing shine on the briar as I move through the pads which is why I include so many photos of this step.
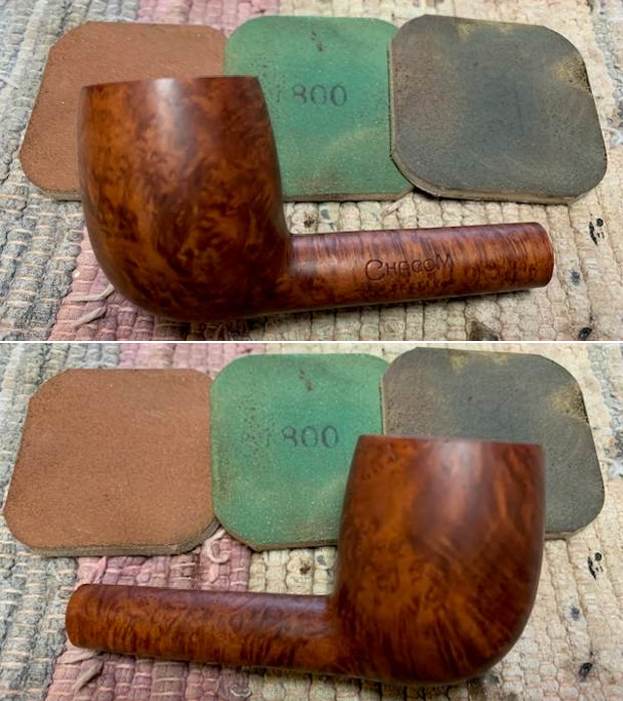
 I rubbed down the bowl and shank with Before & After Restoration Balm. It is a paste/balm that is rubbed into the surface of the briar. The product works to deep clean the finish, enliven and protect the briar. I worked it into the briar with my finger tips. I let it sit for 10 minutes then wiped it off with a soft cloth then buffed it with a cotton cloth. The briar really began to have a deep shine in the briar and the rustication showed depth. The photos I took of the bowl at this point mark the progress in the restoration. It is a gorgeous pipe.
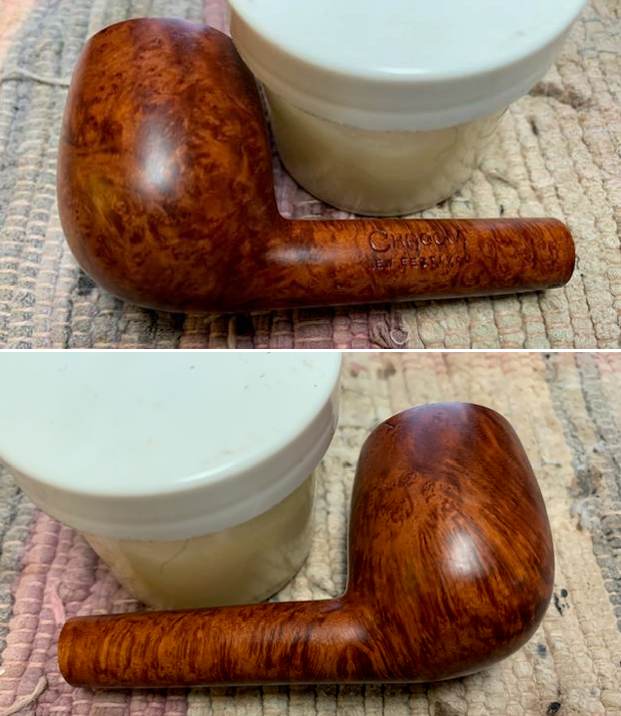
 I set the bowl aside and turn to work on the stem. I polished the stem with micromesh sanding pads – 1500-12000 grit sanding pads and water to wet sand the stem. I wiped it down after each sanding pad with Obsidian Oil on a cotton rag after each sanding pads. I know that many say Obsidian Oil does nothing for acrylic stems, but I find it does two things – first it gives some protection to the stem from buildup and second it give the sanding pads bite in the polishing process.
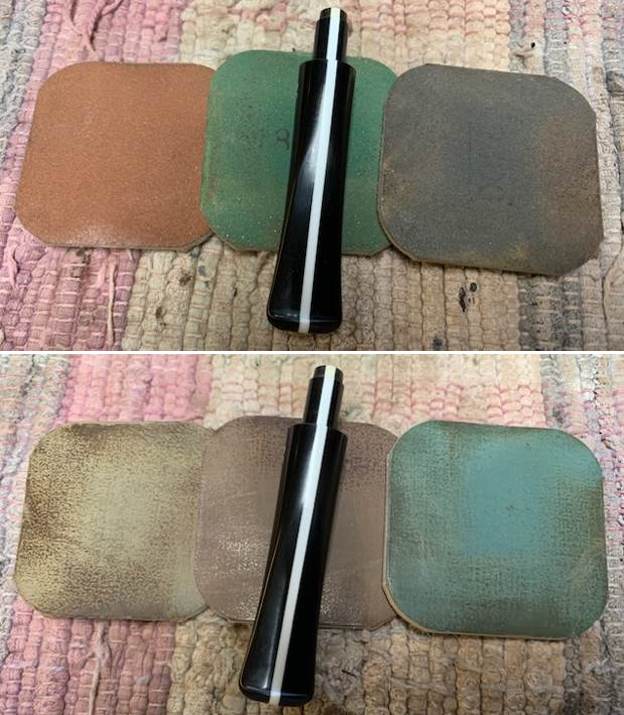
 After finishing with the micromesh pads I rub the stem down with Before & After Fine and Extra Fine stem polish as it seems to really remove the fine scratches in the acrylic. I rub the Fine Polish on the stem and wipe it off with a paper towel and then repeat the process with the Extra Fine polish. I finish the polishing of the stem down with a final coat of Obsidian Oil and set the stem aside to let the oil absorb. This process gives the stem a shine and also a bit of protection.
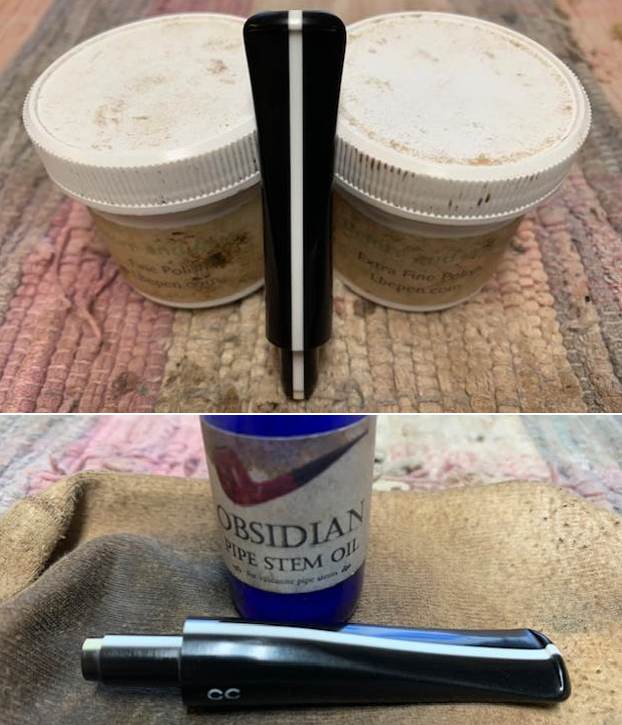 The final steps in my process involve using the buffer. I buffed the bowl and stem with Blue Diamond to polish out the light scratches in the briar and acrylic. I gave the bowl and the stem multiple coats of carnauba wax. I have found that I can get a deeper shine if I follow up the wax buff with a buff with a clean buffing pad. It works to raise the shine and then I hand buff with a microfiber cloth to deepen the shine. It is always fun for me to see what the polished bowl looks like with the polished stem. It really is a nice pipe. The mix of smooth finish around the bowl sides and shank looks great with the black and white acrylic stem. The Chacom New Festival Billiard feels great in my hand. It is a well balanced pipe. Have a look at it with the photos below. The dimensions are Length: 5 ¾ inches, Height: 1 ¾ inches, Outside diameter of the bowl: 1 ¼ inches, Chamber diameter: ¾ of an inch. The weight of the pipe is 1.45 ounces/41 grams. It is a beautiful pipe that I will soon be adding to the rebornpipes store in the French Pipemakers Section. If you would like to add it to your collection let me know. It should be a great smoking pipe.
Hopefully the style of writing of this blog is helpful to you in some way. In it I wanted to show both what I am looking for and how I move forward in addressing what I see when work on a pipe. Let me know if it is helpful to you. It is probably the most straightforward detailed description of my work process that I have done. As always I encourage your questions and comments as you read the blog. Thanks to each of you who are reading this blog. Remember we are not pipe owners; we are pipe men and women who hold our pipes in trust until they pass on into the trust of those who follow us.