Blog by Steve Laug
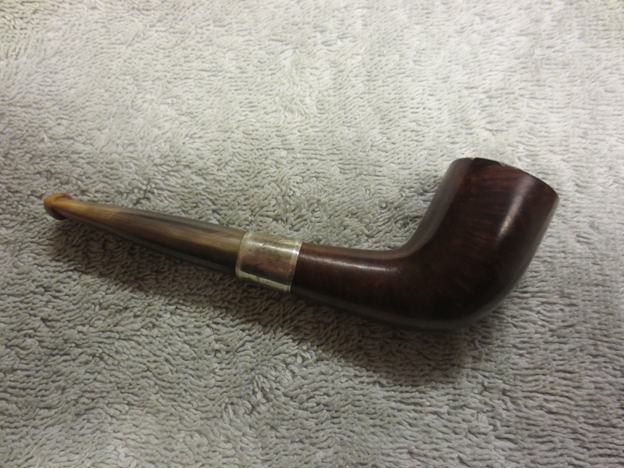
I restored this old horn stem on June 9, 2012 and fit it to an old horn-shaped bowl I had in my box. The bowl is stamped The Regent arched around a star. I wrote about the restoration of the stem and the bowl previously in this post: https://rebornpipes.com/2012/06/09/refurb-on-an-old-the-regent-fit-a-horn-stem-7/ I love the translucence of the horn material. I trimmed off excess horn material to fit the end of the shank. The first photo shows the stem when I started.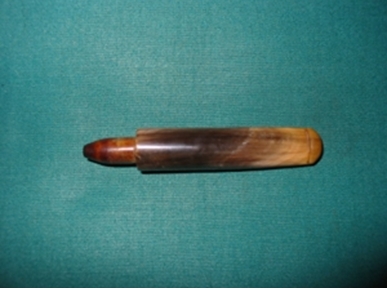 The next three photos show the stem after I had trimmed it to match the diameter of the shank band.
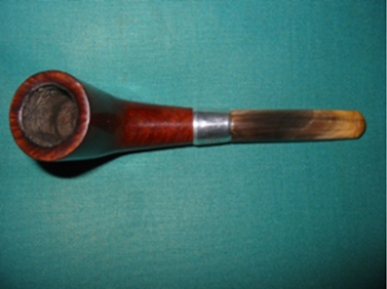
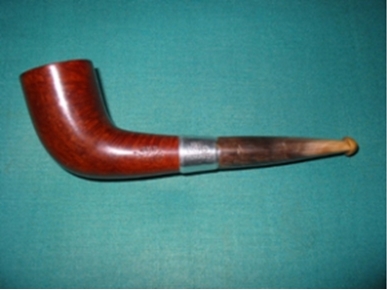
 This holiday season I find that I am out of pipes to restore – I have finished the last of the ones in my box. So during the doldrums of no pipes to refurbish I spent time looking through my collection. I took on the horn stem pipes to look at. I posted on PSU – Pipe Smokers Unlimited – Forum about horn stem pipes. I have quite a few in my collection as I really like the look and feel of a well restored horn stem. I posted the above photos and really did not like the overall look of the stem. It did not seem to flow with the lines of the bowl. In those days I was just starting out on restoring horn stems and I was fearful of ruining the old stem so I did not shape it as aggressively as I do now. I don’t know if it fearlessness or just stupidity but I still am not careless in the work.
I took the pipe out of the cupboard and reworked the stem. I sanded the stem with 220 grit sandpaper to match the angle of the shank – top and sides. I wanted to take out the bulging look, the pinch at the shank stem union. I took off quite a bit more material until the flow looked better and the bulge was gone. I worked to also straighten the sides of the stem from that junction to the button on the end of the stem. I sanded it with medium and fine grit sanding sponges and a fine grit sanding block to flatten angles from shank to button. I finished by wet sanding with 1200-3200 grit sanding pads and then buffed the stem with White Diamond. I took it back to the work table and dry sanded it with 3600-12,000 grit micromesh sanding blocks. I rubbed it down with Obsidian Oil and then gave the bowl and pipe several coats of carnauba wax. I finished by buffing it with a soft flannel buff until it shone.
The finished pipe is shown below. I like the new look of the stem far better than the previous fitting. The pipe is sitting on my desk now and will be in my rotation for this weekend.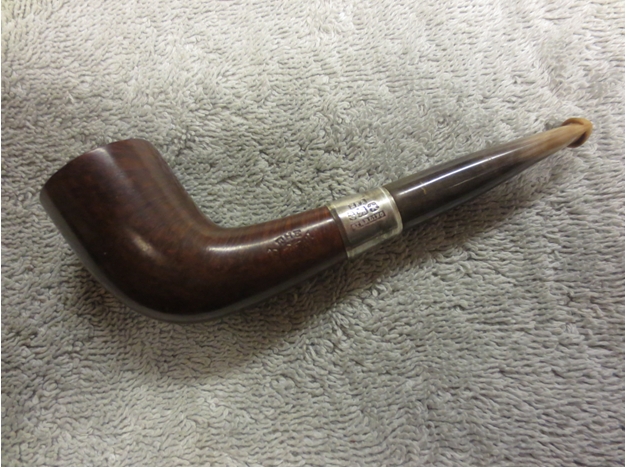


Hold the presses:
“This holiday season I find that I am out of pipes to restore – I have finished the last of the ones in my box”
I’ve always imagined a warehouse full of old pipes at your place!
That pipe looks fabulous with the horn stem, a great choice.
LikeLike
LOL! Al… I have a lot of finished pipes sitting here that I need to move but none left to refurbish… I need a sales manager to move my products…
LikeLike
Steve, you are fortunate to have such superb pipes to work on, collect, and enjoy. We are VERY fortunate that you share all of these techniques with us. I have (and love) several horn stemmed pipes that I have been affraid to work on. With your help, I now feel more confident to attempt minor repairs. Thanks for all you do…and Happy New Year!
LikeLike
I hear you! I photographed and then listed three pipes on the PIpesMagazine.com forum last week, that took me over an hour!
LikeLike