Daily Archives: December 11, 2013

A Review – A Commissioned Alan Stevenson Hand Made Apple


For those who are unfamiliar with Alan Stevenson, a pipemaker from Wisconsin, I am including some information regarding him taken from Pipedia. I think it will be helpful for you to get a feel for the pipe maker before you read my review of his pipe.

“Alan Stevenson is known for his high quality handmade pipes in classic shapes. His trademark hand cut Cumberland stems are a favorite among those who own one or more of his finely crafted pipes. His pipes have a reputation for being some of the best smoking pipes available and their quality is well above their selling price. Alan is a rather modest individual when it comes to his pipe crafting skills, as evidenced from his quote below.” – Pipedia

Quoted from the Alan himself: “My Name is Alan Stevenson and I live in Wausau, WI. I am a very late bloomer for a pipe maker. Have been smoking a pipe since college in 1966. I have always wanted to try making a pipe, so after 30+ years in industry I have retired to my little corner of the garage. Pipemaking for me has really involved a steep learning curve which I have only begun to climb. My background is math, physics and chemistry; I had never touched a wood or metal lathe in my life. Starting at nearly 60 is tougher than most would think.

In 2004 I had tried my hand at a couple of kits from Mark Tinsky and enjoyed working on them. So I paid the kindly Mr. Tinsky a visit in Helena. Mr. Rad Davis was there at that time as well and for a few days I had the privilege of learning a little about pipemaking from these two gentlemen. I left Helena with a couple of pipes, a bunch of briar and some stems and returned to finish working on them in my shop. About 2 years ago I got my nice metal lathe and set about learning how to hand cut a stem. If I ever learn to do that correctly then I might consider that I am a pipemaker. Till that time I am still learning.” – Pipedia

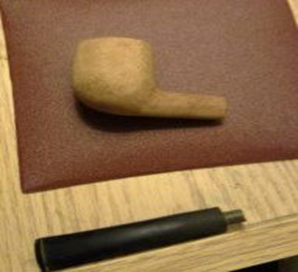
Several years ago I contacted Alan regarding a commissioned pipe that I wanted him to make for me. Earlier I had been gifted one of Alan’s rejects and had stemmed it myself and I loved the finish and feel of that pipe. He had done a great job in laying out the cut of the pipe with the grain of the briar on the reject stummel I had so I wanted to see his magic on a full pipe. I gave him a call and asked if he would carve a pipe for me. My request was pretty simple in that what I wanted was roughly an apple shaped pipe that had a smooth finish. I did not specify colour or finish or even the lay of the grain. I also did not specify a shank extension or the wood that he would use in it. I pretty much left all of the artistry up to Alan to work his magic.
Stevenson1

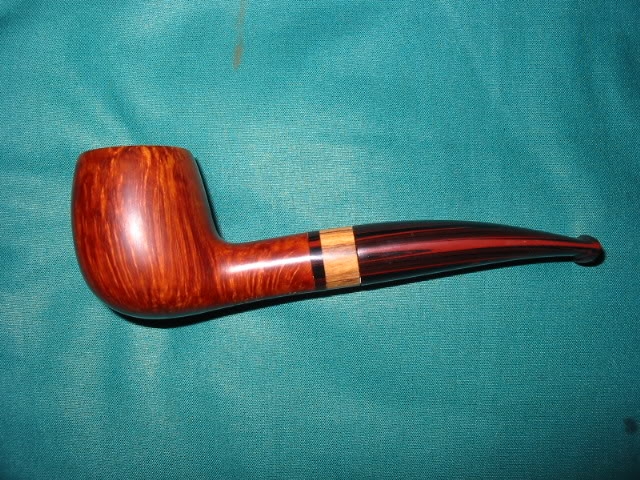
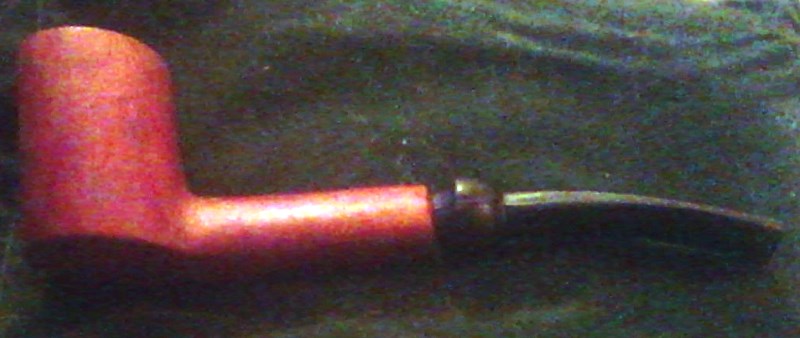
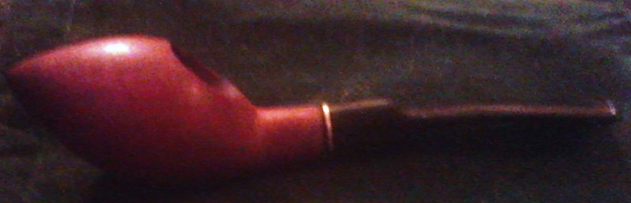
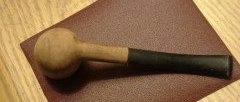
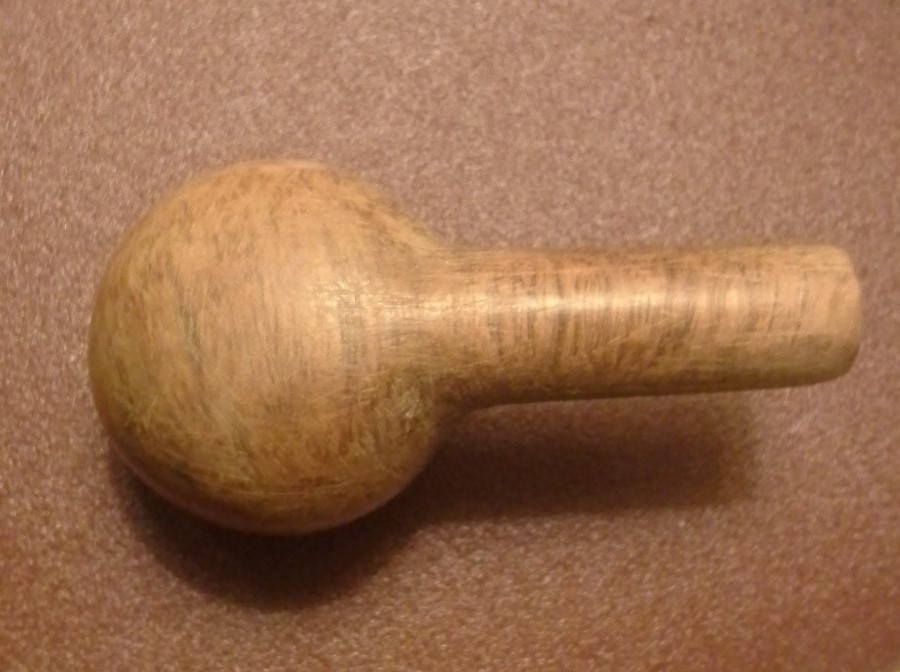
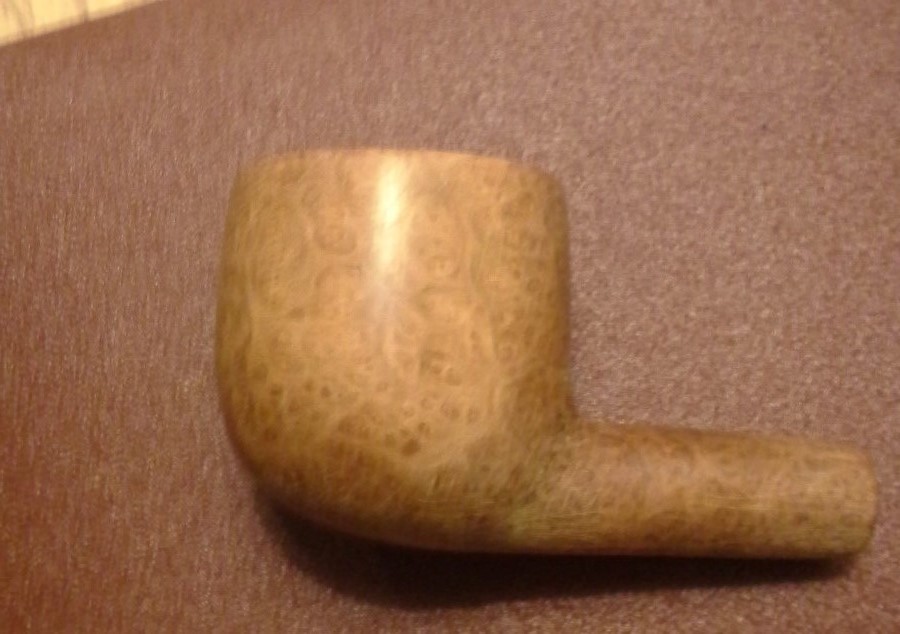
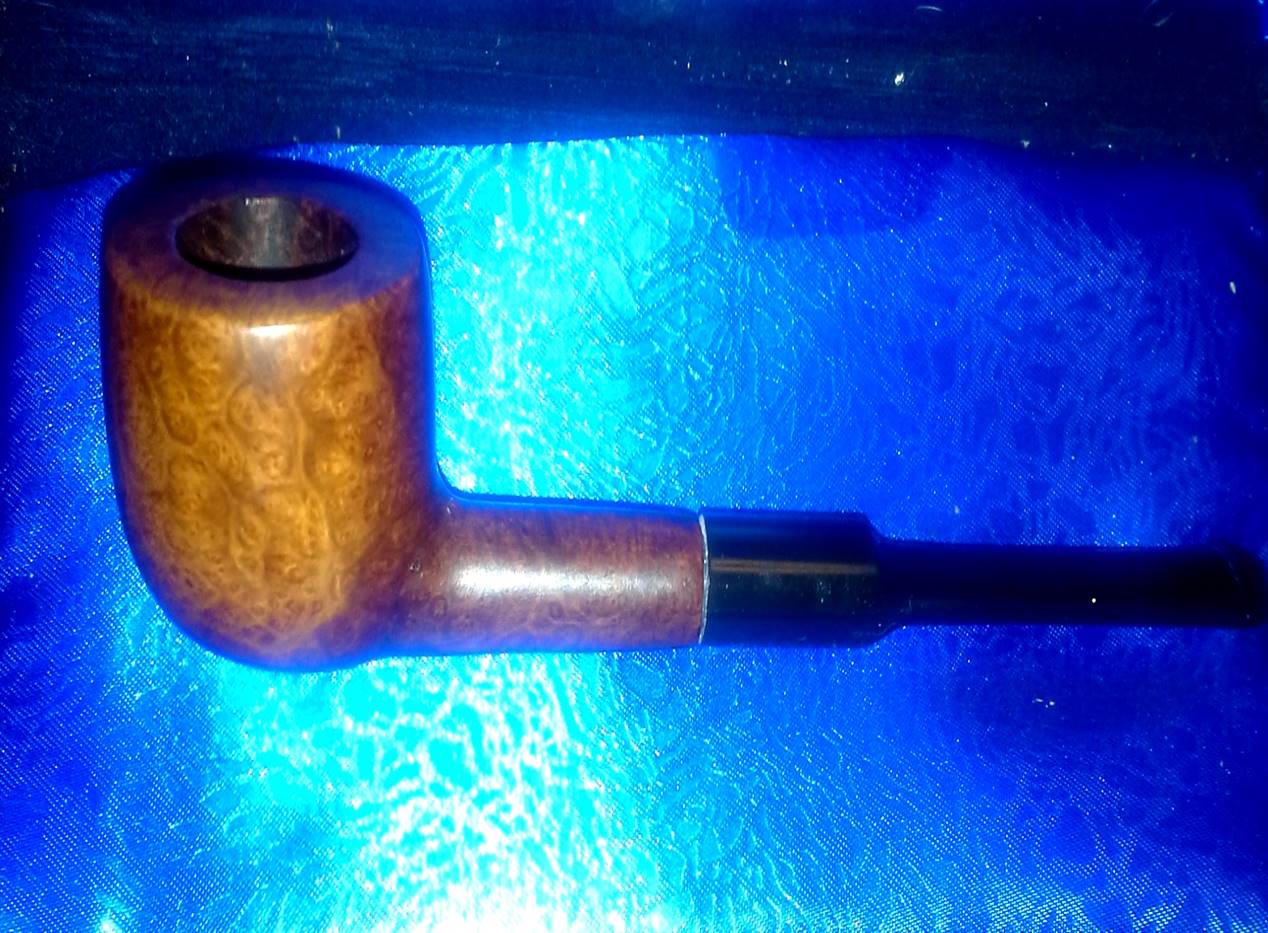
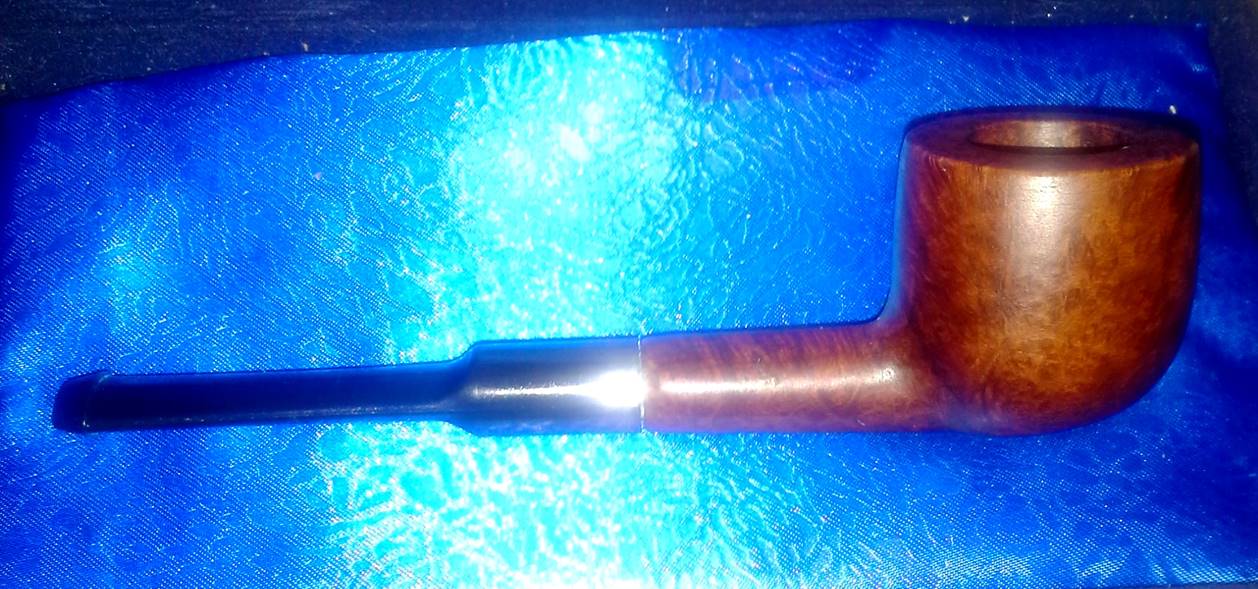
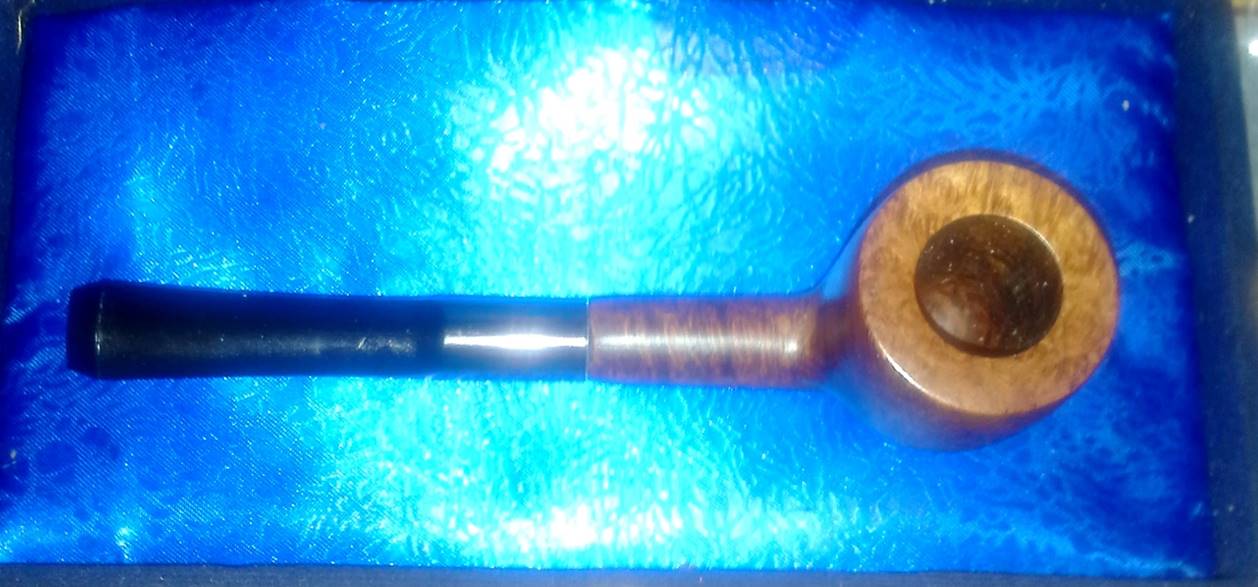
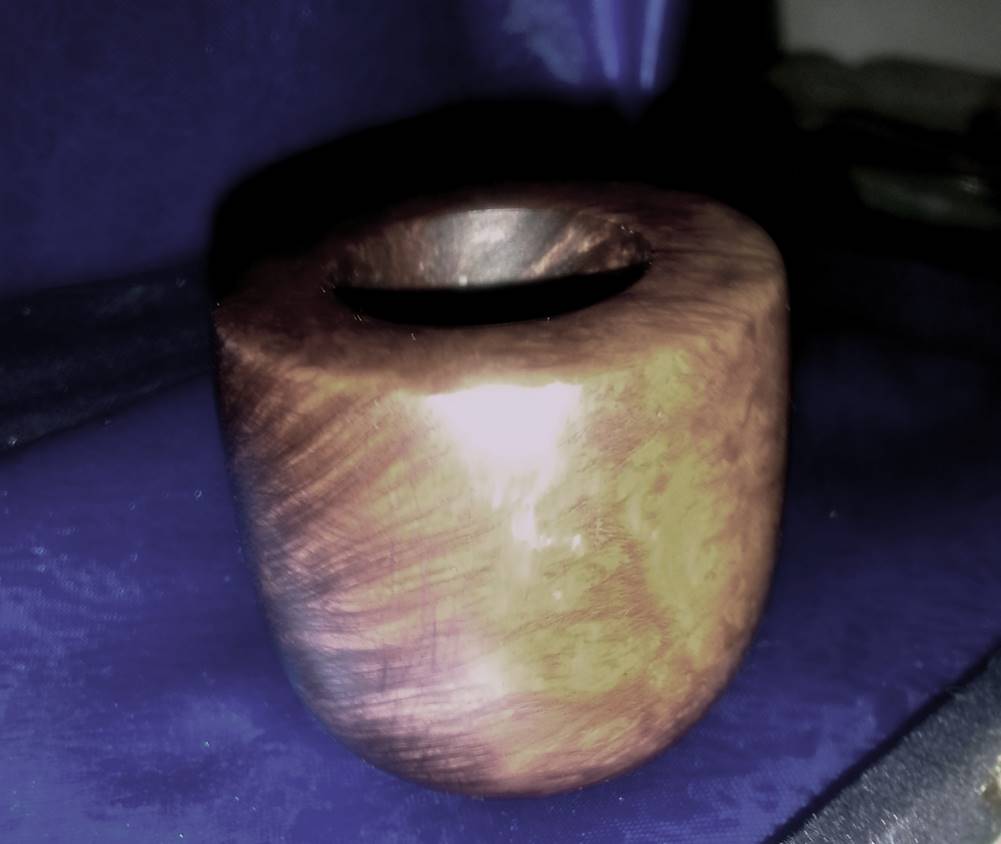
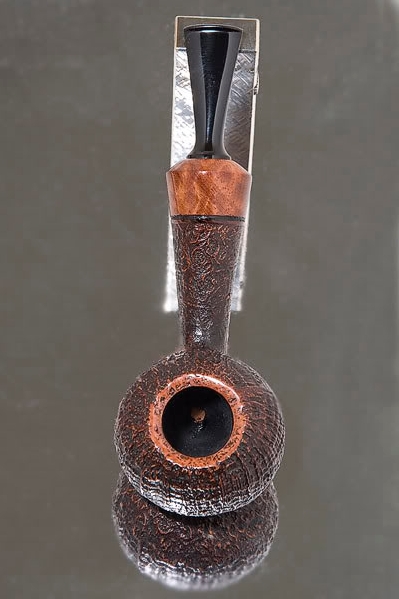
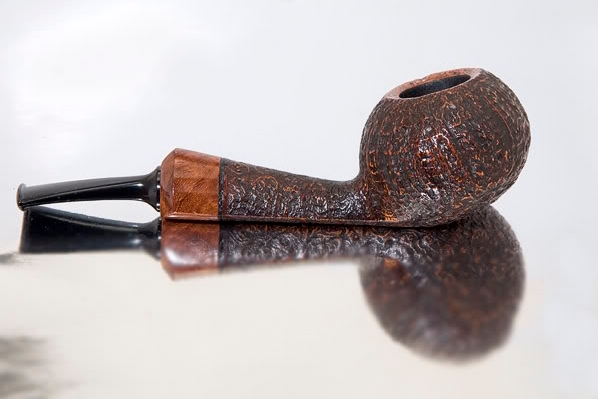
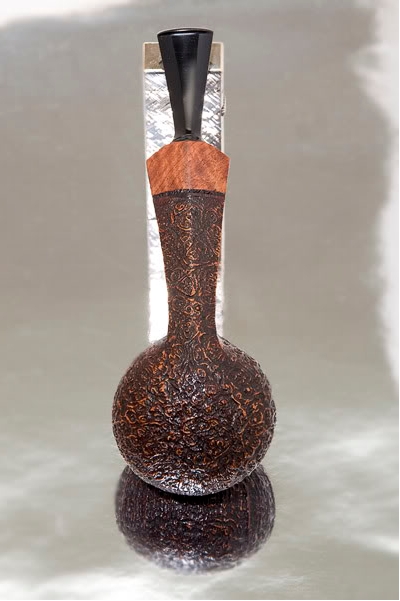
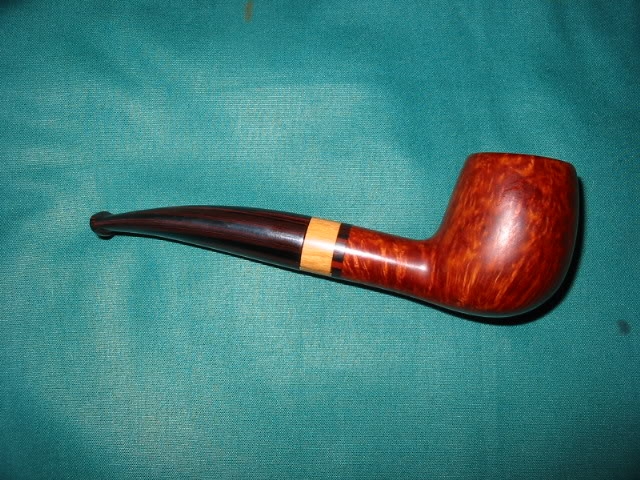
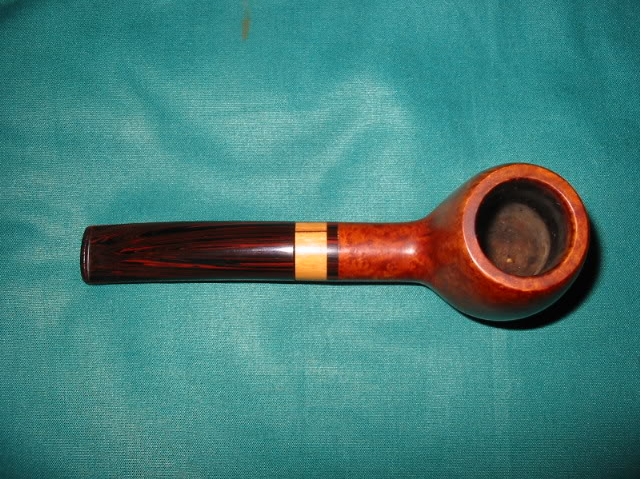
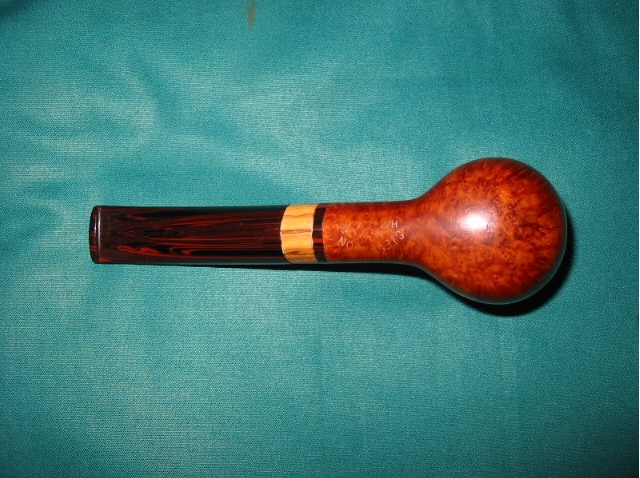
When the pipe arrived and I have to tell you the shape and finish went beyond what I had in mind when I commissioned it from Alan. It was and is beautiful. The length of the pipe is 5 inches and the bowl height is 1 5/8 inches. The bowl diameter is 1 1/4 inches. The chamber diameter is 7/8 inches and depth is 1 1/4 inches. The lay of the shape to the grain is superb. The sides bear a mix of straight grain and flame. There are spots on the front and back of the bowl which have mediocre grain but Alan did a good job of working that into the finish. The rim, the bottom of the bowl and the top and bottom of the shank have some nice birdseye grain. There is one slight flaw in the briar at the front toward the bottom of the bowl that he blended into the grain of the briar nicely. It looks to me that he used a dark brown stain on the undercoat to highlight the grain and then a tan or light brown stain to cover that and give the pipe a warm hue. He made a shank extension that combines a thin band of Cumberland and a wider band of olive wood. The olive wood is also stained with the tan stain and looks good. The stem is Cumberland and matches the band. The overall flow of the bowl and shank is brilliant and the colours are beautifully matched from rim to the end of the shank.
Stevenson2

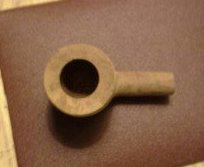
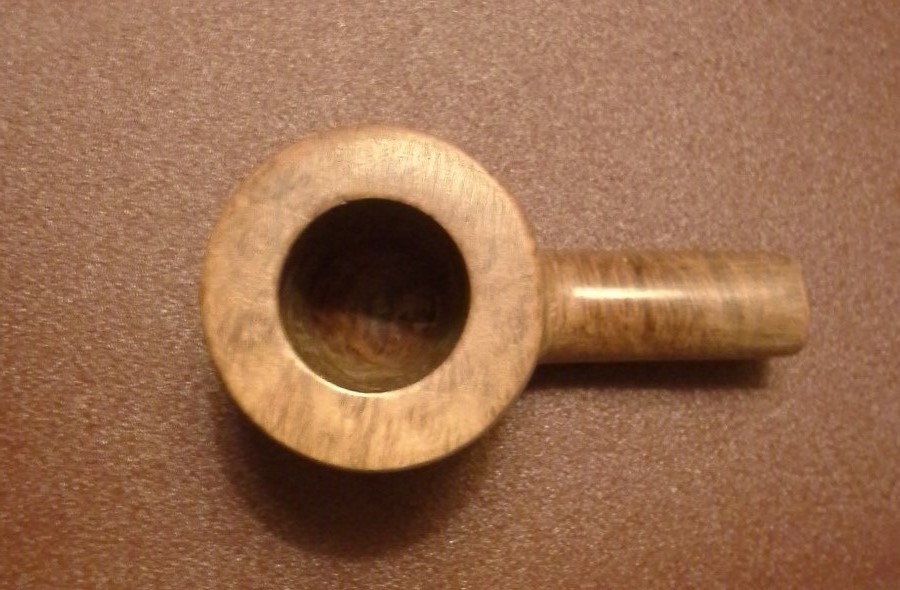
Alan did an excellent job on the inner mechanics of the pipe with drilling that is perfectly executed from the shank and into the bowl – coming out exactly centre in the bottom of the bowl. The airway and the inside of the bowl were very smooth with no rough spots left by the drill bit in the bowl or shank. There was no bowl treatment or coating so just a good smooth briar. He had sanded the inside of the bowl and there were no hidden flaws or surprises.

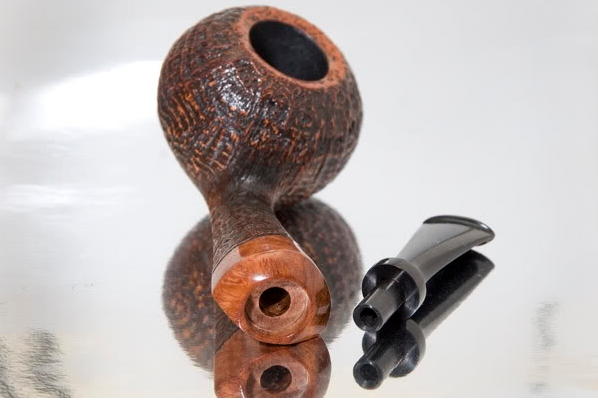
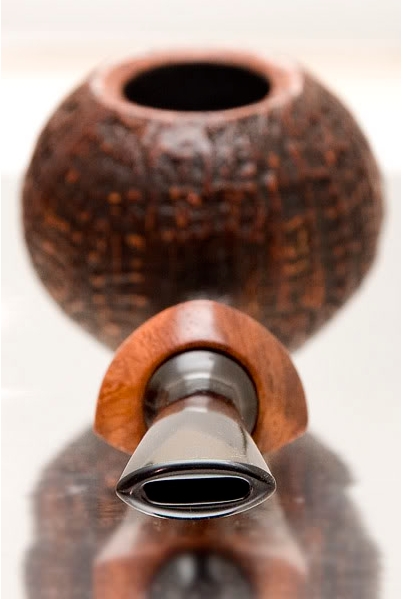
The stem itself is hand cut out of Cumberland. It has a gentle taper from the shank to the button. It has a slight bend to it that gives it a stylized look. Alan did a great job shaping the stem and capturing a shape that really works with this pipe. The stem is nicely finished with no marks or scratches in the Cumberland. The tenon is integrated with the stem and cut into the Cumberland. The fit in the mortise and against the shank is snug. He countersunk the end of the mortise to make for a snug fit of the stem to the shank. There appears to be a slight gap where it meets the shank but as I examine it with a light I think that it is a problem with the stem being slightly larger in diameter than the shank. The end of the tenon is funneled slightly for a smooth transition from the mortise when it is in place. There is a very minimal gap between the end of the tenon and the base of the mortise. The airway is smooth from the entry of bowl airway all the way to the button. The draught is unrestricted and open from the bowl to the tip of the stem. The button is perfect to my liking and very comfortable in the mouth and teeth. The edge is narrow and well shaped. The slot in the mouthpiece is fanned out and is oval in shape. The airway is thus consistent in size from the tenon to the slot. There is no whistle or noise when the air is drawn through the pipe.
Stevenson3

The overall construction of this pipe is very well done. It is light in the hand and in the mouth. It is well balanced and has a shape that fits well in my hand. There are some slight details in the finish of the pipe that in no way affect its smoking ability. They are truly cosmetic in nature. I list them at this point only because to me they are there and others will see them. The first involves the shank extension. There are some spots on the underside of the shank where the epoxy squeezed out between the Cumberland and the olive wood. The second involves the fit of the stem being slightly off. There appears to be gap at the junction as noted above. However, in examining the stem and shank and measuring the diameter of each it is clear that the problem is not a gap but that the stem is slightly larger in diameter than the shank. This could easily be corrected but I have not done so yet. The third issue may appear to be a finicky one to be sure, but it is there nonetheless. The Cumberland of the band and the stem seem to come from different pieces of stock and thus the lines/striations do not line up. This issue does not bother me but some would find it troublesome. Apart from those very simple cosmetic issues the pipe is well made and is a smoking machine.

I have been smoking it for a few years now and after breaking it in with what has become my first love in tobacco, McClelland’s 5100 it has become a great Virginia smoking pipe. It has always delivered a good smoke from the first smoke to the present. It draws well; the lighting has never been a problem. It seemed to take very little time to break it in and continues to be an effortless smoke.
Stevenson4

Thanks Alan for delivering a well made pipe at a great price. It remains a very good smoking pipe through the years since I purchase it. I do not know whether Alan continues to craft his fine handmade pipes but if he does they are worth considering. I see them come up on EBay periodically and one day I will pick another one up. If anyone knows if he continues to make pipes I would love to hear from them. You cannot go wrong with a Stevenson Handmade Pipe.

The Peculiar Particulars of the Pre-formed Pipe, and the Pleasures It Provides – Robert Boughton


Thanks to Robert Boughton for his newest contribution to rebornpipes. It is always a pleasure to read about Robert’s work. He not only reworks old pipes but also does research to provide the historical background of the pipes – something I always have found fascinating.

This subject, that of the little-known unfinished, or pre-formed, pipe having nagged at me for some time to approach but for thinking I lacked suitable samples of previous completed efforts of the same type, which proved erroneous, and for assorted other excuses, all of these being of the good type (as if there were such an animal), at last I find the time to take a holiday, it seems, from my mounting responsibilities, to write it all out.

Guest Blog by Robert M. Boughton
Photos © by the Author

“Who be ye smokers?”
A bewildered crew member in Melville’s Moby Dick (1851), upon
going above-deck to find Ismael and Queequig smoking a peace
pipe (quoted with a nod to our good host, Steve)


Introduction

Let there be no misconception, from the commencement of this essay, as to the precise meaning of the modifier unfinished as I apply it to pipe. To be sure, I do not refer to the stylish, branded varieties sometimes called unfinished pipes in reference to certain fine lines – Savinelli and Baronet, to name a couple – whose pipes of that description are more akin to natural versions of pipe craft, and hence the term natural often applied to them. No, the unfinished, or natural, pipe by any brand name lacks only the final glaze and buffing with waxes with which to complete the process, and also sell for much more than that which I shall discuss with as much brevity as possible. Also, the variation of unfinished pipe of which I will soon find my way to addressing should by no means whatsoever be confused with pipe kits, those more typical introductions to the art of pipe making that involves chunks of briar, in general, with pre-drilled stems that the novice pipe maker then saws, chisels, sands, micro-meshes, buffs, stains, waxes and otherwise lovingly transforms from a veritable lump of wood to a finished mode of partaking of all the world’s smoking tobaccos, the degree of excellence depending on the innate talent of the individual woodworker and maybe some amount of luck.

Therefore, having discussed what I do not mean by unfinished pipe, I will re-name the oddity a pre-formed pipe. In this context, the difference between anything finished by minimum standards and the opposite, the mere basic elements to build one’s own pipe all but from scratch, is easier to comprehend. Thus, my meaning of pre-formed pipe is simply a pre-shaped piece of briar, un-sanded, un-glazed, un-waxed or polished or even showing the grain, in many instances – but with a stem, which may or may not fit as attached. Therein resides the fun and challenge for someone a step or two shy of ready to tackle the difficult enough task presented by even a pipe kit, but prepared to refinish, with considerable detail and elbow work, a pre-formed pipe in the rough.

The owner of my local tobacconist of most frequent choice is good enough to offer a small but ever changing selection of these pre-formed pipes for $12.50 each, with a nice variety of shapes from which to choose, even if those available often defy identification on any official chart of pipe shapes. To me, at least, that is just another part of the charm of these raw pipes in transition from mere rough wood and dull stems to greater things of beauty, regardless of how much or little work is invested by the restorer on the sample. The owner, by the way, tells me her supplier (whom she somewhat enigmatically declines to identify) calls these rough-hewn pipes “stubs,” which in an online search for “smoking pipe stubs” brings up such disparate references as the habit of some pipe smokers to stick a cigar stub in the bowl and puff on it, the usually distasteful dottle of wet, unsmoked tobacco remaining at the bottoms of wet smokers’ bowls, and, yes, Melville’s likeable character in the above quoted novel – which is as massive as the Great White Whale itself – Stubbs (whose greatest sign of character is his large collection of pipes). Again, thanks are due to Steve for pointing this out in an emailed attempt by me to determine the origin of the term stubs in relation to pipes, for upon further thought I recalled the other pipe-smoking characters in Moby Dick adopting the habit of shortening the lengths of their stems, as much as possible in order to tolerate the horrendous stench of rotted fish, through the closer proximity of the pipe smoke to their noses. Perhaps by coincidence, most of the samples of the pre-formed pipes I have seen are indeed on the short side.
broughton1

broughton2

And so, before our weekly meeting Friday night, I once again plumbed the dædal depths of Chuck Richard’s knowledge of pipe lore, and in so doing learned far more than I had anticipated – indeed, everything but a tag better than unfinished or pre-formed, although those adjectives turn out, in a vaguely sad way, to be far too apt: the unfortunate truth of the matter is that the German factory of their origin had never intended to leave these pipe shapes in any condition but complete to a degree noted to that European country. The factory, it seems, simply went belly-up in the 1970s with thousands of the pre-formed specimens sitting there, where most of them were at some point picked up by a U.S. distributor who continues to market them as-is, but not to individuals. (Aha! Thus, the tobacconist owner’s reluctance to disclose the name of her supplier thickens.) Later, a few German pipe interests procured the remainder of the lot and ever since have been selling them to anyone, for the most part in the European Community, who will bite. All of these unfinished pipes, therefore, were cut from decent briar that has aged in the 40-some years since the end of their official production – and are now perfectly suited for the consummation of the process. Perhaps these pre-formed pipes can, as a result, be compared to a fine wine that is left open to breathe. Based on the four or five of these finish-yourself pipes that I have now practiced the art of restoration, this example being the only one I can now document in full (although I am attempting to leave this latest restore pristine), they smoke wonderfully no doubt with or without any further work. But that would not only take away from the ultimate enjoyment of this likely unique and limited edition of unfinished pre-forms, barring the unlikely enthusiasm of a reader to strike out upon the task of building a finish-yourself pipe business; it would also deprive me of the opportunity to get on with the remainder of my tale.

And Now, for Page Two…
As anyone who has ever restored a pipe knows, there are restores, and then there are restores. In any case involving one of these unusual pre-forms, the only real tasks are choosing one with signs of good grain and lack of flaws such as cracks or fillings. In other words, to re-state a theme common to me, somewhat after the old man in Mrs. Robinson advised a memorably disinterested Dustin Hoffman, I have one word for you: sanding!

Here was my little pre-formed pot as I first saw it.
broughton3 broughton4 broughton5

Unfortunately, I was forced to use my cell phone camera to snap these shots and the others that will follow, and so the clarity of the roughness of the plain briar, with bumps and pits and discolorations a-plenty, is somewhat wanting. But I hope you can see enough to get the general condition of my little pot. Again, I chose it over the assortment of others in more exciting shapes for the beauty of the grain I could hardly make out, and the lack of real blemishes.

Of course, after rigorous sanding – with 80-grit paper followed by 150 – I saw the beautiful grain for which I had purchased this particular pipe, in some places elegantly lined and others more spotted, but overall a clear potential for finishing. Then I used some micro-meshes, starting with 1500, then 2400 and at last 12000.

At that point, I was at a quandary. Should I use a stain, or skip it? The natural beauty of the pale briar attracted me very much. Still, I opted to use an alcohol-based shoe stain of a light brown color, which, as it was almost dry, I held a gentle match flame under the bowl and was gratified with the brief poof of blue as the alcohol in the stain ignited and dissipated.

The next step was an easy buff of Tripoli White Wax. Wow! was my initial thought after my first experience applying Tripoli. The immediate soft luster the preliminary wax bestowed upon the previously smooth but somehow flat bowl and shank gave the wood real dimension.

Again, I pondered long and hard on the idea of adding a coat of Tripoli Red, and during that pause remembered more of Chuck’s words to me before our Friday meeting: “Sometimes a little Red Tripoli on the wood is just what you need, especially to give it deeper color.” Still with more than a little flip-flopping in my stomach, I went for it:
broughton8

broughton7

broughton6

Wow! was my initial thought after my first experience applying Tripoli Wax. The immediate soft luster the preliminary wax of Tripoli White bestowed upon the previously smooth but flat bowl and shank gave the wood real dimension. But my gentle blessing of the Tripoli Red gave the old briar absolute radiance.

Suddenly, all that remained were a buff with my new stick of carnauba and – come to think of it – quite a bit of work yet to go before the stem would be in order. I don’t know about the rest of you (and I know this places me with the troops in the rear as far as experience goes), but I have developed an undeniable case of what might only be apt to call stem loathing, if I may possibly coin a phrase. I just hate the buggers, as my British friend and fellow pipe smoker Leigh might say, if he didn’t have the habit of speaking the Queen’s English, and even in the tone and style of William, or His Royal Highness the Duke of Cambridge KG KT.

At any rate, with no way around the dirty deed, I went all-in, setting about the task of reducing a downright humongous overhang of the stem where it must, I repeat, must at all costs end up smooth and flush with the shank opening. I tried to be patient with the wretched thing, you see, I really did. Nevertheless, after a day of patiently trying the coarsest micromesh in my trusty box, getting nowhere with that approach and wearing my entire left arm, hand, four fingers and thumb into spasms of pain, there began to creep into my mind more direct and effective means of accomplishing the necessary duty. With far more grace and good sense than I in fact felt, I returned to the 80-grit sandpaper for a quick adjustment of the problem…and the approach actually worked!

That was about the time I realized I had another, nice and shiny, short straight stem I had stashed away with my spare pipe parts, assorted bowls needing serious work and assorted detritus. At the same time, I flashed on a diminutive Chinese pipe given to me by a friend as a joke owing to my known appreciation of certain specimens of that origin. That pipe, which had been covered in gaudy varnish and appeared at first touch to be made of balsa, would be a perfect match for the longer, curved stem I had adjusted as already described. Still, I finished repairing the original stem, micro-meshing away the rough surface where I had brutishly employed the bully force of abrasions, and then applying a good buff with Tripoli Red. But there I go again, off on a tangent, and when this initially homely Chinese pipe might be the subject of a forthcoming blog.

Without further delay, therefore, here are the final results:
image002

image003

image004

image005

image006

Conclusions
The more I practice restoration as a fledgling, or novice, the higher level of understanding I acquire as to the years required to achieve anything close to master level. At least I am getting quicker on the uptake of that which I now comprehend is limitless information.

What more can I add, except the usual well-deserved thanks to my mentor, Chuck, and my sometime adviser and friend in pipe appreciation, Steve… and everyone else who holds any stock in my ability to learn.

A Review – A Steve Morrisette Tomato


I commissioned this pipe from Steve and had a great time working with him as he designed and executed the work. The pipe is a beauty. Its length is 5 ½ inches and the bowl height is 1 3/8 inches. The bowl diameter is 1 ¾ inches. The chamber diameter is 3/4 inches and depth is 1 1/8 inches. It sports a hand cut acrylic stem. The pipe is a small squashed tomato shape with a ¼ bent stem that fits well in the hand. The shank is shaped like a shield with the right and left sides curving up to a rounded point on the top of the shank. The underside of the shank is a flattened peak with centre ridges that runs the length of the shank. The lower edges of the right and left side are sharp and straight lines that run the length of the shank. From the top the shank flares wider as it moves toward the stem. It has band of black acrylic and then an amboyna shank extension. The stamping is an older Steve Morrisette stamping.
Morrisette4

The finish on the outside of the pipe is a sandblast that is visually very pleasing. It is not too deep a blast but highlights the ring grain on the sides, front and back of the bowl and on the bottom edge of two angular sides of the shank. On the bottom of the bowl and shank is a beautiful sandblasted birdseye that highlights the pattern of the grain. The rim was sandblasted and then sanded smooth leaving a few small birdseye grain visible under the smoothed out blast. There is a thin smooth band between the acrylic band and the shank that was also sandblasted. The mortis is countersunk so that the stem sits into the shank extension. There is a very tactile feel to the sandblast on the bowl and shank that feels great as the bowl warms during a smoke.
Morrisette2

The bowl is stained with a dark brown or black under stain that goes deep into the grooves of the blast and highlights the deeper parts of the blast and the rings and whorls on the birdseye. The higher parts of the blast are stained with a medium brown stain that is a perfect match to the colour of the shank extension. The medium brown is relatively smooth on the rim and on the thin band just ahead of the acrylic band on the shank. In contrast to the bowl and shank Steve cut a black acrylic stem that picks up the thin black band on the shank. The blacks/dark brown stain on the sandblast also provides contrasting highlights to the total package of the pipe. Steve did a great job on the stain and finish of the pipe.
Morrisette5

The stem itself very nicely worked. It is an acrylic stem that is cut at the same flared angles as the shank. The shank extension is crowned and the stem is inset into the crown giving it a very delicate look. The delicate look and feel of the stem deceptive for it has strong lines that form the smooth flat sides of the stem and taper toward the button on both sides. Steve did an amazing job shaping the stem. The short blade of the stem is thin and has a good even tapered flow from the saddle to the button. It is matched in terms of angles on the top and the bottom and on the left and right side of the stem. The design along with the slight bend makes it fit very comfortably in the mouth. It also rests well enough that it can be clenched quite easily. The Delrin tenon has been set into the acrylic of the stem and is the same length as the mortise. The fit is snug. The end of the tenon has been funneled for good airflow.

The button is very thin in width but is elevated above the surface of the stem so that it gives a good edge for holding behind the teeth. It is thinner on the edges with a gentle rise at the centre top and bottom. The slot in the end of the button is inward at the same angles as the exterior of the stem to deliver a mouthpiece that has the same diameter from start to finish. It is also wide open and oval with the same distance from the outer edge of the button to the inner edge of the slot all the way around.
Morrisette6

The mechanics of the pipe are well done. The bowl chamber came with a bowl coating that seemed to be a combination of carbon and a neutral binder. The bowl is drilled at an angle back toward the shank in order to maximize the depth of the bowl with the thin profile of the bent tomato shape. It is also a conical bowl. Steve did a great job with that alignment. I removed the bowl coating before I smoked it and there were no pits or checking in the bowl. The draught hole is centered at the bottom of the bowl and seems to have a slight slope from the bottom to the top of the airhole. There is a very easy and open draw to the pipe. The fit of the stem in the inset shank extension is smooth and tight. The tenon sits deep in the mortise – if not exactly the same length then impressively close! The fit of the tenon is also smooth. The drilling of the draught in the shank is centered in the end of the mortise. The tenon on the stem is drilled to match it and there is no misalignment to the two. The air pulls clearly through the pipe with no whistling at all. Using a light to shine through the various airways reveals smoothly executed airways on the inside. Very nice work on the drilling Steve it is extremely well executed.
Morrisette3

I have been smoking it since I received it and am very happy with it. I have smoked Virginia flake and broken flake tobaccos in it and it packs easily and stays lit. Smoking it is a pleasure and is uncomplicated and effortless. I purchased this one quite awhile ago before Steve moved south to work in a new shop. I have been pleased with it from the start as it has always smoked smooth with none of the new pipe break in woes. Thanks Steve for a well-made pipe that smokes as good as it looks! I am not sure you remember making this one for me but it is one of my favourites.