Blog by Steve Laug
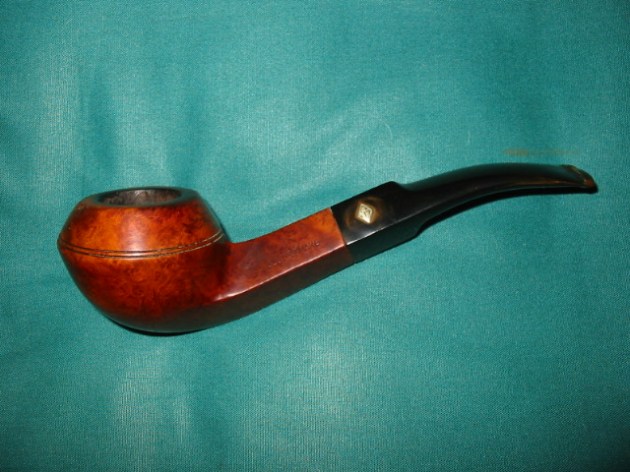
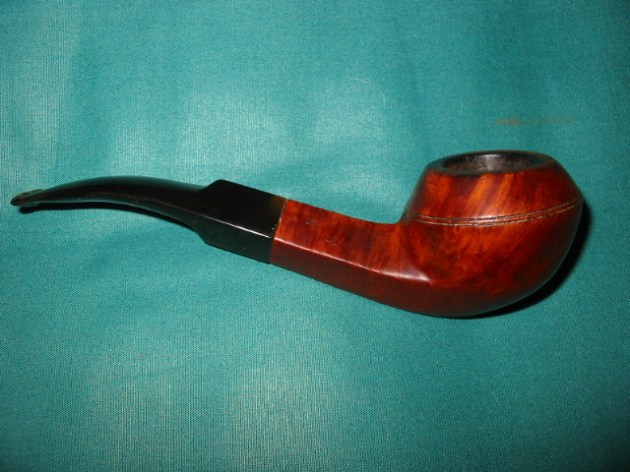
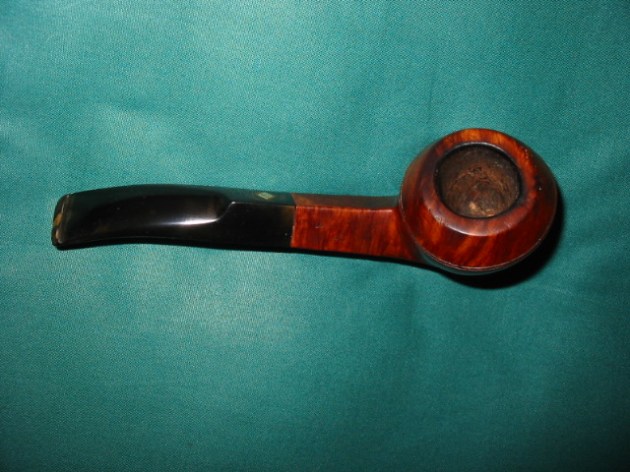
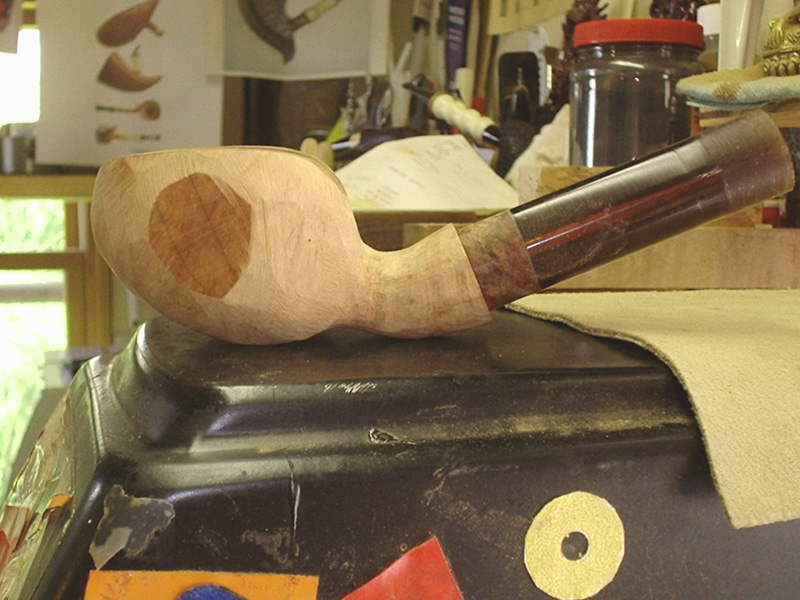
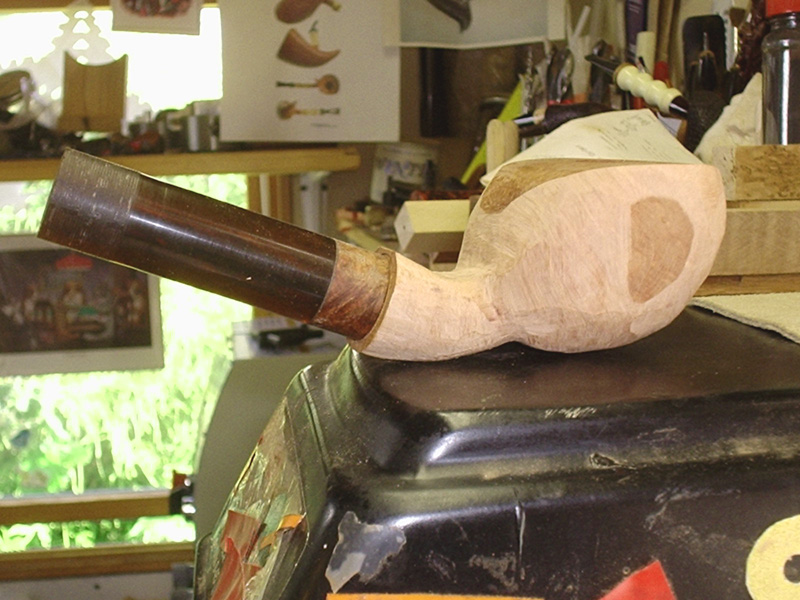
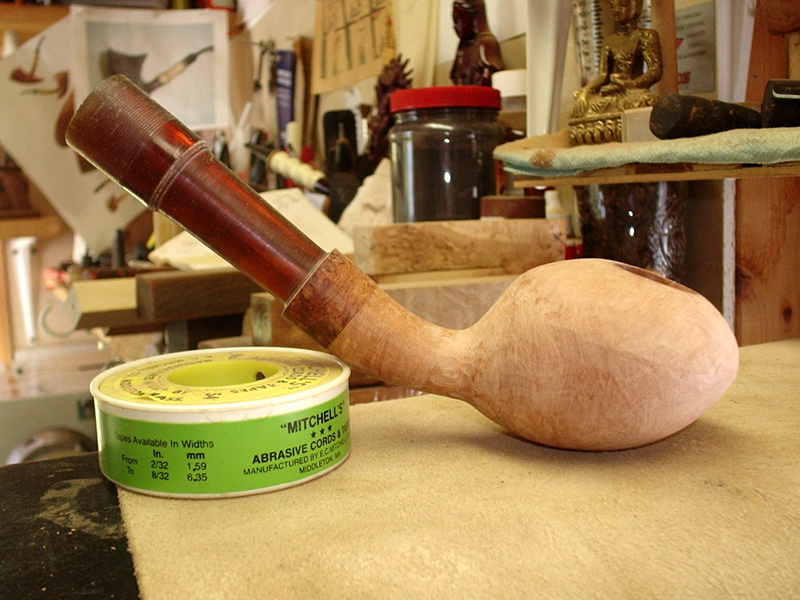
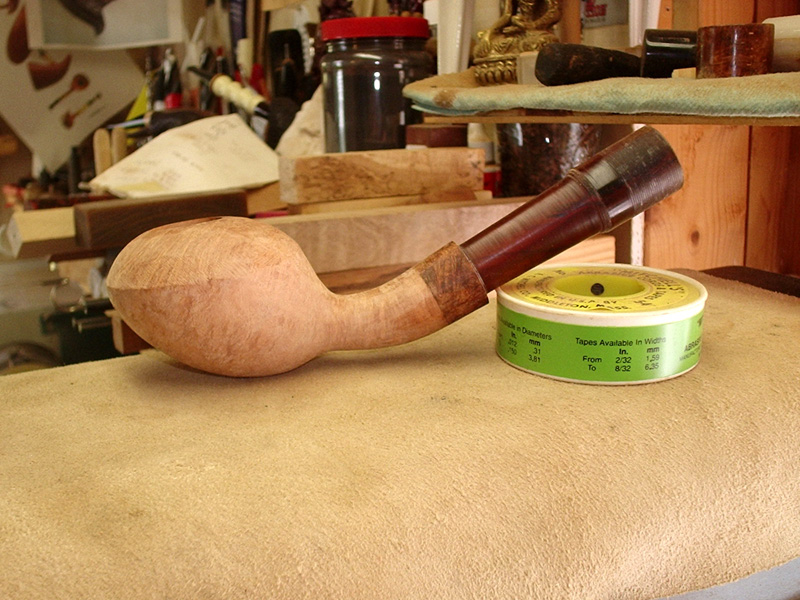
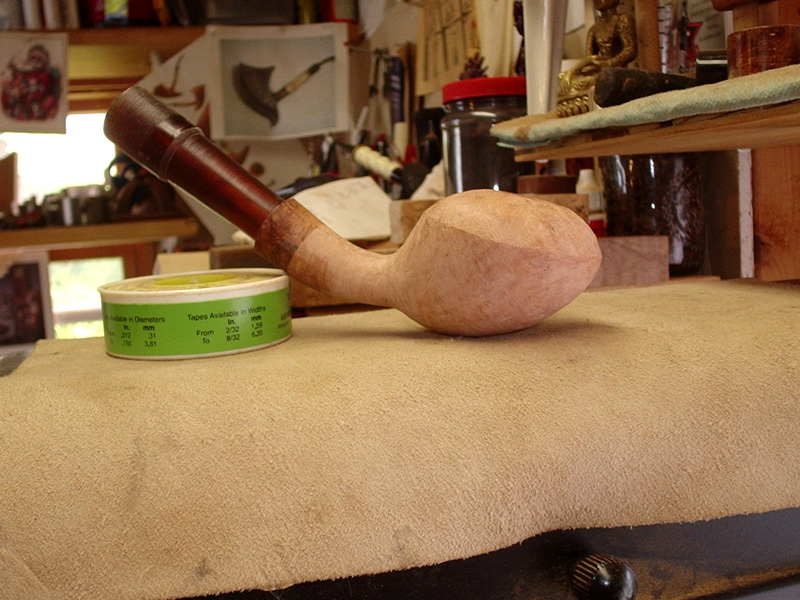
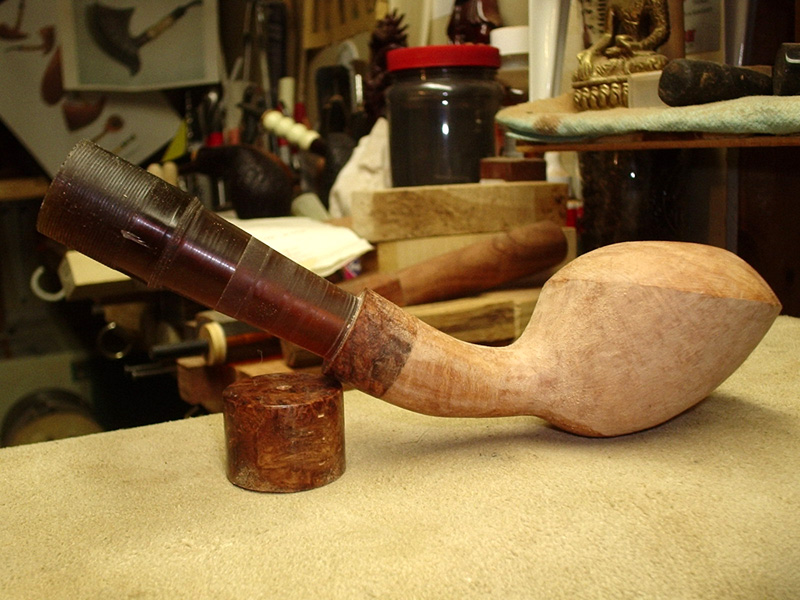
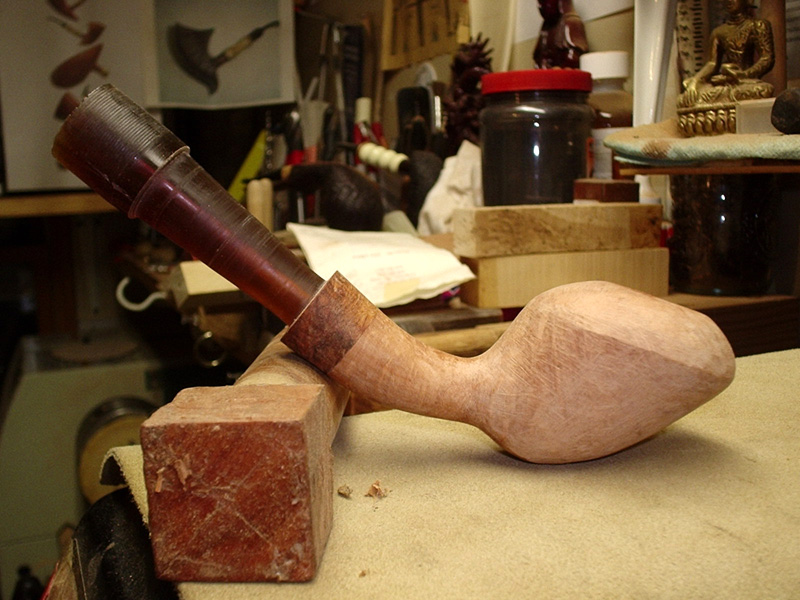
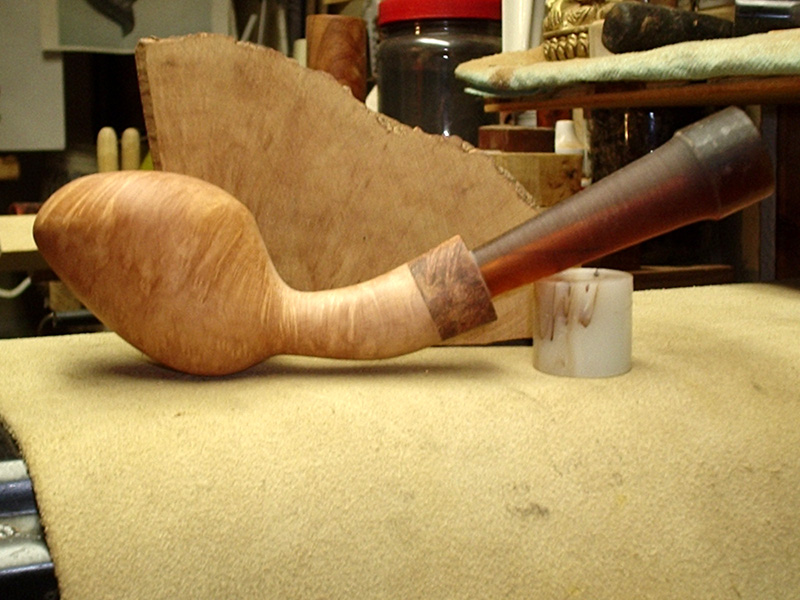
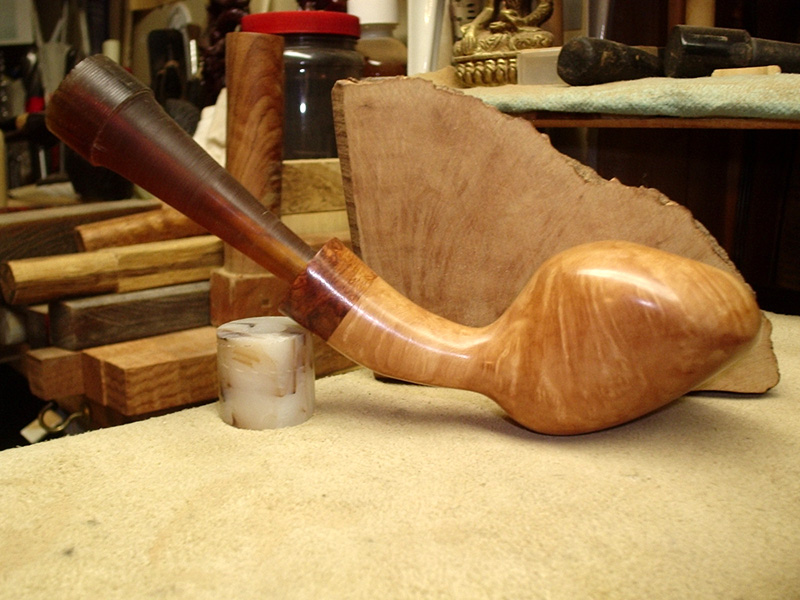
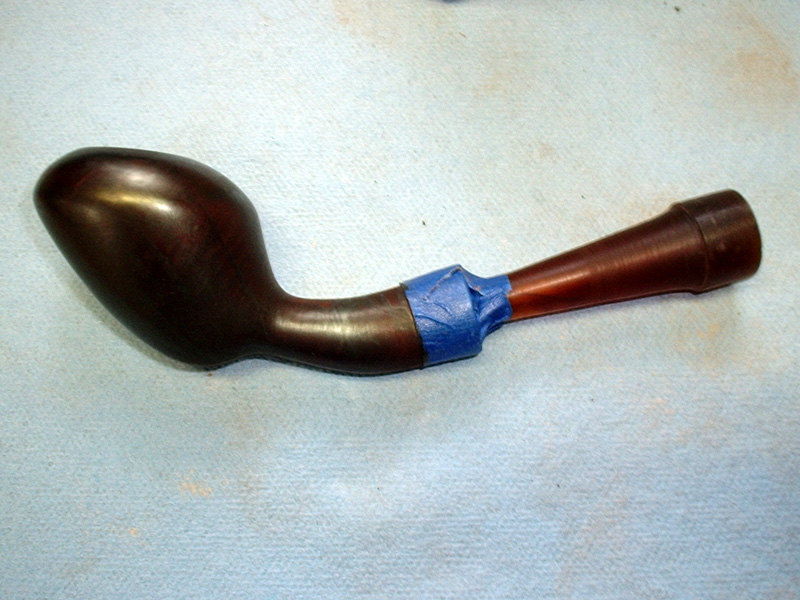
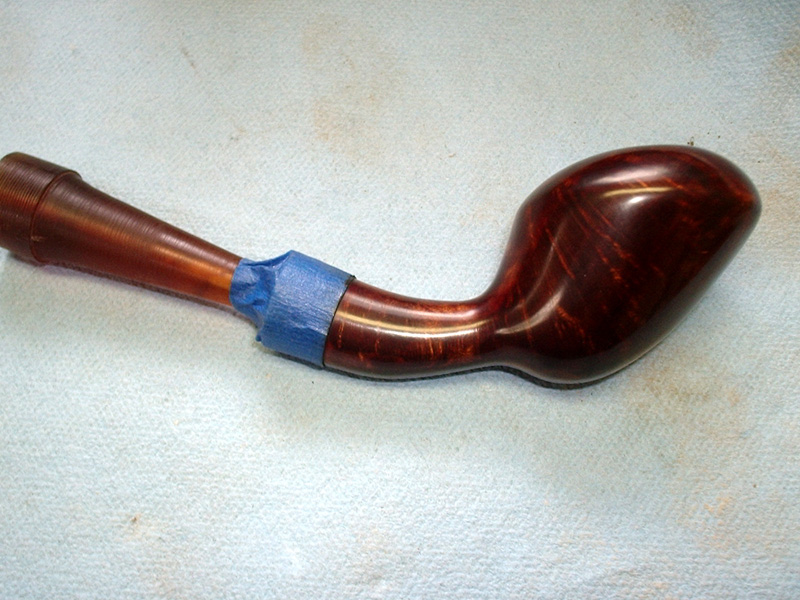
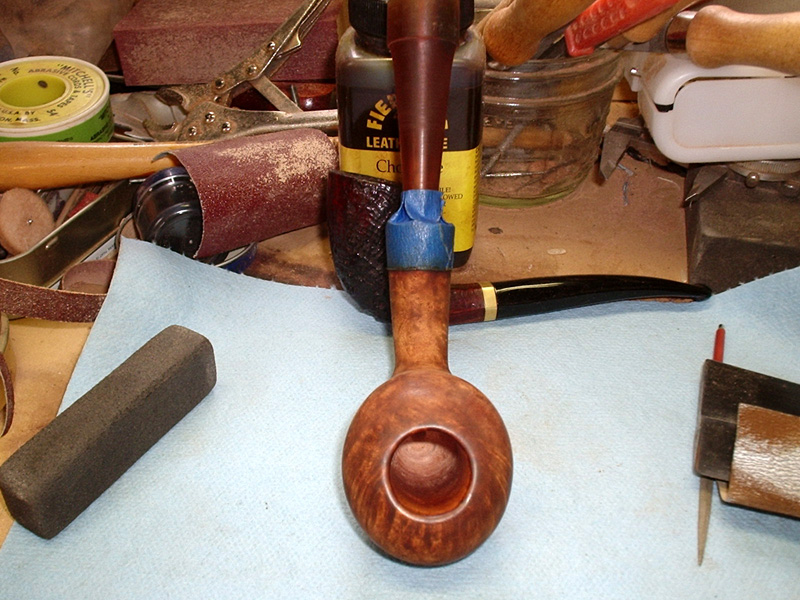
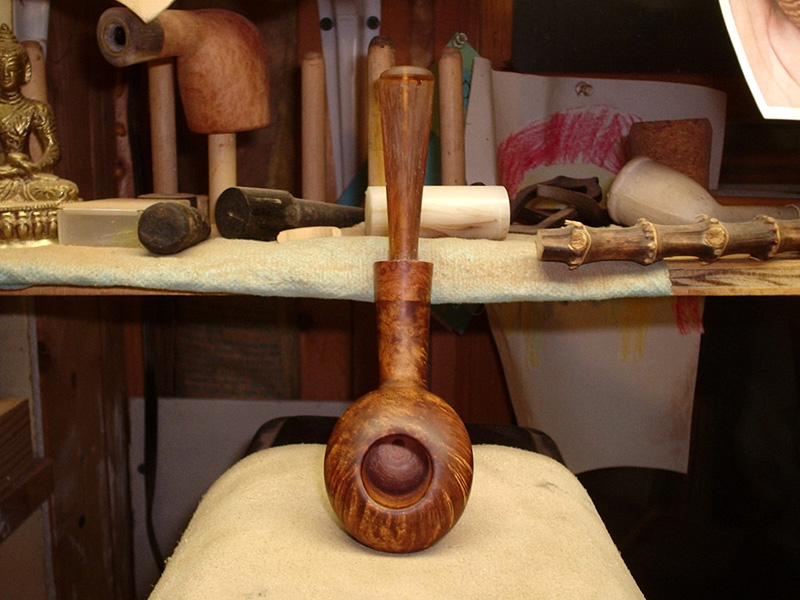
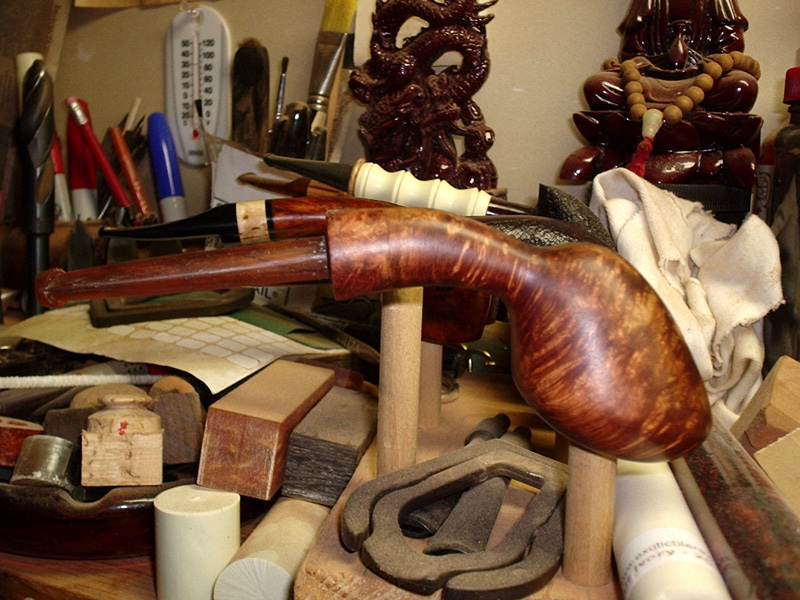
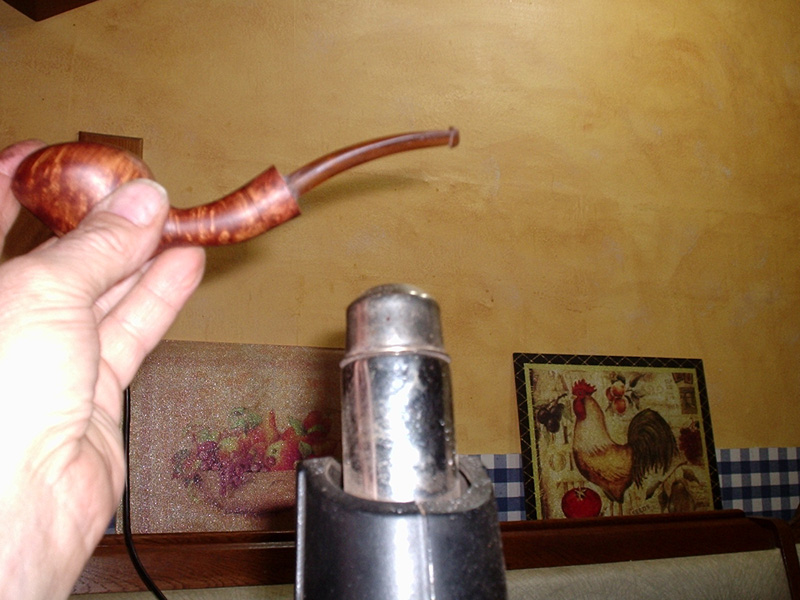
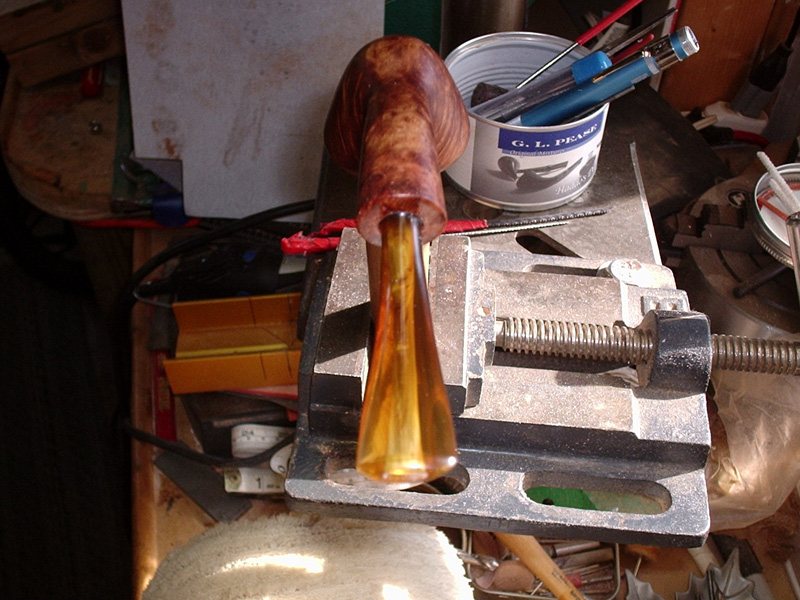
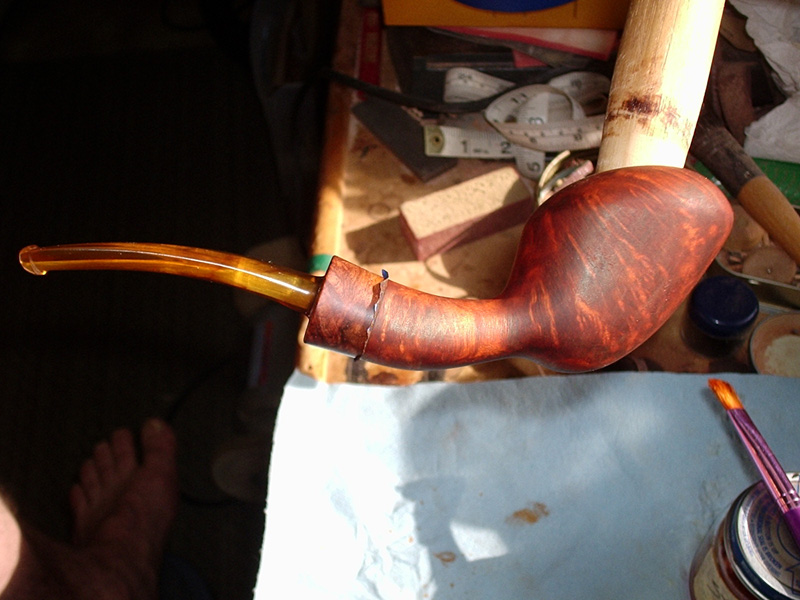
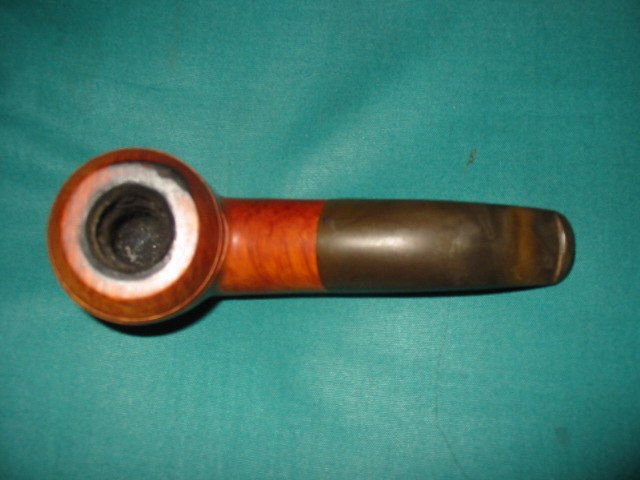
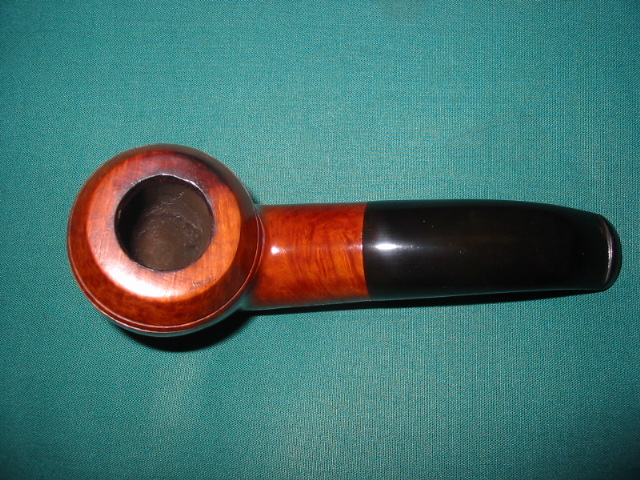
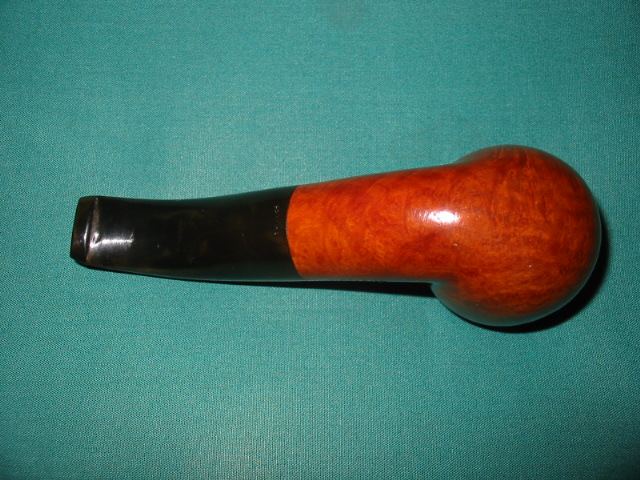
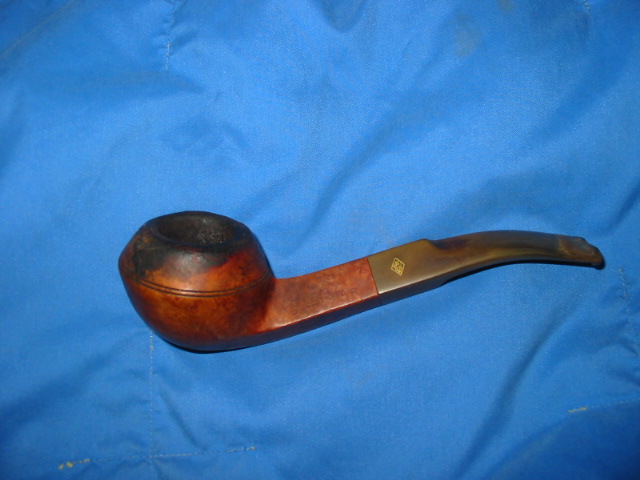
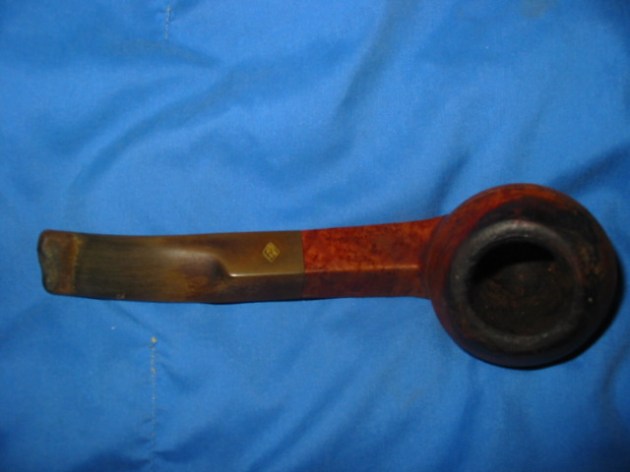
When I saw this old Bulldog on EBay I could not pass it up. It had several things about it that I enjoy – it was a BBB pipe, it was older, and it looked like a challenge as the stem was badly chewed but still retained the shape. In the first three pictures below you can see the overall state of the pipe. The bowl was badly tarred and the finish was ruined, both from the tars and from what appeared to be some water marks. The rim looked to be in bad shape – much buildup of tars and carbon. But as I inspected it I found that there were no dents in the rim. The grain on the pipe showed some promise. The stem fit well and had the stepped down tenon that is on the older BBB’s. The brass logo in the diamond was still pretty clear, a bit worn but still very distinguishable. The button was non-existent and was badly dented by teeth. There was one small bite through on the underside of the stem and the rest were large deep dents. The stem was badly oxidized and in places had a white lime like substance on it. 

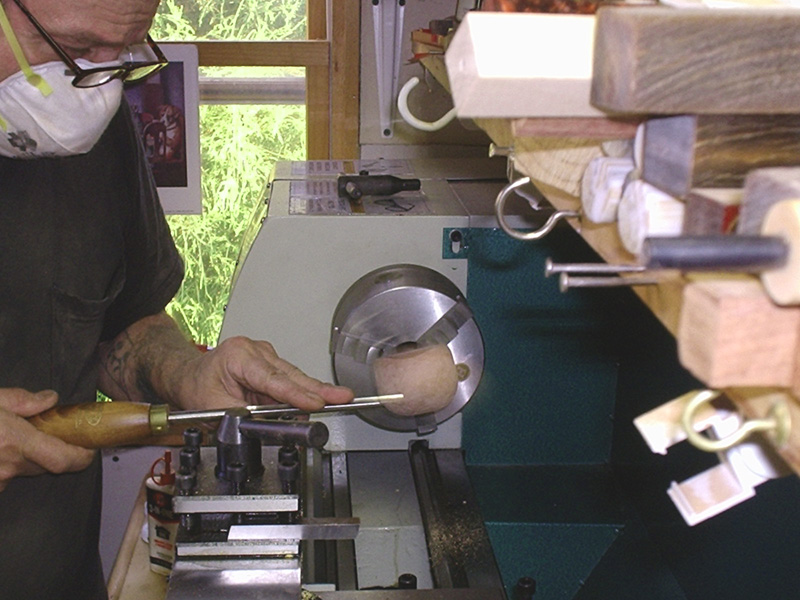
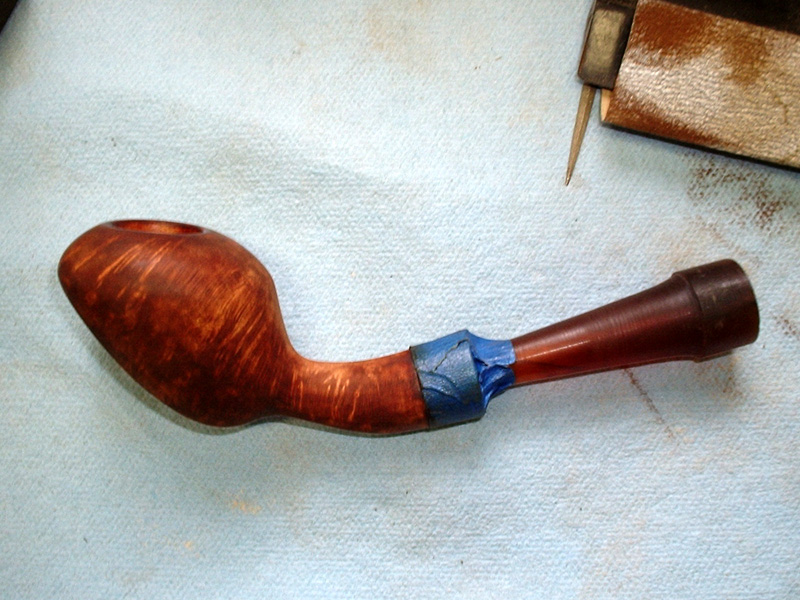
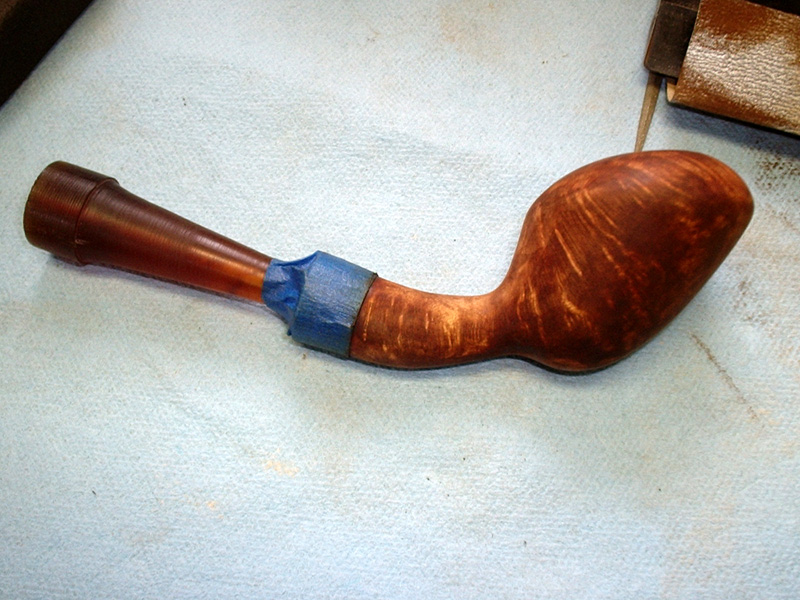
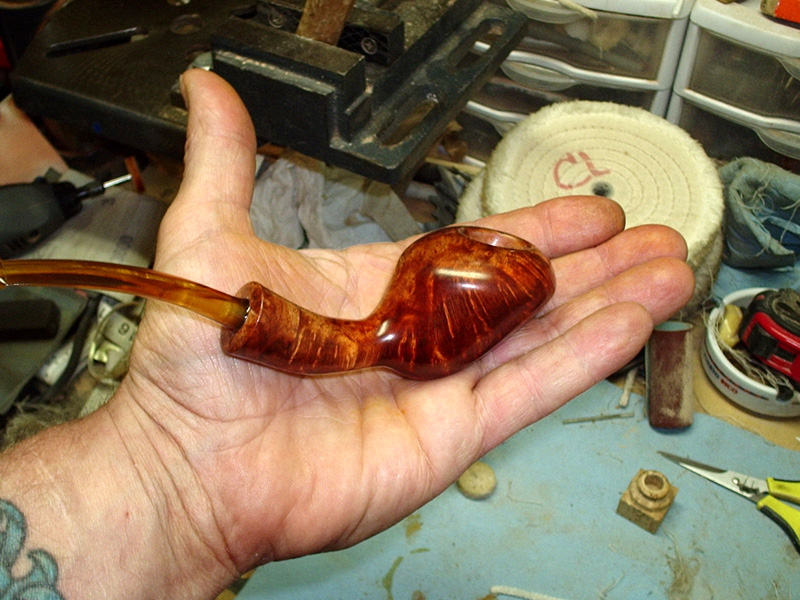
I began the clean up by reaming the bowl and then giving it a thorough scrub with Murphy’s Oil Soap and a soft bristle tooth brush. This one took a lot of scrubbing to remove the grime from the rim and the edges of the slop on the bulldog. I also cleaned out the grooves around the bowl with a dental pick. Once the bowl was cleaned I did the inside of the shank and the stem. This took many pipe cleaners and cotton swabs with alcohol as well as a shank brush to scrub it out. I then greased a pipe cleaner with Vaseline and inserted it in the stem and flattened it in the slot so that the whole slot was filled. Once that was done I was ready to start rebuilding the button and the stem surface. 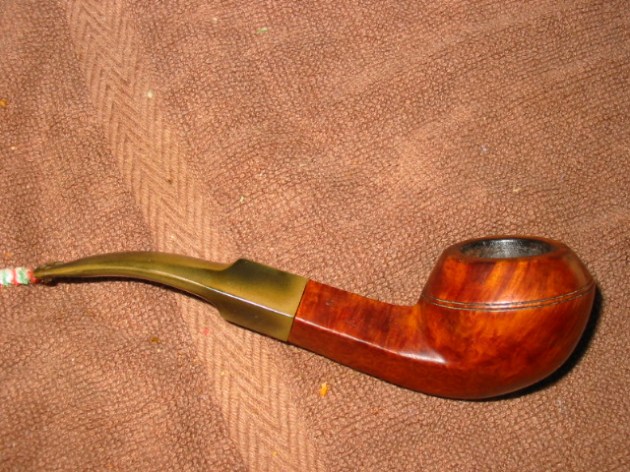
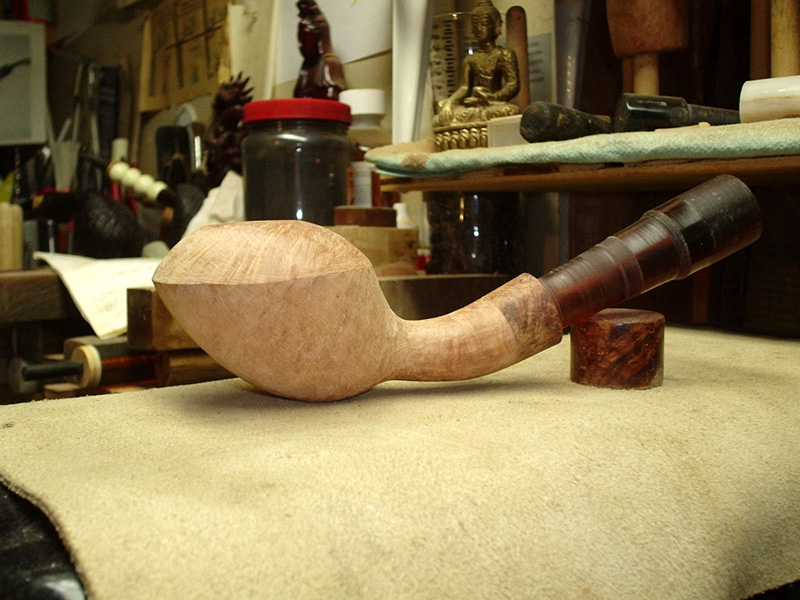
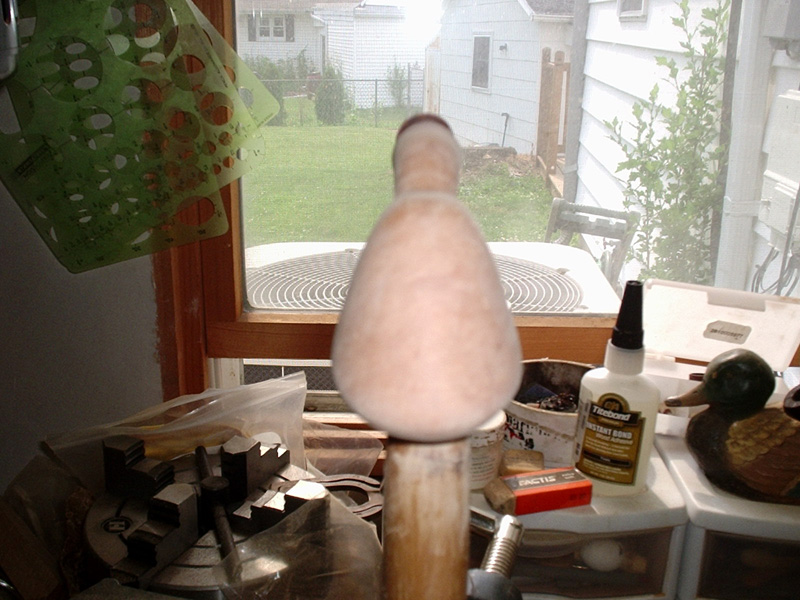
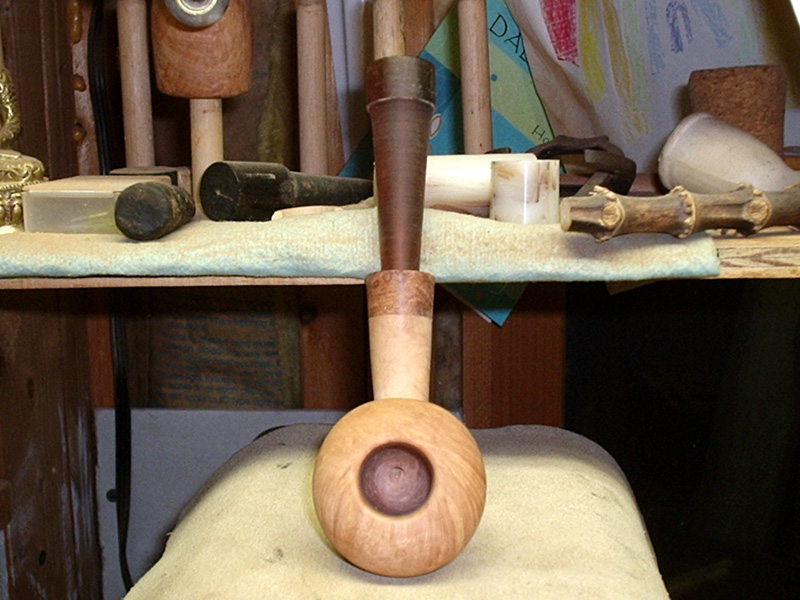
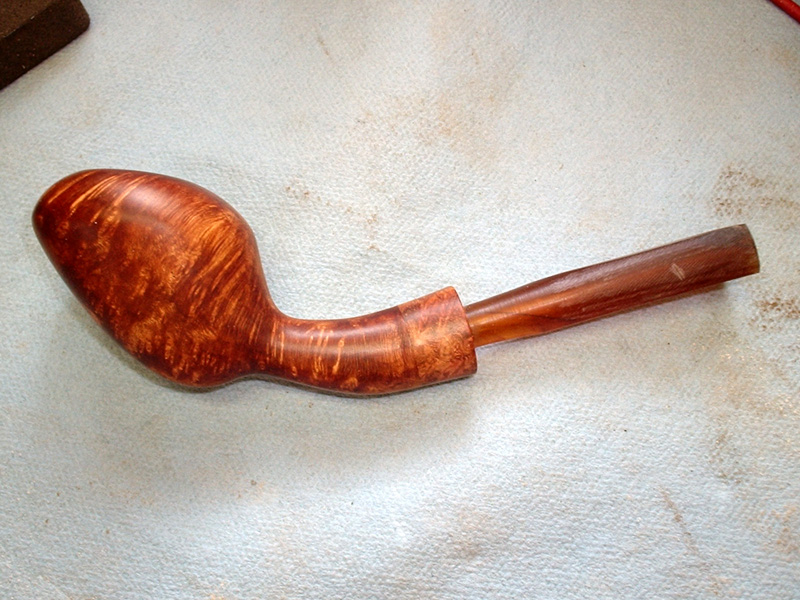
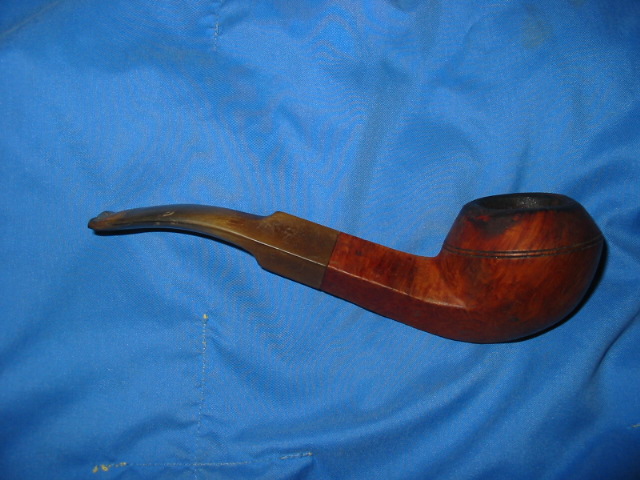
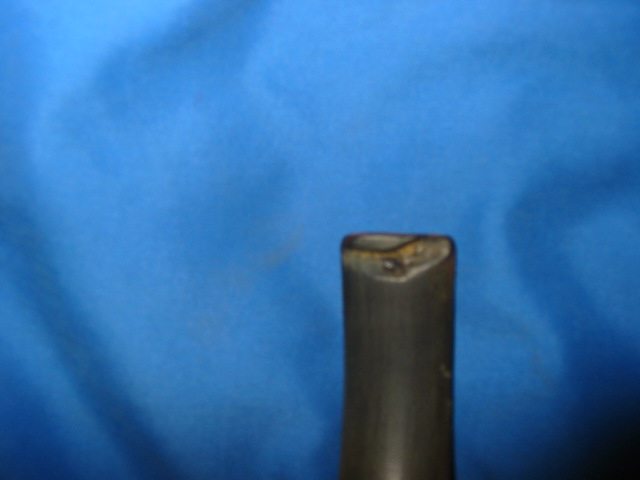
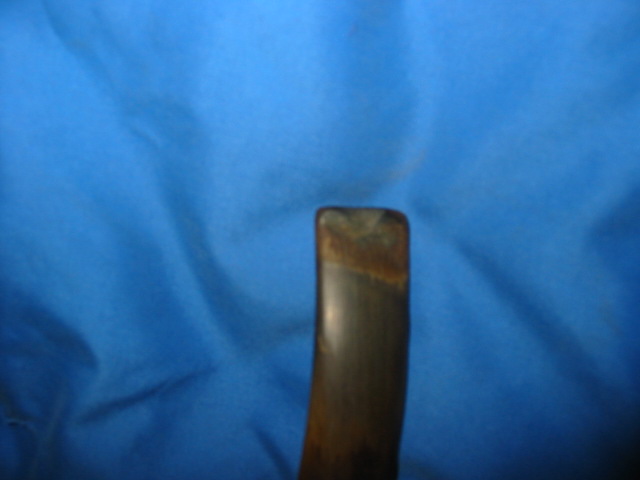
The next two photos show what remains of the button and the deep channels gnawed in the underside (first photo) the top of the stem (second photo). I heated the stem with my heat gun to raise the dents as much as possible but truly they were cut and deep so the heat did very little to remedy the situation. 

With the pipe cleaner and Vaseline inserted in the slot I used super glue to build up the bite marks. The first photo below shows the underside of the stem (remember the bite through and the deep groove in the picture above). I layered in the super glue until the hole and the groove were filled and the button also built up. I rebuilt the top edge as well with the superglue and repaired the button on that edge as well. It was not nearly as damaged as the underside so it took less work to rebuild it with the glue. 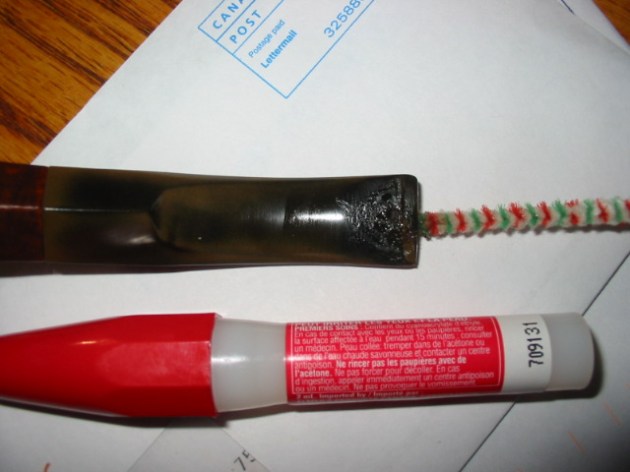
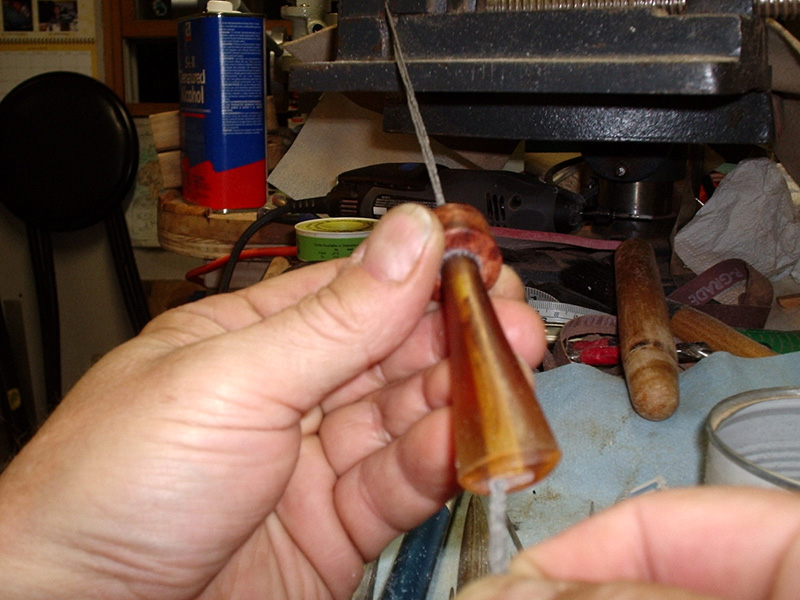
The next photo shows the patch on the underside once it was dry and I had sanded it with 240 grit sandpaper to remove the ridges and the excess of the super glue. 
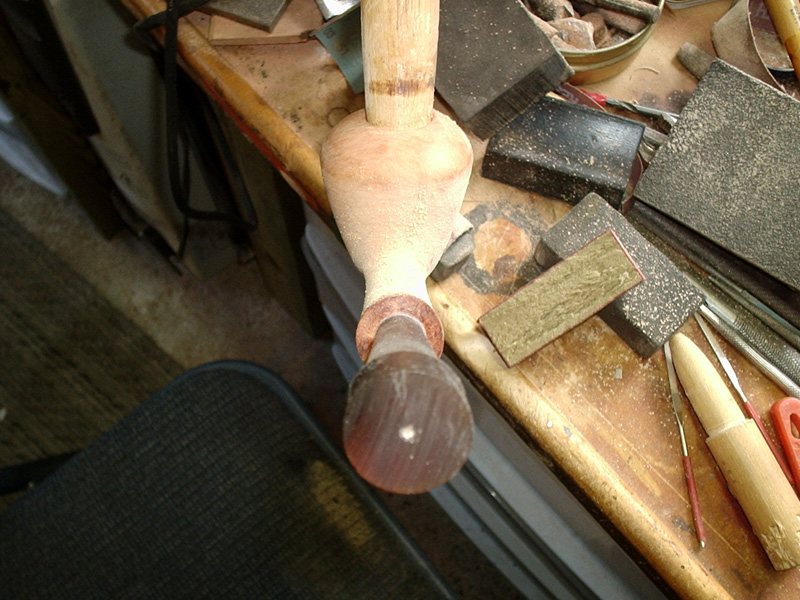
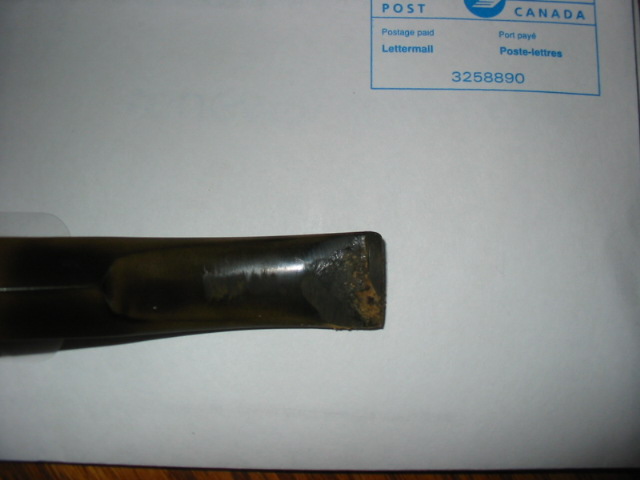
I continued sanding the surface on the underside of the stem and recut the button with my needle files. The photo below shows the underside of the stem after the work is basically finished cutting the button and smoothing the surface of the stem. 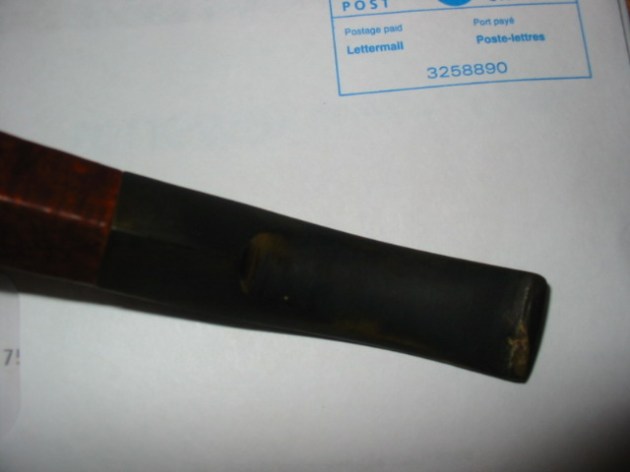
With the top of the stem I also sanded it with 240 grit sandpaper and worked through the 400 and 600 wet dry sandpaper and water to smooth the surface and rebuild the button. I used the needle files to cut the lip on the button and sharpen the profile in the same manner as the underside photos above. Somehow the photos I took of the top side of the stem did not turn out so they are not included in the article. Suffice it to say that the work was the same on both the top side and the underside of the stem.
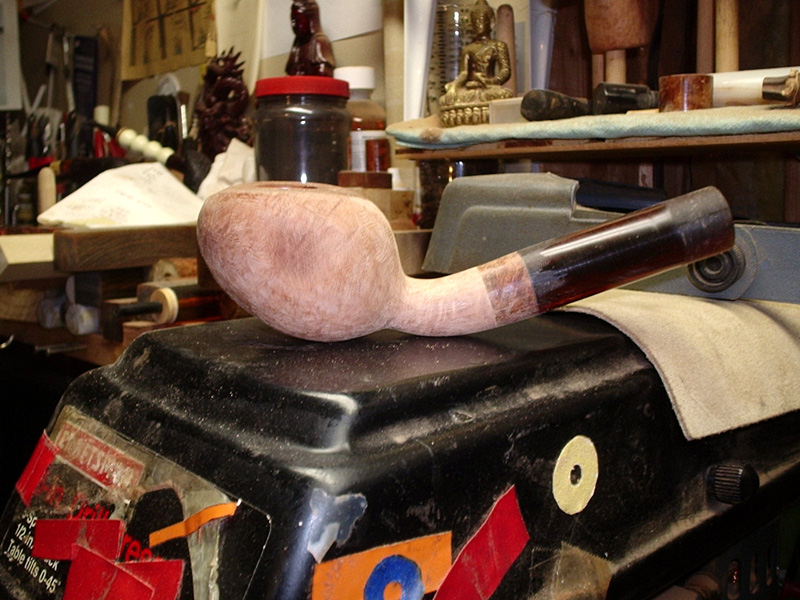
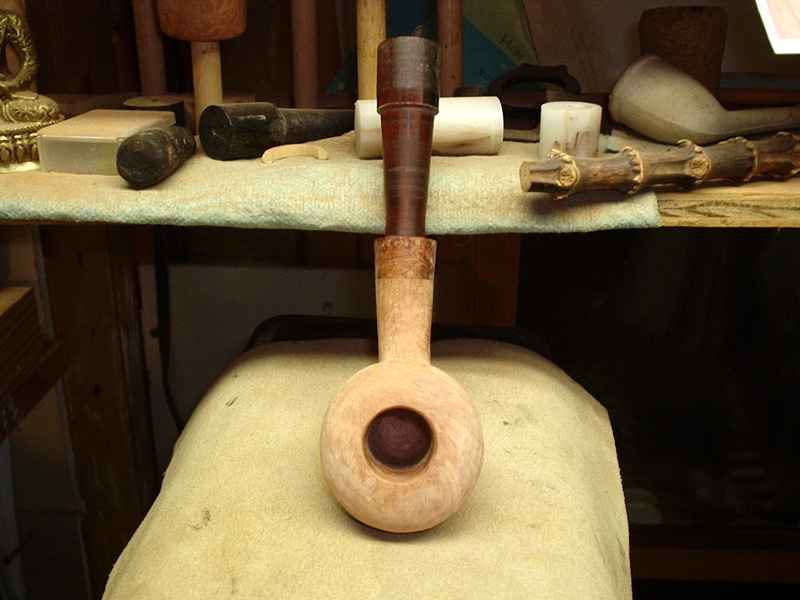
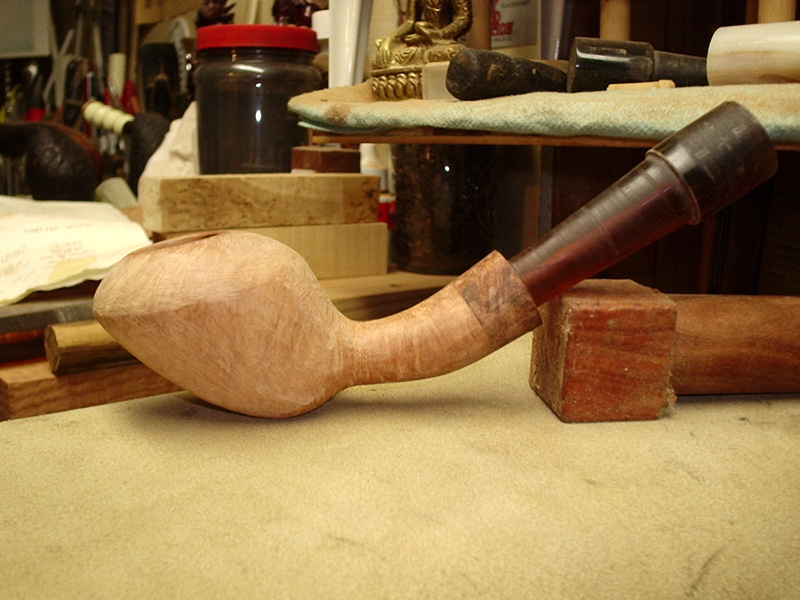
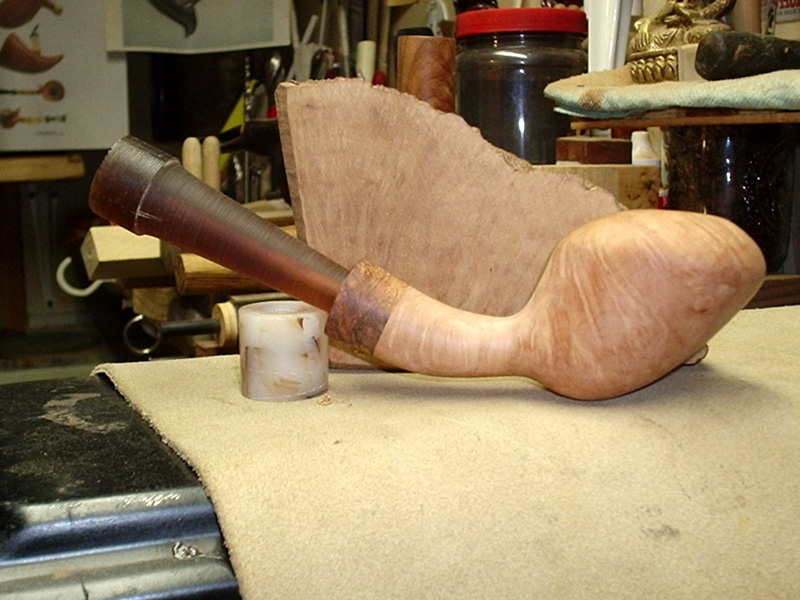
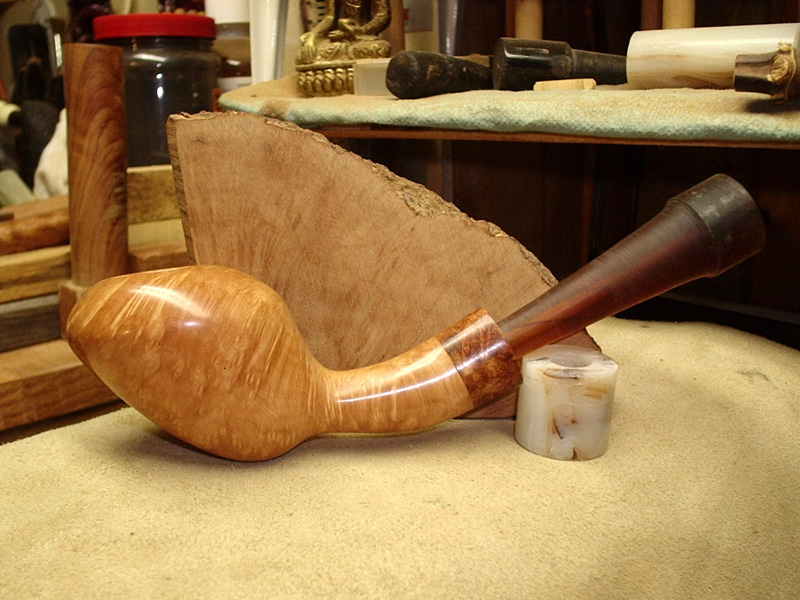
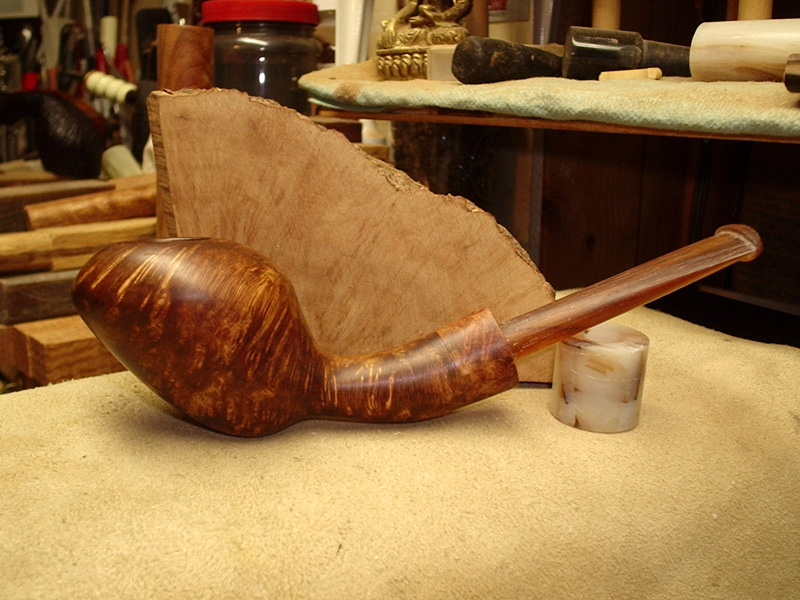
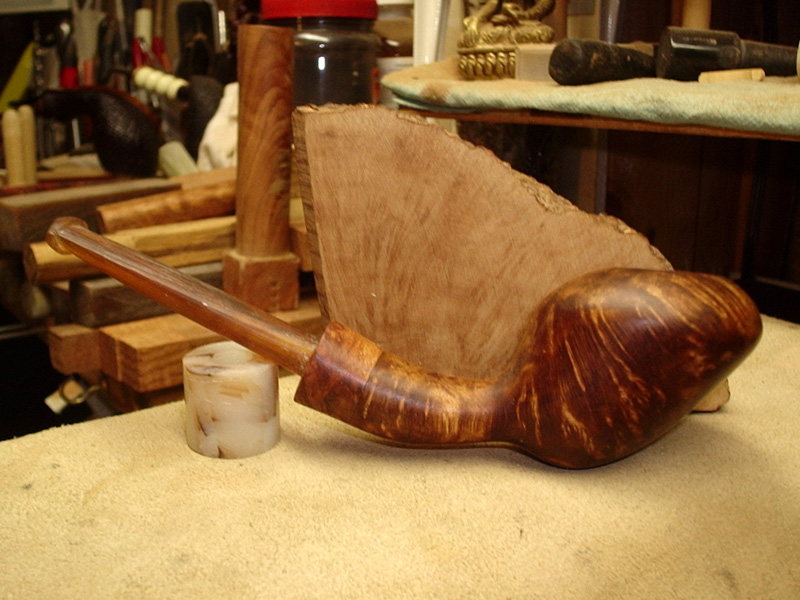
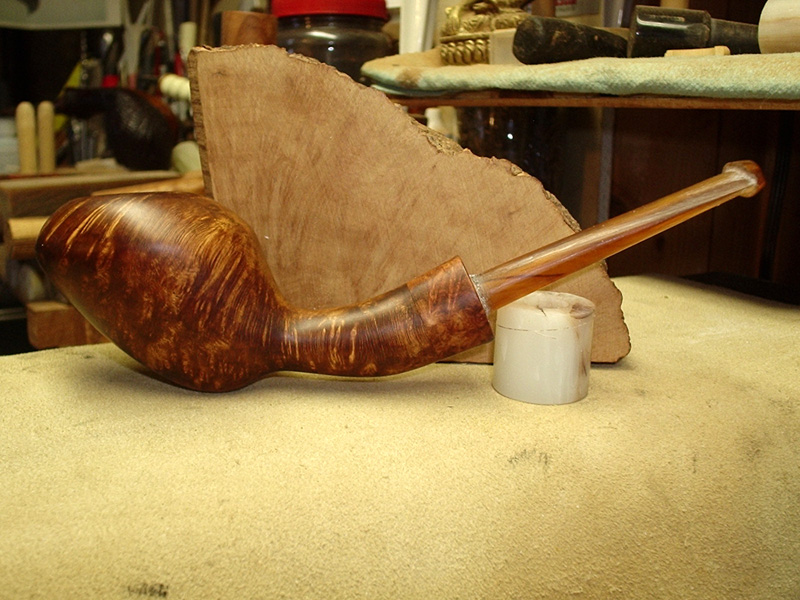
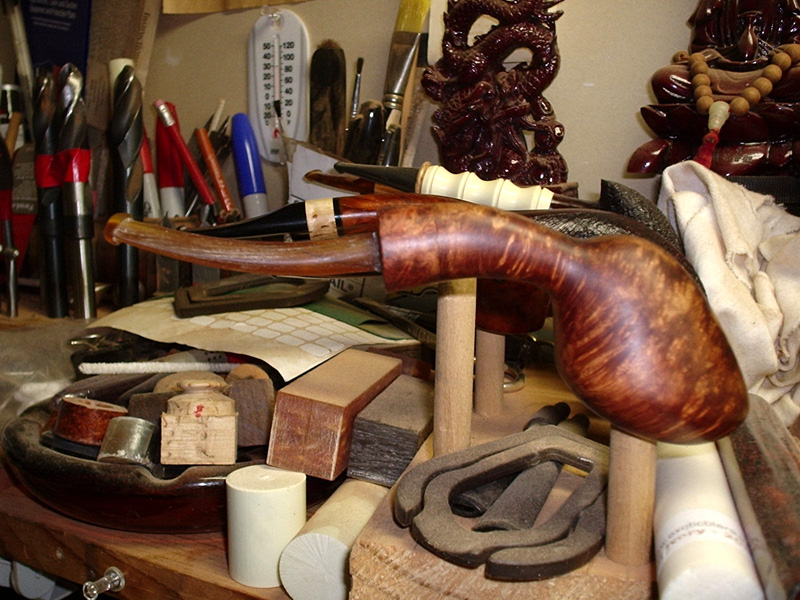
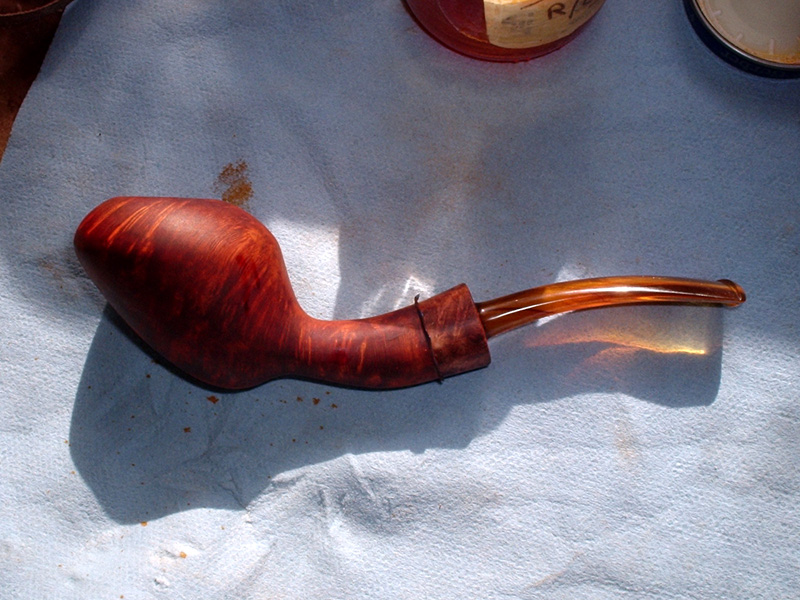
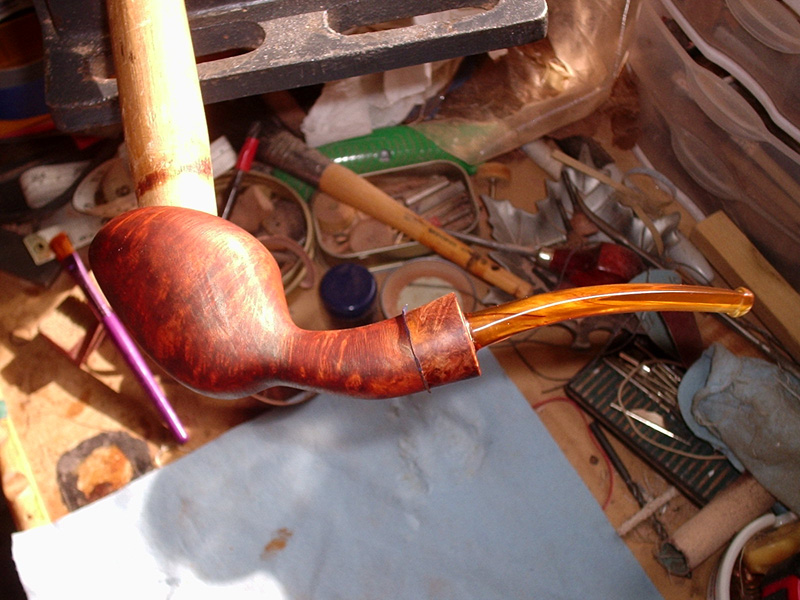
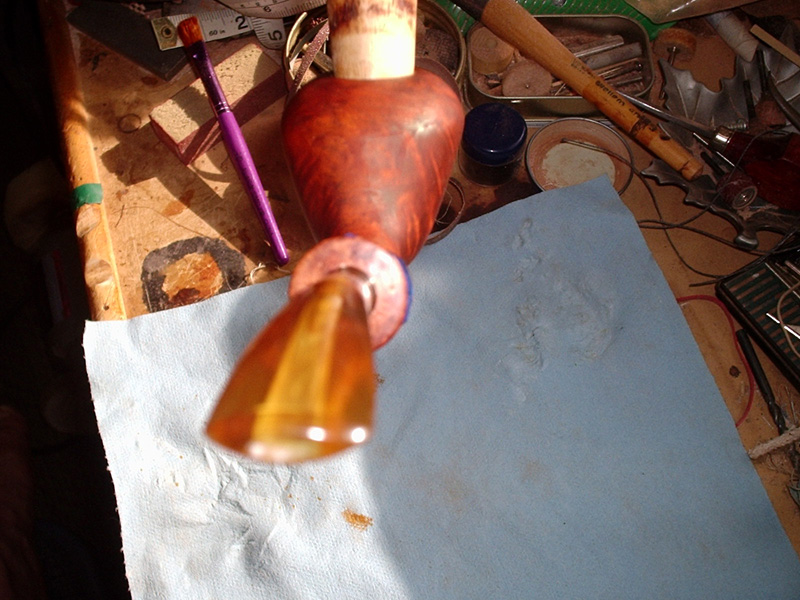
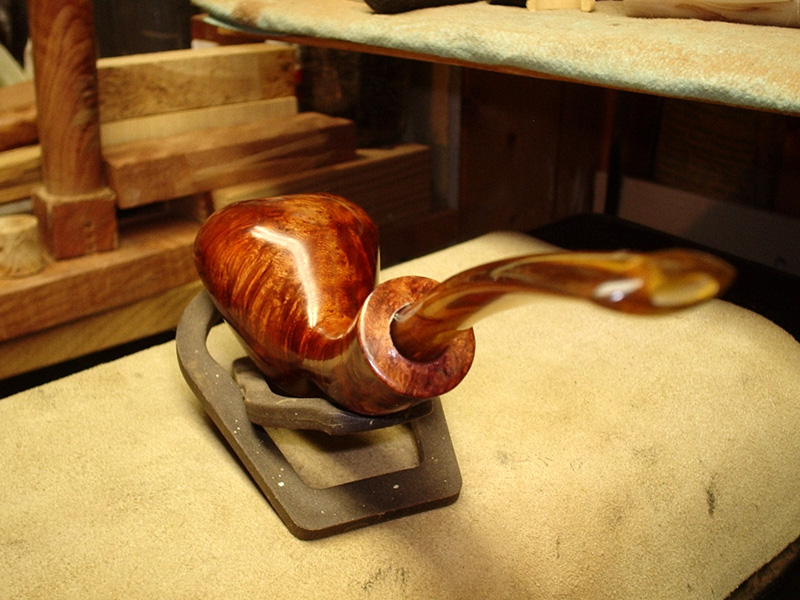
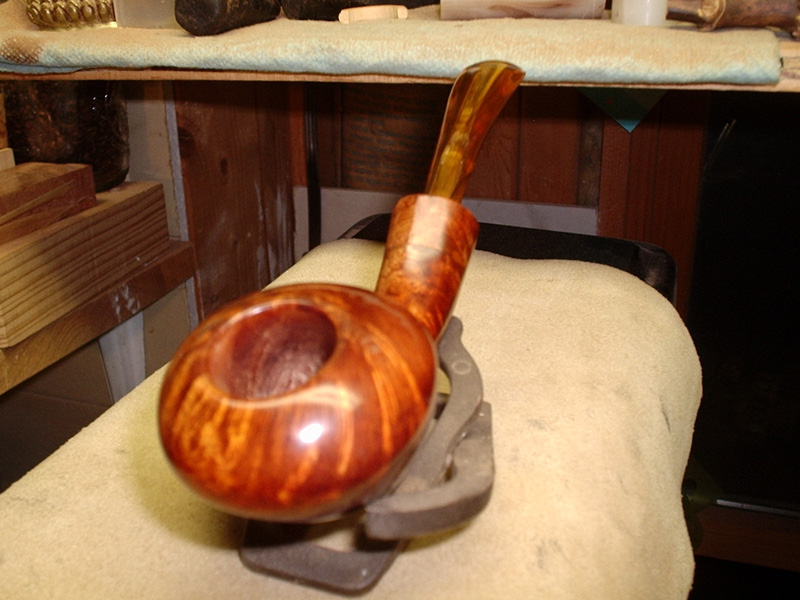
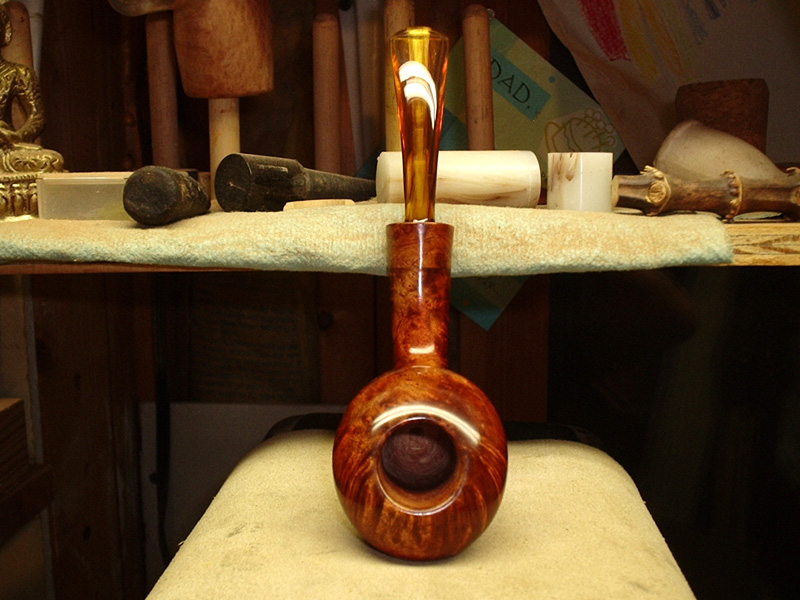
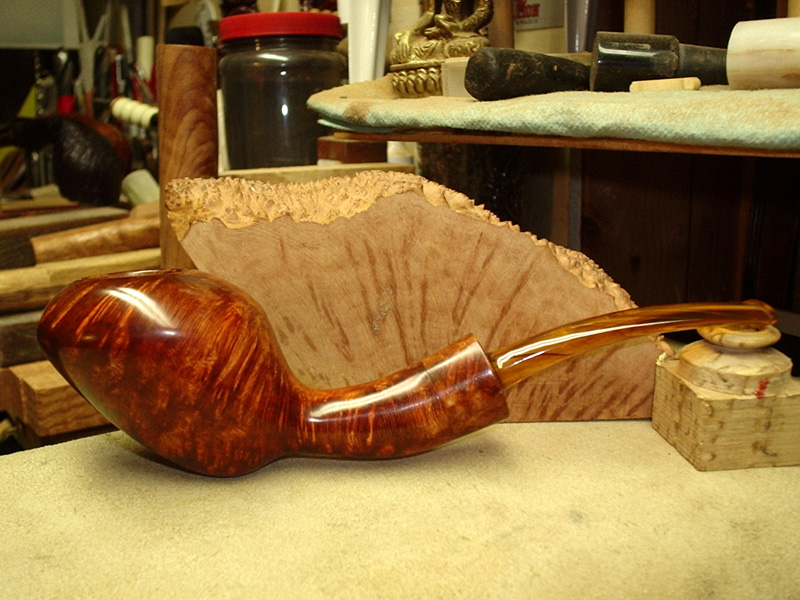
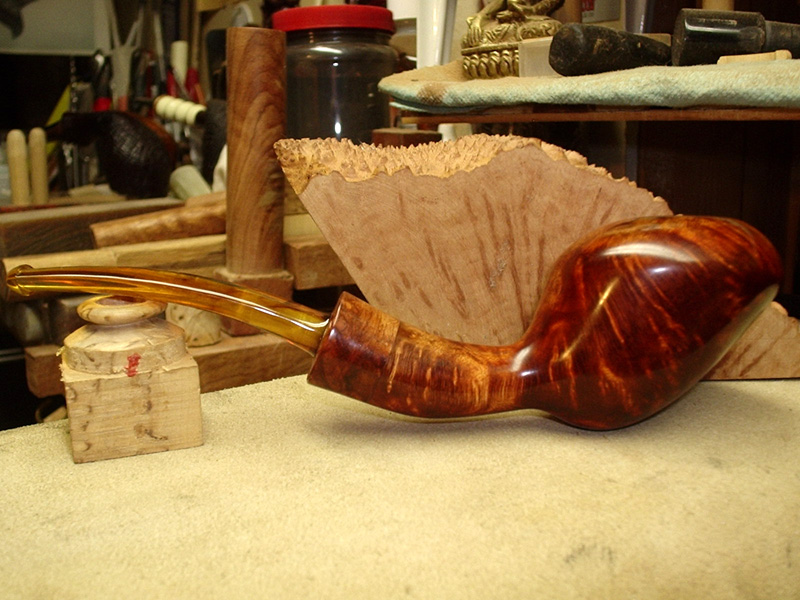
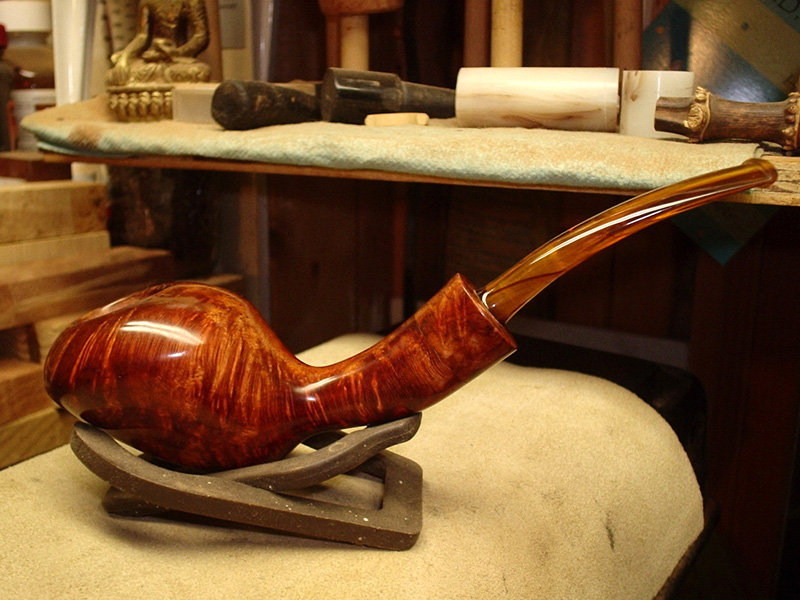
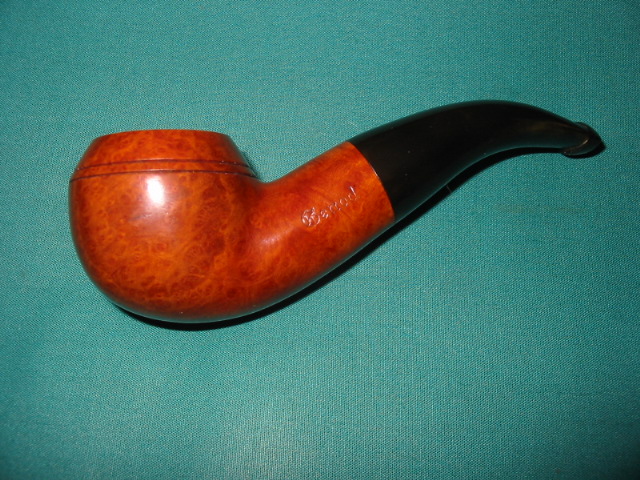
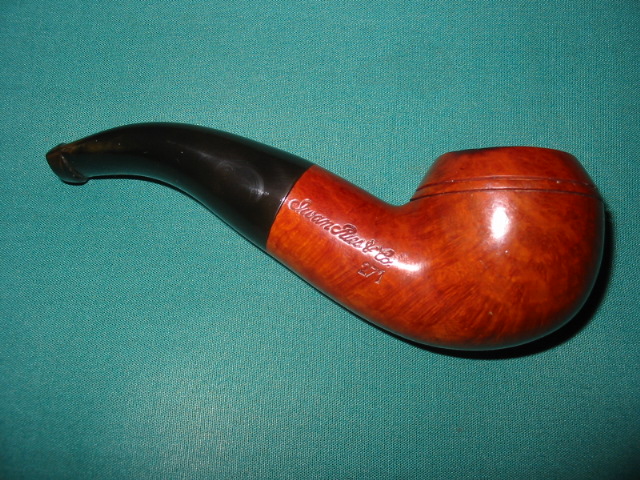
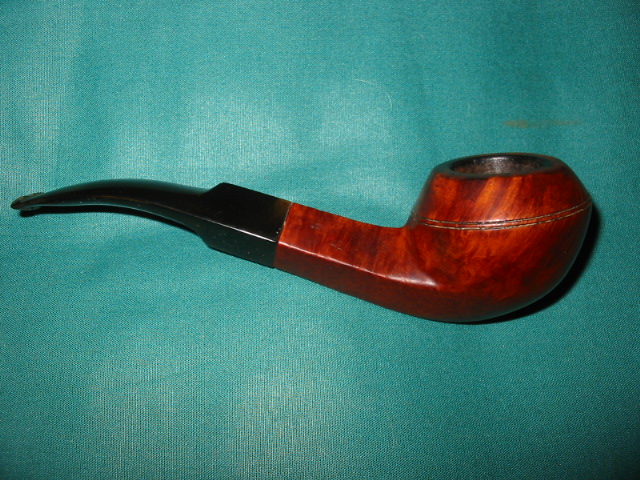
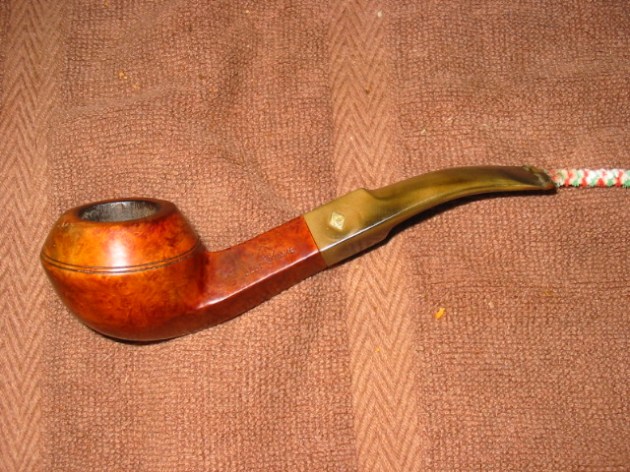
The next series of three photos shows the pipe when it was completed. The bowl was restained with a medium brown aniline stain and flamed to set it. Then it was buffed with Tripoli and White Diamond to polish it. The stem was cleaned with Oxyclean and sanded with 400, 660 and 1200 wet dry sandpaper and water. I left the area around the stem logo as I did not want to damage the metal logo. The work done on this stem was done before I “found out” about micromesh sanding pads. I will have to rework the stem when I take this pipe out the next tim and clean it up around the logo with the micromesh pads. They are perfect for the angles of the logo and it should be much simpler to clean up. Notice the top of the stem in the third photo and the profile of the button on the first two photos. The stem is fully functional and smokes absolutely great. The button is comfortable in the mouth and the bites and dents are not visible.