Tag Archives: pipe cleaners

It’s All About The Aesthetics……. Isn’t It? – Alan Chestnutt


logo This article on Alan’s blog was one in which I was particularly interested. I had recently purchased and estate pipe that was advertised as carefully restored only to find that both the externals and the internals had not been truly cleaned. It seemed that the pipe had only received a good buff and polish and that was it for the cleanup and restoration. I found it irritating to say the least that I had purchased a pipe that cost me enough that it should have been cleaned and wasn’t but that the damage to the exterior had also not been dealt with. In this article Alan speaks about the methodology used at reborn briar to clean estate pipes. It also provides a check list for the hobbyist when he wants to clean up the estate pipes discovered on a pipe hunt. Thanks Alan. The original article can be read at http://estatepipes.co.uk/pipeshop/blog/its-all-about-the-aesthetics-isnt-it.html. Also be sure to check out other articles on the blog and visit Alan’s online shop.
259-1 The aesthetics of a restored estate pipe are an important factor. How the pipe looks on the outside is where most restorers concentrate their efforts. Especially if selling your pipes on the online marketplace, you will want the pipes to look good in photographs. These pictures are what the buyer sees, and will most likely base his opinion on whether to buy the pipe or not. I get tons of emails from satisfied customers after they receive their pipes about how good they look – that they are like a brand new pipe. But these are just external aesthetics, which is the easiest part to achieve

However, to me the most important part of any estate pipe restoration lies not in the external aesthetics, but in the internal functions, cleanliness and sterilisation of the pipe. This is the point that most pipe restorers miss. You have to be prepared to roll your sleeves up and get your hands dirty to accomplish this task properly. I am amazed at the number of so called restored estate pipes that I get in from eBay that look wonderful on the outside, but have had no attention paid to the inside of the pipe – and I have to start the cleaning process from scratch.

The following is how I prepare the inside of a pipe to make it pleasurable and safe for a new smoker.
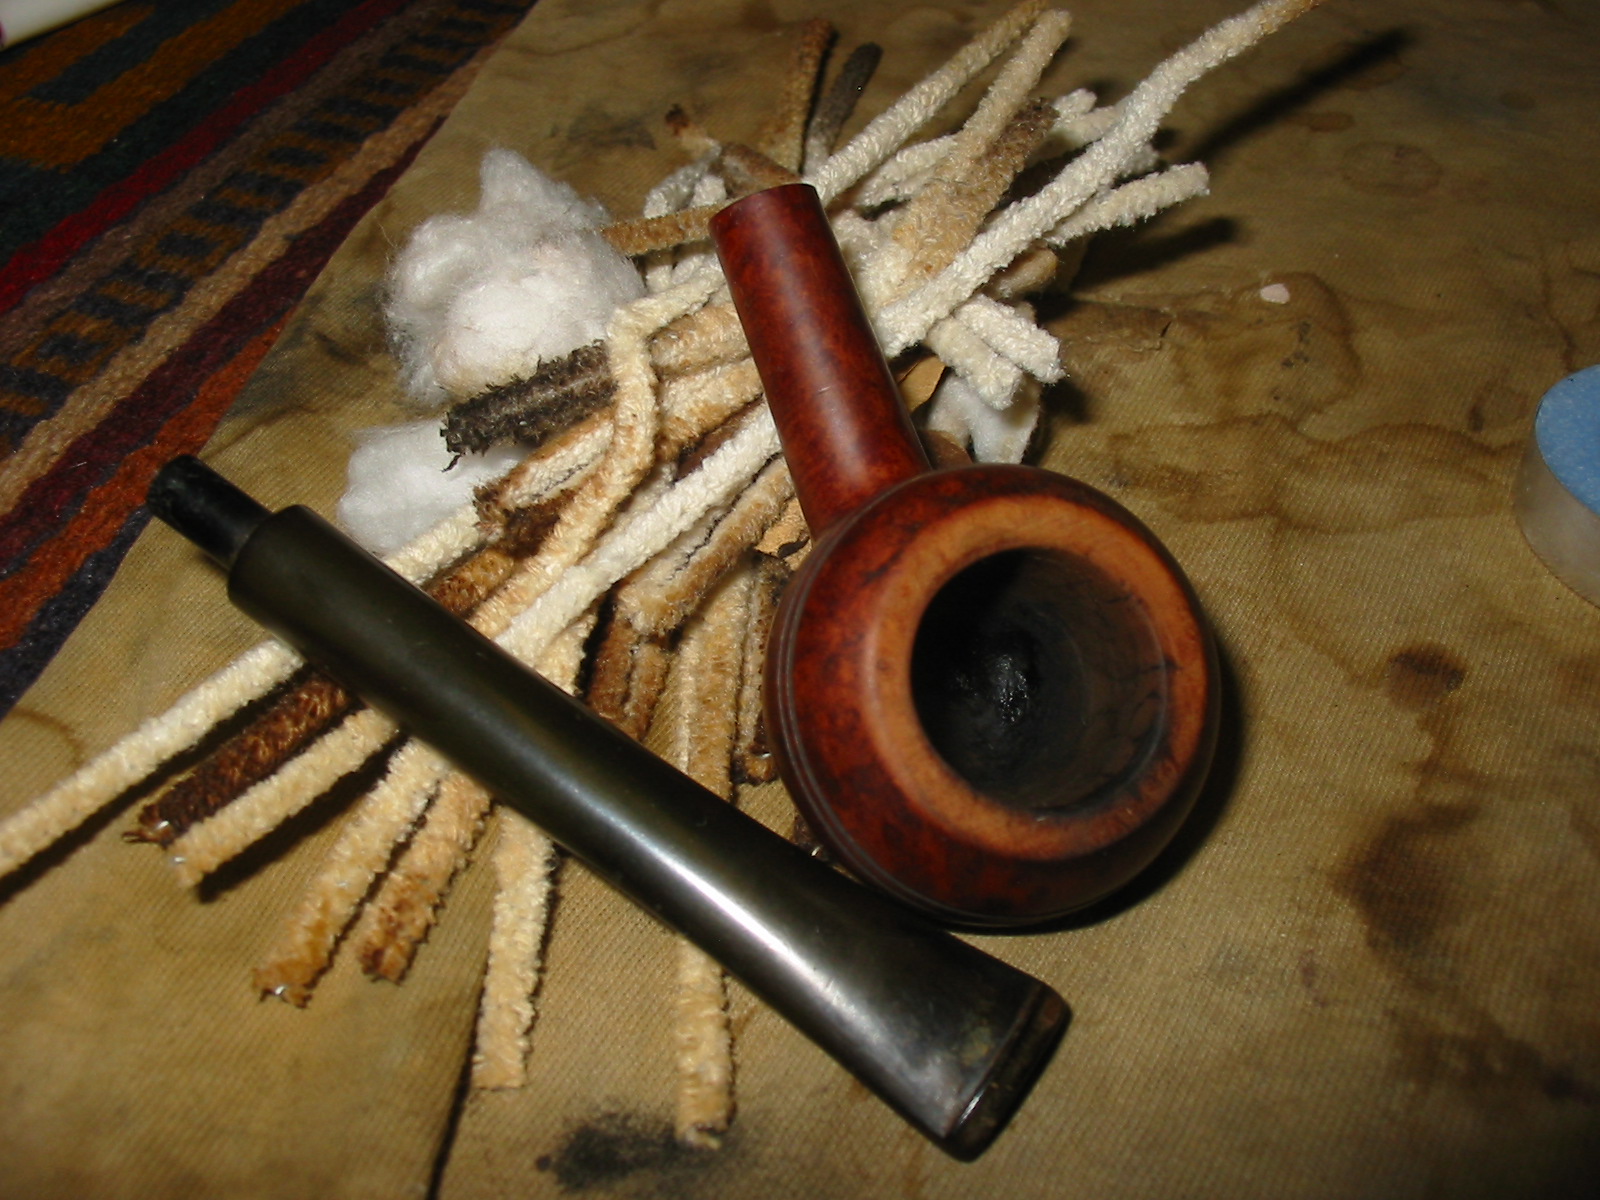
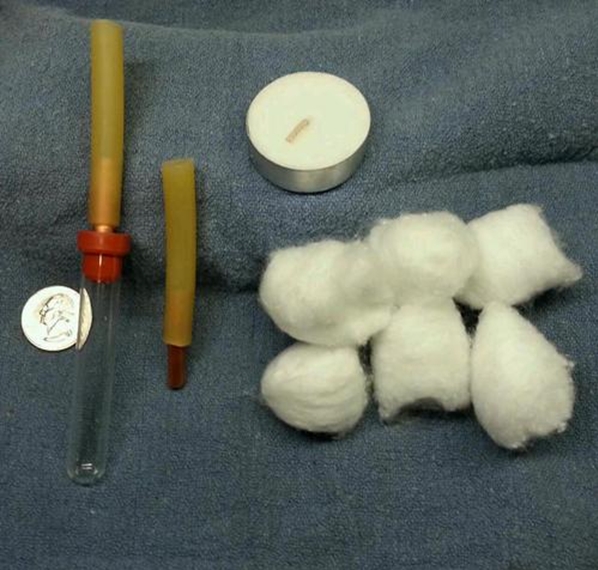
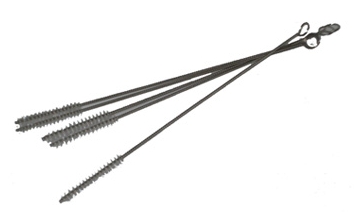
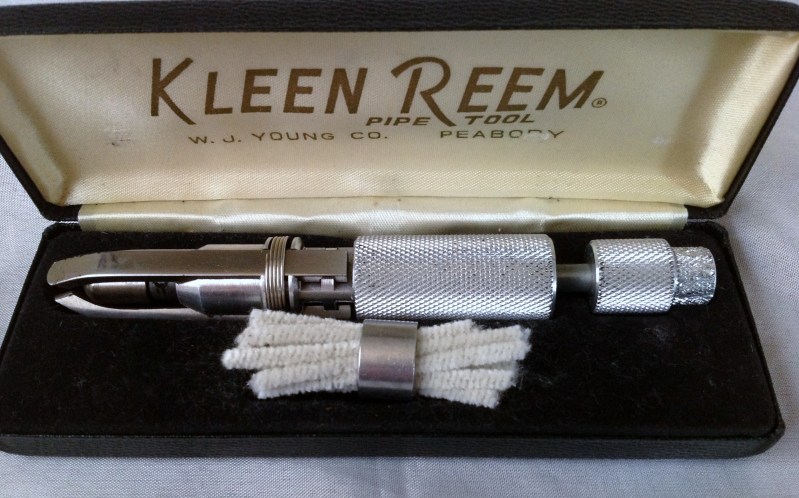
The Stem: It is amazing the number of pipes I receive that seem to have never had a pipe cleaner put through the stem. I have had pipes where the stem is completely blocked with tar. When I soak the stem in a bath to soften any outside oxidation, this also helps to start to soften any internal tars. A final bath in hot water and soap helps this process along. The inside of the stem will first be scrubbed with bristle pipe cleaners, and then the stem sill receive a hot alcohol retort. This will help to soften any remaining stubborn tar in the stem. Continual scrubbing with both bristle and normal pipe cleaners using alcohol follows until they come out clean. Particular attention is given to the sides of the slot and any filter chambers, as these are the places where most tars gather. Finally the stem airway and slot is polished internally to allow for smooth transition of the smoke. This provides both a clean and sterilised mouthpiece to the pipe.

The Bowl Chamber: All excess cake and carbon are removed. If you are restoring one of your own pipes, it is advisable to leave a thin layer of cake inside. The cake in a pipe will retain the oils of the smoked tobaccos. As I don’t know what either the previous smoker or the new smoker’s preferred tobacco is, I do not want to leave any ghosting in the pipe which is why I remove all remnants of carbon. The inside of the bowl is then hand sanded with 600 grit wet and dry paper to leave a smooth finish. Removing all the cake also lets me examine the inside of the chamber for defects.
shank-internal
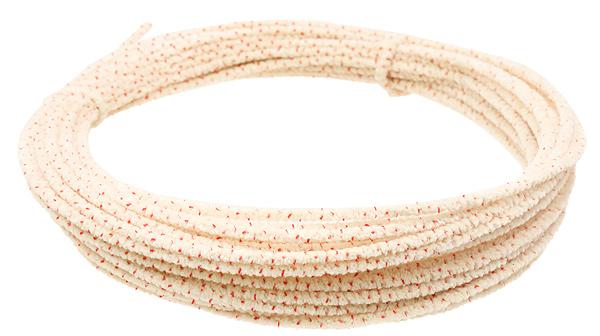
The Airway & Draft Hole:
Thick tars accumulate in the airway of a pipe, especially if they are not cleaned regularly after every smoke. I receive a number of pipes where the airway is completely blocked and wonder how the previous smoker was able to smoke the pipe at all. Pipes in this condition require the airway to be initially hand drilled using the correct size bit to remove this solid build up, as they will not even pass a pipe cleaner. After this the shanks are scrubbed with shank brushes and bristle pipe cleaners dipped in alcohol. This will never entirely remove all the residue on the first clean. The bowl is then given a hot alcohol bath using our special process. This will soften any remaining residue and the airway is again scrubbed with shank brushes and pipe cleaners until normal pipe cleaners come out clean. Finally the bowl receives a final hot alcohol retort to leech out any remaining flavours and totally sanitise the pipe leaving it clean and fresh.

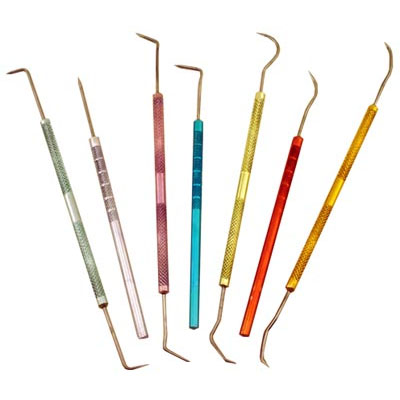
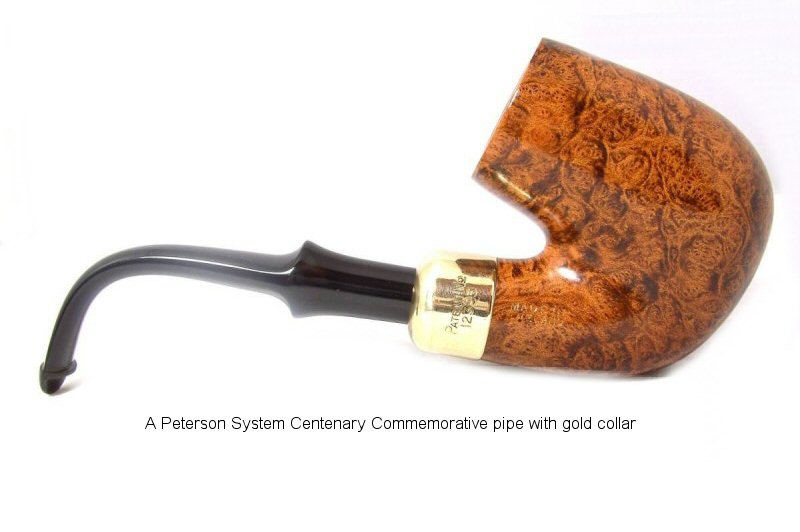
The Shank: To me this is the most vital area of cleaning, yet it is the most disregarded area by the majority of restorers. The shank gathers a cake like build up, especially between the end of the airway and tip of the tenon. Given that this build up is made up from a mixture of tobacco tars and juices, ash and human saliva – it is vital that this is removed before the pipe is passed on to a new smoker! No amount of rubbing with Q-tips and alcohol will remove this hardened build up. In fact the cotton tips may come out looking clean leading the restorer to think that the area is ready for use – wrong! We use a specially adapted tool to scrape out this cake like residue. The first attempt at this will not remove all remnants. Only after the pipe bowl has been given its initial special process hot alcohol bath, will this soften the remaining residue and the shank is scraped out again. The shank can now be scrubbed out with a shank brush and Q-tips dipped in alcohol until they come out clean. Finally the stummel will be given a hot alcohol retort which will remove any remaining oils and leave the pipe clean, fresh and sanitised. The picture shows a before and after shot of a recently restored 1906 Peterson Patent pipe, displaying what a properly restored shank should look like.

At Reborn Briar, we pride ourselves on both the appearance of our restored pipes and the attention to detail of the internal mechanics. Using our special processes means that you will receive a restored pipe that will smoke as clean and fresh as a new pipe and provide you with many years of smoking pleasure ahead.

Not a Bad Day’s Hunt – 14 June 2014


This morning my wife, daughters and I got up early and drove down to Bellingham, Washingto for the day. It was my number two daughter’s 30th Birthday so she wanted to do a bit of shopping and then celebrate with a Mexican dinner. Typically I take them to the shopping mall and then leave for two hours and hit my favourite antique malls and pipe shop. We sat at the border for an hour and a half and then went to breakfast together. Afterward I left them at the mall and headed to my shops.

The first stop was the Senate Smoke Shop. I always try to stop by and support the owner Mike. He has become a good friend so I like to support him when I can. Besides I wanted to pick up a bunch of pipe cleaners and some supplies for my humidor. I also wanted to see if he had any estate pipes in and some new tobaccos. We talked for about an hour while customers came and went. I added items to my pile – pipe cleaners and some humidor supplies. He had taken his estate pipes home so I would have to check back another time.

I did find some well aged Peter Stokkebye Luxury Twist Flake. It was in one of his bulk jars so I picked some up. It is a pure Virginia blend from the best fields of Zimbabwe and southeastern United States. Rolled twist flake. The blend is handrolled into spun cakes; thereafter Cavendish pressed and cut – one of a kind. The descriptor says that it is lightly aromatic, with medium strength but I cannot taste any topping on it. I settled my bill and put the stash in the car. It was now time to check out my antique malls.
dark twist The first shop had some pipes on display with a rack and jar but the $50 price for what was included – a broken Falcon, a cracked Dr. Grabow, a nylon Falcon style pipe and a bowl without a stem – precluded my purchase. I tried to bargain with the seller for just one of the pipes – a nice little bulldog sans stem but she would not break up the set. That was it for that shop. It has been a great source in the past but it did not deliver today.

The second shop had one pretty burned out Viking for sale and nothing more. The price was not too bad for that one but I did not want another Viking to clean up. I walked around the shop and looked deep within the display cases and under boxes and in cans but found nothing more to catch my eye. It was beginning to look like I was going to strike out. I don’t think I have ever gone home completely empty handed. Generally I find something to add to the refurb box. This time I really needed to find a few pipes as the box is down to the last two pipes and one bowl to refurbish. None of them are particularly exciting so I have procrastinated working on them.

I left the second shop and made my way to the third shop. It was incredibly busy inside with a lot of folks looking at the stock and filling the narrow aisles of the store. I called out my greetings to the owner who has become a familiar friend to me – I have bought a lot of pipes from him over the years. He immediately responded that he had purchased 20+ pipes from a widow recently who was cleaning out her late husband’s pipes and tobacco. I have to say I got a little excited at that point. He took out the pipes and put them on the counter for me to go through. He knows my habits by now and stood back to watch as I assessed what he had purchased.

A cursory glance told me that there were some keepers in amidst the junk. There were several newer Kaywoodies, some newer Williards that were badly burned and chipped with many fills all over the bowls. There was a strange rusticated cherrywood with a metal insert in the bowl and shank. There were some bowls that needed stems but none that really caught my eye. I separated the ones that I did not want from the pile and he returned them to the display.

When I was finished there were six pipes in my pile. The old gent whose collection these came from must have liked certain styles of pipes. There were several pairs of pipes. The first pair that I pulled out was English Made Tinderbox, Liverpool shaped, Meerschaum lined, thin shank pipes with remarkable grain. The second pair was also English Made (the stamping on the right side of the shank is the Comoy’s Circle. They are ¾ bent billiards, shape 215 and are remarkably clean for their age. Both are stamped Royal Coachman Other than a few small nicks they are very clean. The last two pipes are distinct. The first is an apple that is stamped Brentwood Supreme and on the right side London England over 335.The second is an American made Mastercraft pot with a chamfered rim and nice grain. All should clean up nicely and the stems are unchewed.
IMG_6834

IMG_6837
The shop normally marks the pipes at $15 each but as I was looking over my pile and making decisions about them the shop keeper wanted to know if I was interested in pipe books. I said of course and he directed me to a pile of books that had two pipe books in the stack. The first was Jean Rebeyrolles, Collectible Pipes a book I already had so I passed it up. The other was The Pipe Book by Alfred Dunhill. Though I already had this book I picked up another copy because I tend to give them away to friends over time. It is a good read for pipemen. It was in new condition and was marked at half the $25 price inside the cover. I quickly did the math – 6 pipes at $15 each was $90 and the book for $12.50 made the total $102.50 and add to that the Washington sales tax and I was looking at $110 for the lot.
IMG_6835
That was not too bad a price for what was there on the counter but as I was busy calculating the price, the shop keeper said he would take $70 for the lot. I was stunned and did not respond immediately and he looked at me and explained the cost per pipe etc. I quickly mumbled a thank you as I was quite pleased. That meant that the pipes and the book were a mere $10 each. I returned home with the six pipes, a pipe book, six bundles of pipe cleaners, some tobacco and the humidor supplies. I was set for awhile. I had some more pipes to refurbish, a gift book and some tobacco to enjoy while I worked. Not too bad a day at all. It is days like these that keep me going out on the prowl for estate pipes and tobacciana. It never ceases to amaze me what I come home with.

I raise my pipe to the humble pipe cleaner


BJLongBulkBox It seems that every time I make a trip to a pipe shop I inevitably pick up some bags or bundles of pipe cleaners. It seems that I can never have enough of them around. Thin, fluffy, regular or bristle I buy them every single time. I use them for my own pipes and go through many of them as I work on estate pipes. They are an indispensable tool of my hobby and craft. There was a time in the past when I ran out of pipe cleaners and had to go hunting for them. The nearby shops did not have them. The craft shops wanted way too much for inferior ones and I did not have a vehicle available to run down to the local pipe shop to pick up a bunch. When that happened I decided I would never let it happen again. So to this day I have a case of pipe cleaners like the one in the picture on the left that I am constantly refilling.

The other day I was checking my supply of pipe cleaners and adding the new bunches I had purchased to the case. It has become a habit to check it regularly. But this time I paused for a moment and wondered about the invention of this amazingly simple device. Where did the idea come from? When was the pipe cleaner invented? Who came up with the idea for the design? Why? This wondering always leads me to “Google” the information and research for the answers to my questions. For me this is as much a part of the hobby as the pipes themselves. The questions lead me to interesting discoveries and information in the process.

I have heard for many years that in times past pipe smokers used chicken feathers (and I suppose other feathers as well) to clean out their pipe stems and shanks. This makes perfect sense when you think about the stiff feather shank and the soft “bristles” of the feather. They function well as a brush when turned inside of the pipe. I am sure many a pipeman used them and threw them away until they needed another. I can almost envision them going out to the henhouse in the yard and either plucking a feather or picking one up, wiping it off and thrusting it into the stem to clean up before or after a smoke.

I discovered through my research several things that were fascinating to me. There is no end to the different tools that inventive pipe smokers have come up with to clean out their pipes. Some of them seem way too complicated to my mind to be a tool that I would use. Others are quite simple but in my life I have never seen them. Pipemen seem to continually come up with ideas for a better pipe cleaner. The have bent and twisted wire, made creative twists and turns of metal, and designed tools that looked like cutting saws for the purpose of cleaning a pipe bowl. I came across many patents for unique designs. A quick Google search for tobacco pipe cleaners will give you ample opportunity to have a look at the wild creativity of designs for a simple tool. I have included two of the more recent patent diagrams from the 1980s that show that the search for the perfect cleaner continues to go on. I am convinced that pipemen will always be looking for a better tool and thus there will always be new inventions that flood the patent office.

pipe cleaner 1

Pipe cleaner 2

There are many more unique and quirky versions of pipe cleaners that have been on the scene for a long time. I have several in my collection that are quite unique but nonetheless no longer made as they did not gain a following. For example, people have put spring cutting blades inside Bakelite cups to collect the scrapings of the blades. But there are also ones that have a growing following. These include such items as small shank brushes that can be washed and reused and also small barrel brushes like those used in cleaning firearms that can be run through the shank and the stem to clean out the debris left behind by the combustion of tobacco. Each of these two tools work quite well and have their place in the refurbishing kit.

IMG_1348 But even with all this creativity and inventiveness churning out new and “better” pipe cleaners none of them have displaced the fuzzy cotton pipe cleaner. For its band of supporters it will never be replaced by any manner of new-fangled notions. It is to the pipe cleaner alone that title of “old pal” has can be given. If you come across a pipe smoker in your travels you will inevitably find pipe cleaners near at hand.

But what triggered the design. I cannot prove this assumption on my part but it seems to me that the idea of the pipe cleaner came as a spinoff of the chicken feather. Its design is kind of a modern art version of the feather. It works in the same way as the feather – a central shaft with brushes attached that can fit in the stem and shank doing exactly what the feather did for those who used it in their pipes. Can’t you imagine it as a “modern” manmade feather?

But who invented it? After a bit of research on the web I found that they were invented by John Harry Stedman (b. 1843, d. 1922) & Charles Angel in Rochester, New York in the early 1900’s. Stedman was a creative inventor who throughout his life invented not only the fuzzy pipe cleaner but also the streetcar transfer ticket in 1892. He sold the pipe cleaner rights to BJ Long Company who has continued to make them for over 60 years and still makes them today. A quick look at their website shows the expansion of the pipe cleaner’s uses to include medical and craft areas. Their product has wide uses and diverse purchasers. To me this brand epitomizes the pipe cleaner. I am sure many of us are familiar with it as most pipe shops in North America sell BJ Long pipe cleaners in bundles and they are sold across the World Wide Web in online shops and on EBay as well.

bjlong

912

Pipe cleaners are normally made from some absorbent material, usually cotton. Bristles of stiffer material like nylon\plastic are added to the bristle version of the cleaner to enable the pipeman to scrub out the shank and stem of their pipes. Typically the cleaner is used by pipemen after a smoke of their pipe or when cleaning their pipes. It is used either dry or it is dipped in alcohol or is wetted with the tongue before it is inserted into the airway. The cleaner absorbs the moistures and oils from the stem and shank. It can also be folded and used in the bowl to knock out debris left behind once the dottle has been dumped. Some pipe cleaners are tapered so that one end is thick and one end thin. The theory behind the design is simple – the thin end is for cleaning the smaller airway of the stem and the thick end for the shank. Some are thin and some are fluffy. The designs are made for different sized airways and stem designs. Pipe cleaners are designed to be thrown away after use though there are many tales of them being washed and reused.

001-545-0102

The construction of pipe cleaners is simple and involves two lengths of wire, called the core, twisted together trapping short lengths of fibre between them, called the pile. Pipe cleaners are usually made two at a time, as the inner wires of each pipe cleaner have the yarn wrapped around them, making a coil; the outer wires trap the wraps of yarn, which are then cut, making the tufts. Chenille yarn is made in much the same way, which is why craft pipe cleaners are often called “chenille stems”. Some pipe cleaner machines have actually been converted into chenille machines. The pipe cleaners produced vary from machine to machine type. Some machines produce very long pipe cleaners which are wound onto spools. The spools may be sold as-is or cut to length depending on the intended use. Other cut the pipe cleaners to length as they come off the machines. The pipe cleaners used by pipe smokers and refurbishers are usually 15 – 17 cm (6 – 7 inches) long while the ones used for crafts are often 30 cm (12 inches) and can be up to 50 cm (20 inches). I have found that these longer pipe cleaners work well in cleaning church warden pipe stems so I have a few always on hand.

I have no idea what you might think about the pipe cleaner or if you even do. It may well be a silent partner in your smoking/cleaning regimen but to me the history and manufacture of them is an interesting piece of our hobby. So to the humble pipe cleaner I raise my pipe!

Cleaning Out the Shank of an Estate Pipe


Blog by Steve Laug

Over the years I have been continually looking for better ways of cleaning out the shank of an estate pipe. I have tried and discarded many methods over that time. The one certainty about the cleaning is that it takes many pipe cleaners, cotton swabs and much alcohol. There are no short cuts to cleaning the shank and airway. Nothing takes the place of slow and repetitive cleaning. Even with using a retort, a short cut on one level, the cleaning of the pipe still takes time before and after the retort has been used. I thought it might be interesting to some of you to read about the process in detail. I have written about the cleaning process – with and without the use of a retort.

With a retort

When I clean the shank with a retort I clean the inside of the stem and remove surface grime in the shank and airway. Before setting up the retort I try to remove as much of the surface grime internally as possible. I ream and clean out the bowl to remove any crumbling or breaking cake. I clean out the stem and button as well to give the pipe a relatively clean surface before I set up the retort. Some people use the retort immediately after reaming and leave out the cleaning step that I begin with. I have done it both ways but like the results of my process. The surgical tubing on the retort slides over the button on the stem and if the surface is dirty or has calcified buildup it does not seal well and the boiling alcohol will seep out around the tubing and make a mess. I clean out the inside of the stem to accelerate the cleaning in the shank. Even with pre-cleaning the pipe it often takes multiple uses of the retort to actually remove all of the tars and oils.

IMG_1115

To prepare the pipe for the retort, I stuff a cotton boll in the bowl and do not press it down to hard into the bowl. I want it to plug the top so that the boiling alcohol does not come out the top but still allow it to circulate within the bowl and the shank. I use isopropyl alcohol in the test tube of the retort and I heat it over a tea light/small candle. The boiling point is quite low so it does not take long for alcohol to begin to boil. The stem and shank heat up as the alcohol goes through them. When it is removed from the heat the alcohol will be drawn back into the test tube and will be a dark brown. I empty out the dirty alcohol, refill the test tube and repeat the process until the alcohol come out clean. I remove the retort and run cotton swabs and pipe cleaners dipped in alcohol through the stem and the shank to absorb anything that has been left behind. When the pipe dries out it smells fresh and new.

retort2

retort3

retort1

Without a retort

The process of cleaning a shank without a retort begins the same way as the above description. I ream the bowl and clean out the bowl and shank with pipe cleaners and cotton swabs dipped in isopropyl alcohol. I use both the bristle and the fluffy pipe cleaners and also shank brushes. The process for cleaning begins with removing the surface grit and grime. This takes many pipe cleaners before they begin to come out semi clean. Then I use the drill bit that is built into the KleenReem reamer and twist it into the shank. It scrapes the sides of the airway all the way into the bowl and removes the tarry buildup. I clean the bit off with alcohol and repeat the process several times until the bit slides through the airway with no impediment. I then wrap a cut pipe cleaner around the drill bit, dip it in alcohol and run it through the shank and airway until it comes out clean. I finish the cleaning process by scrubbing out the shank and the airway with cotton swabs dipped in alcohol and then pipe cleaners folded and unfolded.

mainmaincotton-swabs-1

cotton-swabs-3

Shank brushes

Shank brushes 3

Longs_Extra_Absorbent_Pipe_Cleaners

Longs_Brush_Pipe_Cleaners

Once the pipe cleaners and the cotton swabs come out clean I smell the pipe and shank to see if it smells clean. If not then I stuff cotton bolls in to the bowl tightly. I leave about ¼ inch of clearance from the bowl rim and then fill the bowl with alcohol using an ear syringe. I have found that this keeps the alcohol within the bowl and off the finish of the pipe. I set the pipe in an old ice cube tray that I have and leave it overnight. The alcohol leaches out the oils and tars that are in the shank and bowl. I remove the cotton and wipe out the shank and bowl and repeat the process until the cotton is clean on the next morning. Once that is done the bowl and the shank are cleaned a final time with pipe cleaners and alcohol. The pipe is now ready to be used.

IMG_9808

My Pipe Cleaning Ritual


Over the years I have cleaned up a lot of badly abused estate pipes that the previous owner utterly smoked to death. I have seen bubbles in the varnish of the outer bowl coating on varnished pipes. I have seen darkening on the sides of the bowl from smoking with oily hands. I have seen rims caked with a thick coating of tar to the point of being 1/8 inch thick rolling down the sides like lava. I have seen cake so thick that I could not stand a pipe nail in the bowl. I have seen bowls that are cracked down the sides from having the cake and briar expand at different rates and the cake being so thick that there was nowhere for it to go but out. I have seen burned out bowl bottoms that followed over reaming of the pipe. I have seen airways so plugged that I could barely pass a paper clip through it. I have seen gunk so built up at the shank stem junction that it is bubbling out of the joint with thick hard grime. I have seen buttons and slots so plugged that the airway is a small hole that would make smoking the pipe like sipping through a coffee stirrer. I am sure that I could go on and on with more of those horrendous descriptions that make me shake my head in wonder at how a pipe could get that bad without the pipeman paying any attention to the degradation of the smoke. But I will not go on. Rather I want to turn my thoughts to a solution and some prevention.

I have come to the conclusion that for a pipe to get as bad as the ones that I have cleaned and restored it would not happen overnight but that it would take a gradual almost unnoticeable process to get to that point. A failure to clean the pipe after each smoke and a periodic more thorough cleaning leads to an accumulation of tars, moisture and dottle in the pipe and shank. These combine to make a slow but consistent deterioration of the pipe. I have seen a pipe at its worst and at its pristine first smoke and have developed my own cleaning ritual to keep my pipes smoking clean and dry. It is that ritual that I am writing about in this post. It is a cleaning process that occurs before, during and after each smoke and has become an almost rote pattern for me.

Tools Needed:

  1. Pipe Cleaners – tapered, bristle and regular or extra fluffy pipe cleanersImageImage
  2. Alcohol – High % Isopropyl (I use 91% and 99% when I can get it) or grain alcohol
  3. Shank brushes
    ImageImage
  4. Cotton swab – either generic or q-tips – these are soft cotton bolls attached to a length of cardboard or wooden stick.
    ImageImage
  5. Cotton pads (I use women’s makeup removal pads that are found in most drug and dollar stores. These are multipurpose and work well on rims, stems etc.) Image
  6. Pipe reamer – I have written elsewhere on this blog about the two reamers I use the most, the Senior/Kleen Reem Pipe Tool and the PipNet T handle and interchangeable blade heads. I also have a large assortment of other reamers that I have collected over the years.ImageImage
  7. Battery Terminal Brush – I find that this brush is soft brass bristle and is ¾ inch in diameter and works well to give a quick swipe of the bowl. Image
  1. Pipe tool or pick – I personally use a dental pick that I picked up at a tool shop and it is a versatile tool for cleaning shanks and bowls. O-Ring picks can also work well. ImageImage

Before going into the process of cleaning my pipes and the methods I use I thought it would be a good idea to speak about resting your pipes. I have learned over the years to smoke a pipe throughout the day and then set it aside to rest. I have quite a few pipes so this is easily done. I move through about seven pipes a week and set them aside to dry out and air. I set them in a rack or upright on my desk bowl down so that the moisture in the stem drops to the bowl and air dries before I smoke it another day. I have a seven slot rack that holds the pipes for the week and after smoking I clean and return them to the rack. This is often called a smoking rotation. When I first bought a pipe I smoked it until it tasted awful and then set it aside and bought a new one. I have since learned that if I want to optimize the smoking characteristics of any of my pipes I rest them between smokes. Some folks carry this even farther than I do and smoke a pipe once, set it aside and pick up another. I do not do that and have chosen to smoke the same pipe throughout a given day before setting it aside to rest. It has worked well for me.

I have broken down my cleaning ritual into four distinct parts: before a smoke, during a smoke, after a smoke and then the periodic cleaning I do weekly or monthly. I will describe the each part of my ritual.

Before A Smoke

Every time I pick up a pipe to smoke there is a routine that has become part of the process for me. I blow through it make sure the airway is open and the run a pipe cleaner, either bristle or regular, through the stem to dislodge any leftover ash and pieces of unburned tobacco. I will the fold the pipe cleaner into a U shape and run it around the inside of the bow to remove any loose pieces of tobacco or pipe cleaner fuzz from the bowl. Once I have done that I gently tap my pipe on the palm of my hand and then proceed to pack a bowl as usual. This has become second nature to me whenever I pick up a pipe. It is so much a part of my ritual that when I am looking for estates in antique malls and flea markets that my wife reminds me not to put it in my mouth to blow through it until I have cleaned it! This process has kept me from loading and lighting a bowl with detritus in the airway.

During a Smoke

After cleaning and repairing many blackened and charred rims I am almost anal about how I light my pipes. When I use a match I hold it about a ½ inch or more above the bowl and draw the flame into the tobacco. I am careful to not let the match sit against the rim lest it burn it. When I use a lighter I do the same and keep the flame over the tobacco. If the rim begins to darken or get a bit of buildup you can usually remove it by moistening a cotton pad or swab with saliva and gently rubbing the rim of the pipe with it. I have found that doing this while the pipe is still warm facilitates the removal of the grime. As it heats it softens. If you pay attention and keep the rim clean and are careful when you light your pipe you will eliminate the cause of the charred, blackened rims so common estate pipe finds.

When I am smoking I am also paying attention to the taste of the pipe. If it gets to the point that the smoke is sour, bitter or off from what you normally experience with the pipe and tobacco you will want to do a more thorough cleaning. However, I find that this is quite rare when I keep the interior of the bowl and stem clean after each smoke.

After  a Smoke

Once I have finished a bowl of tobacco I empty out the remaining ash. I also insert a pipe cleaner and clean out the shank and stem. I will often dampen the end of the cleaner in my mouth before inserting it in the button. I extend it into the bowl just a short distance as I do not want to wear a slot in the bottom of the bowl. I am primarily concerned with cleaning the airway at this point. I also work it from side to side in the slot and pay special attention to getting the edges of the slot clean in the button. This is something I also picked up from my refurbishing. I find that the slot will often fill along the edges and gradually close off so I work the pipe cleaner from side to side to keep the button and slot clean. I remove the cleaner and fold it in a U and swab out the inside of the bowl to remove ash and loose pieces of tobacco that did not burn. I tap it lightly against my hand and then use a second cleaner to remove any leftover moisture from the inside of the pipe and stem.

I don’t take apart the pipe while it is warm as I have heard often enough that to do so will loosen the fit and can cause a cracked shank. I have not experienced that first hand but don’t really want to go through that so I let it cool before taking it apart. It is my habit to take the pipe apart when I do the periodic/monthly cleaning. When I have cleaned the pipe I blow through it to make sure it is good and clean and then use the second pipe cleaner for a final time. I wipe down the outside of the bowl with a cloth that I have impregnated with Briar Wipe or a use a microfibre cloth. I wipe off the bowl and rim as well as the stem and give a soft buff with the cloth before I set the pipe back in the rack or on my desk with the stem up. I generally allow my pipes to rest for 4-5 days before smoking them again.

Monthly or Periodic Cleaning

I find that once a month or every six weeks I break down the pipes I have smoked during that time period and give them a more thorough cleaning than what I do immediately after smoking them. Some folks do this weekly but I have found that the monthly cleaning works best for my schedule and style of smoking. My process is spelled out as follows:

I spread out a clean cotton towel on my desk or work table and carefully remove the stem from each of the pipes I am cleaning. I lay them on the towel next to each other and work my way through the lot doing the same procedure to each one. I dip a regular pipe cleaner in alcohol and run it through the stem, from the tenon to the mouthpiece, pulling it through. If I have cleaned my pipes well after each smoke then it is likely that they will come out pretty clean. There always is a bit of oils and tars on the pipe cleaner that the alcohol draws out better than the saliva I use after the smoke. I repeat this process with a dry pipe cleaner, and then use an alcohol dipped one until the pipe cleaner comes out clean. When it is clean I use one final dry pipe cleaner to remove any moisture then I set the stem aside. I have found that if I continue the same process with several pipe stems before moving on to the bowls I can move the cleaning along more smoothly. Maybe it is part of my “system guy” thing but I find the completion of one part of the task refreshing before moving to the next part of my ritual.

I then move on to the bowl and shanks. I use bristle pipe cleaners and pipe shank brushes that have been moistened with alcohol to scrub the inside of the mortise and the airway into the bowl. I am careful not to push the pipe cleaner too far into the bowl as I have seen in my refurbishing pipes that had this done and the bottom of the bowl was grooved and the wall of the bowl dented by repeated over extending of the pipe cleaner (they are wire in the center and they do make an impact over time). I alternate the cleaning with dry, regular pipe cleaners. I will often use a lot of pipe cleaners to get the shank airway clean. I also use a cotton swab dampened with alcohol to clean out the mortise area and the flat area at the bottom of the mortise where the tenon sits. I have found that the cotton swabs allow you to thoroughly clean the mortise well. I alternate between alcohol dampened swabs and dry ones until they come out clean. I use a cotton pad to wipe off any remaining build up on the rim then reinsert the stem in the bowl before I give the pipe a coat of carnauba wax (if you do not have a buffer you can use Paragon Wax for smooth bowls and Halcyon II for rusticated and sandblasted bowls). I polish the wax either by hand or with a soft buff with a flannel pad. If the stem or bowl has a band I polish it with a jeweler’s cloth or a good silver or metal polish. When the pipe is cleaned and shined I put it back in the rack and let it sit for a day or so to thoroughly dry out before smoking it.