Daily Archives: September 21, 2012

A Quick and Simple Refurb on a Bari Senior Mandarin


Blog by Steve Laug

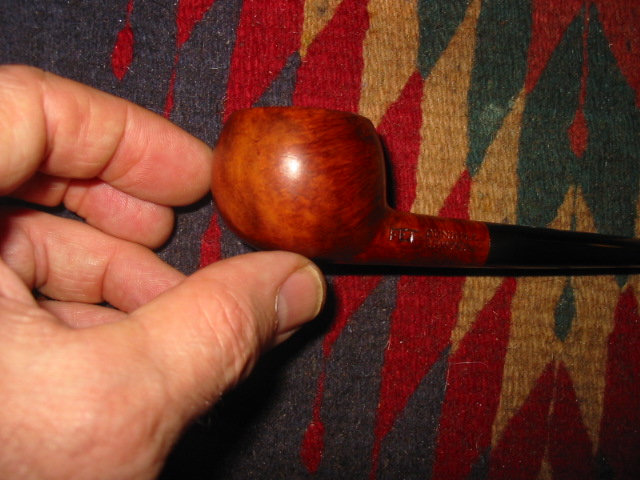
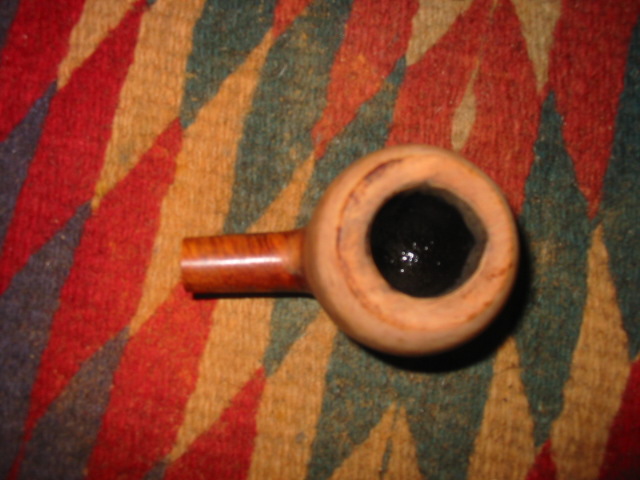
This Danish pipe stamped Bari Senior Mandarin was in my pipe box for quite awhile before I got to it. You have to understand that at that point box of pipes awaiting refurb was full of about 300+ pipes. It is down to about 30 now. It was a busy winter and spring as I cleaned up the lot. It rains here in Vancouver for most of the winter, so refurbishing is a nice dry past time.

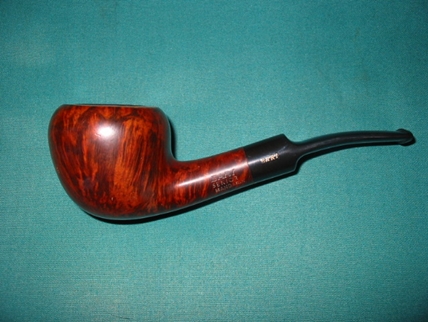
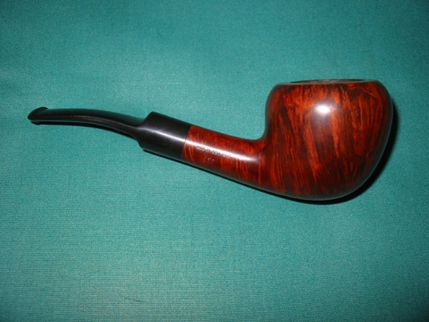
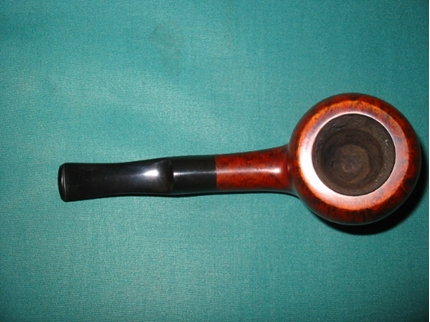
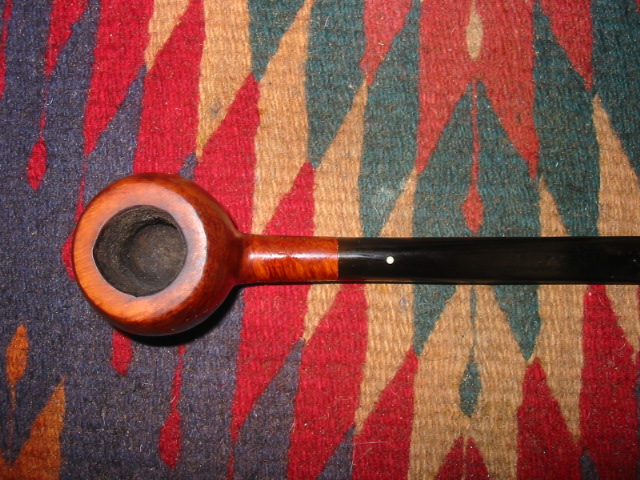
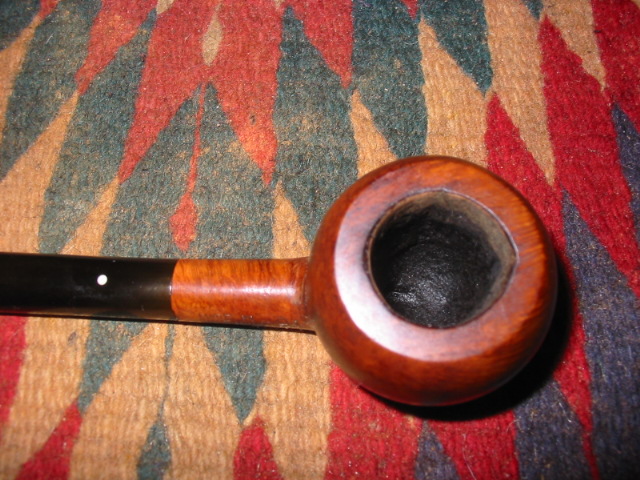
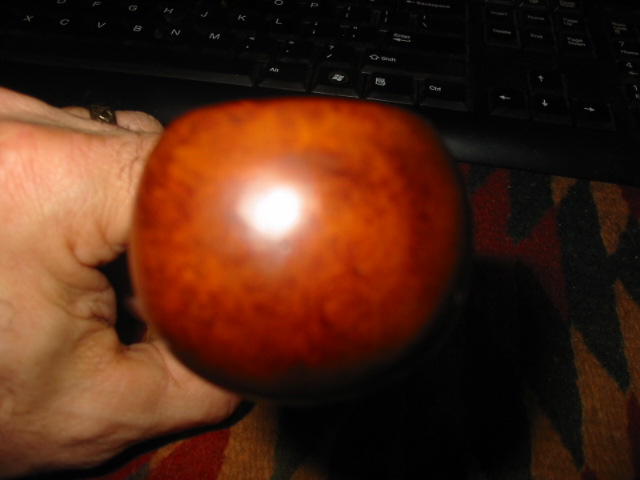
The Bari Senior Mandarin came out of the box looking like the pictures below. I grabbed my camera and took a couple of shots of the pipe before I worked on it. It is a large bowled pipe with nice grain. It was dirty and just needed reaming and cleaning. The rim had a build up of tars and what some lovingly call pipe lava. The finish looked to be okay under the dirt. There were a few small dents in the sides of the bowl that would need to be looked after. The stem had some oxidation but no tooth marks or dents. ImageImage

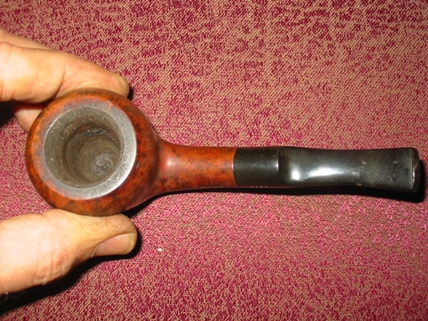
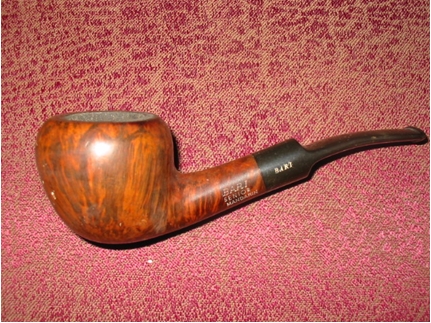
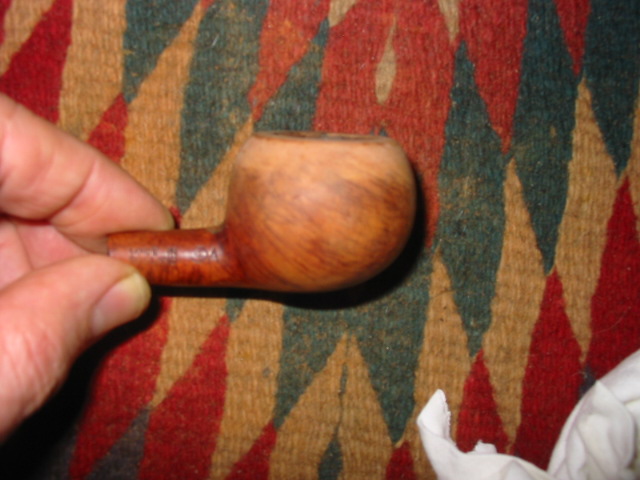
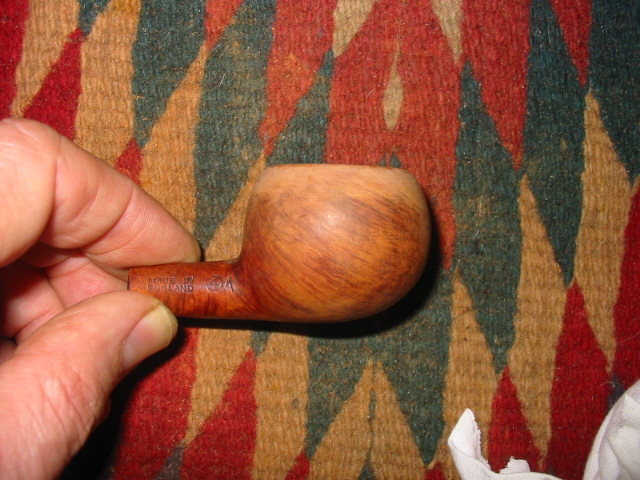
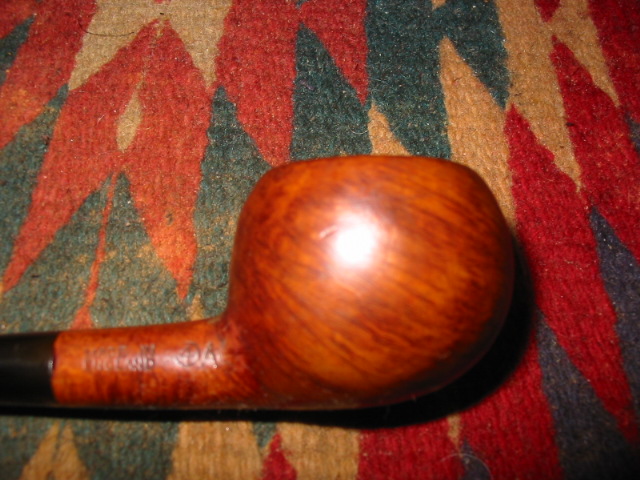
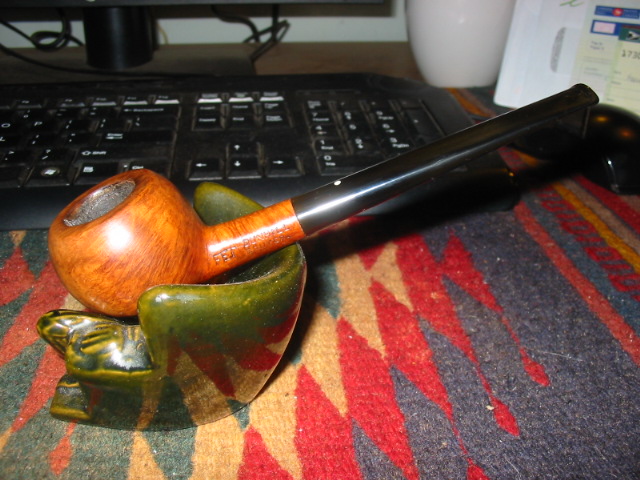
The stem was a relatively simple cleaning job. The oxidation was easily removed with a good buff of Tripoli and White Diamond. I scrubbed the inside and outside of the stem to get rid of the tars and tobacco juice in the airway. The bowl was reamed back to a thin coat of cake and the rim was cleaned of the tars and lava buildup with Murphy’s Oil Soap (undiluted) I wiped the bowl down with a soft cloth and some oil soap to clean away the grime and grit on the bowl and shank. I cleaned the inside of the bowl and shank with a shank brush, bristle pipe cleaners and regular pipe cleaners dipped in isopropyl alcohol until they came out clean. I steamed out the dents with a wet cloth and hot butter knife. Once they were repaired I then buffed the bowl and stem with multiple coats of carnauba wax.

ImageImageImage

Reshaping a Dunhill Prince


Blog by Steve Laug

I picked up this old Dunhill Prince from an antique mall here in the Vancouver area. It was an “expensive” pipe in that it set me back $25. The bowl had been topped – badly – by someone. The shape of the bowl was affected by the work on the rim. This is an interesting pipe in that it is impossible to date. The stampings are very clear but the markings do not have date identifiable features. The other unique thing about this pipe is that somewhere in its life it was repaired on the shank. It appears to have been done by the factory in that the stamping is over the shank splice. The stem was dirty when I picked up the pipe but not too badly oxidized. The bowl had been reamed and was out of round as can be seen in the photos below. The rim was very wide and flattened out and there were scratches on it from the sanding.

ImageImage

After smoking it for awhile in this state and looking at other Dunhill princes online and in person I decided to reshape the bowl and correct the wide rim. I stripped the bowl with acetone and then used 240 grit sandpaper (this seems to be my go to grit with sanding as it leaves smaller scratches that need to be sanded later) to begin to reshape the bowl and rim. The first picture below shows the new shape that is emerging from the briar. I was aiming for the look of the standard Dunhill prince. I had pictures that I constantly cross checked as I worked on this one. The second and third pictures show the shape of the bowl in profile. The second picture is after the work with the 240 grit sandpaper. I wanted the slope on the front to be more rounded and the back slope more round as well. I also wanted the rim to be less wide. The third picture shows the pipe when I had finished the sanding and shaping of the bowl. When I laid it on top of the printed photo of the prince shape it was as perfect a match as I was going to get with this one. ImageImageImage

Now I need to restain the pipe to match the previous colour of the stain. I was careful in removing the finish on the bowl to leave the shank colour original. I used a medium brown aniline stain that I thinned with isopropyl alcohol to get the stain to match the shank colour. I restained the bowl and flamed it to set the stain. I took it to the buffer and buffed the bowl with White Diamond, being careful to not buff the nomenclature on the pipe. In the next three pictures you can see the new shape and the staining. I think the match is very good. ImageImageImage

The last two photos show the pipe in a rest and the shape is exactly what I was looking for. The colour in the photos above is a little redder than the colour of the pipe. The two pictures below are correct in terms of colour. It is a nice warm medium brown colour with the grain showing through. I waxed the pipe with several coats of carnauba. It is a great smoking pipe. ImageImage

Refurb on a BBK Panel Billiard – Swiss made


This BBK Panel was an interesting refurb for me. I had not heard of BBK pipes until I came upon this one. I think it came in a box of pipes that was gifted to me but I am no longer certain where it came from or when I received it. It is stamped BBK both on the bottom of the shank and on the logo on the stem. It had a beautiful blast finish. When I took it out of the box it was dirty and the bowl had a thick cake in it. The rim was blackened and tarred. The stem was a brownish green from oxidation. The beauty was that it was not chewed or dented by tooth marks. It would take a thorough cleaning to learn more about this pipe.

I did not know that I was dealing with a meerschaum lined pipe until I wiped it down to begin the cleaning process. I always wipe down the rim with some Murphy’s Oil Soap to get to the rim and clean away the build up and grime. I use it undiluted and scrub it on the pipe with a toothbrush. Once found that I was dealing with a meerlined pipe I carefully reamed the cake that had built up and then sanded it back. I sanded the rim back to get the grime off of it and expose the meer again. In the second photo below you can see what I found once I had wiped the pipe down with oil soap.


The blast is really nice on this panel so I cleaned it and then restained it with a black aniline stain (Feibings Shoe Dye) to match the original colour of the pipe. I flamed the stain to set it in the briar and buffed it lightly with White Diamond to remove the excess and to give it a polish. I finished by giving it several coats of Halcyon Wax to protect the finish. The stem was oxidized so I buffed it with Tripoli to remove the surface coating of oxidation. I soaked it in Oxyclean to soften the remaining oxidation and then sanded it with 240 grit and 400 and 600 grit wet dry sandpaper before using the micromesh sanding pads (1500 to 6000 grit) to finish the work. I rubbed the stem down with Obsidian Oil and then gave the entirety another coat of Halcyon on the bowl and carnauba on the stem.

I used some liquid White Out to try to recolour the logo on the stem but it did not stick… time to try again. Thanks for looking.