After repairing and refinishing many old estate pipe rims that have felt the burn of a misplaced flame or the blast of a torch lighter I thought I would write up a short piece on lighting a pipe. From my experience it seems that most pipe smokers are creatures of habit if the rims of our pipes are any indication. The burns seen on these pipes indicate where the pipe smoker lit the pipe in the same manner with the same lighter in the same spot repeatedly until the rim was blackened and then burned. It is always quite astounding to me that individuals continue to char and burn the rim even on expensive pipes. The idea for me has always been to burn the tobacco and preserve the briar.
I consistently use the same lighting technique whether I use a Bic lighter, Zippo or a wooden match. I too am a creature of habit. My technique is not original but is something passed on to me somewhere along the way. It is, and has always been, a two part process.
The first light
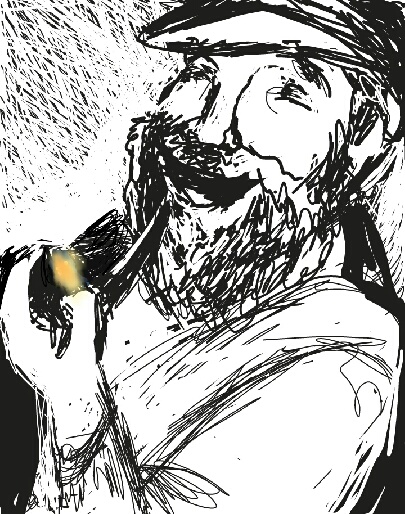
After packing my pipe to my liking I char top layer of tobacco by gently moving the flame over the whole surface of the tobacco at a distance of about a half an inch or more and draw the flame into the tobacco. I avoid letting the flame touch the rim regardless of the tool I use to light my pipe. I also avoid torch lighters and cigar lighters like a plague as they seem far too hot and hard to keep the flame in the bowl. I am convinced that many of the burned rims come from torch lighters. For me this initial charring prepares the bowl for the second step in the process.
The second light
Once the top of the tobacco is charred the tobacco seems to rise a bit in the bowl. I assume that this is from the burning and the expansion of the air in the bowl. I then remove the pipe from my mouth, tamp the tobacco down quite firmly, and relight the pipe. The firmness of the tamping seems to be something that varies a bit from tobacco cut to tobacco cut. I have learned that with flake cut tobacco I tamp more lightly than with shag cut or already rubbed out tobacco. You must be careful not to over tamp the tobacco as you can shut down the draw. It is better to under tamp and redo it than to over tamp and have to unload the bowl and start over. I make sure that no loose tobacco strands are on the rim and then relight in the same manner as I did with the first light. I am experimenting a bit with tamping the edges down a bit more tightly than the middle and leaving a slight cone shape to the tobacco as this seems to keep the flame inside the bowl when lighting.
Throughout the smoke
Pipes have a habit of going out. So I don’t spend a lot of time worrying about it. It is not unusual for even experienced smokers to relight the pipe several times during the enjoyment of a pipeful. Therefore, when I find I need to relight I just use the tamper I always have near at hand, or if it is missing my index finger, and tamp the pipe firmly but carefully to not constrict the draw on the pipe. I then relight in the same manner as above. As the tobacco burns down into the bowl it becomes much easier to keep the flame in the bowl during the lighting. But make sure to continue to point the flame into the bowl and not at the edges. With repeated practice and care this becomes second nature to you.
What I use to light my pipes
I have been asked in the past what to use to light a pipe. For me I generally light my pipe with a cheap Bic lighter. I follow the methods outlined above and have not burned any rims on my pipes. I also have a few Zippos with pipe inserts that I take with me when I am on a walk outside and use them regularly. I also have a few boxes of wooden matches but as I find that most of my pipe smoking is done outdoors it is hard to keep a match lit long enough to get the tobacco burning nicely.