Blog by Steve Laug
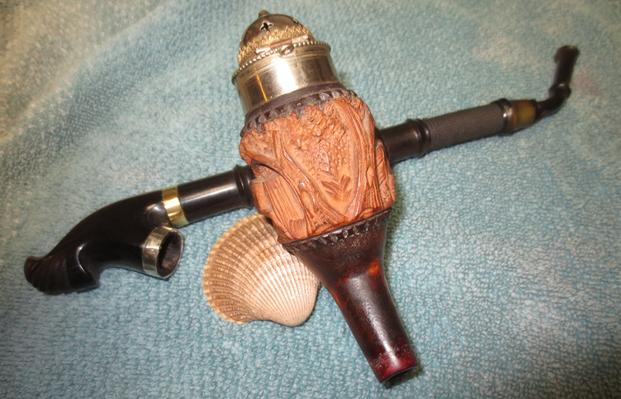
I received a call several days ago about repairing some pipes for a fellow here in Vancouver. He said there were family pipes that he had gotten from an uncle but did not know the details of their history. He brought four of them over to be cleaned up and repaired. In looking them over it was clear to me that two of them were in excellent condition and did not need any work on them. The other two had a few issues. The first of them is a Swiss Hunting pipe. The bowl is made out of walnut and the base of the pipe is made out of horn. There was a skirt of hair in the middle of the long shank and above that it was also made of horn with a flexible cord wrapped extension. The stem was made out of horn. The wind cap unit on the top of the bowl was made of what appeared to be brass but with work it could have been polished silver.  There was a threaded tube that fit into the end of the walnut extension on the base of the bowl. Someone along the way had drilled out the end and it was done poorly – crooked. The brass threaded piece was turned into the end. The current owner had made a cork gasket and pressed it into the horn bass. He had twisted the threaded end of the insert in the shank into the cork. The alignment was not correct and it did not sit properly. I unscrewed the insert from the shank and used a knife to pry out the cork gasket. It looked to me like the shank end was made to sit in the horn base with no gaskets or help it was a pressure fit. The next two photos show the pipe taken apart.
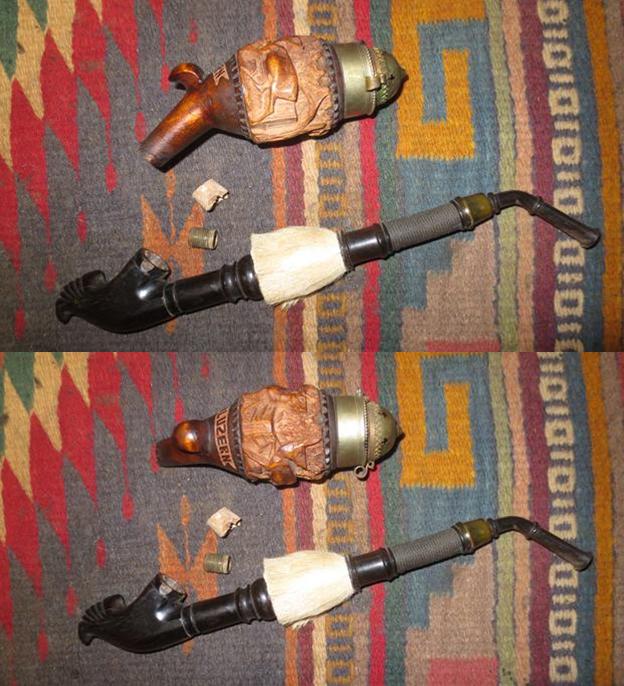 I took some close up photos of the base minus the cork gasket and threaded tube. The first shows the base looking into the portion that the shank end fit into. The inside of the base was dirty and needed to be cleaned out. The top edge looked like it had some cracks in it. Both ends of the base – the one the stem fit in and the one the bowl fit in – both appeared that they had originally had a band in place. I also took a photo of the base from the side.
 The shank end had been broken when it had been drilled out and threaded. The portion of the shank in that place was very thin. The second photo below shows the crooked drilling that had been done on the shank.
 I cleaned out the shank and began to build up the missing chunk with super glue and briar dust. It took quite a few layers to bring it up to the height of the rest of the shank end. I filled in the threaded portion of the shank with super glue. I repaired the edges of the horn base where the band had originally been using black super glue.
 Once the super glue and briar dust repair had dried I sanded the inside walls with a needle file and also a rolled piece of sandpaper.
 The stem was in rough shape. It had tooth chatter and marks on both sides of the stem and there were some damage to the underside of the bend. I unscrewed it from the end of the shank extension. The next four photos show the condition of the stem when I started. I sanded out the tooth marks and chatter with 220 grit sandpaper to remove them. I reshaped the button with sandpaper and filled in the damage at the bend with black super glue.
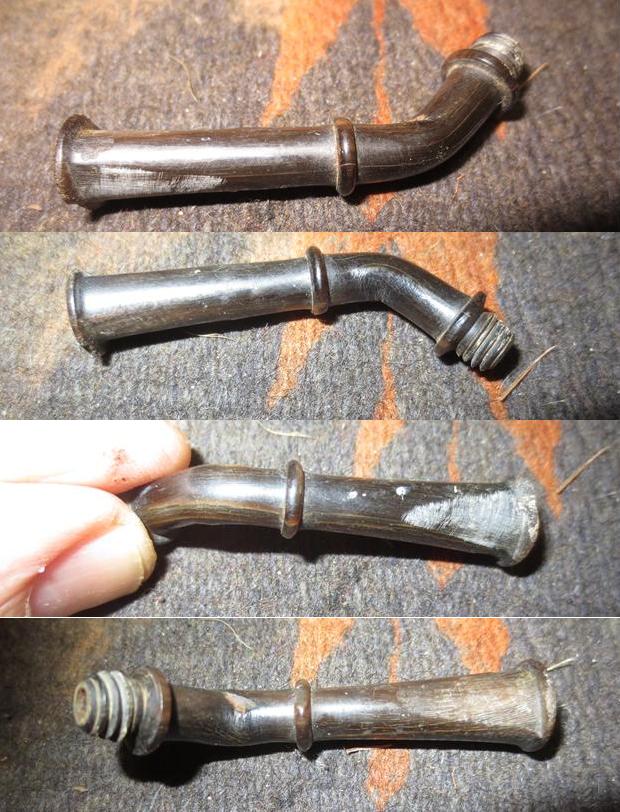 I opened the wind cap and took a photo of the rim top and the bowl. The inner bowl lining was porcelain with a hole in the bottom of the bowl. There were some tars and oils built up on the upper portion of the bowl. The rim top had a buildup of lava that covered it. The inside of the cap was pitted and dirty with dust and debris from the smoking of the pipe.
 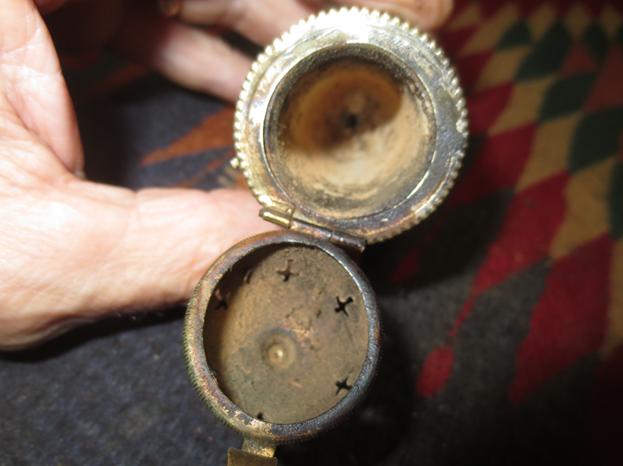 I noticed that the fit of the cap unit on top of the bowl was quite loose. I gingerly wiggled the top free of the bowl unit. The cap looked like brass but upon examination of the inside of the cap it appeared to be silver.
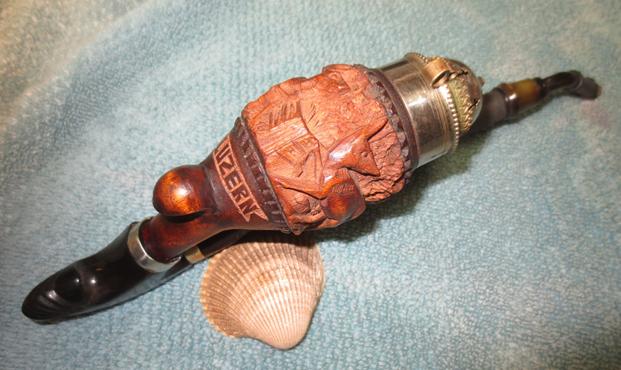
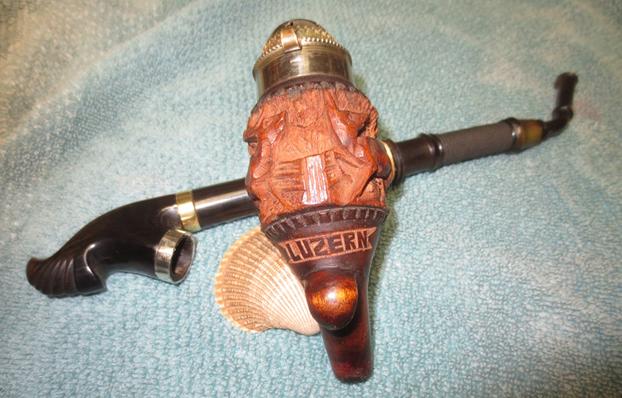
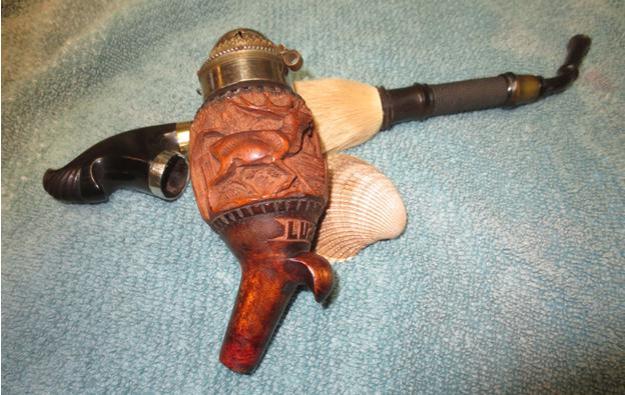
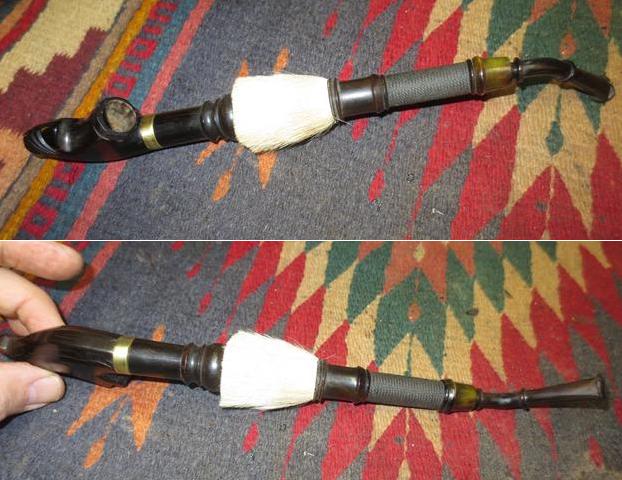
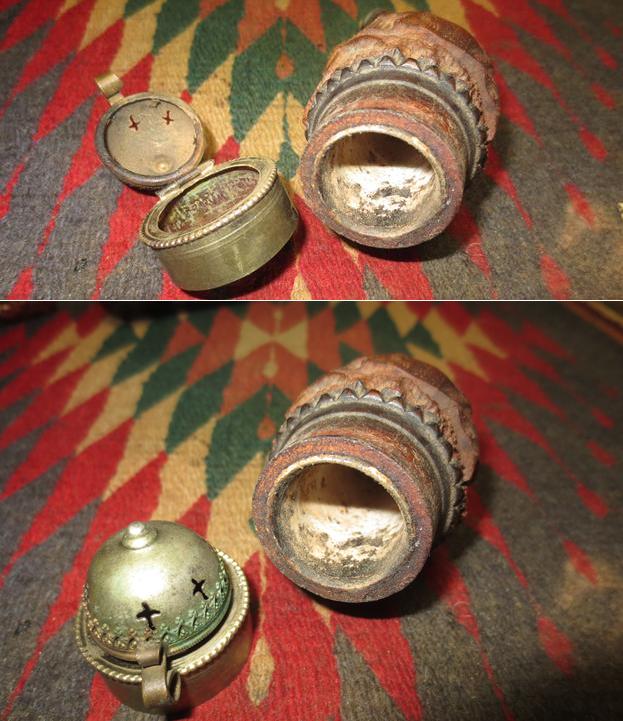 I wiped down the inside of the cap and the top of the bowl with alcohol to remove the debris that was present. I scraped the inside of the bowl with a pen knife to remove the cake that was around the top edge. I used a folded pipe cleaner to dab white glue on the inside of the wind cap unit. I spread it around evenly around the inside and pressed the cap onto the top of the bowl I aligned the hinge and keeper with the point on the carving on the front of the bowl. You can see from the photo below that the front of the bowl is carved with the word LUZERN under the hunting scene on the bowl. LUZERN is the Germanic form of the word Lucerne, a city in Switzerland. The stepped carving around the top of the bowl under the wind cap and the same under the carved hunting scene and the shank end is stained darker than the carving itself.
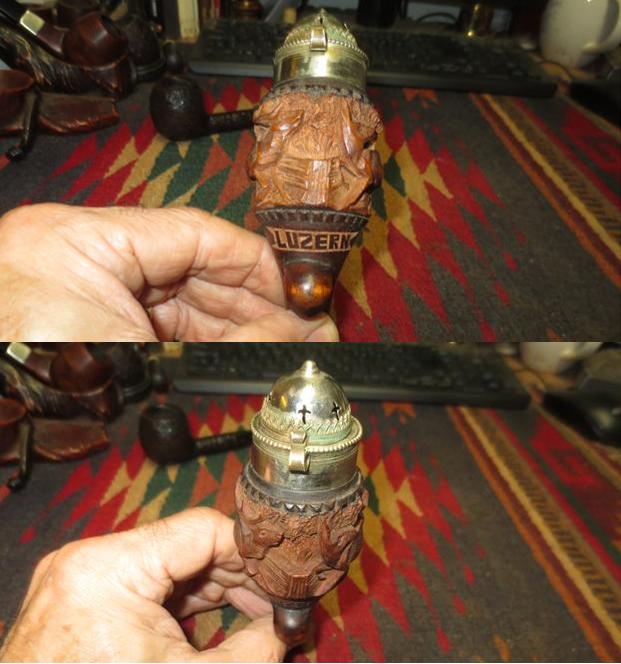
 I scrubbed out the porcelain bowl and the inside of the shank and the base with alcohol, cotton swabs and pipe cleaners. I was able to remove most of the cake leaving behind some that was in the wrinkles in the porcelain. You can see the cracks in the top of the base that need to be repaired.
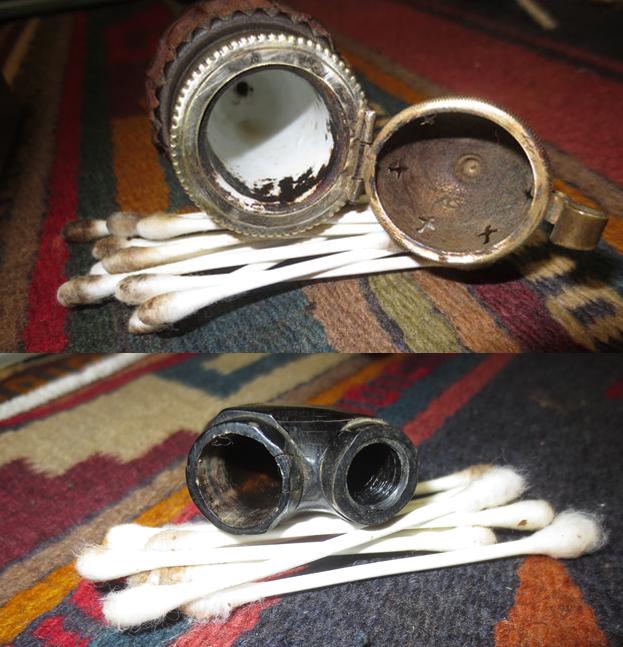 I had an end cap from a damaged WDC pipe that fit the top of the base where the shank screwed into it. I cleaned that end and the cap and glued it in place on the base. It fit perfectly in that place and allowed the proper alignment of the stem and shank extensions. It goes nicely with the colour of the horn at the top of the corded flex hose.
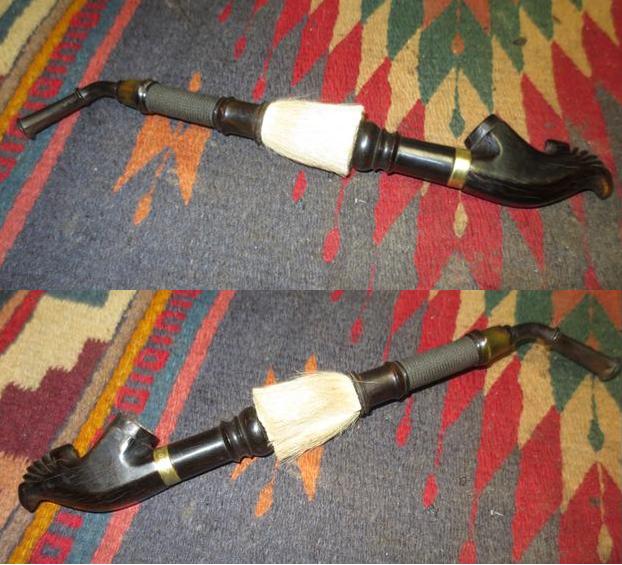
 I needed to cut down a nickel shank band to get a proper fit on the other part of the base. I used a Dremel and sanding drum to cut the band back to the proper size for the base. It took a little time and work to remove the excess. I used the topping board and 220 grit sandpaper to smooth out the cut end and beveled the edges with a folded piece of sandpaper. I polished the band with micromesh sanding pads. I used a folded pipe cleaner to apply the white glue to the inside of the band and pressed it into place on the base. I filled in the open edges on the top with white glue applied with the folded pipe cleaner.
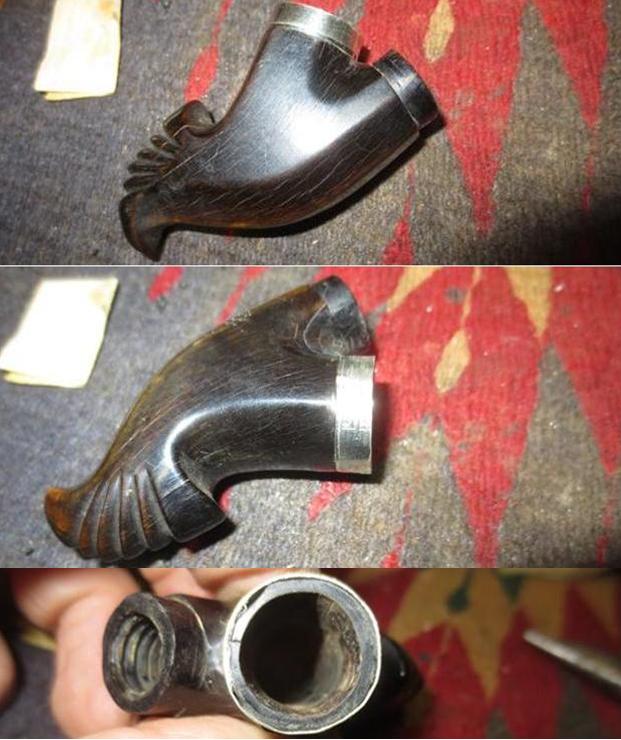 I took a photo of the two bands on the base. I polished them with micromesh sanding pads to remove the scratches and give them a shine.
 I tapered the repaired shank end with 220 grit sandpaper to match the taper of the inside of the base. It took some doing to get the alignment correct. I sanded the inside of the base to match the taper and to clean up the repair I had made. I stained the shank end with a medium and a dark brown stain pen to match it to the rest of the bowl and the base. I waxed the smooth parts of the bowl with carnauba and hand buffed them with a shoe brush and a microfibre cloth.
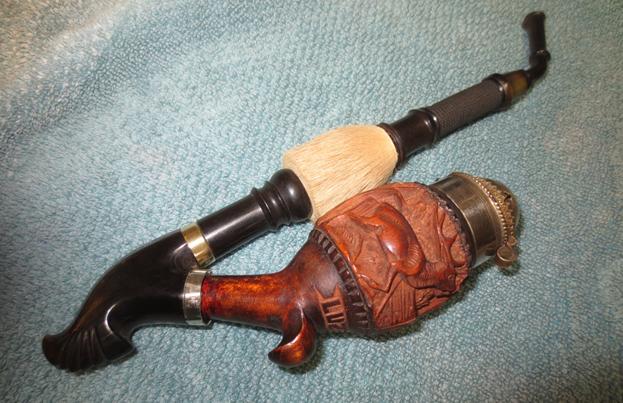
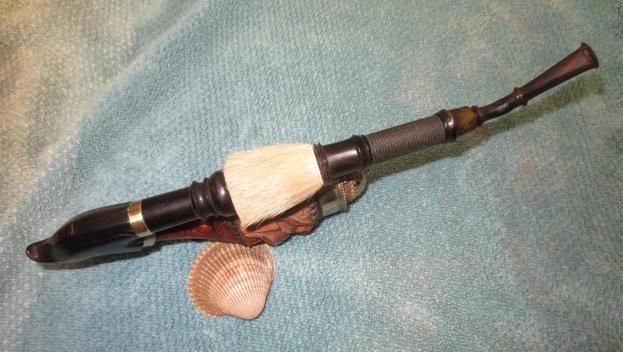
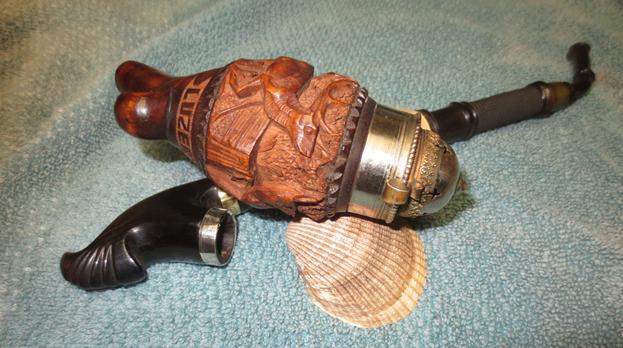
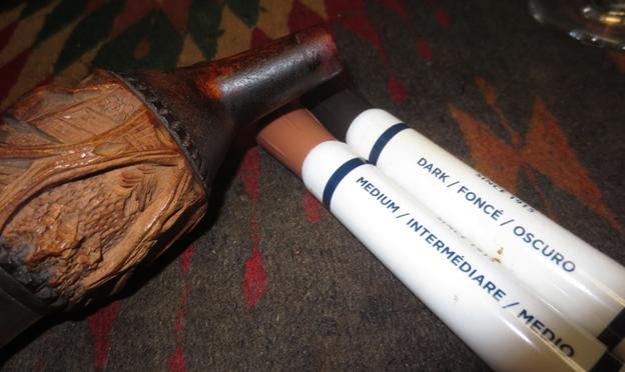 I buffed the base with Blue Diamond on the buffing wheel. I lightly buffed the bowl on the wheel as well. I did not want wax to build up in the grooves of the carving but I wanted the smooth high spots to shine. I buffed the horn portions of the stem and shank to raise a shine. I hand polished the wind cap to remove the tarnish on the cap, the rim top and cap unit on the sides of the bowl using a jeweler’s cloth. The tarnish came off to reveal the silver of the wind cap unit. I put the pipe back together and took the following photos of the finished pipe. I also took some photos of the parts of the pipe. It is a beautiful piece of history. I hope that the owner can speak to his uncle and get a bit more history on this pipe. Either way he will enjoy smoking it now. The draw on it is perfect and it feels good in the hand. I think he is going to enjoy this beauty. I can’t wait to see what he thinks when he picks it up. I need to finish the second hunting pipe so that he can pick them both up.