by Kenneth Lieblich
This pipe is one of those that makes you raise an eyebrow and wonder. I acquired it a while ago in a large lot of pipes and, although it was a mess, it always had appeal and intrigue. Initially, I didn’t know what the pipe was or who made it. Why? Alas, no markings of any kind! It turns out that Steve restored a pipe very much like it about four years ago, but because I had no way of searching for it (I had no brand name), I had to be creative – or, perhaps, I had to be the opposite…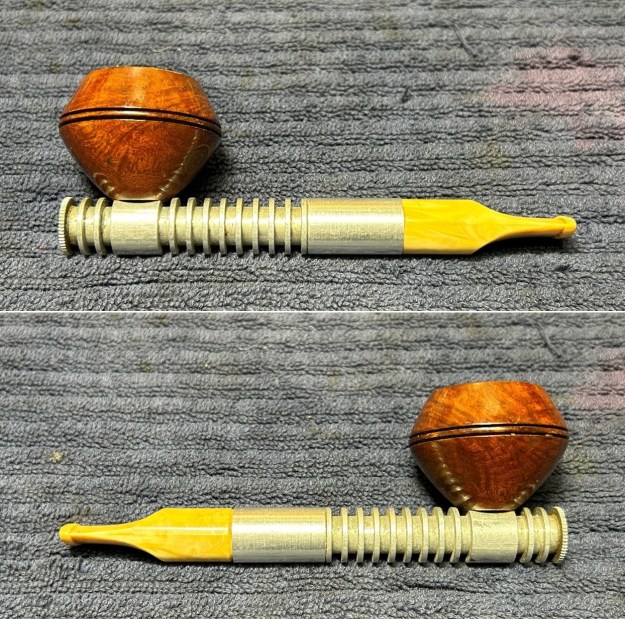
 I went to a very fine resource on metal pipes, a website called www.smokingmetal.co.uk, in hope that I could learn more. I hunted around somewhat randomly for a while but came up empty. Then came the stultifying part. I started going through the entire list of pipes in order to find a match. There were a couple of times when I though I had found it, but it just wasn’t quite right. Eventually, after going through nearly 200 listings, I found it. This is an L&H Stern (aka LHS) pipe and – boy-oh-boy – was I ever relieved. When Steve last restored one of these, more than four years ago, he described it as follows:
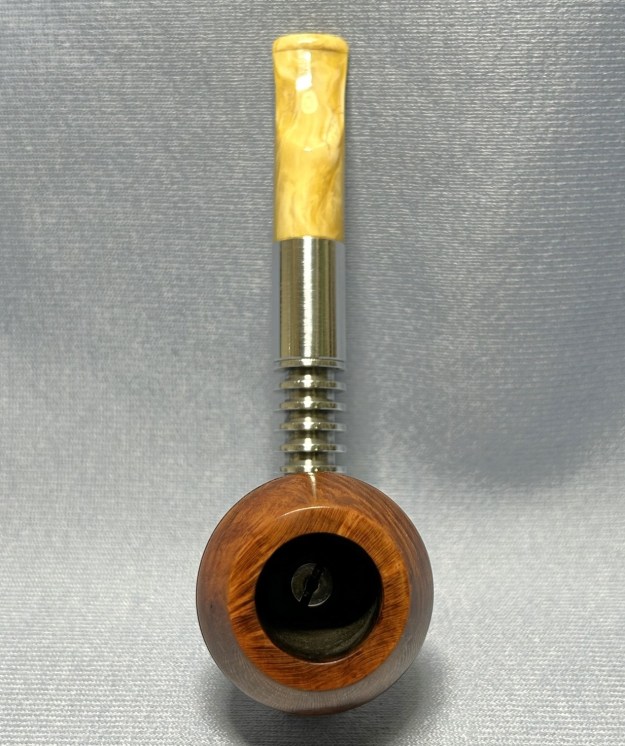
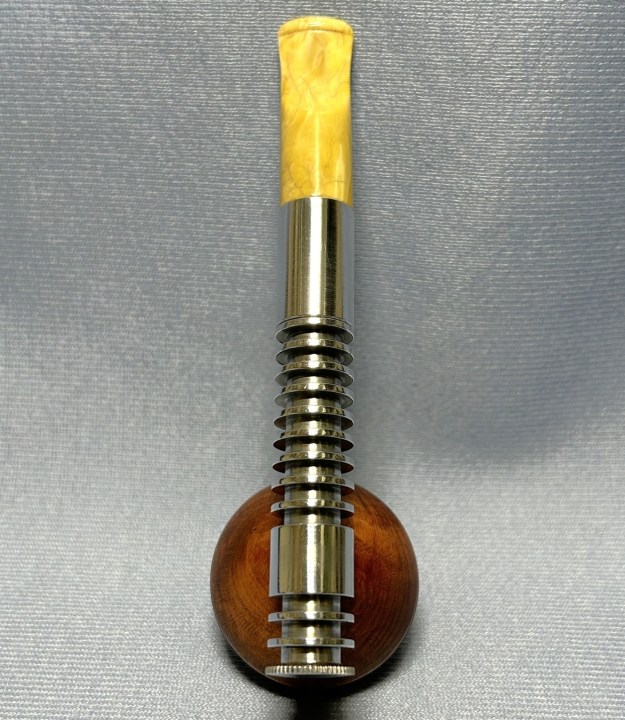
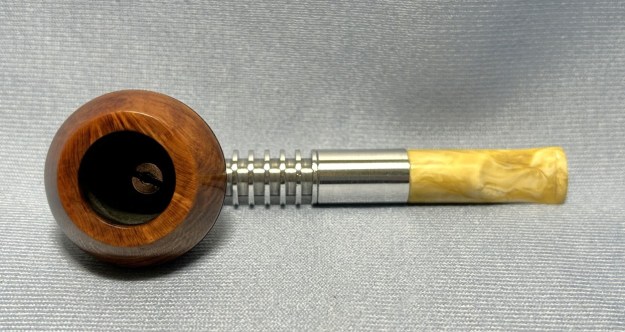
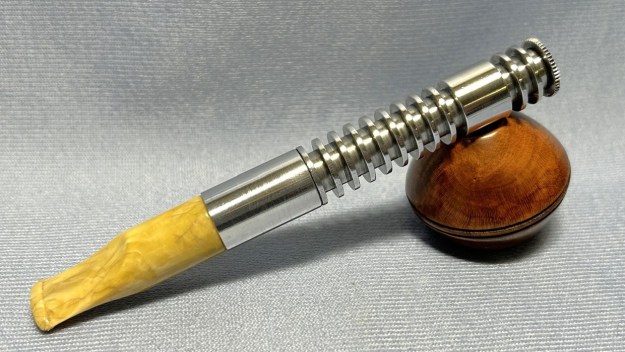
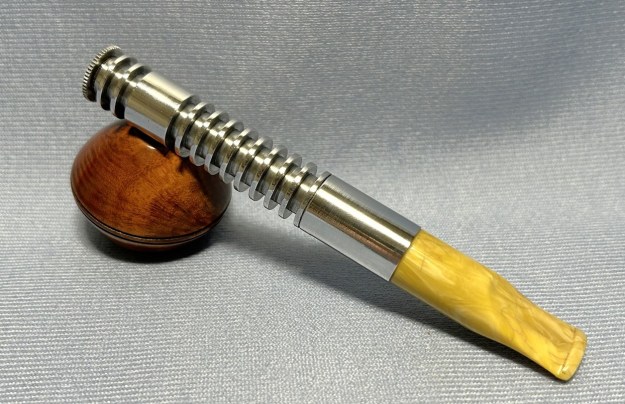
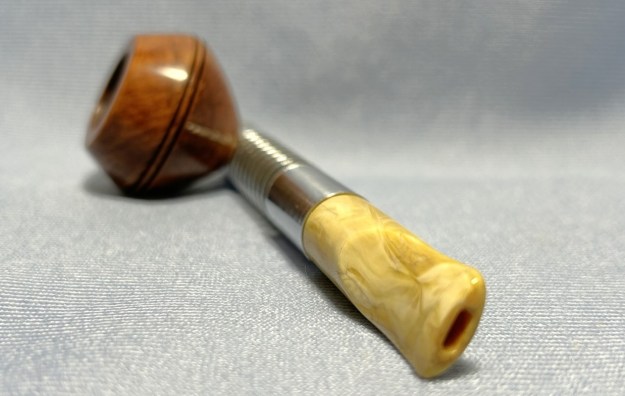
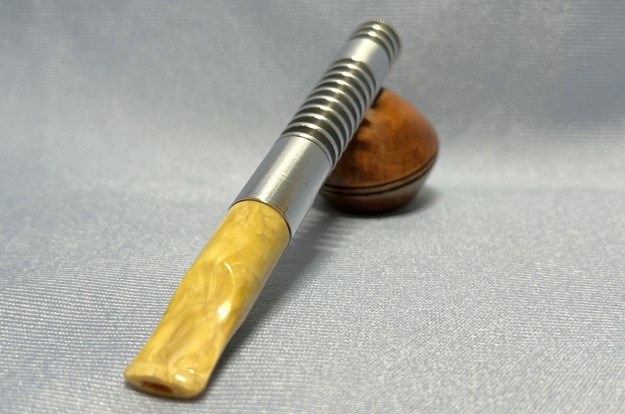
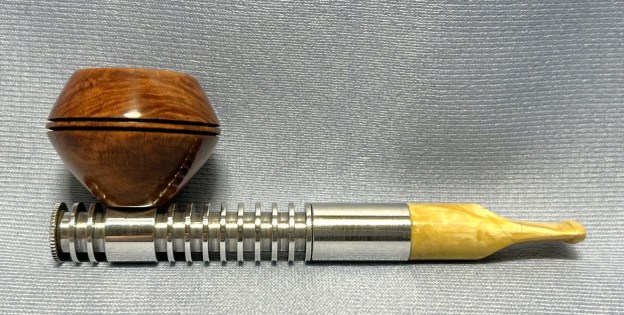
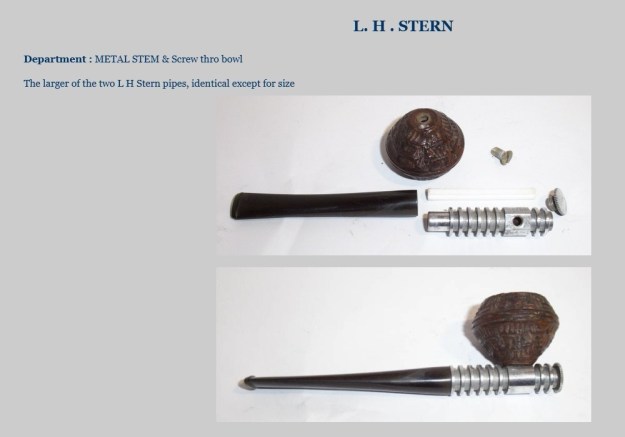
It has a briar bowl with the screw holding it to the top of the metal tube that forms the shank. The smooth finished bowl is either a buldog or Rhodesian bowl with the twin rings around the cap. The shank piece is oxidized aluminum with cooling fins and a threaded end cap that is removable for cleaning. The stem is plastic (perhaps nylon or an early acrylic).
It certainly does have a futuristic look, very characteristic of mid-twentieth-century industrial design. Unfortunately, SmokingMetal didn’t have any information on LH Stern as a company, but they did have these two photos of similar pipes: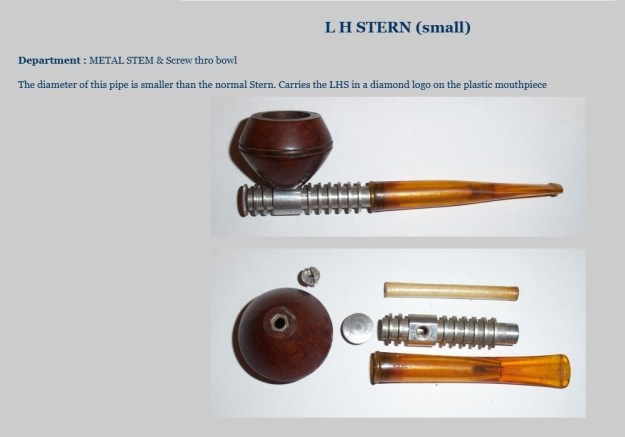
 Pipedia has an article on L&H Stern and I would encourage you to have a look: https://pipedia.org/wiki/LHS. Among other things, they write
Ludwig Stern, a successful pipe manufacturer since 1893 and closing around 1960, reorganized his company along with his brother Hugo Stern, opening a factory in 1911. They named the company L&H Stern Smoking Pipes & Holders. The newly formed company was moved into a six story building on the corner of Pearl and Waters street Brooklyn, NY.
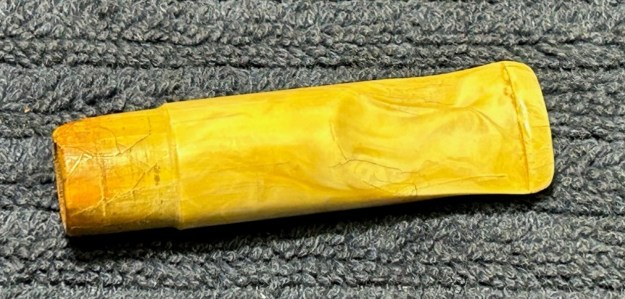
Pipedia also provided a photo of a pipe like mine from a 1946 catalog. It’s difficult to be accurate in dating the pipe, but the late 1940s seems to be a reasonable supposition.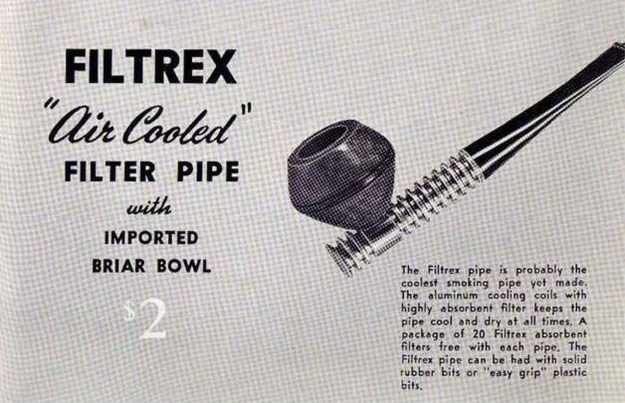 Time to get to work. This pipe was a bit of a mess. The metal was dirty and dull, and the insides were filthy. The stem was worn and had some micro-cracks in it.
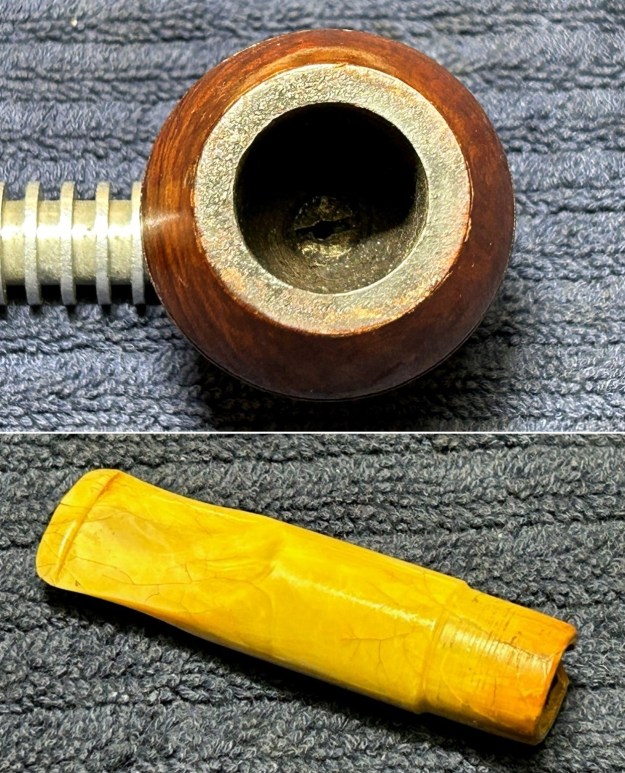
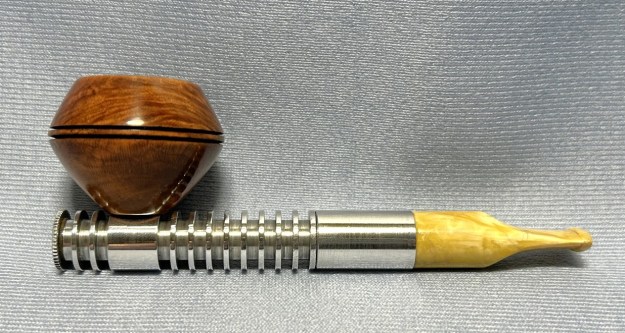
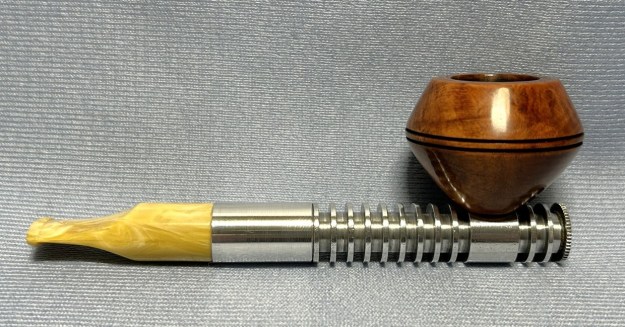
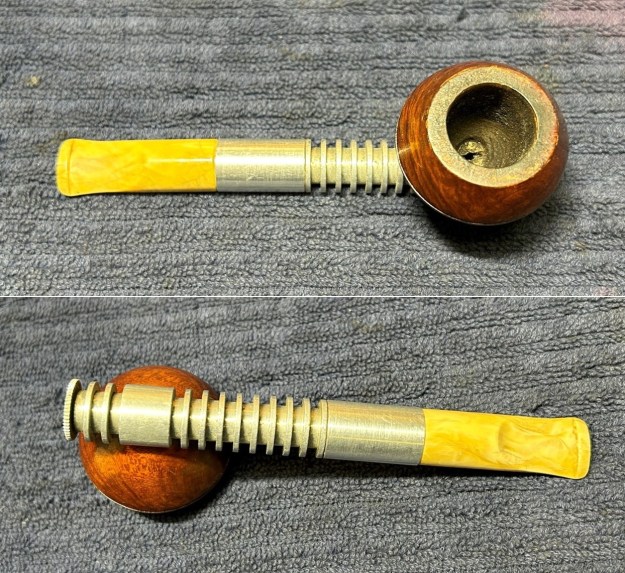
 In the following picture, you can see the pipe as I disassembled it. There are seven pieces, even though the photo appears to show only five. Allow me to explain: there is a stem, a shank (or main section of the pipe), the briar bowl, a nut on the underside of the bowl, a screw that attaches the bowl to the shank, a valve screw at the far end, and a gasket to go along with it.
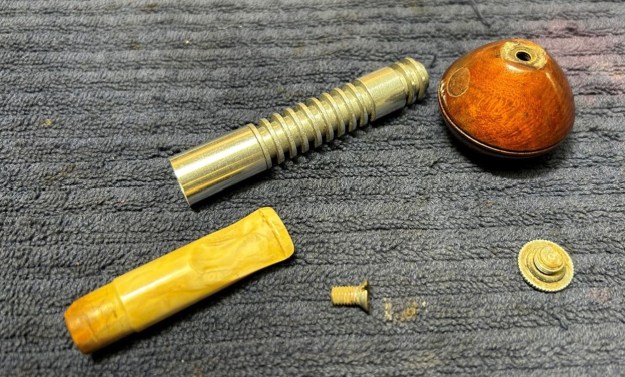 First things first. Before I started working on the stem, I put the metal pieces in an acetone bath. Who knows what sort of horrors might be stuck to the metal and I wanted to get it as clean as possible. I left that to sit for a few hours.
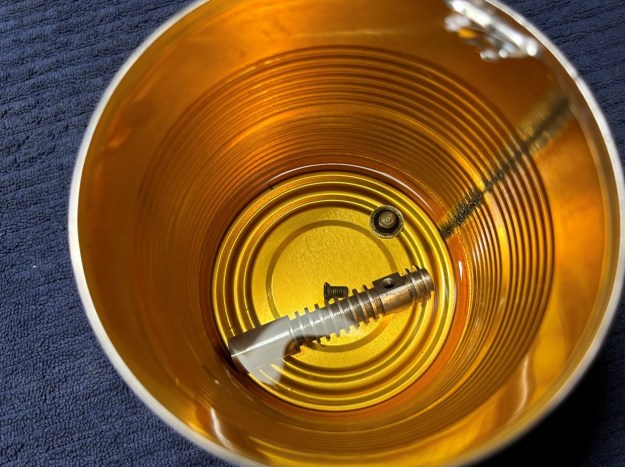 The stem was first on my list. As usual, I wiped the outside down with oil soap on some cotton pads. Then I cleaned out the inside with pipe cleaners and isopropyl alcohol. It was dirty, but not terrible. I’ve seen far worse.
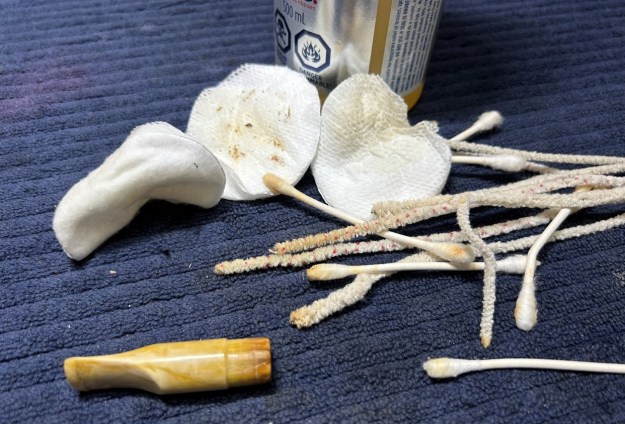 As the photos show, there was a small chunk missing from the end of the stem and, although it didn’t affect anything significant, I wanted to ensure that it was repaired. I rolled up a piece of duct tape and fitted it snugly inside, before making a repair with amber cyanoacrylate adhesive. I used duct tape because the outside does not stick to CA glue.
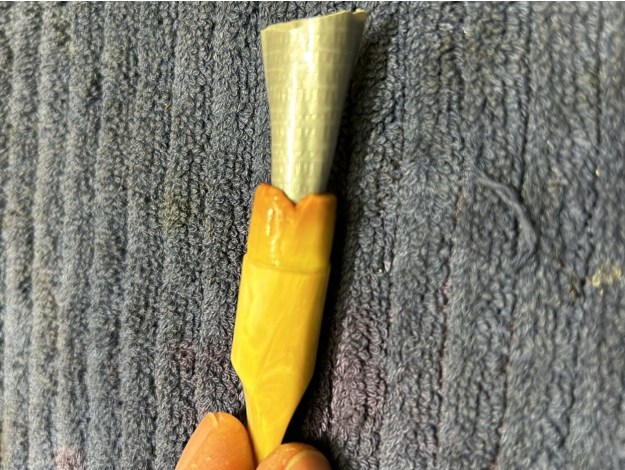
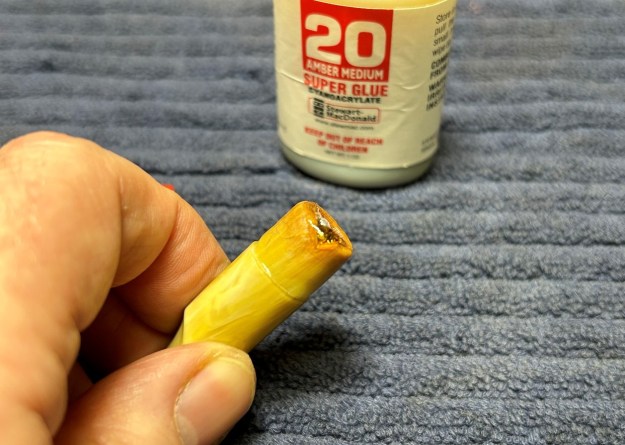 I built up the adhesive on the stem and let it fully cure. At this point, I also added some extra, clear CA glue to the end because the fit was very loose. I then sanded the adhesive with some sandpaper to meld seamlessly into the stem. I then used all nine Micromesh pads (1,500 through 12,000 grit) to smooth the entire stem and highlight the variegated design on the stem. I also used Obsidian Pipe Stem Oil in between each pad scrubbing. I’m not convinced that this did anything, but it’s just what I do!
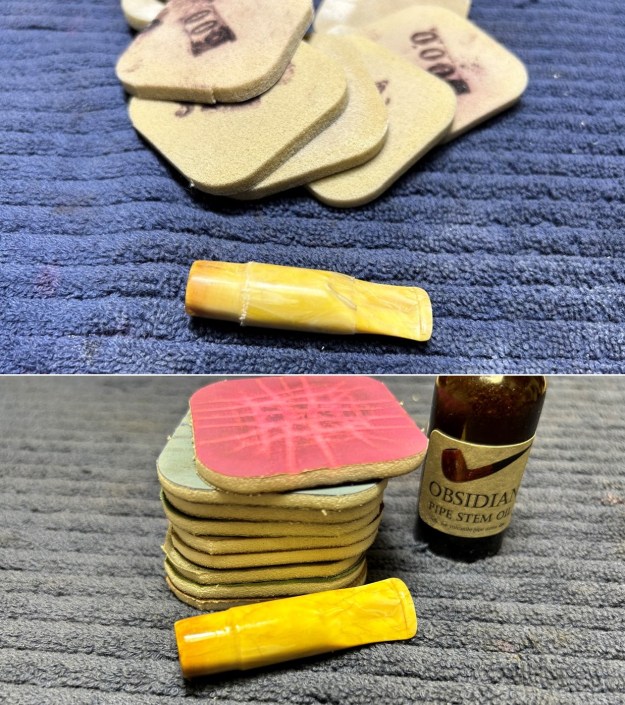
 I yanked the metal bits out of the acetone and wiped them down. Since most of the pipe was made of aluminum, the cleaning procedures were different than usual. The inside of the shank was much more cavernous than normal, too. I started with pipe cleaners and Q-tips for the inside, but that only worked so well. I ended up using some of my usual cleanser to clean the metal shank, including the interior – and I made extensive use of some tubes brushes to get it all really clean.
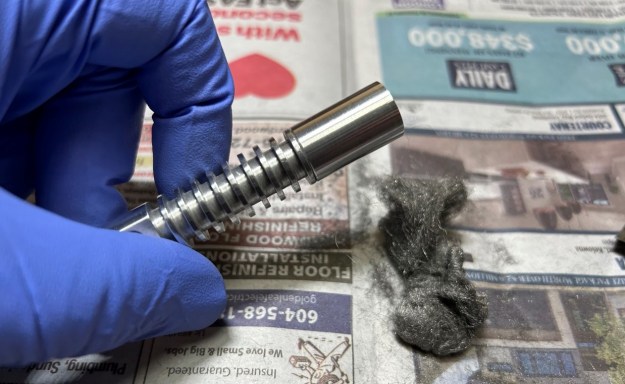
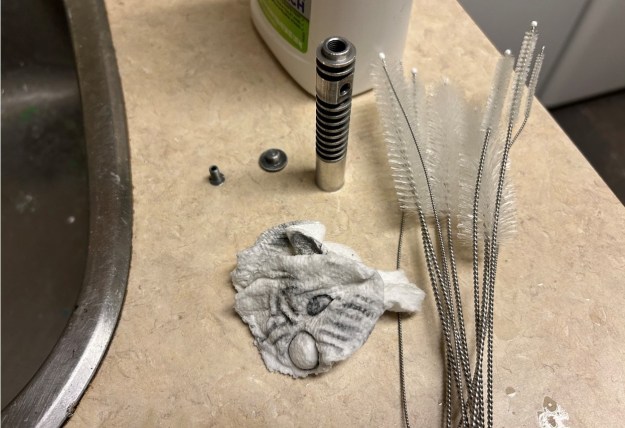 Polishing up the metal was tricky because the cooling fins were relatively deep and would need to be addressed separately. I used some very fine sandpaper to work on those grooves. I then used some 0000 steel wool to give a beautiful polish to the shank. This worked spectacularly well, but it’s such a mess! I laid out some newspaper to catch the debris because it goes everywhere. I did all the same stuff on the two metal screws as well.
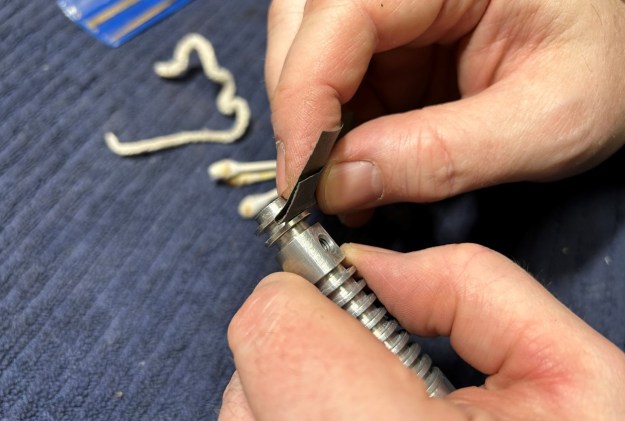
 Now for the briar bowl. This is more standard fare, since I’m working with wood again. I took a small wedge of machine metal and, holding it at a 45-degree angle, gently scraped the lava and carbon off the rim.
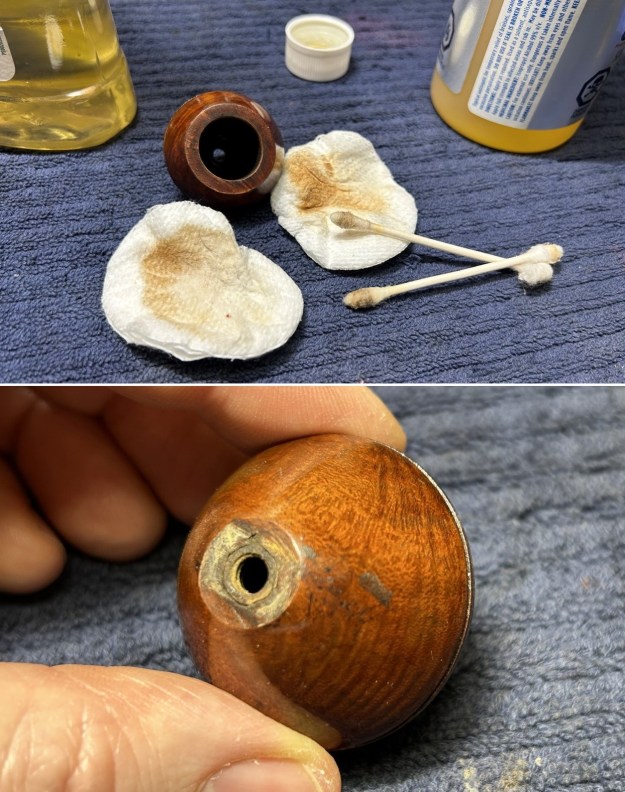
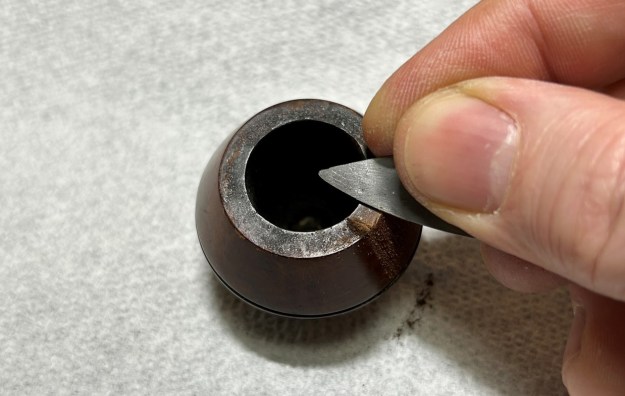 I reamed it with the KleenReem, and 220-grit sandpaper taped to a dowel to eliminate as much build-up as possible. I took the chamber down to bare briar to ensure there were no hidden flaws in the wall. Fortunately, there were none. Then I used cotton rounds and some oil soap to scrub the outside. However, this wasn’t good enough. There were some odd blemishes to the wood and I had to fix that. I went back to the acetone and removed the blemishes thoroughly. I was amazed at how much better the bowl looked after that.
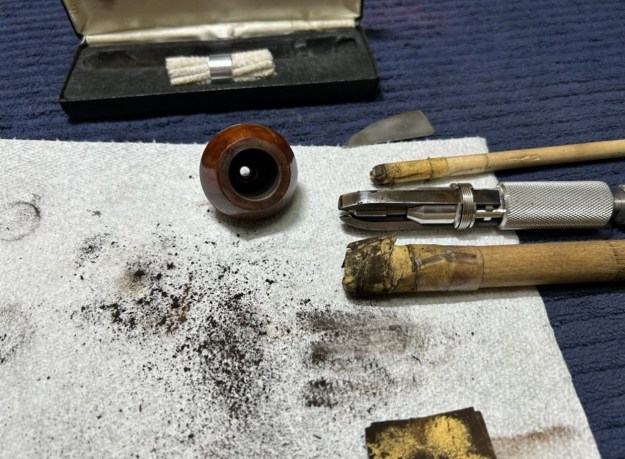
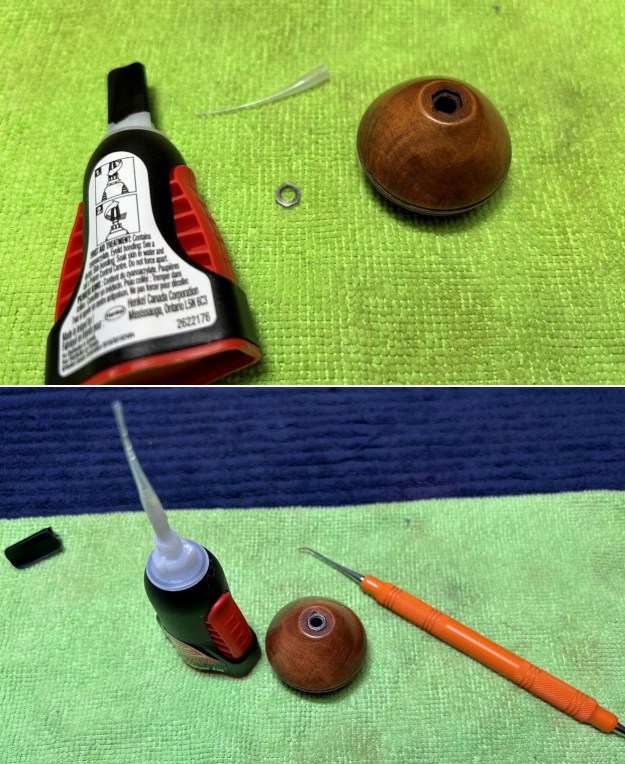
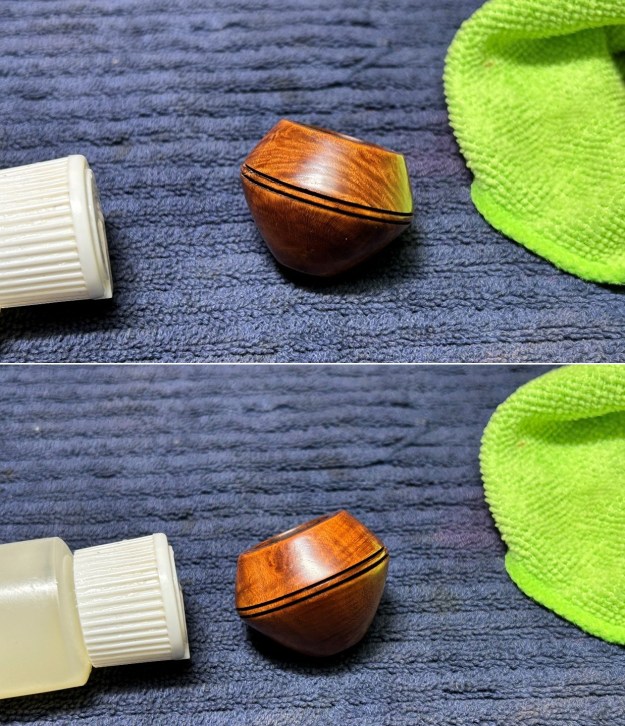
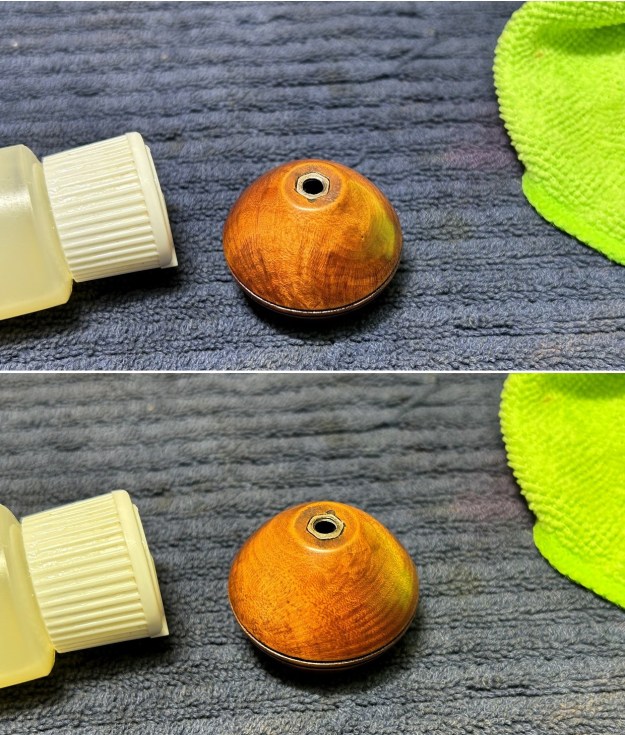
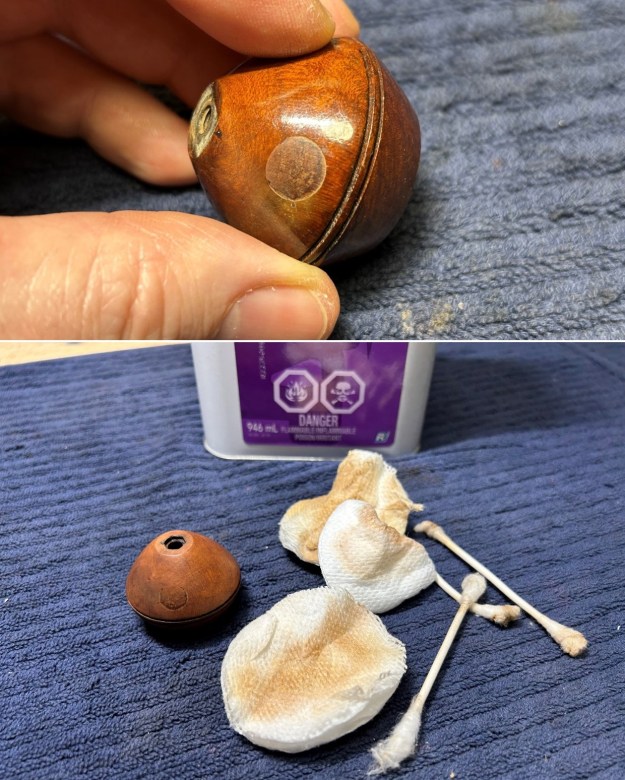 I used the Micromesh pads on the bowl and made them beautiful. As I mentioned earlier, there was a small nut in the underside of the bowl. This popped out while I was working and I cleaned it as I had the other metal parts – then I glued it back in place. I then applied the Before & After Restoration Balm on the wood, as this always makes the briar sing.
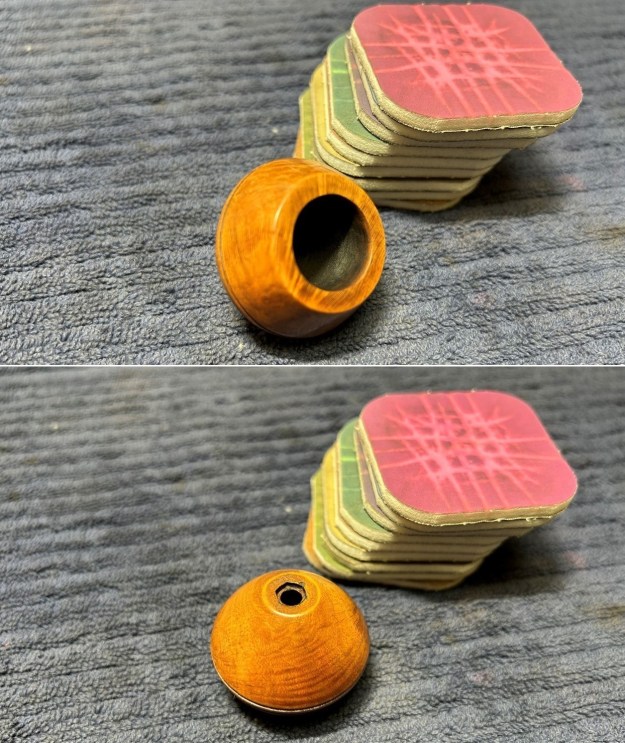
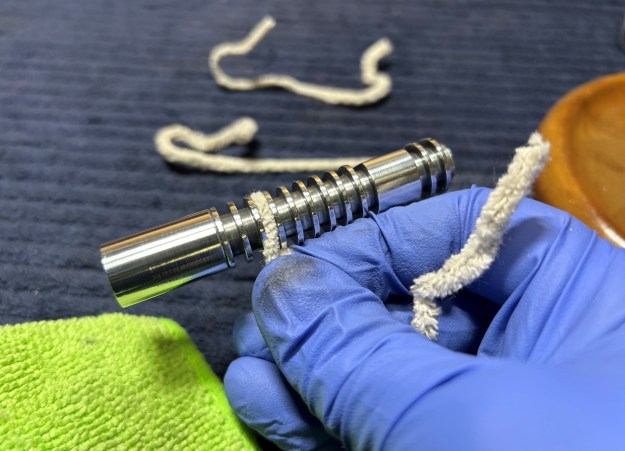
 The buffing procedure was different because of the metal – although the briar bowl did receive the normal White Diamond and carnauba wax treatment. I used Red Tripoli first and White Diamond second to polish the metal nicely. It came out so well! When I went back to my workbench, I cleaned the grooves in the metal with some soft pipe cleaners – just to remove any slight, remaining polishing compound. I then took a microfiber cloth to wipe the metal parts of the pipe to make it shine!
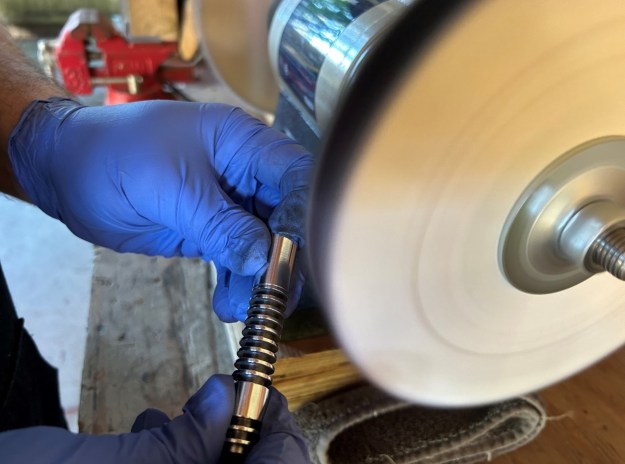
 This L&H Stern looks fantastic again and is ready to be enjoyed by the next owner! I am pleased to announce that this pipe is for sale! If you are interested in acquiring it for your collection, please have a look in the ‘American’ Pipe Section of the store here on Steve’s website. You can also email me directly at kenneth@knightsofthepipe.com. The approximate dimensions of the pipe are as follows: length 4⅞ in. (125 mm); height 1⅔ in. (43 mm); bowl diameter 1½ in. (38 mm); chamber diameter ⅔ in. (17 mm). The weight of the pipe is 1¼ oz. (39 g). I hope you enjoyed reading the story of this pipe’s restoration as much as I did restoring it. If you are interested in more of my work, please follow me here on Steve’s website or send me an email. Thank you very much for reading, and, as always, I welcome and encourage your comments.