Blog by Steve Laug
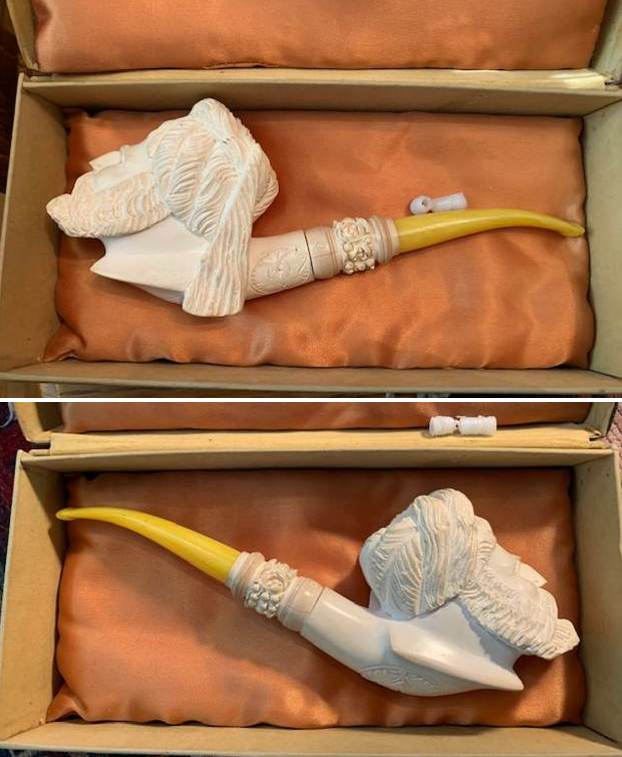
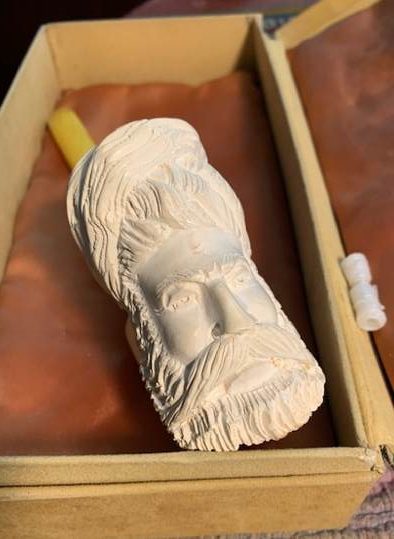
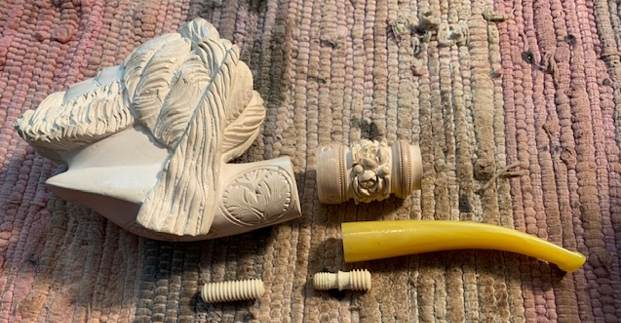
A local friend named Trevor dropped by my porch with a pipe that his boss had given him for his hard work through the years. The pipe had belonged to his boss’s father and he was quite clean to bringing to life so that he could actually smoke it. His boss’s father had never smoke it so it remained an unsmoked Figural Meerschaum in a presentation box. The box had a satin pillow lining and small pillow that sat on top of the pipe. He opened it up and a musty smell emerged from the long unused pipe. In the box sat a carved Meerschaum bowl, a small Meerschaum shank extension and an acrylic stem. The bone tenon in the stem was intact and undamaged. That is not what I was expecting when he had called about a repair on a broken tenon. What had broken was a plastic/nylon tenon that held the shank extension on the bowl and shank of the pipe. A portion of it was stuck in the bowl/shank and a portion of it was in the extension itself. It had snapped off without leaving anything to grab onto to pull it out. The fact that it was a threaded tenon also made this a challenging pipe to work on. Unfortunately I forgot to take photos of the pipe before I started working on it but I have a picture of the parts. You can see the bowl and extension in the photo below. You can also see the bone tenon at the bottom of the photo that goes in the stem. The broken plastic one is between the shank extension and the short shank.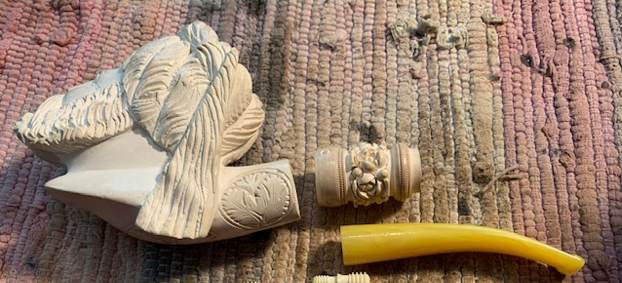 I had run out of bone tenons so I was just going to order some when Jeff called and reminded me that I had boxes of them at his place. I asked him to put together an assortment for me to go through and find the proper one for this pipe. While I waited for them to arrive I put the pipe aside and reflected on how I would remove the broken tenon pieces from the bowl and shank extension. I wrote to Charles Lemon and asked if he had any ideas for a quick and painless removal. Unfortunately he did not. His suggestion was the same as my initial thoughts which was to drill out both portions of the tenon. The threading was problematic if I wanted to keep those parts original but it could be done. However, I was not ready to give up yet on searching for another option.
This week the box of pipes and the bone tenons arrived here in Vancouver. This what he sent me… just a few tenons to choose from. There must be one that would fit in that assortment don’t you think? Now that the replacement tenons were here I had to come to some decisions on removing the broken tenon from the two parts of the pipe. I have often heard people say that they don’t like bone tenons but I have to say this plastic/nylon was far worse than any bone tenon I have worked on in the past.
Yesterday (Friday) I came to a possible solution. I have a set of Spiral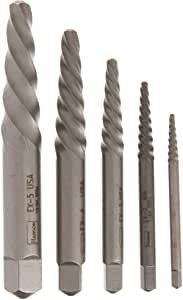 Screw Extractors like those to the right. The idea is to twist them into the head of a damaged screw and then reverse the drill and pull the screw out. I thought possibly I could turn the one that was the same size as the airway in the broken tenon until it bit. Then with a pair of pliers reverse it out. With apprehension about cracking the meerschaum I cast my worries to wind and tried it out. I turned it carefully into the broken tenon in the shank. It bit into the nylon/plastic. I used a pair of pliers and carefully turned the bit to unscrew the broken tenon. It worked very well and within a few minutes the tenon piece was out of the bowl portion of the shank.
I was a little more reticent with the shank extension as it seemed more fragile and there was a small crack on each side of the meer already (at least I am pretty sure it was already there but I cannot be certain as it is certainly there now). I proceeded slowly and carefully with the same procedure and within minutes that piece of the broken tenon was also free of the shank extension. I let out a sigh of relief that it had work and not actually done more damage to the pipe. I took photos of the work and the results and have included them below.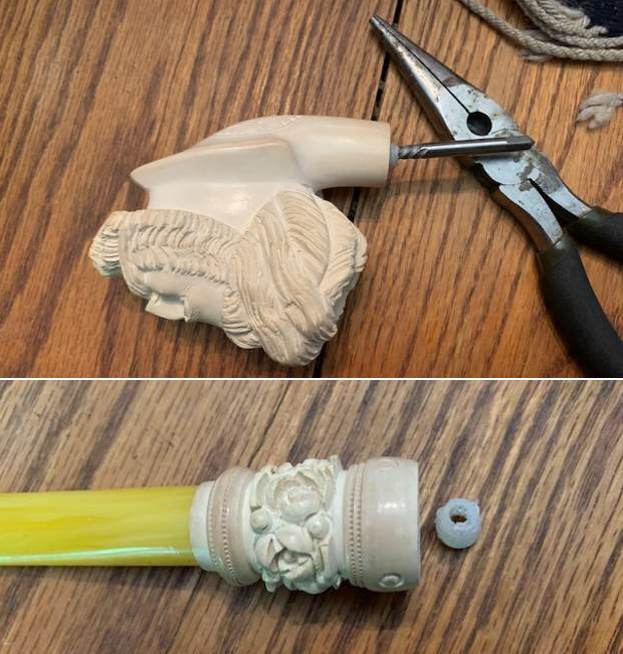 I went through the bag of tenons and found the perfect one. I took a photo of the parts of the pipe to show what I was working with. The tenon on the left is the one that joined the shank and shank extension. The one on the right is the one for the stem and shank extension. The smaller end screws into the stem itself.
 I turned the first tenon into the shank of the bowl to check the fit. The threads fit well but there was a little sloppiness at the shank end that I would need to deal with. You can see how it looks in the photo below.
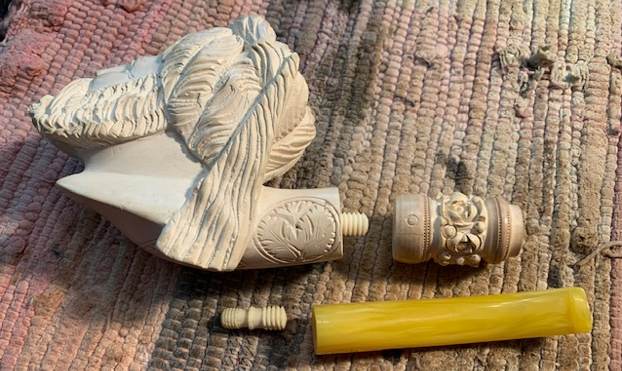 I turned the shank extension on to the tenon and took a photo. You can see the looseness at the joint. If you look closely you can also see the fine hairline crack in the middle of the extension next to the bowl. It is tiny and I repaired it with clear CA glue and clamped it together.
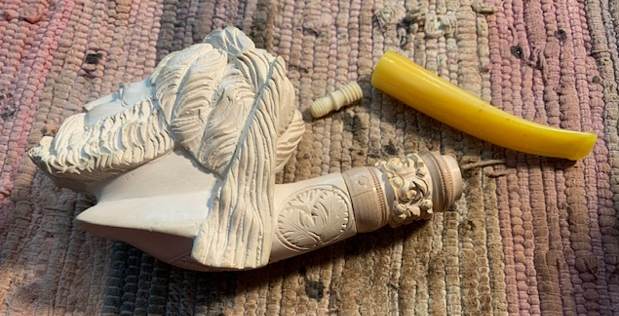 I wrapped the bone tenon with some Teflon tape to assure that there was a snug fit in the shank and help tighten it. I taped the shank extension end with a little less of the to align things on the shank and extension and to snug the fit as well. I also wrapped the end of the tenon that fit in the stem end of the extension as well.
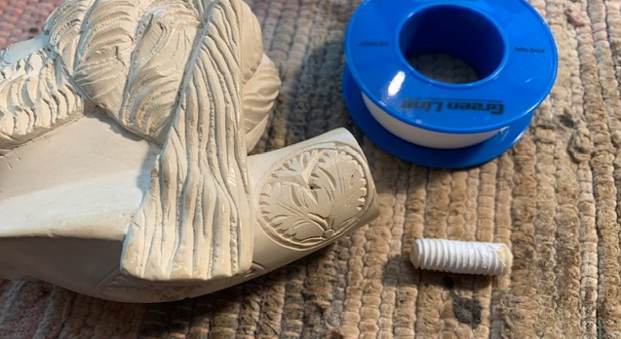
 I turned the stem onto the shank extension and lined it up. It looks good.
 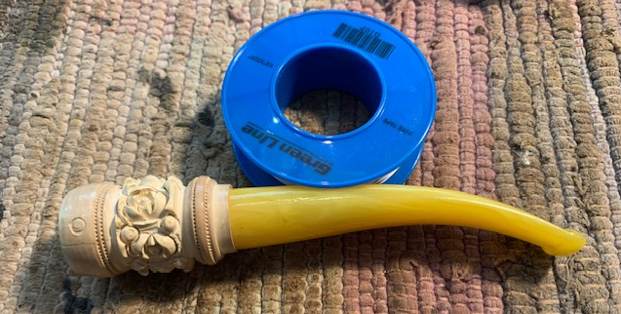 I screwed parts together and everything lined up very well and the draught on the pipe was clear and unobstructed. I took photos of the pipe at this point in the process. It is a nice looking old pipe that is ready for its initial smoke.
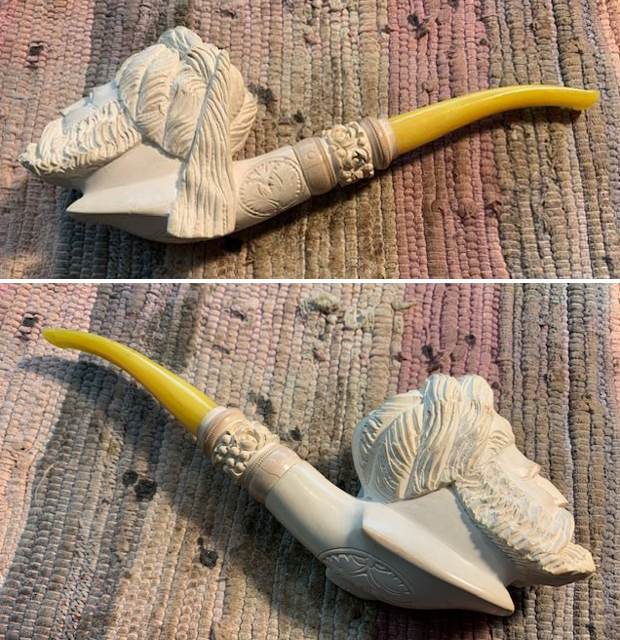
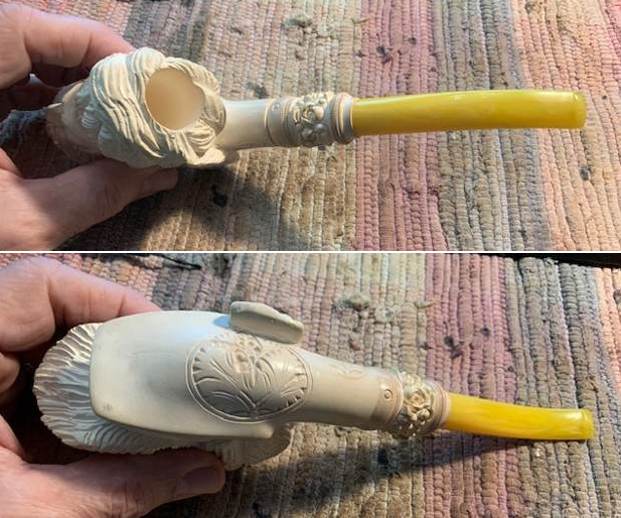 The pipe is ready for Trevor to pick up next time he stops by. I want to check with him about the hairline cracks in the shank extension to see if he remembers them or if perhaps it happened while it was in my care. I am hoping all is well. The cracks have sealed and do not seem to be growing at all. It is really a nice looking old pipe. Thanks for reading along as I worked on the process of this repair.