Blog by Troy Wilburn & Steve Laug
One of the things I love about rebornpipes is that I learn something not only in the refurbishing of the pipes that I do but also in the work of others who contribute here. I am always looking for innovative and untried by me ways to address issues in the pipes we refurbish.While reading Troy’s latest blog on refurbishing the Dr. Grabow Belvedere Apple there was one particular part of it that I wanted to highlight. Most of the steps he takes many of us use when working on estate pipes. But there was one step that was new to me – a different way in which he deals with fills to blend them or mask them into the finish of the pipe. I have found that for me when something like this is included in the ongoing text of a refurb it is easy to lose sight of and it is forgotten. I have never tried his method of masking the fills on the pipe using acrylic paint. I thought I would pull out the process he enumerated from his post and use his photos to show the step by step process that he employed. I wrote and asked Troy if I could do this and he gave his permission. With that all taken care of here is the process. The majority of the text is from Troy’s blog. I have added my comments to his or put them in parentheses following the text.
1. The fills are present in the pipe in hand and they are truly eyesores. I generally pick them out and refill them with my own dark mix or the pipe gets rusticated. But that is not Troy’s tact. He cleaned the surface of the bowl with isopropyl alcohol.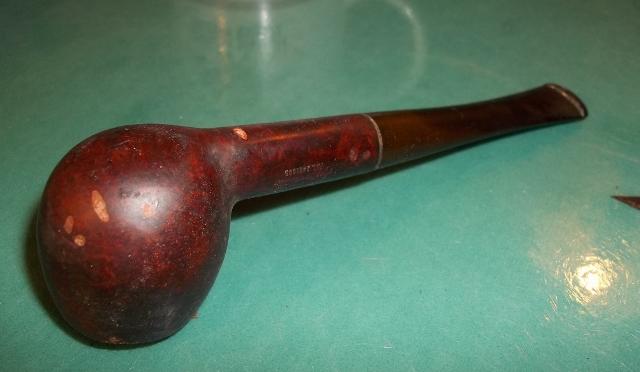
 2. The next steps are taken from his own description of the process in the original blog. Mineral oil is applied to highlight the damage to the bowl and the fills for examination.
 3. I then took some acrylic paint from Walmart and mixed up a color that would help blend the fills in somewhat.
 4. I applied the blended paint to the fills using a small brush.
5. Once all the fills were covered by the paint I set the pipe on the heater for drying.
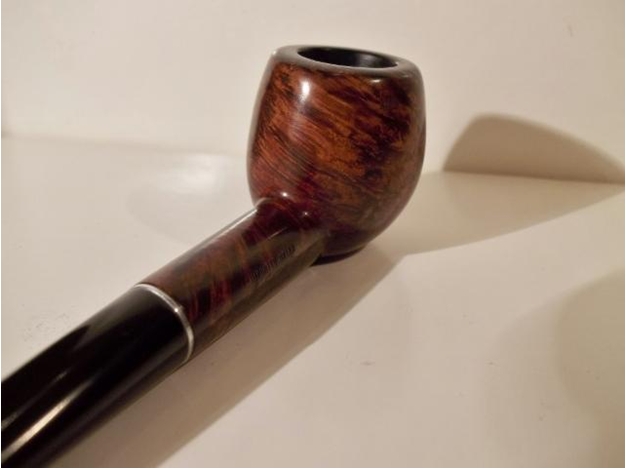
6. After the paint had dried I wet sanded the pipe again with mineral oil and 2500 grit sandpaper to blend out the paint. I sanded the paint very lightly though, as it does not take much to smooth it out. (In the photo below you can see lightly sanded fills. There were a lot of them on this bowl.)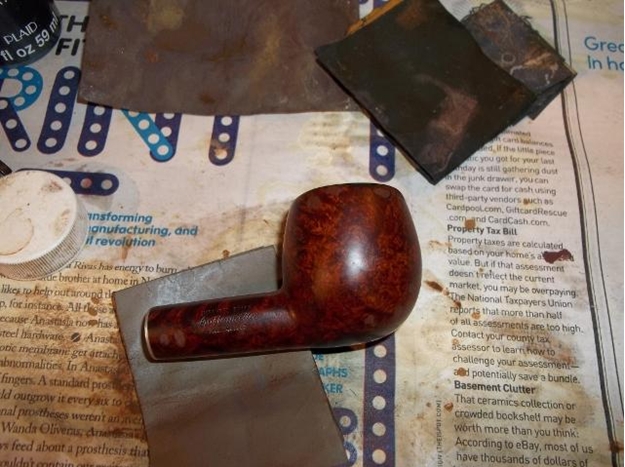 7. I applied a couple of coats of wax to the bowl and shank and after that the fills don’t look too bad.
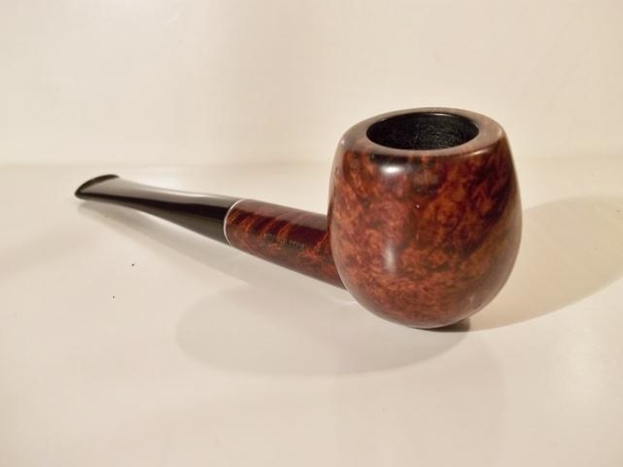
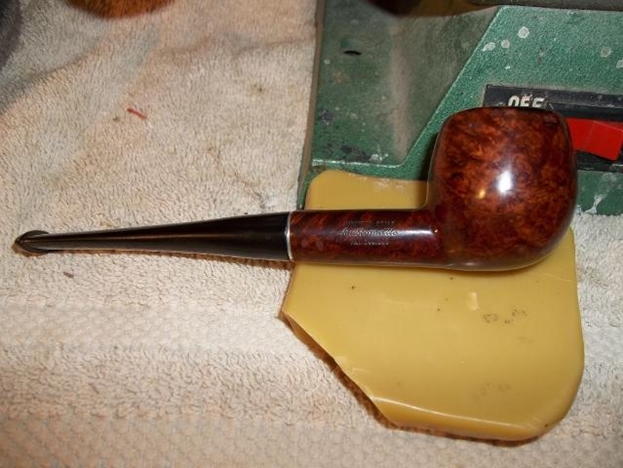 8. I buffed the finished pipe and though the fills are still present they are well blended into the surface of the bowl and shank. (The photos below show different views of the bowl and shank that match those shown above where the fills were very obvious.)
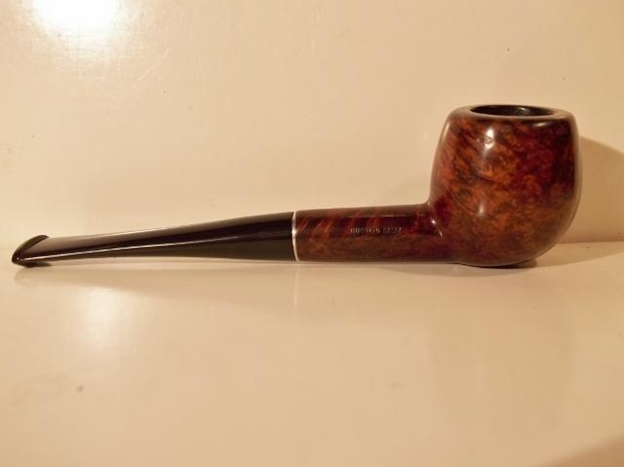


This is al well and good but the fills are still there. I purchased a Bertram off E bay that was the fill express. I sent it out and had it rusticated.
LikeLike
That’s very interesting. The CA glue, clear or black sometimes doesn’t cover/hide them well.
LikeLike
Nice technique that I’ll try on my next bowl.
One problem of using CA glue I find it leaves a shiny spot on the repaired area.
LikeLike