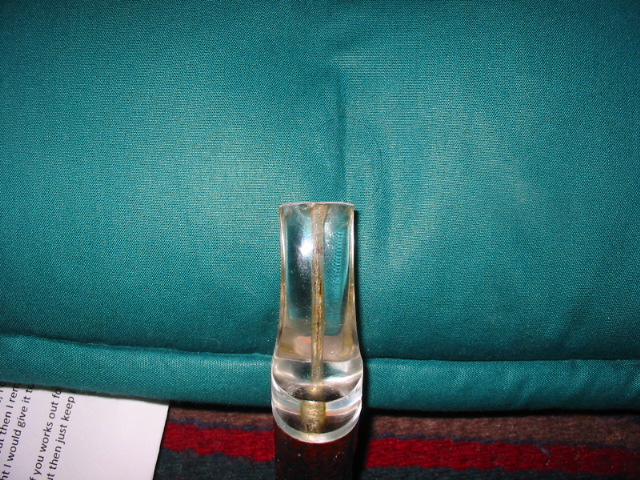
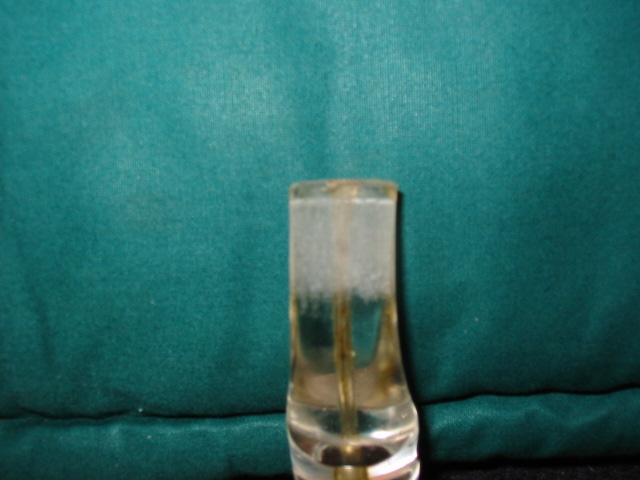
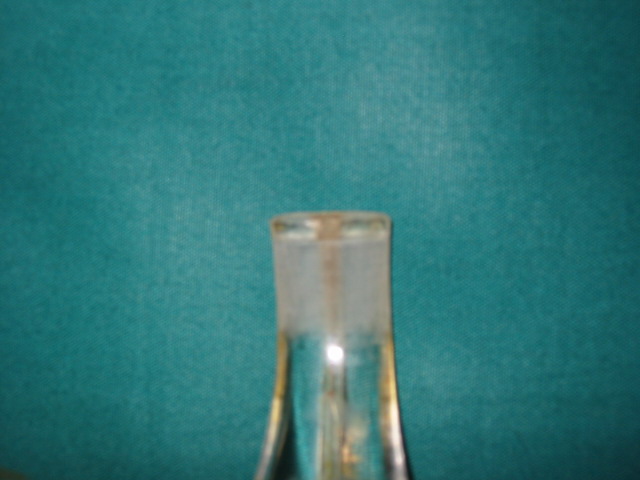
I was gifted this older GBD Prehistoric by a good friend who knows I like working on seeming irreparable pipes. He knows that I enjoy the challenge and that I work to get them back to a workable condition. The stem was truly a mess as can be seen from the photos below. It had bite through holes on both the top and the bottom of the stem. The button was destroyed by the bite marks. This one would prove to be a bit of a challenge. My usual method of repairing bite throughs with Super Glue would not work as the hole was on both sides of the stem. You can tell by the three pictures below the size of the hole. I included even the blurry ones to show the extent of the problem that needed to be addressed.


After carefully picking at the holes with my dental pick I could tell that the surrounding Perspex material around the holes was compromised and pieces continued to come off with very little pressure on the dental pick. It was clear then that I would have to shorten the stem back to the point on the stem where there was solid material to work with. To do this involved cutting off almost a ¼ inch of the stem. The two photos below show the stem after the material has been removed. I used my Dremel with a sanding drum on it to take back the stem to this point. Care must be exercised to keep the finished surface straight and level. But I have found that this is fairly easy to do with the Dremel set at the lowest speed.

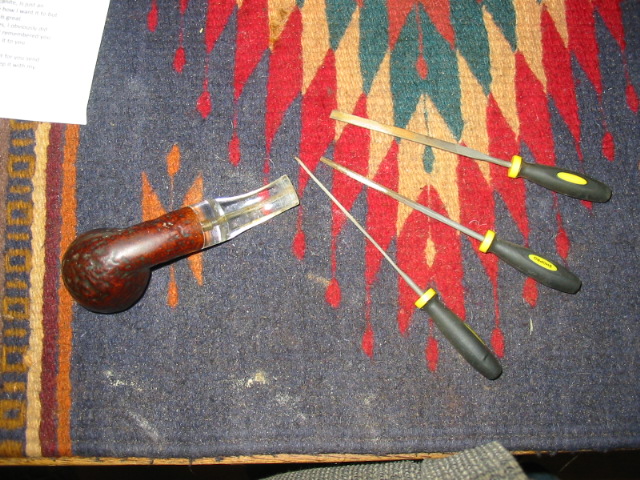
Once the stem is cut back to the solid material a new button has to be carved. I use a series of needle files to do this. Note in the picture below the three files that I used the most. The top one is a flat rectangular one that does a great job on the top and bottom of the stem to cut a straight 90 degree edge into the Perspex. The oval and the round file I used to open the slot in the button to match the shape of the one I cut off. Once the stem has been cut the airway at the end is merely a round hole or as in this case was barely flared. I like an oval slot in the button and the files do a great job in that process. I have two sets of needle files that I use. I clean the teeth on the files with Isopropyl alcohol and a brass tire brush. It keeps them from getting clogged with the Perspex dust.
In the three pictures below you can see the button that has been cut in the stem. I also used sandpaper to thin the stem profile forward of the button to give it the proper slope and give the button some depth. Note the rough surface of the stem is caused by the use of 240 grit sandpaper to accomplish this task. The top photo is the top side of the stem at the button, the second is the underside of the stem and the bottom photo is a profile shot to show the look of the button. When the stem was at this point it still needed quite a bit of sanding to smooth out the new button and shape the stem. The edges in the profile are a bit sharp and needed to be rounded to match the part of the stem that remained untouched. I rounded the edges with the 240 grit sand paper to match the shape of the stem.
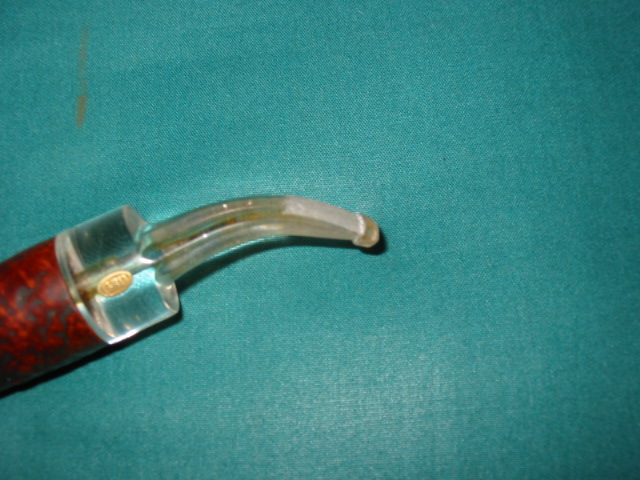
The next two photos below show the stem after that reshaping has been done. I then had to polish the stem to get it back to it clear sheen. I started that with some 400 and 600 grit wet dry sandpaper that was used with water to give it the bite to cut through the scratches of the files and the sandpaper. The first photo shows the pipe next to another GBD Rhodesian for comparison sake. You can see in that photo how much of the Perspex stem I removed to cut the new button. The second photo shows the shaping and flow of the stem once I have finished with the polishing with the wet dry sandpaper.

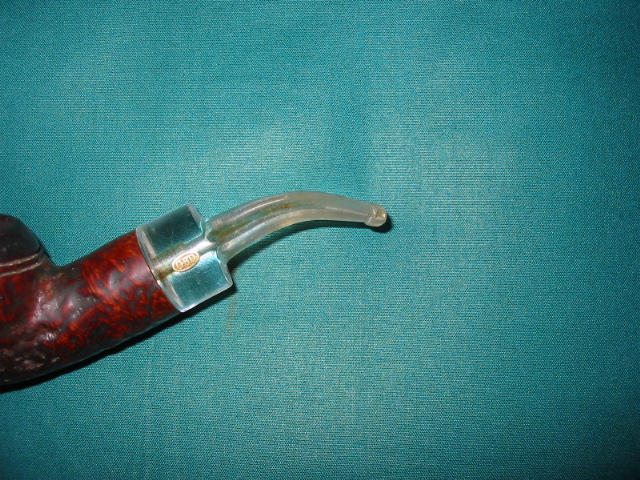
The last three photos show the finished pipe. The bowl was polished and the polishing on the stem was done with the micromesh pads through the 1500, 1800, 2400, 3200, 4000 and 6000 grits soaked in water to facilitate a good polish. Each grit level of micromesh took out more of the scratching that remained after the sanding. By the 3200 grit the surface was smooth and shiny. The last two grits gave it a thorough polishing and then I finished it on the buffer with White Diamond and carnauba wax.


I work a great deal with perspex and have found that with care even clear perspex can be joined invisibly by solvent welding using dichlormethane. The trick is to grind the joined surfaces absolutely flat before joining them and being sure that the pieces don’t move at all when you press them together. Then leave them for at least a month for the solvent to totally evaporate, The solvent diffuses quite a way into the plastic and if you try to work it too soon you find that the plastic near the joint is softer and undercuts when you try to polish it.
LikeLike
I was not sure either Al when I started. It came out really well. Since then I have reworked many stem button and found it to be getting easier with each one I do. Thanks for the comment.
LikeLike
Wow, that is a memorable save and a pipe very much worthy of the effort. I would not thought a new button could be shaped so nicely on a cut off stem. Well done!
LikeLike