Blog by Steve Laug
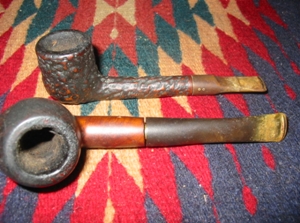
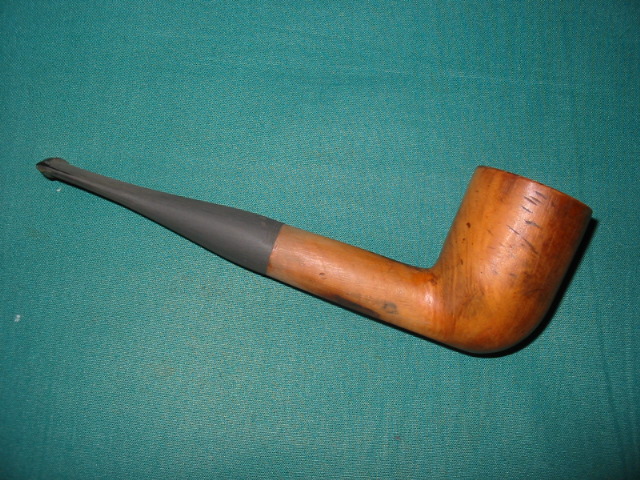
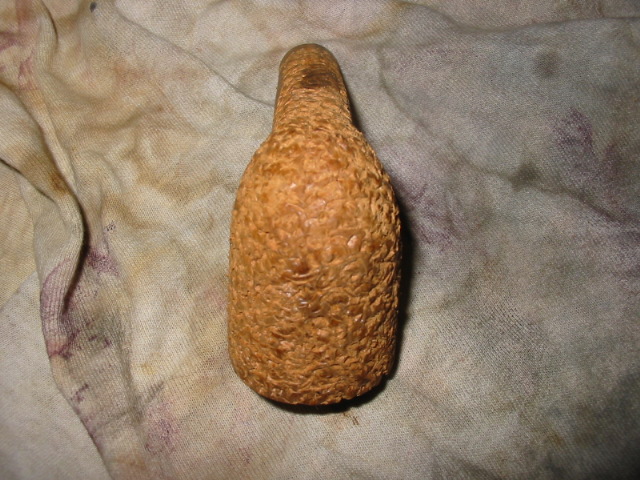
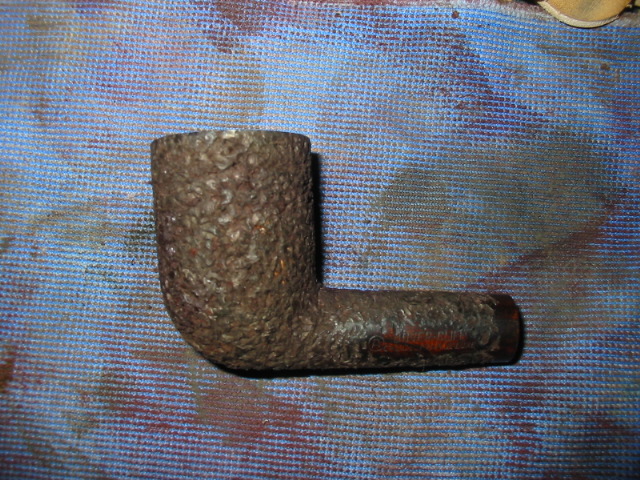
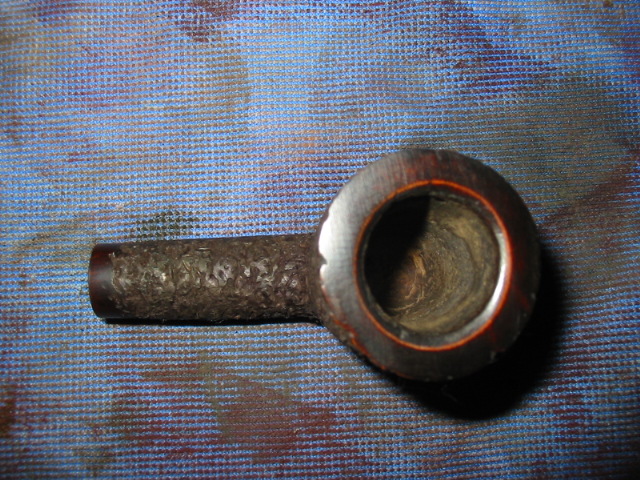
I finished cleaning up a pipe bowl, turned the tenon and fit the stem on it this afternoon, but then I was stuck. The pipe is stamped D in a circle and next to that Dover Cliff, it had a pleasing shape but was almost entirely without grain. I know this sounds impossible to most of us, but truly there was very little grain even visible on the bowl or shank. Rather, it was a piece of briar that was made up of bald spots connected by a few straight grains. It also had three significant burn marks – on the bottom of the shank, the top of the shank and on the rim. Added to that problem, there were probably 20 or more fills per side of the pipe that looked like scratches but were actually filled with black putty. They are visible in the sanded and clean bowl pictured below. The front and the back of the bowl also had fills. Interestingly, the rim was without fills as was the shank. The rim was chamfered inward toward the bowl but had burn marks all around the bowl as if it had been lit with a torch. My question was what to do with the finish on this pipe. I knew from experience that a coat of stain would only highlight the many flaws rather than hide them. The burn marks were significant enough that even sanded, they had permanently coloured the wood. No amount of stain would hide the burns on the shank and the rim. I could give it a solid stain of black or brown but I was not interested in using a solid body stain. That left me with two options – put it back in the box for another day or rusticate it. I decided to rusticate it and then stain it.


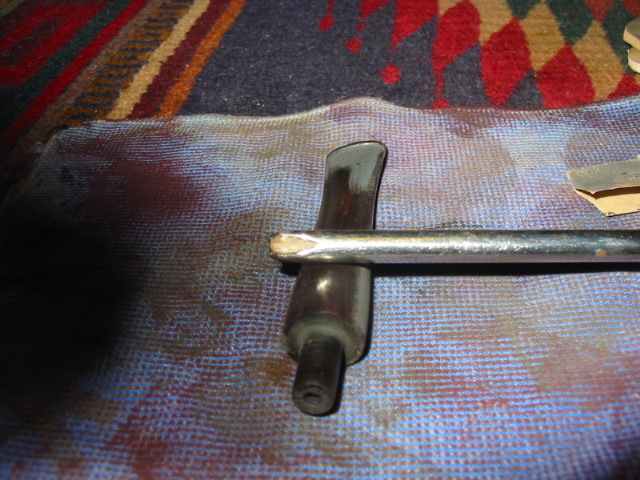
I took out my rustication tools and looked them over – the fistful of nails and the florist frog, (I have shown these both in a separate post on rusticating) and decided it was time to try something different. I took out my Dremel and put on the cutting/grinding wheel and took a Philips screwdriver and ground the tip off of it. Once I had ground the point off I used the grinding tool to cut a trench both ways across the remaining + to create what I was looking for. Once that was done the screwdriver was left with four points on the head of the shaft. These four points were sharp teeth. I polished the steel with my buffer and my new tool finished. The great thing was that it even had a comfortable handle which would allow me a bit of creature comfort as I pushed it into the briar and twisted it to rusticate the wood. It also would provide a very different rustication pattern in the briar than my other tools. It would produce a very rough rustication pattern that should be interesting on this particular pipe.


I decided to take my time and document the process as I worked on the pipe. As I worked on each step of the rustication I took photographs and wrote down what I had done. The tool worked very well and was a good fit in the hand. The sharp teeth cut deeply into the briar and left a rough finish to the surface of the briar. The process went quickly. It took me about a half hour to complete what turned out to be the first level of rustication. I left the rim of the pipe smooth and left a smooth rectangular area on the shank where the stamping remains. I decided to also leave a smooth band around the shank where it joins the stem. I find that it makes it much easier to match a stem to the smooth surface than to a rusticated chipped surface. All of these smooth spots stand out nicely. To protect the shank and create a band near the stem I wrapped the shank with cello tape up the shank about ¼ inches. The tape would protect it from the points of the tool and provide a straight edge for me to work against. I also put a strip of tape over the area where there was stamping on the shank to protect it. I avoided the rim as I rusticated the pipe so there was no need to tape it off. One of the great features of this new tool is the small tip size that allows me to rusticate very closely to the shank/bowl junction and up to the top edge of the bowl. It also was very easy to work near the band that I was creating at the stem/shank junction. The ease of control made this a great tool to use.
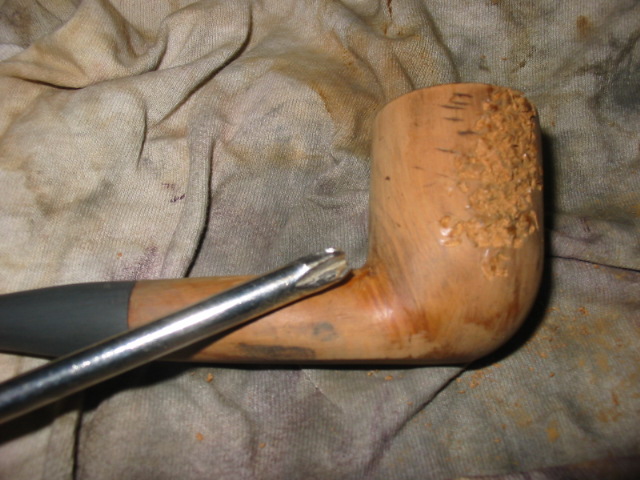

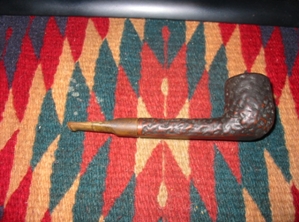
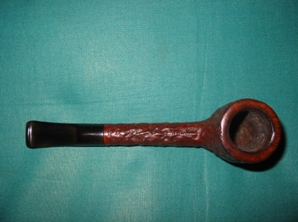
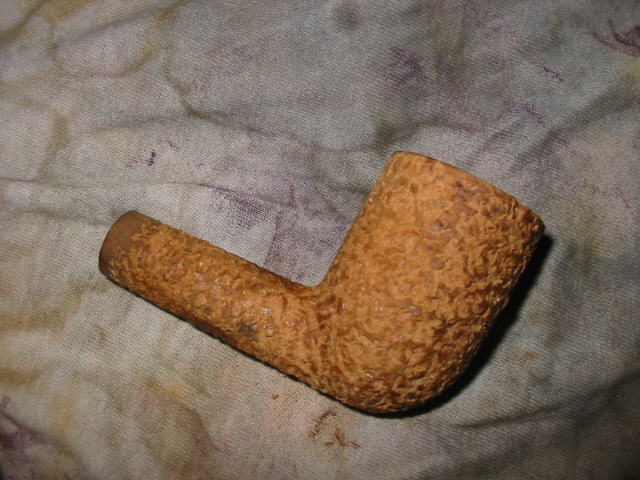
I worked my way down the sides of the pipe from top to bottom. From there I moved to the shank sides from the bowl to the stem and the top of the shank from the stem to the bowl. I used the same pattern on the other side of the shank around the stamping and then on the underside of the shank and bowl. Once I had it completed it that far I took a few pictures and then proceeded to rusticate the remaining side of the pipe and back end at the shank/bowl junction. I finished the rustication with working on the front of the pipe. Once the pipe was fully rusticated the burn marks were pretty much obliterated and were definitely less visible. The many fills in the bowl were hidden under the rustication. I used a wire brush on the pipe bowl to knock of the loose chips of wood before I gave it an initial coat of dark brown stain. I flamed the stain to set it deeply in the briar. It burned with the signature blue flame for quite awhile setting the stain in the deep grooves. Once it was dry I laid it aside for a bit and then took it to the buffer and gave it a light buff with red Tripoli. The finished pipe still needed more work in my opinion before it would be acceptable.

I took time to look over the pipe and handle it to get a feel for the rustication. I like a random look to the rustication rather than a repeated pattern. To me it looks more natural once it is finished. After this inspection I decided to give it a second level of rustication with the tool to make it even more rustic and more random in its look. This second rustication was much easier to do and took less time. One of the benefits of having the brown stain on the bowl is that the new places I rusticated were raw and stood out clearly. I could easily see where I needed to do more work on the bowl. I worked my way around the bowl and shank again. I checked to see if it was in keeping with the look I wanted it to have and gave it a few more twists of the tool. Now it was ready for the finish stain.


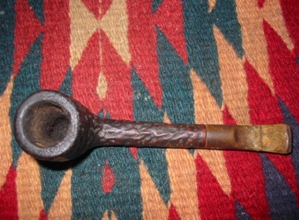
Before I stained the pipe I needed to do some work on the rim. To address the burned areas on the rim the best decision was to top the bowl. It was not only burned but also worn around the inside edge of the rim and that needed to be addressed. I sanded in a slight bevel on the inner rim to restore the roundness of the bowl and give it a finished look. I re-stained the rim with the dark brown and let it dry before I re-stained the whole pipe with oxblood stain applied with the wool dauber that came with the stain. The pipe soaked up the stain nicely. I stained the top of the bowl and the smooth portions on the side of the shank and the band around the shank near the stem. I let it dry for several hours before I polished the smooth portions. This drying also revealed some places on the bowl that needed a bit more stain to adequately cover them. So I re-stained those portions that showed bare wood in the crevices.


I used the micromesh sanding pads (1500 through 6000 grit) on the smooth parts of the pipe to polish them. Once that was done I waxed the smooth portions. Then I buffed them with a soft cloth to give them a bit of contrast to the rusticated portions. I decided to leave the rusticated part with a matte finish. The pipe is finished in terms of the rustication and the staining. I will need to let the oxblood stain dry overnight before it is thoroughly dry. The bowl feels amazingly good in the hand. The tactile nature of the rustication really gives it a rough yet pleasant feel.

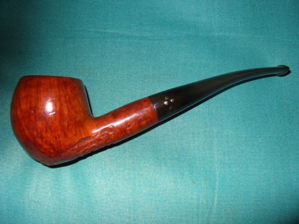
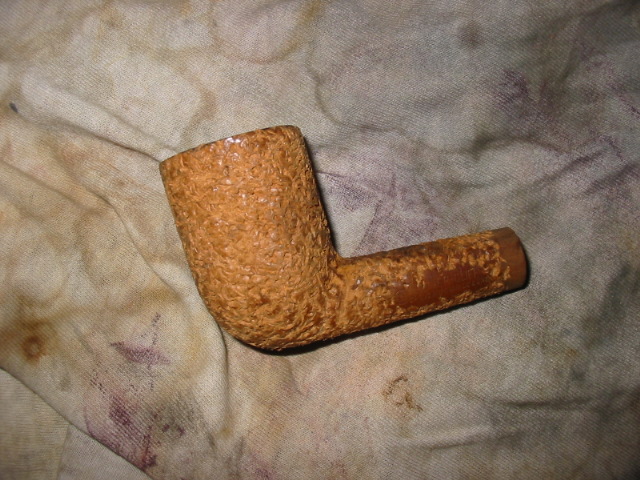
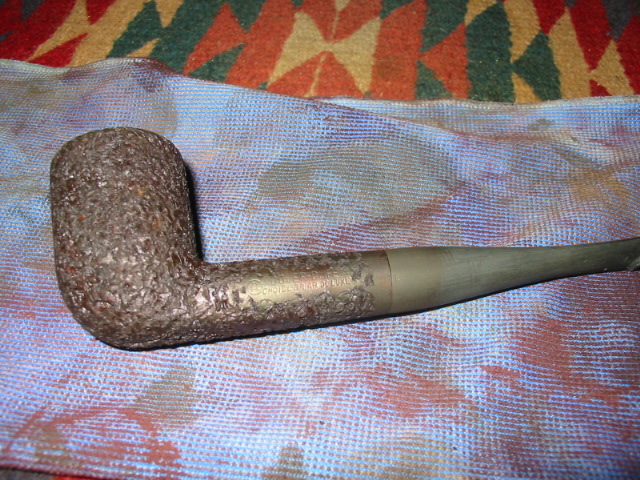
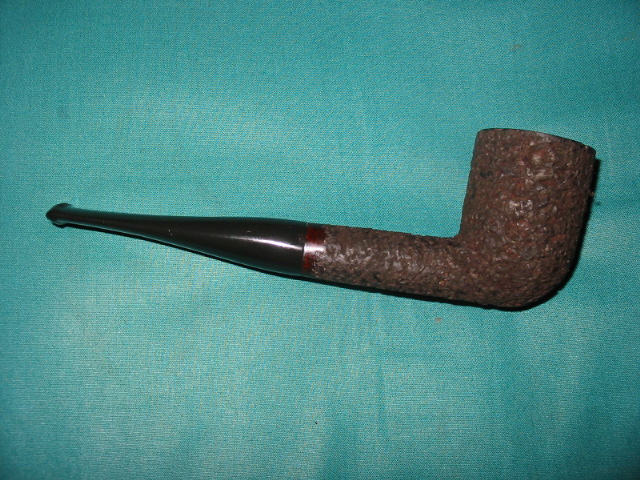
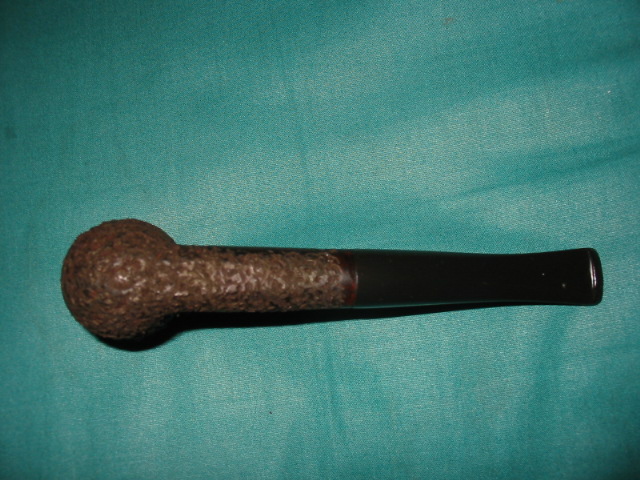
The bowl is finished and ready for the stem. The above pictures give you the idea of what it looked like once it was finished. The contrast on the rim and on the smooth parts of the shank added a nice touch and highlighted the rustication. In person the pipe is a deep rich oxblood/cordovan colour that is not captured in the pictures above. The pits and crevices actually show the red and give depth to the rusticated surface. I gave the pipe one more once over under a bright light and touched up spots on the finish that did not get a good coat of the stain. I then went over the smooth surfaces with another coat of wax and hand buffed them before setting the pipe bowl aside for the night.
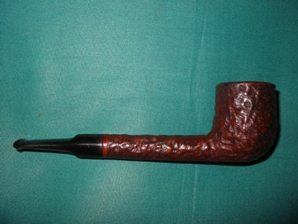
I then tackled the stem to remove scratches that showed up in the bright light. I used some 240 grit to take out some of the deeper grooves and some tooth dents in the reclaimed and reworked stem. My method is to remove the deeper grooves with the 240 grit and then use the 400 and 600 grit wet dry sandpaper afterwards. I find that if I use those first it seems to only polish the grooves rather than remove them. The 240 grit gives a solid base to work with in the polishing that takes place with the wet dry sandpaper and then the further polishing with the micro-mesh pads. I finished the polishing with 1500, 1800, 2400, 3200, 4000 and 6000 grit micro-mesh that was kept wet in a bowl of water that I kept by the work table. I changed the water between grits to keep it clean and to ensure that I was not polishing the older grime into the stem. The stem came out beautifully and was ready to be put back on the pipe while it rested overnight.
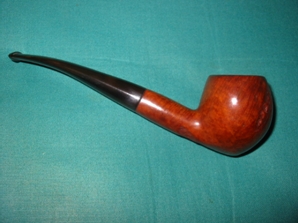
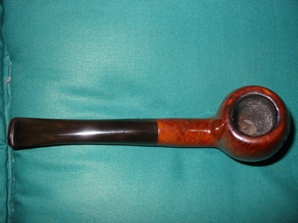
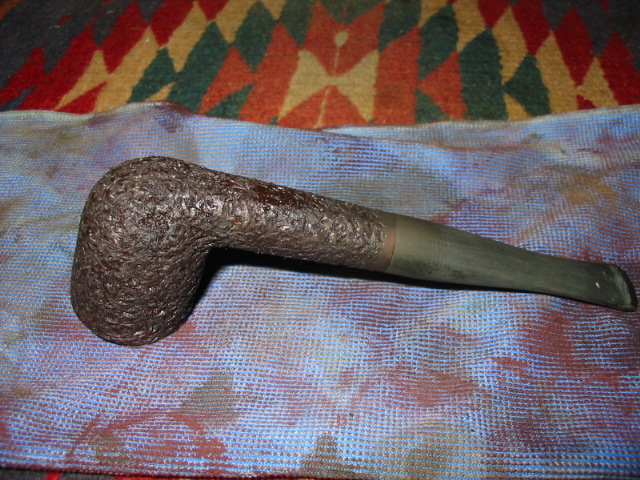
The next morning I polished the stem and the smooth areas of the pipe and rechecked the rustication to make sure that all areas were covered by the stain. I took the pictures below after it had been polished and was ready to smoke. The new rusticated finish creates a far better looking pipe in my opinion and provides a very tactile pipe for the pipe smoker who likes rusticated finishes. The new tool worked so well that I will have to sort through my box of bowls to re-stem to see if there is another pipe that could benefit from this kind of face lift. Thanks for looking.


Steve Laug
June 04, 2012