Blog by Steve Laug
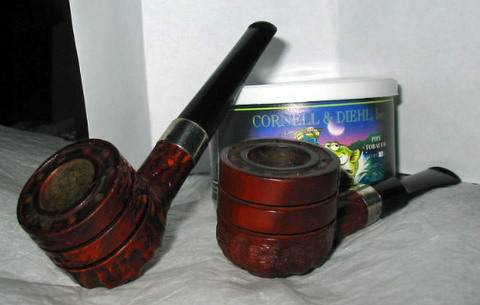
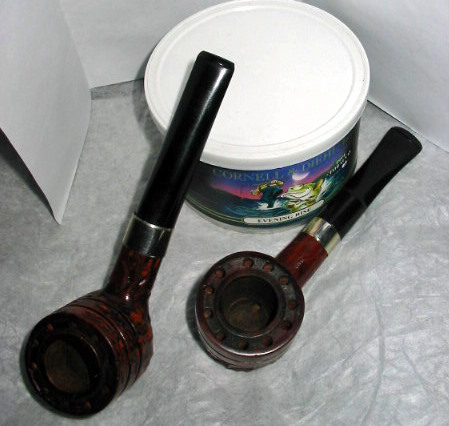
I picked this old ceramic double-walled pipe up at an antique shop. The thing that attracted me to it was the amber stem. Or at least it appeared to be amber. The stem was taped to the shank with scotch tape and the bowl was badly caked with thick tars and carbon. The outside of the bowl was spotty with grime and grease. There were fingerprints all over the grime. The stem was blackened on the inside and showed stain through the airway and button. The bowl was cream coloured porcelain under the grime and had a Delft blue Dutch windmill on the front and smaller ones on the horizon around the bowl. The bottom edge of the bowl and part way up the sides was had blue lines and shadows drawn in to look like a canal with the windmills on the other side of the water. Behind and above the windmills clouds and sky had been stylized into the scene. The entirety had been glazed with a clear glaze over the pipe. With a little work this might very well turn out to be a beautiful pipe.

When I brought it home to work on it there was quite a bit to do to clean it up. I removed the scotch tape from the stem and shank and the stem dropped out of the shank on the work table. It had a metal screw tenon that was clogged and badly bent. I was able to remove the screw tenon from the stem with a pair of needle nose pliers. It was threaded into the stem so with a little effort I was able to unscrew it. The stem was indeed amber and as the screw tenon came out a small flake of amber came with it. I cleaned the airway on the stem with isopropyl alcohol, pipe cleaners and a shank brush. I scrubbed the button and slot to remove the blackening that was built up on it. I then removed the scotch tape from the shank using some acetone to soften the glue. It came off easily. The gold coloured band is stamped GoedeWaagen Made in Holland. I cleaned the band and polished it. I used a dental pick to remove the broken cork that was inside the shank. It was glued it and it was brittle. It came away with a bit of work. I used cotton swabs to clean out the shank. In the bottom of the shank was a metal piece that originally had been on the end of the cork insert and slid below the inner bowl of the double-walled pipe. I scrubbed the bowl with hot water and repeatedly ran water through it to loosen the buildup of tars inside between the walls. I scrubbed the outside of the bowl while I was washing it and was able to remove all of the grim. The remaining patina and coloration of the bowl is similar to a meer.


I decided to replace the original tenon with a Delrin pushpull tenon. That sound like an easy swap but it was not that simple. The tenon that was in the pipe was very small and the threads were fine. The new Delrin tenon was ¼ inch in diameter and was a good open draw. I drilled the amber very carefully with 3/16 inch drill bit to remove the threads and then a ¼ inch drill bit to open it up. I used a cordless drill that I adjusted to a slow speed and gently opened up the amber to ¼ inch. I took it back to the work table and used a tap to thread the newly drilled opening. Once that was clean and open I screwed in the new tenon and the stem was good to go. I cleaned up the tenon and stem junction and sanded it smooth so that the fit was smooth and transitionless.
Then it was time to figure out how to work on the mortise. I did a bit of searching to see if I could find what the original mortise looked like when it was new. There was nothing that I could find to make the job a bit easier. So I began to work through some options. I had a wine cork that I kept here so I thought that might be a good base to begin with. I drilled the cork with a ¼ inch drill bit so that the airway through it would be open and easy to work with. 

I screwed in the Delrin mortis portion of the push pull tenon on one end of the cork and threaded in the metal tip in the other end. I then took my Dremel to the cork to reduce the size of the cork. I removed the outside of the cork with the sanding drum until it was as close as I could get with the Dremel. I then sanded the cork with a folded piece of emery cloth until it was almost perfect. I unscrewed the metal tip and measured the depth of the shank so that the cork plus the tip would end up with the tip just below the air hole in the bottom of the bowl. I cut the cork with an art knife that was sharp until it was the correct length. Then I used my sanding board to level the cork so that when the metal tip was in it would sit smoothly. It took a bit of sanding but once it was done I reinserted the metal tip. 


With the cork the right length and ready to insert I needed to fine tune the fit. I decided to stabilize the cork around the metal tip and the Delrin insert as I did not want it to break when I inserted in the shank. I used super glue to stabilize the cork. I then sanded the cork by hand with the folded emery paper until it was round and smooth. I wanted it to be a tight pressure fit in the shank. From what I could read the cork insert was put in and left until the pipe smoker decided to remove it to clean it. Then a new cork would be used to replace it. I decided to keep that tradition. 


Once the cork fit correctly, I greased it with some Vaseline jelly and fit it in the shank. I was able to easily press it in place. When I was level with the end of the shank I use a ball point pen to set it a bit deeper to receive the tenon with a slight bevel. 

I pushed in the stem and aligned it and the fit was absolutely perfect! I polished the bowl and the stem with a quick buff of White Diamond and then gave the entirety several coats of carnauba wax to protect it. 


")
")
")

")
")
