Blog by Steve Laug
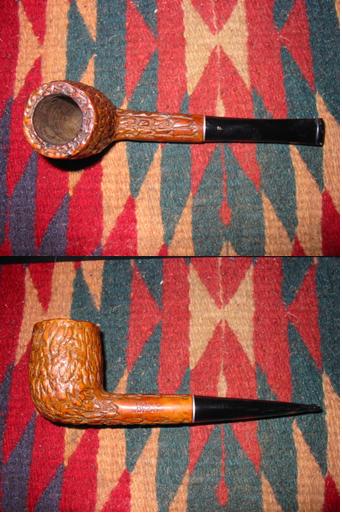
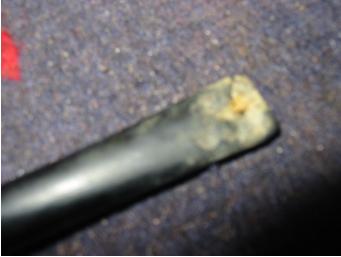
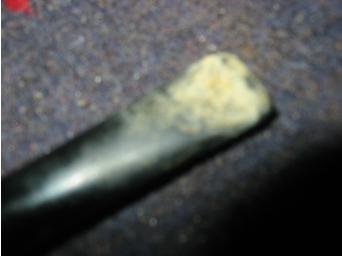
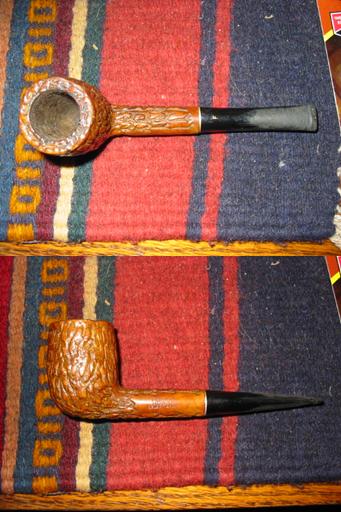
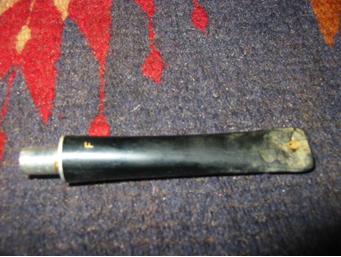
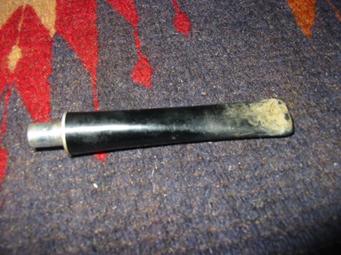
Sometimes I just repair a stem because it is there and I can get the practice working with it. Such was the case with the pipe below. It is a very low end pipe with a nylon stem and a metal tenon that holds a paper filter. The bowl of the pipe was rusticated and definitely not a favourite shape or style of mine. This one would not be a pipe I kept or would be tempted to add to the collection. It was solely a pipe that would provide me an opportunity to work on the tooth dents, the bite through holes on the top and the bottom of the stem near the button as pictured in the two photos below. A decision had to be made whether to fill the hole with super glue or to cut of the bitten through end of the stem and reshape a new button. The dents and holes were very big and the stem was truly a mess.
I used heat from a heat gun and boiling water to raise the tooth dents in the stem and then sanded it to provide a smooth surface in front of the button. I wanted to minimize the amount of the stem that I would have to cut off should I choose that method.

I used heat from a heat gun and boiling water to raise the tooth dents in the stem and then sanded it to provide a smooth surface in front of the button. I wanted to minimize the amount of the stem that I would have to cut off should I choose that method.

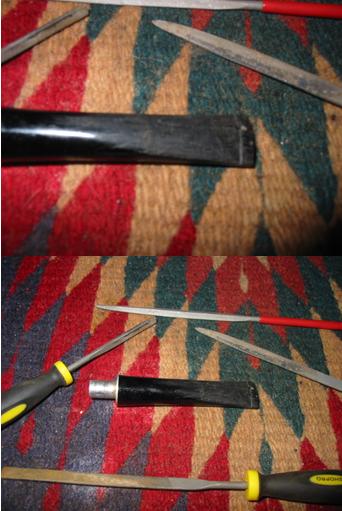
Once I had leveled the stem out, I again studied the bite through areas. It was clear to me that I was going to cut off the stem and reshape the button. I used a Dremel to cut back the button and the damaged area of the stem. The next three photos show the result of the cut back. I did not have to remove nearly as much as I originally thought I would as the heat had raise many of the tooth marks in the stem. I sanded the stem to smooth out the flow and slope of the stem and remove the remaining tooth damage. Even though the photos are a bit out of focus you can see the work that was done on the stems. If I had doubted that the stem was made of nylon it became very clear as I sanded it. The grey hue of the material can be seen in the photos below.
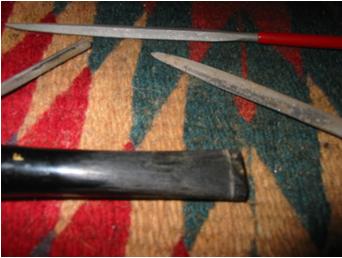
Once the stem surface was smooth and the remaining dents were minimized it was time to take out the needle files and begin to cut the new button on the stem. I used a square bladed needle file to do the initial cuts in the button. I am always concerned to make a clean straight edge on the button so I find that a square blade with no taper or tip makes that task simple. I then clean it up with a flat bladed file and smooth out the transition between the button and the slope of the stem. The other files in the pictures below are used to shape the button and to define its final form. The three photos below show the files and the progress in cutting the new button. You can also see that the small dents that remained are disappearing in the shaping of the button. Care must be taken not to cut the edge too deeply and recreate the hole in the stem again. In this case I had enough meat on the stem to allow me to cut a well defined button.

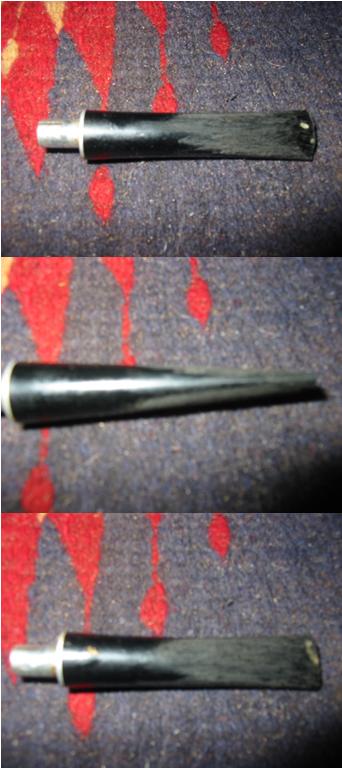
Once I had the button cut and defined I put the stem on the pipe to continue the process of refining the line of the stem and smoothing out the transition to the button. I wanted to taper the button toward the lip rather than leave it flat so you can see that in the profile picture below. The stem is just about finished by the time these photos were taken and only needed the final sanding to bring the stem to completion.

The stem was then sanded with 400 and 600 grit wet dry sandpaper to remove the deep scratches and then followed that with micromesh sanding pads from 1500-12000 grit. The finished stem is picture below both in profile and from a top view. The new button is comfortable and the slot is open and passes a pipe cleaner easily.
The pipe provided a great opportunity to work on a stem restoration and the recreation of a button and it has since found a new home in the rack of a happy pipe smoker who needed some pipes for working outside and in the yard. This is a perfect yard pipe and should continue to deliver a great smoke to him as long as he chooses to keep it.